
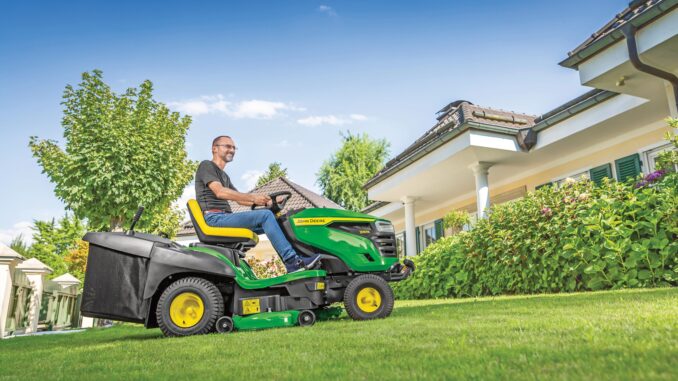
The John Deere S240 is a premium lawn tractor aimed at homeowners who want a step up from entry-level machines, with stronger mowing capability, a Kawasaki V-twin engine, and Accel Deep deck options commonly found in 42-inch and 48-inch versions. For most owners in the USA and Canada, it is a practical machine for regular lawn mowing, seasonal cleanup, and light towing work, but it still rewards routine maintenance and fast diagnosis when problems first appear.
This guide covers John Deere S240 repair, troubleshooting, maintenance, common parts, diagrams, manuals, and realistic DIY repair boundaries. The goal is simple: help owners identify what they are seeing, understand the likely causes, and decide whether the job is suitable for home repair or better left to a dealer.
John Deere S240 overview
The John Deere S240 sits in Deere’s S200 lawn tractor range and is positioned above more basic homeowner models, offering a V-twin engine and heavier-duty mowing feel for users who want a smoother, more durable machine for medium to large residential lawns. Depending on configuration, owners commonly see the S240 with a 42-inch or 48-inch Accel Deep mower deck, and that deck size matters when ordering blades, belts, and related deck parts.
The main systems that matter most on the John Deere S240 are the engine and fuel system, mower deck system, hydrostatic drive system, and the electrical/safety interlock system. In real-world ownership, those are also the systems behind most complaints such as no-start conditions, rough running, poor cut quality, blade engagement trouble, weak drive response, and intermittent shutdowns.
Common service parts owners regularly buy for the S240 include the fuel filter AM116304, oil filter AM125424, spark plug M805853, pre-cleaner MIU12554, air filter MIU12555, 42-inch mower belt GX25232, traction drive belt GX20006, ignition switch GY20074, and battery TY25878. For deck hardware, 42-inch deck owners will also commonly encounter blade kit numbers AM141031, AM141032, AM141033, and AM141034 depending on cutting setup, while 48-inch deck owners need different blade and belt references such as M145476, M127673, and UC10514.
John Deere S240 troubleshooting approach
The best way to diagnose a John Deere S240 is to begin with the exact symptom, not the part you think is bad. A mower that cranks but will not start points you in a very different direction from one that starts and dies, cuts unevenly, vibrates badly, or loses ground speed under load.
The main symptom groups on the John Deere S240 are:
-
Starting issues.
-
Running and fuel-related issues.
-
Cut-quality problems.
-
Vibration and noise.
-
Overheating, smoke, or leaks.
-
Transmission and drive complaints.
-
Electrical and safety-switch faults.
That symptom-first method prevents wasted parts replacement and helps you catch simple causes first, such as a disengaged safety condition, dirty air filtration, worn blades, loose deck hardware, or an overdue fuel filter.
John Deere S240 repair needs that should not wait
Some problems on the John Deere S240 need immediate attention because they create a safety issue or can quickly damage expensive parts. Severe vibration, burning smells, oil leaks near hot engine surfaces, a slipping deck belt, or hydro drive issues that worsen quickly should not be ignored.
1. John Deere S240 starting issues
If the S240 will not crank, cranks slowly, or cranks without firing, the first risk is not usually catastrophic damage, but repeated failed starts can hide battery, switch, or fuel-delivery issues that get worse over time. Owners often see this after storage, after the machine runs out of fuel, or when a safety condition is not correctly reset.
Common causes:
-
Weak battery or poor terminal connection.
-
PTO switch left engaged.
-
Brake/park brake not set correctly.
-
Dirty or stale fuel.
-
Plugged fuel filter.
-
Fouled spark plugs.
-
Air filter restriction.
-
Faulty seat, brake, or PTO safety switch.
Basic owner checklist:
-
Confirm the PTO/blade switch is fully off.
-
Set the brake/park brake exactly as required for starting.
-
Check battery voltage, terminal cleanliness, and cable tightness.
-
Inspect fuel quality and verify fuel is reaching the filter.
-
If overdue, replace the fuel filter, air filter, and spark plugs as baseline service items.
2. John Deere S240 cut-quality problems
Poor cut quality on the John Deere S240 usually shows up as uneven height, strips of uncut grass, clumping, ragged tips, or scalping. This matters because many owners first blame the deck design when the actual cause is routine wear, blade condition, deck level, or belt condition.
Common causes:
-
Dull or bent blades.
-
Wrong blade type for the setup.
-
Deck out of level.
-
Packed underside of deck.
-
Worn or slipping deck belt.
-
Incorrect tire pressure.
-
Mowing too fast or in wet/heavy grass.
Basic owner checklist:
-
Check blade condition and confirm the correct blade set for the deck size.
-
Measure and correct tire pressure before adjusting deck level.
-
Clean the deck underside and inspect for packed grass.
-
Inspect the mower drive belt for glazing, cracking, or slack.
-
Re-level the deck before assuming spindle or deck-shell damage.
3. John Deere S240 vibration and noise
Strong vibration on an S240 is a stop-now symptom because it can quickly damage spindle bearings, deck parts, pulleys, belts, and engine mounts. If the machine suddenly starts shaking more than normal, assume a rotating part is damaged or loose until proven otherwise.
Common causes:
-
Bent blade.
-
Blade installed loose.
-
Debris wrapped around spindle area.
-
Damaged pulley.
-
Worn spindle bearing.
-
Belt damage.
-
Engine mounting issue.
Basic owner checklist:
-
Shut the machine off and remove the key before inspecting under the deck.
-
Check blades for bends, cracks, and loose mounting hardware.
-
Inspect belt routing and pulley condition.
-
Spin deck pulleys by hand with the belt removed if deeper diagnosis is needed.
-
Stop DIY work if vibration remains after blade and belt inspection, because spindle or crankshaft damage may be involved.
4. John Deere S240 overheating and leaks
An S240 that runs hot, smells burnt, smokes, or leaves oil on the frame should be addressed quickly because air-cooled engines rely on clean cooling passages and proper oil level. A small leak or cooling blockage can become an engine-life problem if ignored through the mowing season.
Common causes:
-
Low oil level.
-
Dirty engine cooling fins.
-
Debris packed around the engine.
-
Old oil.
-
Loose drain point or filter.
-
Fuel seepage.
-
Excessive grass buildup around hot components.
Basic owner checklist:
-
Check engine oil level on level ground.
-
Inspect the oil filter and drain area for seepage after service.
-
Clean cooling fins and the engine shroud area if accessible.
-
Remove dry grass and debris from deck and engine areas.
-
Do not continue operating if smoke or burning smell continues after cleaning and oil checks.
5. John Deere S240 transmission and drive problems
Drive complaints on the John Deere S240 often feel like weak forward motion, poor hill performance, delayed response, or a tractor that seems fine cold but weak once warm. Owners should take these seriously because slipping belts, incorrect freewheel settings, or hydro wear can become much more expensive if pushed.
Common causes:
-
Traction drive belt wear.
-
Freewheel/bypass not fully returned to drive position.
-
Linkage adjustment issue.
-
Low traction from tires or wet turf.
-
Internal hydrostatic wear.
Basic owner checklist:
-
Confirm the freewheel control is fully in the drive position before testing.
-
Inspect the traction drive belt GX20006 for wear or slack.
-
Check for external linkage movement and obvious looseness.
-
Test drive response on level ground before assuming hydro failure.
-
Treat internal hydro repair as dealer-level unless you have strong equipment-repair experience.
6. John Deere S240 electrical problems
Electrical issues on the S240 often present as no-crank, intermittent starting, dead lights, blade engagement trouble, or shutdowns tied to seat/brake/PTO position. Because Deere uses safety interlocks heavily on this platform, simple switch logic problems are common and should be checked early.
Common causes:
-
Dirty battery terminals.
-
Weak battery.
-
Ignition switch fault.
-
PTO switch fault.
-
Seat or brake safety switch issue.
-
Loose connector.
-
Corrosion after storage.
Basic owner checklist:
-
Clean battery terminals and verify cable tightness.
-
Confirm the ignition switch and PTO switch feel positive and consistent.
-
Check whether the problem appears only when seated, braking, or engaging blades.
-
Inspect visible wiring around battery, seat, and switch areas.
-
Use a multimeter before replacing multiple electrical parts at random.
Summary:
Check hydrostatic transmission leaks
To check a possible hydrostatic-transmission leak on a John Deere S240, clean the area first, inspect it dry, then run the mower briefly and trace any fresh oil back to its highest point. Do not assume every oily patch under the rear of the tractor is transmission fluid—engine oil, fuel, deck grease, and wet grass residue can migrate rearward.
Safety first
-
Park on a flat, solid surface.
-
Disengage the PTO, set the parking brake, switch off the engine, remove the key, and let the machine cool fully.
-
Wear gloves and use a torch/inspection light.
-
If raising the tractor is necessary, use suitable ramps or axle stands—not a hydraulic jack alone.
The S240 operator information includes transmission inspection/service material, and Deere directs owners to its official manuals and support resources for model-specific procedures.manuals.deere+2
Where to inspect
The hydrostatic transaxle is at the rear of the S240, beneath the seat/rear frame area. With the engine off, inspect these points in order:
A genuine transmission-fluid leak may arise from seals, gaskets, hose/connections on applicable systems, or a damaged housing; an internal or housing leak typically warrants professional assessment rather than a simple external adjustment.lawntrend+1
Best method: clean, run, recheck
-
Photograph the area first if you need a record for a dealer or warranty claim.
-
Brush off grass and dirt from the transaxle, fan, pulley area, axle ends, and surrounding frame.
-
Degrease carefully with a suitable cleaner; avoid saturating electrical connectors, belts, and plastic components.
-
Wipe everything dry with paper towel or a rag.
-
Place clean cardboard beneath the rear of the mower overnight.
-
Run the mower for 10–15 minutes without mowing, then inspect again. If safe to do so, drive it forward and reverse gently.
-
Switch off, let moving parts stop, then look for the first fresh wet point, not just the lowest drip point.
A useful workshop trick is to dust a completely dry suspected area lightly with talcum powder or aerosol leak-detection powder. Fresh oil makes a clear dark track, making the source far easier to identify.
Identify the fluid
Transmission oil and engine oil can look similar once dirty, so trace the source rather than judging only by colour.
-
Transmission leak: starts on the transaxle body, axle seals, input-shaft/pulley area, or case seam; may be associated with drive weakening, whining, jerky movement, overheating, or reduced hill performance.
-
Engine-oil leak: often starts higher up—around the engine drain, oil filter, crankcase, breather, or dipstick tube—and drips onto the frame or transmission below.
-
Fuel leak: usually smells strongly of petrol and evaporates or remains thin rather than oily.
-
Water/grass residue: tends to be clear, green-brown, or muddy and will not leave an oily film between fingers.
What to do after finding it
Minor dampness only
If there is only light grime or a slight oily film, clean it and monitor it after several mowing sessions. Record the location and check whether the film returns.
Active drip or oil spray
Do not keep mowing until the source is identified. A leak around the input shaft, axle seal, or case seam can lower lubrication and lead to weak drive, overheating, or transaxle damage. Fluid loss is especially significant if the mower begins to slow on slopes, move intermittently, whine unusually, or becomes less responsive in forward/reverse.lawntrend+1
Leak at a seal or housing
An axle seal, input-shaft seal, cracked housing, or internal transaxle repair is usually a dealer/workshop job. The S240 is associated with a Tuff Torq K46DP hydrostatic transaxle in available technical material, listed with approximately 2.2 L / 2.3 qt oil capacity; however, confirm the transmission identification tag and your exact serial number before buying fluid or parts.slideshare
Important caution
Do not automatically add oil, remove plugs, or substitute an oil type merely because the transmission appears damp. Confirm the actual source and use the exact procedure and fluid specification for your S240’s serial-number range and transaxle. Deere’s official S240 support page provides maintenance and parts guidance, while the official manuals portal is the best starting point for the applicable operator manual.
How to test the transaxle under load safely
How do I check the bypass valve and drive belt
On an S240, the “bypass valve” is normally operated by a freewheel/bypass rod or lever at the rear of the tractor. It must be in its normal drive/engaged position for the hydrostatic transaxle to propel the machine; when pulled into bypass, the tractor can be pushed by hand but may not drive properly under engine power.
Check the bypass first—it is quick and costs nothing—then inspect the traction drive belt for wear, contamination, routing, and tension. Deere’s S240 owner information and parts guide are the right references for the exact configuration, as deck size and serial range can affect part identification.deere+1
1. Check the bypass control
Make it safe
-
Park on level ground.
-
Disengage the mower PTO.
-
Apply the parking brake.
-
Turn the engine off, remove the key, and wait for all moving parts to stop.
-
Do not work beneath the tractor unless it is properly supported with ramps or axle stands.
Find and inspect it
Look at the rear of the tractor around the transaxle and rear frame. The bypass/freewheel control is typically a rod or handle that can be pulled out for moving the tractor manually when the engine is off.
Check the following:
-
The rod/lever is fully returned to the normal operating position, rather than left pulled out in freewheel mode.
-
Its linkage is not bent, disconnected, jammed with grass, or held out by debris.
-
The retaining clip, spring, and linkage connection—if present—are secure.
-
The control moves smoothly between positions with the engine off, but returns and seats positively in the normal drive position.
-
The tractor is not unusually easy to push with the engine off and bypass supposedly engaged. A lawn tractor in normal hydrostatic-drive configuration usually resists being pushed more than one left in bypass.
Functional check
With the engine off:
-
Put the bypass in the freewheel/release position.
-
Carefully try to push the tractor a short distance on level ground. It should roll comparatively freely.
-
Return the control fully to its normal drive position.
-
Try again. It should be noticeably harder to push.
Then start the tractor normally, release the parking brake, and check forward and reverse movement at low speed. If it still will not drive but the bypass control is fully returned, inspect the belt system next.
Do not attempt to force the rod with pliers. If it sticks, clean around the linkage and investigate why; forcing it can bend the linkage or leave the bypass partly open.
2. Inspect the traction drive belt
The traction drive belt runs from the engine pulley to the hydrostatic-transaxle input pulley, through idler pulleys and guides. It is separate from the mower-deck belt. For the S240, Deere’s replacement-parts guide identifies the relevant machine configuration and parts reference information.deere
Access safely
-
Keep the engine off and key removed.
-
Let the exhaust and engine cool.
-
If the deck blocks access, lower it fully or remove it only if you know the safe removal procedure.
-
Use a torch and inspect from the side; do not place hands around pulleys or belts unless the engine is off and the spark-plug leads are disconnected if you will rotate components manually.
What to look for
Inspect the complete belt route, not just the portion you can see near the engine.
A continuously tensioned hydrostatic drive belt should not become “loose” in the way that a manual-drive clutch belt does. However, it can slip because it is worn, glazed, oil-soaked, incorrectly routed, misaligned, damaged, or running on a faulty pulley/idler.greentractortalk
3. Simple belt and pulley test
With the engine off:
-
Check that the parking brake is released for the inspection.
-
Turn accessible idler pulleys by hand. They should rotate smoothly, without grinding, binding, or major side-to-side play.
-
Look behind each pulley and belt keeper for trapped grass, sticks, wire, or compacted debris.
-
Inspect the engine drive pulley and transaxle pulley for oil, rust, worn grooves, or wobble.
-
Rotate the belt/pulley system by hand only where it can be done safely; watch for belt wandering, snagging, or a pulley that turns eccentrically.
-
Reapply the parking brake when finished.
If the belt is oily, do not simply fit a new belt and continue. First locate the source—an engine leak above the belt or a transaxle input-shaft seal leak can quickly ruin the replacement belt and make the tractor appear to have a transmission fault.
4. What your findings mean
Avoid these mistakes
-
Do not inspect belts, pulleys, or the bypass mechanism with the engine running.
-
Do not reach near the transaxle cooling fan or belt to “see if it is turning.”
-
Do not use the brake as a transmission load test.
-
Do not substitute a belt merely because it fits; use the part specified for the tractor’s exact deck/model and serial range.
-
Do not leave the bypass in release mode after manually moving the tractor.
The official Deere S240 owner page provides access to the applicable operator manual, service information, safety material, and parts diagrams; use that material to confirm the exact bypass-control location and traction-belt part number for your serial number before replacement.
How do I test safety switches
Test the S240’s safety interlock system in two stages: first, perform the functional checks from the operator manual; then, only if a switch is suspected, use a multimeter with the tractor powered down. Never bypass or jumper a safety switch for normal use—the system prevents unintended starting, blade operation, or machine movement. Deere’s operator-manual test specifically states that, with the parking brake unlocked, the engine must not crank; if it does, the safety interlock circuit has a fault.techinfo-omview.apps-prod-vpn.e06.c01.johndeerecloud
Safety and preparation
-
Park on level ground with the mower deck/PTO disengaged.
-
Keep clear of the deck and tyres; do every running test from the operator’s seat.
-
Keep the test area clear of people, pets, walls, vehicles, and drop-offs.
-
Use the normal starting procedure and have your foot ready to apply the brake.
-
If an interlock test produces an unexpected result, stop the engine immediately and do not mow until it is corrected.
-
Do not short wires together or run the tractor with any safety switch defeated.
The main interlocks to investigate are normally the seat switch, brake/park-brake switch, PTO switch, and—in models fitted with it—the reverse/RIO circuit. The exact wiring logic can differ by serial range, so treat the functional results below as the important check and use the applicable Deere diagram if testing terminals electrically.techinfo-omview.apps-prod-vpn.e06.c01.johndeerecloud+1
Functional tests
1. Brake/park-brake start test
This confirms that the tractor will not crank unless the brake interlock is satisfied.
-
Sit in the seat.
-
Ensure PTO is off.
-
Unlock/release the park brake.
-
Turn the key to the start position.
Correct result: The engine must not turn over. Deere explicitly specifies this test and identifies cranking in this condition as an interlock-circuit problem.techinfo-omview.apps-prod-vpn.e06.c01.johndeerecloud
Then:
-
Sit in the seat.
-
PTO off.
-
Fully depress the brake pedal and/or set the park brake as specified on your machine.
-
Attempt to start.
Correct result: The starter should operate normally, assuming battery, fuse, solenoid, and engine systems are sound.
If it only cranks when you press the pedal unusually hard or wiggle it: inspect the brake-pedal tab/bracket, switch mounting, connector, and wiring. A misaligned pedal tab can fail to actuate an otherwise good switch.lawnmowerly
2. PTO start-inhibit test
This confirms the tractor will not start with the mower deck commanded on.
-
Sit in the seat.
-
Apply the brake/park brake normally.
-
Pull the PTO switch to the engaged position.
-
Attempt to start.
Correct result: The engine must not crank.
-
Return PTO to off/disengaged.
-
Try again with the brake condition satisfied.
Correct result: It should crank and start normally.
If it cranks with PTO engaged, stop using the tractor until the PTO switch/circuit is repaired. If it refuses to crank with PTO definitely off, inspect the PTO switch movement, connector, wiring, and its continuity. PTO switch faults can also cause blades not to engage or to stop intermittently.lawnmowerly
3. Seat-switch engine-stop test
This checks whether the tractor protects against an operator leaving the seat during operation.
-
Sit in the seat and start the engine normally.
-
With the tractor stationary, apply/set the parking brake.
-
Keep the PTO off.
-
Carefully lift your weight enough to uncompress the seat—do not dismount near the deck or attempt this while travelling.
Depending on the exact interlock logic, the engine may be permitted to run with PTO off and park brake set. That is normal on many lawn tractors.
The more meaningful test is:
-
Sit in the seat with engine running.
-
Ensure the test area is clear and remain stationary.
-
Release the parking brake and/or engage the PTO, following the sequence allowed by your machine.
-
Rise just enough to release the seat switch.
Correct result: The engine should shut down promptly when the system detects no operator under a condition that requires an operator in the seat—such as PTO engaged or travel enabled. Seat-switch malfunction can cause shutdown over bumps, no-starts, or failure to stop when the operator leaves the seat.lawnmowerly
Do not fully leave the machine while it is running; merely unload the seat briefly while keeping control of the machine.
4. Reverse/RIO check
If your S240 has a reverse-implement-option system, the mower blades should not ordinarily remain engaged while reversing unless the specified RIO override sequence is deliberately used.
-
On level ground, start normally and engage the mower deck.
-
Select reverse without intentionally activating the RIO override.
-
Observe the specified safety response for your model.
If blades continue to operate in reverse without the required override sequence, stop and consult the exact operator manual/wiring diagram for your serial range. The RIO design and operating sequence vary, so do not use a generic wiring assumption. Deere makes the relevant operator manuals and technical publications available through its owner and technical-information resources.manuals.deere+1
Multimeter testing
Use this only after a functional test points to a specific switch.
Setup
-
Switch the engine off and remove the key.
-
Disconnect the negative battery cable if unplugging or handling connectors around the switches.
-
Locate the switch and unplug its connector—test the switch terminals, not the powered tractor harness.
-
Set a digital multimeter to continuity or low-ohms mode.
-
Photograph connector positions before removing anything.
Test principle
Operate the relevant mechanism while watching the meter:
A good switch does not necessarily show continuity in every state; some are normally open and others normally closed. The key is a clean, repeatable change of state when the mechanism moves. Switches that remain permanently open, permanently closed, intermittent, or electrically noisy while being held still are suspect. Continuity testing is a standard way to assess seat, brake, and PTO interlocks once disconnected.lawnmowerly
Inspect before replacing
Many apparent switch failures are mechanical or wiring faults:
-
Loose, corroded, wet, or grass-packed connectors.
-
Chafed, pinched, broken, or rodent-damaged wiring under the seat/fender pan.
-
A seat-switch plunger that is not being fully pressed by the seat.
-
A bent brake-pedal actuator tab that misses the brake switch.
-
A PTO switch that feels loose, does not latch cleanly, or has heat-discoloured terminals.
-
A blown fuse, poor battery ground, weak battery, or starter-solenoid fault mistaken for an interlock failure.
Use electrical contact cleaner only on unplugged connectors; allow it to dry fully before reconnection. Do not pack connectors with grease unless the connector and grease are specified for that purpose.
Interpreting your result
DIY or dealer for a John Deere S240?
The John Deere S240 is one of those tractors where routine maintenance and several common repairs are realistic for a careful homeowner, but internal engine work, hydrostatic transmission diagnosis, and advanced electrical troubleshooting usually cross the line into dealer territory. Most owners can safely handle service parts, blade work, deck cleaning, and some belt replacement, provided they work methodically and follow the operator manual’s safety precautions.
Good DIY jobs on the John Deere S240
-
Engine oil and oil filter service.
-
Air filter and pre-cleaner replacement.
-
Fuel filter replacement.
-
Spark plug replacement.
-
Blade removal, sharpening, and replacement.
-
Deck cleaning and leveling.
-
Battery replacement and terminal cleaning.
Advanced DIY or dealer jobs
-
Mower belt routing when the deck has multiple related wear issues.
-
Spindle diagnosis and replacement.
-
Electric PTO or interlock diagnosis.
-
Steering linkage wear diagnosis.
-
Hydrostatic drive diagnosis or internal repair.
-
Valve clearance check/adjustment at longer service intervals.
Skill level guide
-
Beginner: oil, filters, battery, spark plugs, deck cleaning.
-
Intermediate: blades, deck leveling, mower belt replacement, switch testing.
-
Advanced: spindle work, electrical diagnosis with a meter, linkage correction, engine valve service.
John Deere S240 parts needed before you order
Before ordering John Deere S240 parts, gather the full model name, the tractor Product Identification Number, the engine model information, and the mower deck size. This matters because deck width changes blade and belt numbers, and some serial-sensitive items are safer to confirm against a Deere diagram before purchase.
For practical ordering, the bare minimum is:
-
Full model: John Deere S240.
-
Deck size: 42-inch or 48-inch Accel Deep.
-
PIN/serial from the tractor tag.
-
Engine model/spec information from the engine label.
OEM parts are usually the better choice for belts, electrical switches, and fit-sensitive or safety-critical items on the S240. Aftermarket parts can be fine for some filters, blades, and batteries, but only when the seller clearly cross-references the exact Deere OEM number and the correct deck version.
John Deere S240 diagrams and manuals
For manuals and diagrams, owners should start with Deere material first and then use a Deere-focused parts seller for quick visual confirmation and common wear items. That reduces the risk of ordering the wrong belt or blade set, especially on tractors that may look identical but have different deck widths.
Useful sources:
-
John Deere S240 Operator’s Manual — best for controls, operation, safety, and owner-level service guidance.
-
John Deere service interval reference — useful for maintenance timing and long-term care items.
-
John Deere Parts / owner support — useful as an official starting point for OEM parts sourcing and confirmation.
-
Green Farm Parts S240 maintenance guide — useful for common service part numbers and quick maintenance lookups.
If you need a deeper exploded view, a Deere dealer parts counter or JDParts lookup tied to your specific PIN is the safest route for serial-sensitive components. That is especially true for deck hardware, electrical switches, and parts that vary by build date or deck package.
How to find John Deere S240 model and serial numbers
These identification numbers matter because the S240 may share a family resemblance with other Deere lawn tractors while still using different deck parts, switches, or engine-related service items. Even when a part “looks right,” the PIN and engine model information are what protect you from ordering mistakes.
Use this process:
-
Park the tractor safely, remove the key, and let hot components cool.
-
Find the tractor Product Identification Number tag on the machine frame area specified in the operator manual or by the dealer parts diagram.
-
Confirm the mower deck width by measuring or checking the deck decal if the tractor was purchased used.
-
Locate the engine model/spec label on the engine shroud or engine housing area.
-
Photograph all tags before ordering parts so you can match details exactly when shopping online or at the dealer.
Buying John Deere S240 parts online and in stores
The best buying strategy is to identify the OEM part number first, then compare pricing and availability across official and Deere-focused sellers. That avoids the common problem of buying a “fits S240” aftermarket listing that only matches one deck version.
Use each buying channel for the right type of part:
-
Online: best for filters, belts, blades, batteries, and common tune-up parts once the OEM number is confirmed.
-
Dealer counter: best for serial-sensitive parts, electrical items, deck hardware, or when diagrams are confusing.
-
Retail stores: acceptable for oil, spark plugs, some batteries, and universal maintenance supplies if the packaging clearly matches the Deere number or engine specification.
Useful links:
Step-by-step John Deere S240 fitting guide for common parts
These are the most practical, high-impact DIY jobs for the S240 because they directly affect starting, running quality, cut quality, and routine reliability. Always work on a cool machine, remove the key, and isolate ignition risk before touching rotating parts.
Replace the John Deere S240 air filter
A restricted air filter can cause hard starting, rich running, and reduced engine performance.
-
Raise the hood and locate the air cleaner housing on the engine.
-
Open the housing and remove the main air filter and pre-cleaner.
-
Clean loose dust from the housing without pushing dirt into the intake.
-
Fit the new pre-cleaner MIU12554 and air filter MIU12555.
-
Reassemble the housing carefully so the seal seats correctly.
Change the John Deere S240 spark plugs
Worn plugs can cause hard starting, rough running, and poor power under load.
-
Let the engine cool fully before removing plug leads.
-
Pull the plug boots straight off and clean around the plug wells.
-
Remove the old plugs and compare condition between cylinders.
-
Install new M805853 plugs and set gap as specified in the engine service information.
-
Refit the plug boots securely and test start the engine.
Replace John Deere S240 blades
Sharp, straight blades are one of the biggest factors in cut quality on the S240.
-
Disable starting risk and access the deck safely using approved support methods.
-
Note the blade orientation before removal.
-
Remove the blade hardware and inspect blades for bends or cracks.
-
Install the correct replacement blade set for your 42-inch or 48-inch deck.
-
Tighten hardware to the correct specification from Deere literature and test for smooth operation.
Replace the John Deere S240 mower deck belt
A worn deck belt can cause weak blade speed, poor cut quality, squealing, or intermittent blade drive.
-
Remove or lower the deck as needed to access belt routing safely.
-
Record the current belt routing before removal.
-
Inspect idlers and pulleys while the old belt is off.
-
Fit GX25232 for many 42-inch decks or UC10514 for many 48-inch decks, depending on your exact mower.
-
Recheck routing, tension, and pulley seating before engaging blades.
Preventing repeat John Deere S240 problems
Regular maintenance on the John Deere S240 prevents many of the failures owners describe as “sudden,” especially no-start complaints, rough running, weak cutting, and belt-related mowing issues. In practice, most repeat failures come from delayed tune-up work, grass buildup, or running worn blades and belts too long.
Focus areas:
-
Starting reliability: keep the battery clean, fuel fresh, and ignition tune-up parts current.
-
Cut quality: keep blades sharp, deck level, and underside clean.
-
Fire and overheating prevention: remove grass buildup and keep cooling fins clean.
-
Drive performance: inspect the traction belt and avoid pushing the tractor when the hydro freewheel setting is wrong.
-
Electrical reliability: keep terminals clean and watch for interlock-related starting symptoms before replacing expensive parts.
John Deere S240 maintenance schedule
The S240 maintenance pattern shown in Deere-related service references includes an initial 8-hour lubrication point, 25-hour recurring checks, 50-hour or annual deck/battery service, 100-hour engine service items, and a 200-hour valve-clearance check that is typically dealer work. Service frequency should increase in dusty, hot, or severe mowing conditions.
Daily / before each use
-
Check engine oil level.
-
Inspect for loose hardware or obvious leaks.
-
Clear grass and debris from deck and engine area.
-
Confirm blades and controls operate normally.
After first 8 hours
-
Lubricate mower spindles and pivot points.
-
Lubricate front axle pivot and axle spindles.
Every 25 hours
-
Lubricate front axle pivot and axle spindles.
-
Check mower blades for wear or damage.
Every 50 hours or yearly
-
Clean or replace emission filter if equipped.
-
Sharpen or replace mower blades.
-
Check mower drive belt.
-
Check and level mower deck.
-
Clean mower deck.
-
Lubricate mower spindles and pivot points.
-
Clean battery terminals.
Every 100 hours or yearly
-
Change engine oil and filter.
-
Replace air filter element(s).
-
Replace fuel filter.
-
Replace spark plug(s).
-
Clean engine cooling fins.
-
Check and clean battery.
Every 200 hours
-
Check or adjust valve clearance, typically dealer service.
Seasonal checklist
Spring
-
Install a fresh air filter if needed and inspect the battery after winter storage.
-
Sharpen blades and level the deck before first heavy mowing.
Mid-season
-
Clean the deck more often in fast-growing conditions and inspect the mower belt for heat wear.
-
Replace the fuel filter or plugs early if symptoms appear before the normal interval.
Fall / end of season
-
Remove packed debris, stabilize or manage fuel properly, and inspect blades and belts before storage.
-
Clean battery terminals and store the machine dry.
Repair, upgrade, or replace a John Deere S240?
For most S240 owners, repair makes sense when the machine is structurally sound and the problem is limited to service parts, blades, belts, battery, switches, or deck setup. Upgrade makes more sense when your mowing needs have changed, while full replacement becomes easier to justify if multiple major systems need work at once.
Repair if:
-
The issue is limited to maintenance parts, deck belt, blades, battery, or an isolated switch.
-
The engine and hydrostatic drive still perform well.
Upgrade if:
-
You need a wider deck, better attachment capability, or heavier-duty use than the S240 was bought for.
-
Repeated mowing-time or lawn-size demands exceed what a residential lawn tractor comfortably handles.
Replace if:
-
The engine, hydro, and deck all need significant work at the same time.
-
Structural wear, chronic electrical faults, and high parts cost make repair uneconomical.
John Deere S240 troubleshooting FAQ
1. Why will my John Deere S240 not start?
The first things to check are the PTO switch, brake/park brake position, and battery condition because the S240 relies on safety interlocks to allow starting. If those are correct, move on to fuel quality, the fuel filter, air filter, and spark plugs, especially if the machine has been sitting.
2. Why does my John Deere S240 crank but not fire?
That usually points to fuel delivery, stale fuel, spark plug condition, or an air/fuel restriction rather than a dead battery. Start with fresh fuel, a clean air filter, and known-good plugs before chasing more complex faults.
3. Why did my S240 stop after I backed up?
On the S240, reverse mowing behavior is tied to the reverse implement option and PTO logic, so the deck may disengage if the override procedure is not used. Many owners mistake this for a failure when it is actually normal safety-system operation.
4. Why does my John Deere S240 start and then die?
A machine that starts and dies may have stale fuel, a restricted fuel filter, carburetion/fuel-delivery trouble, or an intermittent safety-switch issue. If the problem appears only when you shift position in the seat or change brake/PTO status, inspect interlocks early.
5. Why is my John Deere S240 running rough?
Rough running often comes from dirty air filtration, old fuel, fouled spark plugs, or overdue engine service items. Because the S240 has a V-twin engine, comparing both spark plugs can also reveal whether one cylinder is contributing differently from the other.
6. Why is my John Deere S240 low on power?
Low power under mowing load commonly points to dirty air filtration, worn plugs, old fuel, or a deck that is dragging from grass buildup or blade issues. A partially slipping mower belt can also make the tractor feel weak because blade speed falls off in heavier grass.
7. Why does my John Deere S240 cut unevenly?
Uneven cutting usually comes from dull or mismatched blades, wrong tire pressure, an out-of-level deck, or packed debris under the deck shell. Check tire pressures before adjusting the deck, because leveling a deck on uneven tires gives misleading results.
8. Why does the John Deere S240 leave strips of uncut grass?
That is often a blade-speed or blade-condition problem, not a deck design issue. Inspect the blades, belt condition, and deck cleanliness, then consider whether ground speed is too high for the grass conditions.
9. Why is my S240 cutting grass ragged instead of cleanly?
Ragged grass tips usually mean the blades are dull rather than sharp enough to slice cleanly. Sharpening or replacing the blades is one of the most effective cut-quality fixes on this machine.
10. Why does my John Deere S240 scalp parts of the lawn?
Scalping often comes from deck height set too low, uneven terrain, poor deck leveling, or anti-scalp/gauge wheel setup issues. Confirm the deck is level and the mowing height matches your lawn before assuming there is a deck fault.
11. Why is my John Deere S240 vibrating badly?
Strong vibration usually means a bent blade, loose blade hardware, spindle trouble, or pulley/belt damage. Stop mowing immediately until the rotating components are checked, because continued operation can cause secondary damage.
12. Why does my S240 make a squealing noise when I engage the deck?
A squeal on engagement often points to a worn or glazed mower belt, a weak idler condition, or pulley trouble. If the sound appears only with the deck engaged, focus on deck-drive parts before looking at the engine.
13. Why does my John Deere S240 mower belt keep coming off?
A belt that repeatedly jumps off is often routed incorrectly, worn beyond service, or running on a damaged pulley or misaligned deck component. Replace the belt only after checking pulleys and guards, otherwise the new belt may fail the same way.
14. What is the mower belt number for a John Deere S240?
Many S240 tractors with a 42-inch deck use mower belt GX25232, while many 48-inch deck versions use UC10514. Because deck size matters, owners should confirm the exact deck before ordering.
15. What is the traction drive belt number for the S240?
A common traction drive belt listing for the S240 is GX20006. It is still worth confirming against the specific tractor serial details before ordering because drive complaints are often blamed on the belt when the root cause is elsewhere.
16. What spark plug does a John Deere S240 use?
A commonly listed S240 spark plug is M805853. When replacing plugs, it is smart to inspect both old plugs for differences in color or deposits because that can help flag uneven running.
17. What oil filter fits the John Deere S240?
A common oil filter listing for the S240 is AM125424. Many owners replace it together with fresh 10W30 engine oil during the annual or 100-hour service.
18. What fuel filter fits a John Deere S240?
A commonly listed fuel filter for the S240 is AM116304. Replacing it on schedule is a good preventive step for hard-start and poor-running complaints.
19. Why does my John Deere S240 battery keep going flat?
Repeated battery drain can come from poor terminal condition, age, charging issues, or leaving lights or key circuits on. Start by cleaning the terminals, testing battery condition, and ruling out simple operator-related discharge.
20. Why are my S240 headlights not working?
The S240 ignition has accessory/light positions, so first confirm the key is in the correct position for lamp operation. If that checks out, inspect the bulb and wiring before replacing switches.
21. Why will my John Deere S240 not move?
First confirm the freewheel or bypass control is fully returned to the drive position, because the tractor is designed to roll freely when that control is set for pushing. After that, inspect the traction drive belt and linkage before assuming internal hydro failure.
22. Why does my S240 move weakly on hills?
Residential lawn tractors can feel weaker on slopes when traction is poor, belts are worn, or the hydrostatic system is stressed by heat and load. If the problem is new, inspect the drive belt and confirm the tractor performs normally on level ground first.
23. Why does my John Deere S240 slow down after warming up?
That can point to hydro wear, belt slippage, or a machine that performs acceptably cold but loses efficiency with heat. External checks are still worthwhile first because a worn drive belt is far cheaper than transmission work.
24. Why does the PTO or deck engagement seem inconsistent?
Inconsistent blade engagement may come from switch trouble, electrical connection issues, or deck-drive wear that makes engagement feel delayed or weak. If the symptom is paired with intermittent electrical behavior elsewhere, include the PTO switch and wiring in your checks.
25. Why does my John Deere S240 overheat?
Most overheating complaints on air-cooled lawn tractors trace back to debris-packed cooling areas, low oil, or neglected service in hot and dusty conditions. Cleaning engine cooling fins and keeping the engine compartment free of dry grass are basic but important steps.
26. Why is oil leaking on my S240 after a service?
After an oil change, the first places to inspect are the filter seal, drain point, and any spilled oil that was not cleaned away. A careful leak check after idling the engine briefly is a smart habit because it catches small mistakes before the next mowing session.
27. How often should I change oil on a John Deere S240?
Service references for the S240 point to annual or 100-hour oil and filter replacement, with more frequent service under dusty or severe conditions. If the tractor sees short-run use, heavy summer mowing, or a lot of dust, earlier oil changes are reasonable.
28. How often should I replace the air filter on my S240?
The standard interval is yearly or around 100 hours, but dusty mowing can shorten that considerably. If the engine starts losing power or the filter is visibly loaded, replace it sooner rather than waiting for the calendar.
29. When should I replace the fuel filter on a John Deere S240?
Deere-focused S240 schedules commonly place fuel filter replacement at the 100-hour or 200-hour range depending on the schedule reference being used, so owners should confirm against their specific manual and operating conditions. In practice, if fuel quality is questionable or symptoms appear, replacing it early is inexpensive insurance.
30. When should spark plugs be replaced on the John Deere S240?
Spark plugs are commonly treated as annual or 100-hour service items on S240 maintenance references. They can last longer in light use, but replacing them on schedule helps avoid avoidable starting and running complaints.
31. How often should I sharpen S240 blades?
Blade condition should be checked often, and sharpening or replacement is commonly addressed yearly or whenever cut quality drops. For owners mowing sandy ground, larger properties, or rough lawns, blade attention may be needed several times a season.
32. How do I know if my John Deere S240 deck is out of level?
Typical signs are uneven cut height from side to side, scalping, or a cut that looks different after blade sharpening. Once tire pressures are confirmed, the deck can be measured and adjusted using Deere’s normal deck-leveling procedure.
33. Should I buy OEM or aftermarket John Deere S240 parts?
OEM is usually the safer choice for belts, switches, and exact-fit items because those parts are more sensitive to dimensions and performance differences. Aftermarket can work well for some filters, blades, and batteries when the cross-reference is exact and the seller is reputable.
34. Where can I find a John Deere S240 manual?
A solid starting point is the Deere operator manual page for the S240, which covers controls, safety, and owner maintenance basics. For parts lookups, Deere parts support and Deere-focused sellers with model pages are helpful companions.
35. Is the John Deere S240 a good DIY repair mower?
Yes, within limits: the S240 is very workable for routine maintenance, blade service, filters, plugs, battery work, and some belt jobs. The realistic cutoff is advanced hydrostatic, internal engine, and deeper electrical diagnosis, where dealer support usually saves time and wrong-part expense.