
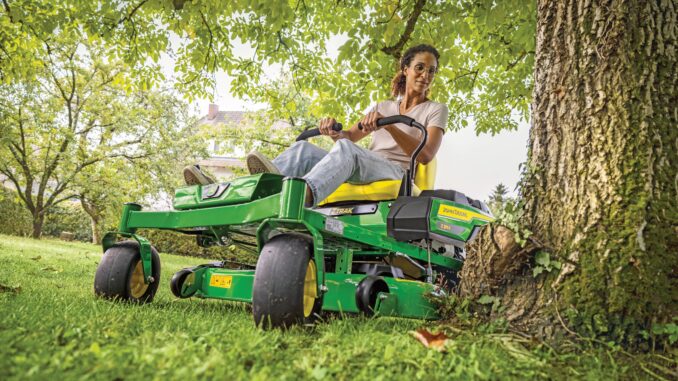
The John Deere Z335E is a residential zero-turn mower designed for homeowners who want faster mowing, tighter maneuvering, and more productive cutting than a traditional lawn tractor. It is especially well suited to medium residential properties with obstacles such as trees, beds, and edging where a zero-turn layout saves time and reduces trimming work.
Because it combines dual transaxles, a zero-turn steering system, an electric PTO clutch, and a 42-inch mower deck, troubleshooting tends to follow recognizable patterns involving starting, fuel delivery, cut quality, vibration, transaxle performance, and electrical or interlock problems.
This guide focuses specifically on the John Deere Z335E and is written in technical but clear language. It covers model-specific repair priorities, parts identification, manuals and diagrams, OEM versus aftermarket choices, online and in-store buying advice, detailed fitment guidance for common wear parts, and a maintenance plan aimed at preventing repeat failures.
1.Overview of the John Deere Z335E
At a general level, the Z335E is an entry-level John Deere ZTrak zero-turn mower intended for regular residential mowing rather than commercial daily service. It is designed to deliver higher mowing productivity than a lawn tractor by using independent motion-control levers and dual transaxles, allowing the machine to pivot closely around obstacles and reduce uncut areas.
From a technical perspective, the Z335E in the North American market is commonly paired with a 42-inch mower deck and a residential engine and transaxle package.
The parts and maintenance guide for the Z335E lists common 42-inch service items including mower blade GY20683, deck belt GX25628, oil filter GY20577, fuel filter GY20709, air filter GY21435, and MulchControl kit BM24794.
Other Deere-oriented parts sources list additional commonly used items such as traction drive belt GX26401, ignition switch TCA22740, battery TY25878, bagging kit GX25668, and deck gauge wheel GX10168 for this model family.
John Deere z335e – General description of use
The Z335E is built for frequent residential mowing where speed and agility matter. It is most at home on maintained lawns, moderate terrain, and landscaped properties, but it still follows the operating limits in Deere’s manual for slopes, cleanout, and zero-turn safety.
John Deere z335e – General description of specs and systems
-
Mower type: residential zero-turn mower.
-
Deck: 42-inch mower configuration with service parts clearly identified in Deere’s maintenance sheet.
-
Control system: dual motion-control levers, park brake lever, PTO engagement switch, lift lever and cut-height pin system.
-
Powertrain: belt-driven deck, dual transaxles, and a traction drive system using a traction belt listed as GX26401 by a Deere-oriented parts source.
-
Electrical system: battery, ignition switch, PTO clutch, interlock system, fuses, and related wiring.
John Deere z335- General description of major parts
-
Engine and air/fuel system: air filter, fuel filter, carburetion/fuel-delivery parts, spark plug(s), oil filter, cooling fins and screens.
-
Deck system: 42-inch blades GY20683, deck belt GX25628, spindles, idlers, washout, level-adjustment hardware, discharge parts, mulch and bagging accessories.
-
Drive system: dual transaxles, traction drive belt GX26401, motion-control levers, park brake linkage, and cooling areas around the transaxles.
-
Electrical: ignition switch TCA22740, battery TY25878, PTO clutch and associated interlocks and harnesses.
2. Troubleshooting Approach for the Z335E
Zero-turn mowers can seem more complex than lawn tractors because they combine steering and drive into one control system, but troubleshooting is still best approached by symptom.
On the Z335E, most real-world faults fall into one of six categories: starting and no-run issues, cut-quality problems, vibration and abnormal noise, overheating or leaks, transmission/drive complaints, and electrical or PTO faults.
Before inspecting or repairing the machine, always park on a level surface, disengage the mower blades, lower attachments, apply the park brake, stop the engine, remove the key, and wait for all motion to stop.
Deere’s operator manual also recommends disconnecting the battery or spark plug wires before service work and highlights frequent cleanout of the muffler area, engine fins, deck-top belt area, transaxles, and under-seat wiring/battery area to reduce downtime and fire risk.
3. John Deere Z335e – Emergency and Immediate Repair Needs
On the Z335E, urgent repairs are the ones that affect safe starting, blade control, steering/drive response, or fire risk. Because this machine uses rotating blades, dual hydro drives, and a compact under-seat electrical area, a small neglected issue can become an expensive or dangerous failure quickly.
3.1 John Deere Z335e – Starting Issues
Starting problems on the Z335E usually fall into three patterns: no crank, crank/no start, or starts and then dies quickly. Because the machine uses an interlock system, zero-turn control lever position, park brake status, and PTO switch position all matter before the engine is even allowed to run.
John Deere Z335e – No crank or only clicking
General description: If you turn the key and get nothing or only a click, the likely causes are battery condition, fuses, solenoid function, or an interlock issue preventing start permission.
Checks:
-
Measure battery voltage and inspect battery terminals for corrosion.
-
Check fuses under the seat/console area; zero-turn no-start videos and field troubleshooting notes commonly point to fuse and solenoid issues on Z335E machines.
-
Verify park brake is set, PTO is off, and control levers are in the correct neutral/park position per Deere operating procedure.
-
Listen for solenoid click and inspect related wiring.
John Deere Z335e – Cranks but will not start
General description: If the engine turns over but does not run, focus on fuel delivery, carburetion, spark, and air intake. A practical Z335 troubleshooting example shows the importance of verifying fuel pump pulse-line routing and fuel flow before assuming the carburetor is bad.
Checks:
-
Confirm fresh fuel and proper venting from the fuel cap.
-
Replace the fuel filter; Deere’s Z335E maintenance sheet lists GY20709, while another Deere-oriented source lists AM116304 for some Z335E configurations, so confirm by serial number and engine configuration before ordering.
-
Inspect fuel hoses and pulse line routing to the fuel pump, because a disconnected or misrouted pulse line can prevent fuel delivery.
-
Check spark and inspect air filter condition.
John Deere Z335e – Starts then dies after a few seconds
General description: This often points to fuel starvation, cap venting, pulse-line issues, or carburetor restriction rather than a completely failed ignition system.
Checks:
-
Loosen fuel cap briefly to rule out venting problems.
-
Inspect pulse line and fuel pump routing carefully.
-
Confirm fuel is reaching the carburetor and not just the filter inlet.
John Deere Z335e – 3.2 Cut Quality Problems
Cut quality issues on the Z335E are usually caused by blade condition, deck level, deck cleanliness, or belt speed issues. As with most zero-turn mowers, poor cut is rarely caused by lack of raw engine power unless the engine is also running poorly.
Common causes:
-
Dull, bent, or mismatched blades.
-
Incorrect deck level or front-to-rear pitch.
-
Worn or slipping deck belt GX25628.
-
Heavy clipping buildup under or on top of the deck.
The operator’s manual gives a clear deck-leveling method and states the side-to-side blade-tip difference must not exceed 3 mm (1/8 in), and the front blade tips must be 3–6 mm (1/8–1/4 in) lower than the rear.
Those measurements are critical for the Z335E because even small zero-turn deck setup errors show up quickly as striping, scalping, or uneven cut lines.
3.3 John Deere Z335e – Vibration and Noise
A zero-turn mower with a deck running at full speed should feel smooth and controlled. Strong vibration, rumbling, grinding, or belt slap on the Z335E usually means blade damage, spindle wear, deck-belt issues, or loose hardware that should be addressed immediately.
Checks:
-
Inspect blades GY20683 for bends, cracks, severe wear, or imbalance.
-
Spin spindles by hand and listen for roughness after disabling ignition safely.
-
Inspect the deck belt GX25628 for cracking, glazing, stretch, or misrouting.
-
Check idler arm lubrication and pivot function; Deere’s maintenance sheet includes lubricating the mower idler arm as a regular service item.
3.4 John Deere Z335e – Overheating and Leaks
The Z335E’s compact layout means debris control matters. Deere’s operator manual specifically identifies the muffler, engine cooling fins, intake screens, deck-top belt area, transaxles, and under-seat battery/wiring area as primary cleanout zones. That is important not just for fire prevention, but also for cooling and component life.
Checks:
-
Clean muffler shields, manifold and exhaust areas frequently.
-
Clean engine cooling fins and intake screens.
-
Inspect the top of the mower deck under shields for packed grass around spindle and belt areas.
-
Check around transaxles, drive areas, and under-seat battery/wiring compartment for debris and oil or fuel contamination.
Leaks should be handled promptly because oil and fuel residue trap debris and increase fire risk.
3.5 John Deere Z335e – Hydraulics, Transmission, and Steering/Drive Problems
The Z335E does not steer like a lawn tractor, so drive complaints often show up as weak response on one side, tracking issues, poor hill response, or jerky lever behavior. In general, start with traction drive belt condition, transaxle area cleanout, lever adjustment, and tire condition before assuming internal transaxle failure.
Common symptoms:
-
Weak movement on one or both sides.
-
Sluggish response after warming up.
-
Tracking unevenly in a straight line.
-
Jerky acceleration or poor pull on inclines.
Checks:
-
Inspect traction drive belt GX26401 if equipped on your serial/configuration.
-
Check tire pressures; Deere includes tire pressure checks in the daily operating checklist.
-
Inspect transaxle cooling areas and surrounding fins for debris.
-
Confirm motion-control levers are adjusted evenly and linkages are intact.
3.6 John Deere Z335e – Electrical Problems
Electrical faults on the Z335E commonly affect starting, PTO engagement, safety shutdowns, or accessories. Because the machine uses multiple interlocks and a compact harness layout, diagnosis should begin with basic voltage, fuse, and switch checks before major parts replacement.
Common wear or service items include ignition switch TCA22740, battery TY25878, and key AM125504 as listed by a Deere-oriented parts source.
Checks:
-
Verify battery voltage and terminal condition.
-
Check fuses in the machine’s electrical area.
-
Verify PTO switch and clutch operation if blades will not engage.
-
Inspect under-seat wiring harness and storage compartment area for chafing, corrosion, or loose connectors.
Summary:
Most common problems
The operator manual specifically flags poor engine performance from old/dirty fuel, no-start faults from brake/PTO/lever interlocks and electrical issues, uneven running from cooling or fuel/air restrictions, overheating from blocked cooling areas or wrong oil level, and vibration from belts, blades, or debris on drive sheaves.pdf.lowes
Issues owners mention
Owner feedback is mixed but points to a few practical weak spots:
-
Deck alignment and cut quality: Some reports involve a deck needing adjustment or a cut that becomes uneven when blades, belt tension, tyre pressures, or deck pitch are neglected.lowes+1
-
Throttle/control hardware: A smaller number of users report throttle trouble or control-arm hardware problems; one review source notes a right-hand control arm failure repaired under warranty.lowes+1
-
Battery/start complaints: Some owner reports cite battery failures, although this does not establish a universal Z335E defect.lowes
-
Ride, traction and turf marking: The mower can feel rough on uneven ground, and zero-turn tyres can skid and mark turf, especially during abrupt turns or on wet grass.lowes+1
-
No fuel gauge: This is an inconvenience rather than a failure, but it is frequently noted by owners.
John Deere Z335E transmission and drive issues
John Deere Z335E drive complaints are often caused by the external drive system—a worn/slipping transmission belt, debris around the transaxles or cooling fans, bypass levers left in the push position, incorrect tracking, or neutral creep—rather than failed hydrostatic transaxles. On the early Z335E covered by manual OMGX26258, Deere includes procedures for transaxle oil level/service, neutral-creep adjustment, tracking adjustment, cooling-fan cleaning, and transmission-belt replacement.manuals.deere
Symptoms and likely causes
Checks in the right order
Before working underneath, park on level ground, disengage the PTO, set the parking brake, stop the engine, remove the key, and wait for all moving parts to stop. Deere explicitly warns to keep clear of belts and to service only with the machine safely parked.images.thdstatic
-
Confirm the bypass levers are engaged.
The Z335E has a manual-release/freewheel function for pushing the machine. If either transmission bypass lever is left in—or not fully returned—the mower may not move, may move weakly, or may act as if a transmission has failed. -
Inspect the transmission drive belt.
Look for cracks, glazing, frayed edges, missing chunks, stretch, oil contamination, or a belt riding low in a pulley. Check that it remains on the engine sheave, both transaxle sheaves, and the idler pulley. Deere specifies that the belt is spring-tensioned and self-adjusting; there is no routine manual tension adjustment.images.thdstatic -
Check the idler and pulleys.
With the engine off and key removed, inspect the idler arm, spring, pulley bearings, pulley grooves, guards, and debris buildup. A seized or rough pulley can heat and destroy a new belt quickly. -
Clean around the transaxles.
Remove packed grass, leaves, and dust from the transaxle housings, cooling fans, cooling fins, belt drive, and nearby frame areas. Deere identifies the transaxle area, belt drives, and fins as routine cleanout locations; blocked cooling can cause heat-related loss of drive and shorten transaxle life.images.thdstatic -
Check tyre pressures and rear-wheel hardware.
Different tyre pressures can mimic a transmission or tracking fault. Also check wheel hardware, hubs, and keys where applicable; a wheel that is loose on its hub can create a misleading “one side has no drive” symptom. -
Test for neutral creep and tracking.
If the mower slowly moves with both control levers centred, it needs neutral-creep adjustment. If it veers left or right while both levers are equally positioned, first correct tyre pressure, then follow the manual’s tracking-adjustment procedure. Both are listed as Z335E service items by Deere.manuals.deere -
Assess the transaxles only after the above.
If the belt drive, bypass levers, cooling, wheel hardware, tyres, and external controls are sound—but one side remains weak when hot, whines excessively, or loses motion under moderate load—internal transaxle wear or damage becomes more likely.
Important model-year distinction
The Z335E has existed across more than one Z300 generation. The original Z335E manual, OMGX26258, includes “Checking Transaxle Oil Level” and “Changing Transaxle Oil and Filter,” alongside adjustment and belt-service sections.manuals.deere
By contrast, later Z300 manuals for certain related models describe the transmission as a sealed component with no routine maintenance, while still requiring inspection of the self-adjusting transmission belt and cleaning of the cooling fans. Therefore, do not add oil, drain a transaxle, or order a replacement drive belt solely from the model name—confirm the mower’s product identification number/serial number and obtain the manual and parts diagram matching that exact machine.images.thdstatic+1
When to stop and use a dealer
A dealer or hydrostatic-transmission specialist is sensible when:
-
One transaxle repeatedly becomes much hotter than the other after normal mowing.
-
The mower loses drive only once hot, despite a sound belt and clean cooling system.
-
There is visible oil leakage from a transaxle, axle seal, or hydraulic connection.
-
A grinding, knocking, or metallic whine accompanies loss of motion.
-
A new correctly routed belt immediately throws, burns, or fails.
-
The mower has no drive after the bypass levers are fully engaged and all external parts check out.
Avoid treating weak drive by simply increasing engine speed or forcing it up slopes. The Z335E manual warns against sudden turns and loss of traction on slopes; if it stops climbing, disengage the PTO and reverse down slowly rather than trying to power through.
How to replace John Deere Z335E transmission drive belt
How to remove the mower deck on John Deere Z335E
For a John Deere Z335E with the 42-inch Accel Deep deck, remove the deck by lowering it to its service/removal position, taking the deck belt off the electric PTO clutch, disconnecting the front draft rod and rear lift links, then sliding the deck out from the side. The deck is heavy and awkward, so use a helper where possible. Deere’s parts guide confirms the Z335E configuration uses a 42-inch Accel Deep deck and GX25628 mower-deck belt.deere
Prepare safely
-
Park on level, firm ground.
-
Disengage the PTO/blades.
-
Move both steering levers fully outward to set the parking brake.
-
Stop the engine, remove the key, and allow the engine, muffler, pulleys, and belt to cool.
-
Disconnect the negative battery lead if your hands will be near the PTO-clutch wiring.
-
Raise the deck fully, clear grass/debris around the deck, then lower it to the lowest cutting-height position. This removes tension from the lift links and makes the pins easier to remove.
-
If fitted, remove the mulch plug, bagger chute, or other deck attachment first.
Do not reach around the PTO clutch or under the machine with the engine running. Use blocks or a helper—do not try to support the deck’s weight with one hand while removing a loaded pin.
Removal sequence
1. Remove the deck belt from the PTO clutch
The deck belt runs from the mower-deck pulleys to the electric PTO clutch on the engine crankshaft.
-
Work from the front/side of the mower where you can see the engine pulley and clutch.
-
Locate the deck-belt tensioner/idler arm on top of the deck.
-
Use the appropriate wrench, ratchet, or breaker bar on the idler-arm service point to rotate the arm against spring tension.
-
Slip the deck belt off the electric PTO clutch pulley.
-
Let the tensioner return slowly; do not allow it to snap back.
You generally do not need to remove the belt completely from the deck just to remove the deck. Keep it resting on the deck pulleys where practical, clear of the chassis. The belt listed for the 42-inch Z335E deck is Deere GX25628.deere
2. Disconnect the front draft rod
At the front-centre of the deck:
-
Locate the front draft rod/support rod where it attaches the deck to the front of the mower frame.
-
Remove its retaining clip or cotter pin.
-
Slide out the attachment pin.
-
Support the deck while removing the pin so the rod does not bind.
-
Lift or move the draft rod clear of the deck bracket.
Take a photo before removal. The pin and washer/clip order should be restored exactly during reinstallation.
3. Disconnect the rear lift links
At the rear-left and rear-right of the deck:
-
Find the two rear lift-link attachment points connecting the deck to the mower’s lift arms.
-
Remove the retaining clip from one side, then pull the pin while supporting that corner of the deck.
-
Repeat on the other side.
-
Keep the deck flat on the ground; do not allow one side to hang from the remaining link.
Some Z335E deck configurations use a single convenient lift-height-pin/bolt arrangement as part of the attachment system, but the precise hardware can vary by serial number and deck revision. Photograph your machine’s pin, washer, and clip arrangement before separating it.jamesriverequipment
4. Free any remaining guides or supports
Before pulling the deck out, check that:
-
The belt is fully clear of the PTO clutch.
-
The front draft rod is disconnected.
-
Both rear lift links are disconnected.
-
No anti-scalp wheel, chute, wiring, belt guard, or attachment is snagging the frame.
-
The deck-height linkage is not still holding the deck.
If the deck will not move freely, stop and find the remaining connection—do not force it.
5. Slide the deck out
-
Turn the front wheels/steering levers as needed to create clearance.
-
Slide the deck carefully out from the left or right side, choosing the side with best clearance around your mower and work area.
-
Keep the deck low and level.
-
Roll it on its anti-scalp wheels where possible rather than dragging it across the ground.
Reinstallation checklist
Refit the deck in the reverse order:
-
Slide deck back beneath mower, correctly oriented.
-
Reconnect rear lift links and secure every pin with its correct retaining clip.
-
Reconnect the front draft rod.
-
Route the deck belt correctly and reinstall it on the electric PTO clutch while holding the idler tensioner against spring force.
-
Confirm the belt is inside all belt keepers and fully seated in every pulley groove.
-
Raise and lower the deck through its full range to ensure nothing binds.
-
Start the mower in an open area; engage the PTO briefly and listen for abnormal belt noise or vibration.
-
If you removed the deck for service, check deck level and blade condition before mowing.
Common problems
-
Pin will not come out: Raise or lower the deck height slightly to remove load from the link, then wiggle the deck by hand while withdrawing the pin. Do not hammer hard on a loaded linkage.
-
Belt will not come off PTO clutch: You have not rotated the spring-loaded deck-belt idler far enough, or the belt is caught on a belt keeper.
-
Deck will not slide out: A lift link, front draft rod, deck belt, or accessory is still attached.
-
Deck belt comes off after refitting: It may be outside a belt guide, twisted, or routed incorrectly around the tensioner. Recheck before engaging the blades.
-
Mower cuts unevenly afterward: Confirm tyre pressures, deck lift-link attachment, deck level, blade condition, and correct belt seating.
For serial-number-specific diagrams, Deere’s Z335E owner-information portal provides access to the relevant operator information, parts diagrams, safety material, and service resources.
How to level the mower deck on John Deere Z335E
Level the John Deere Z335E deck on a flat, hard surface with the deck set to the 2.5-inch leveling position. First adjust the rear left/right deck height so it is level side-to-side; then adjust the front lift rods so the deck has the correct front-to-rear pitch. Deere specifies that once calibrated at 2.5 inches, the deck should be level and correctly calibrated at the other cutting-height settings.manuals.deere
What you need
-
Flat, level concrete or paving—avoid a sloping driveway, gravel, or lawn.
-
Gloves.
-
Tyre-pressure gauge.
-
The Z335E’s supplied deck-level wrench and deck-level gauge, normally stored under the seat.
-
An 18 mm wrench for the front lift-rod adjustment.
-
Optional: a ruler or Deere blade-tip deck-level gauge AM130907 for a cross-check.manuals.deere
Preparation
-
Park on level, hard ground.
-
Disengage the PTO, stop the engine, remove the key, and let moving parts stop.
-
Disconnect the negative battery cable or spark-plug leads to prevent accidental starting.
-
Check and equalise tyre pressures before doing anything else. Unequal tyre pressures make a correctly adjusted deck appear crooked.
-
Raise the deck, clean grass buildup from under and above it, and check that blades are straight, sharp, and securely fitted.
-
Lower the deck to the 2.5 position—the Z335E’s designated deck-leveling setting.
-
Adjust the anti-scalp/gauge wheels so they do not touch the ground while the deck is being leveled. The mower’s deck wheels should not be carrying deck weight during adjustment.manuals.deere
Level side-to-side
The two rear deck-level points are at the left-rear and right-rear deck rim.
-
Lift the seat and remove the deck-level gauge and leveling wrench from their storage location.
-
Place the gauge on the ground beneath the left-rear deck-level point.
-
The deck rim should just clear the top of the gauge—Deere describes this as the gauge “just slipping” beneath the deck rim.
-
Repeat at the right-rear deck-level point.
-
If one side is high or low, move the seat fully rearward and insert the supplied deck-level wrench into the corresponding top opening in the fender deck until it engages the rear adjustment bolt.
-
Turn the adjustment:
-
Clockwise to raise that side of the deck.
-
Counter-clockwise to lower that side.
-
-
Recheck both sides until the gauge just slips under both rear deck-rim points.
If more than 3 mm (1/8 inch) adjustment is needed, alternate between the two sides. A large correction on only one rear adjustment can change the other side.manuals.deere
Set front-to-rear pitch
After both rear points are level, set the front hanger/bracket height.
-
Use the deck-level gauge under the front deck hanger bracket at adjustment point 3.
-
The gauge should again just slip beneath the bracket.
-
If adjustment is necessary, locate the two front lift rods—one on each side.
-
Using an 18 mm wrench, loosen the rear lock nut on both front lift rods equally.
-
Turn the front adjustment nut on both rods equally:
-
Clockwise raises the front of the deck.
-
Counter-clockwise lowers the front of the deck.
-
-
Continue until the gauge just slips under the front bracket.
-
Shake the deck lightly to settle it, confirm that the draft rod is tight against both draft hooks, then tighten the rear lock nuts.manuals.deere
Keep left and right front-rod adjustments equal. Unequal adjustments can reintroduce side-to-side error or make the deck hang twisted.
Final checks
-
Raise the deck fully and confirm it latches in the transport position.
-
If it will not latch, Deere directs you to lower both rear deck-adjustment points equally by turning their adjustment nuts counter-clockwise, then recheck the front setting.manuals.deere
-
Return the leveling gauge and wrench beneath the seat.
-
Reposition the gauge wheels so they are close to the ground at your usual mowing height but normally not carrying deck weight.
-
Test mow a short, dry, level section of grass and inspect the cut.
Optional blade-tip check
You can cross-check the adjustment using blade tips:
-
For side-to-side measurement, rotate the outer blades so their tips point outward to the left and right. Measure from each tip to the level surface. The difference should be no more than the manual’s allowed tolerance.
-
For front-to-rear measurement, rotate a blade so one tip points directly forward and the other directly rearward. The front tip should be slightly lower than the rear tip, not higher.manuals.deere
A deck that is level at the rim but cuts badly often has another cause: unequal tyre pressure, bent or unbalanced blades, worn spindle bearings, a badly worn deck belt, grass buildup under the deck, or mowing too fast for conditions.
How to check tire pressure on John Deere Z335E
Check the Z335E’s tyre pressure when the tyres are cold, using a low-pressure gauge at each valve stem. For the Z335E covered by Deere’s operator information, the specified pressures are 15 psi (103 kPa) front and 10 psi (69 kPa) rear.manuals.deere
Steps
-
Park the mower on level, firm ground.
-
Turn off the engine, disengage the PTO, set the parking brake, and remove the key.
-
Let the mower sit long enough for the tyres to cool if it has just been used.
-
Locate the valve stem on each wheel and remove the small valve cap.
-
Press a low-pressure tyre gauge squarely and firmly onto the valve stem until it seals; read the pressure.
-
Check all four tyres:
-
Front left and front right: set both to 15 psi.
-
Rear left and rear right: set both to 10 psi.manuals.deere
-
-
Add air with a small compressor or hand pump if low. If overinflated, press the centre pin in the valve stem briefly to release air, then recheck.
-
Refit the valve caps.
Why equal pressure matters
For mower-deck leveling and a clean cut, matching pressure side-to-side is as important as the exact figure. A rear tyre even modestly lower than the other can make the mower deck appear out of level and leave one side of the cut higher.
Check pressure before:
-
Leveling the mower deck.
-
Diagnosing an uneven cut or mower pull.
-
Long mowing sessions.
-
First use after winter storage.
-
Replacing or repairing a tyre.
Important caution
Use a low-pressure gauge designed for lawn and garden tyres rather than relying on a typical automotive gauge. Do not inflate according to the maximum pressure molded on the tyre sidewall; that marking is a tyre-limit rating, not necessarily the operating specification for the mower. Deere directs owners to inspect tyres for damage and check them with an accurate low-pressure gauge.manualshelf
If your Z335E has a different wheel/tire configuration or was built for another market, verify the serial-number-specific operator’s manual before changing the recommended pressures.
How to change transmission fluid on John Deere Z335E
Where is the serial number located on John Deere Z335E
On a John Deere Z335E zero-turn mower, look for the Product Identification Number (PIN)/serial-number tag on the front panel below the operator’s seat. Raise the seat and inspect the frame panel directly beneath it with a torch; the tag will show the model and a long alphanumeric serial/PIN.deere+1
What to look for
The identification tag normally includes:
-
Model: Z335E.
-
PIN/serial number: usually a 13- or 17-character alphanumeric number, depending on the production generation.
-
Date of manufacture: often marked as DOM on the serial-number/PIN plate.deere+1
For ordering parts or determining the correct operator/service manual, record the entire PIN, not just the last six digits. Deere says the serial/PIN is needed when obtaining parts and service information.pdf.lowes
If you cannot see it
-
Wipe the panel/frame below the seat; grass, dust, and oil residue can obscure the label.
-
Use a phone torch and photograph the tag rather than trying to read it upside down.
-
Check the rear frame area as a secondary location—some zero-turn ID plates are positioned on a frame tube between the rear wheels or near the engine.jackssmallengines+1
-
Check original purchase paperwork, warranty registration, or past dealer service invoices.
Other serial numbers
Do not confuse the mower’s PIN with the engine or transaxle identification numbers:
How to register a John Deere Z335E serial number
To register a John Deere Z335E, use John Deere’s official Product Registration site and enter the machine’s full PIN/serial number, purchase details, and proof of purchase. The portal accepts a 13- or 17-character PIN, so copy the number exactly from the identification label rather than relying on a partial serial number.productregistration.deere
Before registering
Gather:
-
Model: John Deere Z335E
-
Full machine PIN/serial number
-
Sales receipt or invoice
-
Purchase date
-
Retailer/dealer name and location
-
Your contact details
John Deere states that a sales receipt, model number, and product identification/serial number are required for registration.deere
Register online
-
Go to John Deere’s official Product Registration page.
-
Select the product-registration/warranty-registration option appropriate to your purchase source.
-
Enter the Z335E’s full PIN/serial number. The site expects a PIN of either 13 or 17 characters.productregistration.deere
-
Enter the model number, purchase date, seller, and purchaser details.
-
Upload or retain a clear copy of the sales receipt if the registration process requests it.
-
Submit the registration and save any confirmation email, number, or screenshot.
For a Z335E, the PIN is generally on the identification tag beneath the operator’s seat, on the mower frame/front panel. Record it carefully because a single incorrect character can prevent the system from locating the correct machine record.
If bought from a dealer
If you bought the Z335E new from an authorised John Deere dealer, the dealer normally registers the warranty as part of delivery—no additional registration should be required from you.deere
You should still ask the dealer to confirm:
-
The PIN has been registered to your name.
-
The warranty start/delivery date is correct.
-
Your email and telephone details are attached to the owner record.
-
Any extended warranty or service plan has also been registered.
If bought from Lowe’s or Home Depot
For machines purchased from Lowe’s or Home Depot, register online if you did not complete a warranty card at purchase. John Deere specifically identifies these retailer purchases as cases where online registration may be needed.deere
Check warranty status
After registration, you can check the equipment’s warranty status through the Owner Support area of Shop.Deere.com: select the warranty tab and enter the mower’s serial number.deere
If it is used
Online registration does not automatically guarantee warranty transfer or establish ownership for every used machine. Keep the bill of sale, the seller’s information, photos of the PIN label, and service records. Contact an authorised John Deere turf dealer with the PIN and proof of purchase to ask whether the ownership record can be updated and whether any remaining warranty is transferable in your market.
How to read John Deere Z335e serial number year format
John Deere Z335E engine serial number location
The John Deere Z335E uses a Briggs & Stratton Intek V-twin engine, and its engine identification is normally stamped or labelled on the engine blower housing/shroud, muffler heat shield, or near/above a spark plug. On some versions, it may be on or beneath the OHV valve/rocker cover.manuals.deere+1
Where to check first
With the mower parked safely, seat raised if necessary, and engine cool:
-
Open the engine area and use a torch.
-
Inspect the top and sides of the black engine shroud/blower housing.
-
Look near the spark-plug areas on each cylinder head.
-
Check the muffler heat shield.
-
Inspect the OHV valve/rocker cover for a stamped identification number.
-
If a decorative or protective cover blocks the stamping, remove that cover only after confirming it is not part of a hot exhaust guard; Briggs & Stratton notes that some engine identification numbers may be concealed by a shroud.briggsandstratton
What number to record
For Briggs & Stratton engines, record all three groups exactly as shown:
MODEL – TYPE – CODEExample format:
40N877 – 0000 – G1The model identifies the engine family, the type identifies the build/specification variation, and the code functions as the engine production/serial code. Briggs & Stratton says these numbers are stamped directly into the engine and are needed to find the correct engine parts and service information.briggsandstratton+1
Do not confuse these numbers
The Z335E engine itself is identified by Deere as a Briggs & Stratton 40 Intek engine, but the exact Briggs Model–Type–Code is still necessary for parts such as carburettor components, starter parts, ignition parts, gaskets, and internal engine items.manuals.deere
Best way to capture it
Clean the area gently with a dry cloth, take several close-up phone photos with flash, and write down every character before ordering parts. Avoid pressure-washing directly at labels, electrical connections, the air intake, or hot engine components.
John Deere Z335E transaxle serial number location
John Deere Z335E deck and machine serial number locations
On a John Deere Z335E, the machine PIN/serial-number tag is under the seat, generally on the upper frame area above/near the engine. The mower deck has a separate identification label, usually fitted to the deck shell/frame; check the top surface near the belt guards or the outer side/rear of the deck after cleaning accumulated grass. The machine and deck numbers are not interchangeable.manuals.deere+1
Machine serial number
-
Park safely, turn off the engine, remove the key, and raise the seat.
-
Use a torch to inspect the mower frame beneath the seat, particularly the upper right-hand frame area and the frame above the engine.
-
Look for the John Deere Product Identification Number label—often headed “Manufactured by John Deere”.
-
The tag should display:
-
Model:
Z335E -
PIN/serial number: normally a 13- or 17-character identifier
-
The serial/PIN is typically shown or underlined at the top-right area of the tag.deere+1
-
The complete mower PIN is the number to use for parts lookups, model-year identification, registration, warranty enquiries, and matching the proper operator/service manual. Deere says to provide the product model and identification number when requesting servicing information.manuals.deere
Deck serial number
The deck does not normally use the same frame PIN as the mower. Find its own tag by inspecting:
-
The top of the deck shell, near the belt guards, spindle-pulley area, or deck belt-routing label.
-
The outer left/right deck wall.
-
The rear edge or rear frame/bracket of the deck.
-
The underside of a belt cover/guard, if your deck has a removable guard.
For a Z335E with the 42-inch Accel Deep deck, clean the deck top and look first around the left and right belt guard/spindle areas. If the label is hard to read, use a dry cloth and phone torch; avoid pressure-washing it.
Record every field on the deck tag:
Avoid common mix-ups
If you cannot find the deck tag after checking the top and sides, remove the deck or look with a phone camera along the rear and underside. A tag may have been painted over, damaged, or removed during a prior deck replacement; in that situation, the mower PIN plus a photo of the complete deck and its belt/spindle layout will let a John Deere dealer identify the likely deck assembly.
4. John Deere Z335e – DIY or Dealer? Repair Decision Guide
The Z335E is owner-serviceable for many routine jobs, but it is still more complex than a basic lawn tractor because of its twin transaxles and zero-turn control system. The best rule is to handle routine service and clearly visible wear items yourself, but move toward dealer support for repeated electrical faults, control adjustments you cannot stabilize, or transaxle-related problems.
Good DIY jobs
-
Oil and filter service; the maintenance sheet lists oil filter GY20577 and oil TY22029.
-
Air filter and fuel filter replacement.
-
Blade replacement, sharpening, and deck cleanout.
-
Deck belt replacement GX25628.
-
Battery replacement and basic fuse checks.
-
Deck level adjustment using Deere’s published measurements.
Advanced DIY or dealer jobs
-
Traction drive belt replacement if access is difficult or control linkages must be disturbed.
-
PTO clutch diagnosis beyond basic voltage checks.
-
Motion-control lever linkage alignment beyond comfort adjustment.
-
Internal transaxle repair or replacement.
-
Persistent no-start after fuel, spark, and interlock basics have been confirmed.
Skill level guide
-
Beginner: filters, battery, blades, cleanout, tire pressure, routine inspections.
-
Intermediate: deck belt replacement, deck leveling, switch replacement, basic electrical checks.
-
Advanced: traction/drive diagnosis, transaxle-related work, complex no-start diagnostics.
5. John Deere Z335e – Parts Needed, OEM vs Aftermarket, and What Information You Need
Ordering correct parts for a Z335E requires more than just the model name because Deere manuals state the dealer needs the machine product identification number, engine serial number, and even transaxle serial numbers for some service support. That matters especially when a part varies by serial range or by deck/transaxle configuration.
Information to gather before ordering
-
Model: John Deere Z335E.
-
Product Identification Number (PIN) from the machine.
-
Engine serial number from the blower housing.
-
Left and right transaxle serial numbers from tags on the forward side of each transaxle housing.
-
Deck size and accessories installed.
-
Existing part number if visible.
Common Z335E service and repair parts
John Deere Z335e – OEM vs aftermarket
OEM is usually the best choice for belts, switches, ignition components, PTO-related parts, steering/drive-related items, and any part where exact fit affects safety or tracking. Aftermarket can make sense for blades, batteries, filters, and tune-up items if the supplier clearly cross-references to the Deere OEM number and the exact Z335E configuration.
6. John Deere Z335e – Where to Find Parts Diagrams and Service Manuals
The best sources for parts identification are Deere’s own publications and model-specific parts lists. Deere’s operator manual says service literature and technical manuals can be purchased through the Technical Information Store, and parts can be ordered through JDParts.
Useful sources:
-
Operator’s manual PDF: https://pdf.lowes.com/productdocuments/d1f45b36-abfb-41b3-be15-d7e5e9cf7b06/42709753.pdf
-
Z335E parts and maintenance sheet: http://pdf.lowes.com/useandcareguides/889818001016_use.pdf
-
Deere technical publications store: https://techpubs.deere.com/
-
JDParts ordering/info: http://JDParts.deere.com
-
Green Farm Parts Z335E guide: https://greenfarmparts.com/john-deere-z335e-ztrak-mower-maintenance-guide/
7. John Deere Z335e – How to Locate the Model Number, Serial Number, and Other IDs
Correct identification is critical on the Z335E because Deere asks for the machine PIN, engine serial number, and transaxle serial numbers for service support. This is more detailed than many lawn tractors and reflects the multiple major assemblies on a zero-turn mower.
Step-by-step guide
-
Park safely and remove the key.
-
Locate the machine Product Identification Number tag and record it exactly.
-
Locate the engine serial number on the engine blower housing and record it.
-
Locate the left and right transaxle serial tags on the forward side of each transaxle housing and record them separately.
-
Keep these numbers in your maintenance record and use them when buying belts, switches, engine parts, or transaxle-related parts.
8. John Deere Z335e – Buying Parts Online and In Physical Stores
For the Z335E, a good buying strategy is to combine one official Deere source with one Deere-focused independent supplier and one large retailer reference. That gives you the best chance of matching the exact machine, checking price, and finding stock quickly.
Useful online and store-related URLs
-
JDParts: http://JDParts.deere.com
-
Deere technical publications: https://techpubs.deere.com/
-
Green Farm Parts Z335E guide: https://greenfarmparts.com/john-deere-z335e-ztrak-mower-maintenance-guide/
Buying advice
-
Online: confirm the exact OEM number and compare it to your serial-number-specific machine data.
-
Dealer counter: best for transaxle, ignition, and serial-number-sensitive parts.
-
Retail source: useful for common maintenance parts like blades, oil, air filter, and deck belt when the listed part number matches your machine.
9. John Deere Z335e – Step-by-Step Fitting Guide for Common Parts
The best parts for inexperienced owners to start with are blades, filters, and deck belts. These are common service items on the Z335E and directly affect most day-to-day complaints such as poor cut, vibration, and seasonal starting issues.
John Deere Z335e – Blade replacement
-
Park safely, remove the key, disconnect spark plug wires or battery negative cable, and wear gloves.
-
Raise the front safely or access the deck according to your preferred safe service method.
-
Block the blade to prevent rotation.
-
Remove blade fastener and note hardware order.
-
Install new GY20683 blade in the correct orientation.
-
Tighten to the correct specification from service literature and repeat on the other blade.
-
Test for smooth operation and vibration before mowing normally.
John Deere Z335e – Deck belt replacement
-
Park safely and lower/prepare deck for service.
-
Photograph existing routing.
-
Release belt tension and remove the old GX25628 deck belt.
-
Inspect idlers and spindles while the belt is off.
-
Route the new belt exactly as required and confirm it sits fully in all pulley grooves.
-
Lubricate the idler arm pivot if needed and verify belt tracking at low throttle.
John Deere Z335e – Fuel, oil, and air service
-
Replace oil filter GY20577 and refill with the correct oil listed for the machine’s engine/service sheet.
-
Replace fuel filter GY20709 or the correct serial-number-verified equivalent.
-
Replace air filter GY21435 if dirty or at the required interval.
-
Start engine and check carefully for leaks or loose connections.
10. John Deere Z335e – Maintenance to Prevent Problems Reoccurring
The Z335E rewards regular cleaning and interval service. Deere’s daily checklist and maintenance sheet both show that a lot of reliability comes from simple, repeatable habits: checking oil, cleaning deck and muffler areas, keeping tire pressure correct, checking transaxle oil level, and maintaining belts, blades, and filters on schedule.
Focus areas
-
Starting reliability: fresh fuel, clean battery connections, correct lever/brake/PTO use, clean filters.
-
Cut quality: sharp blades, clean underside of deck, correct deck level, sound deck belt.
-
Vibration prevention: inspect blades immediately after impacts and grease/service deck points as required.
-
Fire prevention: clean muffler area, engine screens, deck-top belt zone, transaxles, and under-seat compartment often.
-
Drive performance: monitor tire pressure, traction belt condition, and debris around transaxles.
11. John Deere Z335e – Maintenance Schedule and Year-Round Checklist
The Z335E maintenance sheet gives a practical baseline schedule. After 8 hours, Deere says to check mower deck level.
Every 50 hours or annually, Deere lists fuel filter replacement, engine oil change, mower belt check, engine oil filter change, blade sharpening/replacement, mower deck spindle lubrication, underside deck cleaning, mower idler arm lubrication, tire pressure check, deck-level check, and engine cooling fin cleaning.
Every 100 hours or annually, Deere lists air filter replacement, and at 200 hours Deere calls for engine valve-clearance check/adjustment by a dealer.
Daily or before each use
-
Check engine oil.
-
Clean muffler area, intake screens, and mower deck.
-
Check brake system and safety interlock system.
-
Check fuel level and look for leaks.
-
Check tire pressures and transmission oil levels.
Every 50 hours or annually
-
Change oil and oil filter.
-
Replace fuel filter.
-
Check mower belt.
-
Sharpen or replace blades.
-
Lubricate deck spindles and idler arm.
-
Clean underside of deck and engine cooling fins.
-
Check tire pressure and deck level.
Every 100 hours or annually
-
Replace air filter element(s).
Every 200 hours
-
Have valve clearance checked/adjusted by a John Deere dealer.
John Deere Z335e – Seasonal checklist
Spring
-
Battery check, oil service, filter service, blade inspection, belt inspection, deck leveling, tire pressure correction.
Mid-season
-
Deck cleanout, blade condition check, transaxle-area cleanout, idler lubrication, cooling-fin cleaning.
Fall / storage
-
Full cleanout of all Deere-identified debris zones, fuel management for storage, battery maintenance, and dry storage after cooldown.
12. Repair, Upgrade, or Replace the John Deere Z335E?
For most owners, the Z335E is worth repairing when the core machine is sound and the needed work is in normal wear parts. Belts, blades, battery, filters, switches, and deck service are expected costs on a residential zero-turn and do not by themselves justify replacement.
Repair if
-
The engine starts and runs well after normal service.
-
Transaxles are fundamentally healthy.
-
Deck shell, frame, and control system are still solid.
-
Problems are mainly belts, blades, battery, filters, deck leveling, or switch-related.
Upgrade if
-
You want mulching, bagging, or similar capability using Deere-supported accessories like MulchControl BM24794 or bagging kit GX25668.
Replace if
-
Both transaxles are weak, the engine has major issues, and deck or frame condition is poor.
-
Repeated major repairs exceed the value of the machine.
-
Your property or workload now needs a heavier-duty zero-turn platform.
13.Troubleshooting FAQ
1. Why will my John Deere Z335E not crank at all?
A true no-crank condition usually means the start circuit is not being completed or the battery cannot supply enough current. Begin with battery voltage, battery terminals, and fuses, then confirm the park brake is set, the PTO switch is off, and the control levers are in the correct neutral/park position for starting. If those are correct, listen for solenoid click and inspect the harness and starter circuit.
2. Why does my Z335E just click when I turn the key?
A click usually indicates the solenoid is trying to work but the battery is weak, the battery cables have too much resistance, or the starter/solenoid contact set is failing. Load-check the battery if possible and clean both battery terminals before replacing anything expensive.
3. Why does the engine crank but not start?
On the Z335E, that usually means you need to verify fuel delivery, spark, and air flow in that order. Replace the fuel filter, confirm the fuel pump pulse line is connected correctly, and check whether fuel is actually reaching the carburetor before assuming deeper engine trouble.
4. Why does my Z335E start and then die after a few seconds?
That pattern usually points to fuel starvation or a venting problem rather than a starter or battery fault. Check the fuel cap venting, the pulse line to the pump, and actual fuel flow to the carburetor. This specific style of fault has been documented by Z335 owners and often turns out to be a routing or supply problem rather than a failed carburetor alone.
5. Can a disconnected pulse line really stop the mower from running?
Yes. A troubleshooting example for a John Deere Z335 shows that a disconnected pulse hose at the fuel-pump system can cause a no-run condition even when fuel appears present in the machine. On small-engine fuel-pump systems, that pulse signal is what drives the pump.
6. Why does my Z335E have starting problems after sitting for a few weeks?
Old fuel, partial carburetor varnish, and weak battery charge are common causes after storage. Replace stale fuel, check the battery charge, inspect the air and fuel filters, and verify that the cap, pump, and pulse line are all working correctly.
7. Where are the first things I should check on a Z335E no-start?
Start with the easiest visible items: battery terminals, fuses, PTO switch off, park brake on, lever position, fuel level, and filter condition. Then move to fuel flow, spark, and pulse-line inspection. A careful visual inspection often saves time on this model.
8. Why do the blades not engage even though the engine runs?
This usually means the PTO system is not getting the right electrical signal or the PTO clutch is not responding. Start with battery voltage, fuse condition, PTO switch operation, and wiring to the PTO clutch. If voltage reaches the clutch and it still does not engage, clutch failure becomes more likely.
9. Why does the engine die when I try to engage the mower deck?
That can happen if an interlock is seeing an unsafe condition or if there is an electrical fault that drags the system down when the PTO is applied. Check seat-related logic, wiring condition, fuse health, and PTO clutch wiring before assuming a major engine problem.
10. Why is my cut uneven from side to side?
Deere’s operator manual states the side-to-side blade-tip difference should not exceed 3 mm (1/8 in). If your cut is uneven, first set tire pressures correctly, then measure deck level with blades positioned as Deere instructs. After that, inspect blades and spindle condition.
11. Why does my Z335E scalp on one side?
Scalping usually means deck height, deck leveling, gauge-wheel adjustment, or mowing speed is wrong for the terrain. Zero-turn mowers react quickly to uneven ground, so a small deck setup error shows up clearly. Follow the deck-level procedure in the operator’s manual and confirm the anti-scalp wheels are adjusted appropriately.
12. Why does the lawn look torn and brown after mowing?
Brown tips normally mean the grass is being torn rather than cleanly cut. The usual causes are dull blades, incorrect front-to-rear deck pitch, or mowing conditions that overload the deck. Deere specifies the front blade tips should be 3–6 mm lower than the rear on this deck, and that setting helps produce a cleaner cut.
13. Why does my Z335E leave strips of uncut grass?
This often happens when blades are dull, the deck is out of level, the underside of the deck is packed with clippings, or the deck belt is slipping. Start with the easiest corrections: blade condition, deck cleanout, deck level, and belt inspection.
14. Why does the deck belt keep wearing out early?
A deck belt usually fails early because of misrouting, pulley/idler problems, contamination, or poor alignment rather than bad luck alone. The Z335E maintenance sheet identifies GX25628 as the deck belt, and using the correct belt is the first step. Also inspect the idler arm and pulleys for wear or binding.
15. Why does my mower vibrate badly at full blade speed?
Severe vibration usually means bent blades, spindle problems, or a belt issue. Stop mowing and inspect the blade pair immediately, because continuing to mow can damage the spindles, deck shell, or pulley system.
16. How do I know if a spindle is going bad?
A failing spindle often feels rough when rotated by hand, may have noticeable play, and can create rumbling or growling noises when the deck is engaged. If vibration appears after blade replacement and the blades are correct and balanced, spindle wear becomes a strong suspect.
17. Why does my zero-turn pull harder on one side than the other?
Uneven pull can come from tire pressure differences, linkage adjustment differences, traction issues, or one transaxle running hotter or weaker than the other. Start with tire pressures and lever adjustment before assuming a bad transaxle.
18. Why does my Z335E track crooked in a straight line?
This can happen when tire pressures are unequal or motion-control levers are not set evenly. Deere provides lever-adjustment guidance in the operator’s manual, and small setup differences can change how straight the mower feels at speed.
19. Why is one side weak only after the mower warms up?
That points toward heat-related performance loss in or around one transaxle, debris restricting cooling, or a traction drive issue. Clean the transaxle and surrounding fins, inspect the traction drive belt, and verify the problem repeats only after warm operation.
20. Should I assume a bad transaxle if the mower feels weak?
No. Start with external causes first: tire pressure, debris around the transaxle, lever adjustment, traction belt condition, and drag from a brake or linkage. Internal transaxle failure is possible, but it is not the first thing to assume.
21. Why does the machine feel jerky when I move the control levers?
Jerky response can come from operator input, linkage wear, uneven lever adjustment, or hydro response issues. Verify that both levers are adjusted correctly and that linkages move smoothly without binding. Also inspect tires and transaxle area for debris or drag.
22. How important is tire pressure on a zero-turn like the Z335E?
It is very important. Deere includes tire pressure in the daily checklist, and incorrect tire pressure affects tracking, deck level, cut quality, and ride behavior. Many drive and cut complaints improve once the tires are corrected.
23. Why does my Z335E seem to run hot or smell overheated?
This machine has several critical cleanout zones, and Deere specifically identifies muffler parts, engine fins, deck-top belt areas, transaxles, and the under-seat area as debris-prone locations. If those areas are packed with grass and dust, heat builds quickly and fire risk increases.
24. What areas should I clean most often to prevent fire and overheating?
Focus on the muffler and exhaust shield, engine cooling fins and intake screens, the top of the mower deck around the belt and spindle area, the transaxles and belt-drive areas, and the battery/wiring area under the seat. Deere highlights these exact zones in the machine cleanout section.
25. Why is there grass packed on top of the mower deck when the underside is already clean?
Because debris can accumulate above the deck around belt and spindle areas, not just underneath. Deere specifically calls out the top of the mower deck under shields as a primary cleanout area, and neglect there can contribute to belt wear and heat issues.
26. How often should I replace the air filter on a Z335E?
Deere’s maintenance sheet says to replace the air filter every 100 hours or annually, whichever comes first. In dusty conditions, inspect it more often because restricted airflow affects starting, power, and fuel mixture.
27. How often should I replace the fuel filter?
The Deere maintenance sheet says every 50 hours or annually. Because there are differing filter numbers in Deere-related sources for Z335E configurations, confirm the correct filter by serial number before ordering.
28. How often should I sharpen or replace the blades?
Deere’s maintenance sheet includes sharpening or replacing mower blades every 50 hours or annually. If you hit rocks, roots, or hidden debris, inspect the blades immediately rather than waiting for the next interval.
29. How often should I check deck level?
Deere says to check mower deck level after the first 8 hours and again every 50 hours or annually. You should also recheck it after blade impacts, deck removal, tire changes, or any noticeable cut-quality change.
30. Is the deck level really that sensitive on the Z335E?
Yes. Deere gives very specific side-to-side and front-to-rear targets because even small setup errors affect cut quality and scalping on a zero-turn. The combination of speed and close-turning maneuverability makes deck setup more noticeable than on some slower tractors.
31. What oil filter and service parts do I need for routine maintenance?
Deere’s maintenance sheet lists oil filter GY20577, oil TY22029, fuel filter GY20709, air filter GY21435, and blade GY20683 for the standard 42-inch setup. Verify those against your serial number and engine before ordering a full service kit.
32. Should I buy OEM or aftermarket belts and blades?
For belts in particular, OEM is usually the safer choice because exact length, width, and material matter for tracking and belt life. Premium aftermarket blades can be acceptable if they clearly cross-reference the Deere number, but cheap unknown parts often create vibration or poor cut.
33. Where should I buy Z335E parts online?
A good approach is to use JDParts for official lookup, Deere Technical Publications for manuals, and a Deere-focused supplier such as Green Farm Parts for cross-checking common service items and accessory availability. This gives you a balance of fit accuracy, parts info, and price comparison.
34. Can I service this mower myself if I am not very experienced?
Yes, for routine jobs like oil service, air filter, fuel filter, blades, and deck cleanout, provided you work safely and follow the manual. Deck leveling and belt replacement are realistic next-step jobs for careful DIY owners. Transaxle or deep electrical work is better left for advanced DIYers or dealers.
35. When should I stop troubleshooting and send it to a dealer?
If you have already confirmed battery, fuses, interlock basics, fuel flow, pulse-line routing, spark, and common wear parts, but the problem persists, dealer diagnosis may save time and money.
How to replace the Z335E mower deck belt
To replace the mower deck belt on a John Deere Z335E (42‑inch deck), you’ll remove tension, route a new belt following the factory diagram, and then re‑tension and test. The exact belt is typically GX25628 for the 42‑inch Z335E deck, but always confirm against your serial number and maintenance sheet first.
Below is a clear, step‑by‑step process based on Deere’s official instructions and field-tested methods.
1. Preparation and safety
Before working around belts and springs, make sure the machine is fully secured.
-
Park on a flat, solid surface and set the parking brake.
-
Disengage the PTO (mower switch OFF) and stop the engine.
-
Remove the key and wait for all moving parts to stop.
-
Allow the engine and muffler to cool completely (Deere explicitly calls this out before belt work).
-
For maximum safety, disconnect the negative battery cable or spark plug wires to prevent accidental starting.
If you plan to follow Deere’s official method, you will remove the deck first; some owners instead change the belt with the deck on the machine, but Deere’s documented procedure assumes the deck is removed.
2. Tools and parts you’ll need
-
New deck belt (usually GX25628 for Z335E 42‑inch deck – verify in your parts/maintenance sheet).
-
Basic socket set and wrenches (commonly 13 mm and 15 mm used in owner videos).
-
Pliers or a suitable spring tool for the idler spring.
-
Safety glasses (springs are under tension; Deere specifies eye protection when working with spring‑loaded parts).
3. Remove the mower deck (official Deere method)
Deere’s service page “Replacing Mower Drive Belt (Z335E 42 in Mower)” begins by removing the mower deck to give clear access to the belt and top of the deck. If you prefer to keep the deck on, you can follow a video method instead, but this is the factory approach.
-
Lower the deck to the lowest cutting position.
-
Remove any deck support pins, lynch pins, and draft‑arm connections per the deck removal procedure in the operator’s manual.
-
Slip the existing belt off the engine PTO pulley at the front of the deck.
-
Slide the deck out from under the mower.
If you prefer not to remove the deck, several owners demonstrate a “deck‑on” method by popping the idler spring, taking the belt off the PTO pulley, and routing the belt from underneath with the tractor raised slightly. The routing is the same either way.
4. Release deck belt tension and open spindle covers
Deere’s official procedure for the 42‑inch Z335E deck has several steps to safely remove spring tension and expose the belt path.
-
Wear eye protection and be aware that components are under spring tension.
-
Remove the tension spring from the tension arm (idler arm). Use pliers or a spring tool and keep your hands clear of the spring’s path.
-
Disconnect the spindle cover torsion spring from the wire form so you can lift and remove the spindle covers.
-
Lift the left spindle cover and slide it off the wire form; repeat for the right spindle cover.
Exposing the top of the deck and pulley/sheave surfaces makes it much easier to remove and install the belt and to clean the deck at the same time.
5. Remove the old belt
Once the tension spring is off and the covers are removed, you can take the belt out completely.
-
Remove the nut on the tension arm and lift the sheave (pulley) up to remove the belt from the belt guide.
-
Slip the belt out from around all deck pulleys: spindles, idlers, and any belt guides.
-
Completely remove the belt from the deck and inspect it for cracks, glazing, fraying, or stretching.
This is a good time to:
-
Clean the top surface of the mower deck.
-
Clean pulley and sheave grooves so the new belt seats properly.
6. Install the new belt following the routing diagram
Correct routing is critical. Deere’s service page explicitly says, “Install belt on mower deck as shown,” referring to the routing diagram for the Z335E 42‑inch deck.
General routing (conceptual):
-
The belt loops around both spindle pulleys (one for each blade).
-
It goes around the idler(s) and tension arm pulley.
-
It wraps around the front drive/pickup area where it will later route up to the engine PTO pulley.
Because routing details are easier to follow visually, use:
-
The belt routing decal under the footrest or on the deck, if present.
-
The diagram in the operator’s manual or the Z335E 42‑inch deck service page.
Take care that:
-
The belt sits fully in the V‑groove of each pulley, not on top of the sides.
-
The belt runs on the correct side of each belt guide and keeper.
7. Reassemble: tension arm, covers, and spring
After routing the belt, you’ll reverse the disassembly steps.
-
Reinstall the tension‑arm sheave (pulley) and nut, ensuring the belt is inside any guides; torque the sheave nut to the spec Deere gives (47 N·m / 35 lb‑ft).
-
Reinstall both spindle covers on their wire forms, aligning the keyway and stake as shown in the Deere instructions.
-
Reconnect the spindle cover torsion spring to the wire form so the covers sit correctly.
-
Reinstall the tension spring on the tension arm. On some machines, it is easier to hook the spring first and then slip the belt onto the PTO pulley; in other cases, owners pop the belt off the PTO pulley to get enough travel to hook the spring and then pull the belt back on.
Ensure the tension arm pivots freely and the spring provides firm, smooth belt tension.
8. Reinstall the deck and route belt to PTO pulley
If you removed the deck:
-
Slide the deck back under the mower and reconnect draft arms, lift links, and deck‑support pins with their clips according to the deck‑install procedure.
-
Route the belt up and around the engine PTO pulley at the front; ensure the belt is inside any guards and belt keepers, not rubbing on metal.
-
Double‑check overall routing and that nothing is twisted.
If you left the deck on, follow your chosen video’s method in reverse: wrap the belt around the deck pulleys, then around the PTO pulley, then reattach the idler spring and any covers; owners report this can be done using a pick or pry bar to relieve spring tension without deck removal.
9. Final checks and testing
Before mowing, verify everything is seated and working correctly.
-
Spin each deck pulley by hand with the engine off to confirm the belt stays in place and nothing binds.
-
Check that all guards, covers, pins, and springs are reinstalled.
-
Reconnect the battery or spark plug wires.
-
Start the mower at low idle, engage the PTO briefly, and watch and listen for abnormal belt movement, squealing, or vibration.
-
If everything looks and sounds normal, raise engine speed to mowing rpm and let it run a short time before cutting grass.
If the belt jumps, slaps, or rides out of a pulley groove, immediately disengage and re‑check routing, guides, and tension‑arm assembly.