
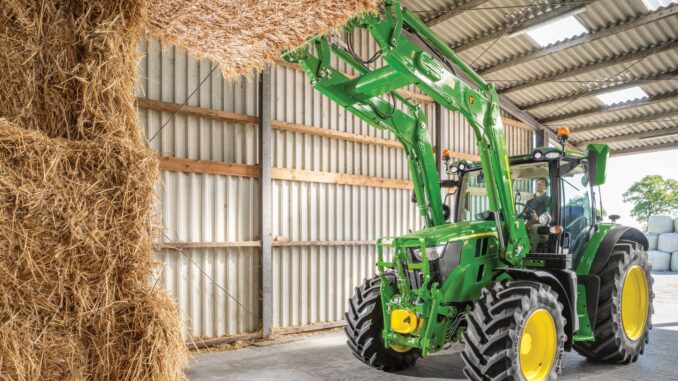
The John Deere 1025R is a sub-compact utility tractor built for homeowners and acreage owners who need one machine for mowing, loader work, light ground engagement, snow removal, and general property maintenance.
See Also ;
John Deere 1025R Serial Number Lookup Guide
Deere’s North American operator’s manual groups it with the 1023E and shows it as a compact utility tractor with diesel engine, hydrostatic transmission, PTO systems, hydraulics, and standard maintenance intervals extending from daily checks to 6000 hours.
For most owners, the real challenge is not understanding what the machine can do, but knowing how to diagnose common symptoms, which repairs are realistic DIY jobs, what parts information to gather before ordering, and which maintenance tasks prevent expensive failures. This guide is written for USA and Canada owners and follows a symptom-first approach so you can start with what the John Deere 1025R is doing wrong before jumping to parts replacement.
General overview of the John Deere 1025R
The John Deere 1025R sits in Deere’s small compact utility tractor lineup rather than the lawn tractor range, which is why it combines a diesel engine, hydrostatic drive, rear three-point hitch, rear PTO, optional mid-PTO use, front axle drive capability, and hydraulic functions in one chassis. The operator’s manual sections cover engine operation, transmission operation, MFWD, PTO, hydraulics, hitch systems, brakes, steering, ballast, transport, storage, maintenance, troubleshooting, and specifications, which tells you this is a much more capable machine than a typical residential mower.
The main systems owners deal with most often are:
-
Engine and fuel system: diesel engine, fuel filters, air filters, coolant system, water separator, and alternator belt.
-
Drive system: hydrostatic transmission, transmission/hydraulic oil, suction screen, front axle oil, MFWD driveline, brakes, and differential lock.
-
PTO and mower system: mid and rear PTO engagement, deck-height control when equipped, PTO switch, and mower deck drive components on mowing setups.
-
Electrical and safety system: battery, relays, fuses, start circuit, interlock system, lights, and several operator/safety switches.
-
Hydraulic and hitch system: loader hydraulic circuits, three-point hitch, selective control valve functions, and hydraulic couplers/hoses.
Common service parts that John Deere 1025R owners regularly buy include the transmission filter LVA16054, primary air filter M131802, secondary air filter M131803, inline fuel filter AM116304, fuel filter M801101, engine oil filter M806418, fan belt M805011, PTO switch AM127393, neutral start switch MIA881067, battery TY26498, thermostat M811895, and radiator cap R109301. These are all listed on Deere-focused maintenance and parts pages for the 1025R.
John Deere 1025R troubleshooting approach
The best way to diagnose a John Deere 1025R is to begin with the symptom the owner actually sees: no crank, hard starting, power loss, poor mowing, hydraulic weakness, overheating, warning lights, or unusual noise. Deere’s operator’s manual includes separate troubleshooting sections for the engine, electrical system, machine, brakes, and steering, which supports this symptom-first method instead of guessing at random parts.
The main symptom groups on a John Deere 1025R are:
-
Starting issues: no crank, slow crank, starts then stalls, or hard cold starts.
-
Running issues: loss of power, excessive smoke, rough running, or repeated fuel starvation.
-
Cut and PTO issues: deck will not engage, uneven cut, poor cut quality, or belt/blade-related problems on mowing setups.
-
Vibration and noise: squealing belt, rattling driveline, mower vibration, or abnormal engine/fan noise.
-
Overheating and leaks: hot-running engine, coolant loss, plugged cooling fins, hydraulic seepage, or fuel leaks.
-
Transmission and drive problems: weak hydro response, no movement, noisy front axle, poor traction, or driveline lubrication issues.
-
Electrical and safety switch faults: dead PTO, intermittent starting, blown fuses, bad battery connections, or interlock-system faults.
Emergency and immediate repair needs
Some John Deere 1025R problems need attention right away because they affect safe operation or can quickly damage expensive components. Stop using the tractor until repaired if you have fuel leaks, hydraulic leaks under pressure, overheating, loss of braking, major driveline noise, damaged PTO shielding, or a safety system that no longer works correctly.
4.1 John Deere 1025R starting issues
A starting problem may show up as no crank, a single click, slow cranking, or a crank-no-start condition. It matters because repeated unsuccessful starts can flatten the battery, mask an interlock fault, and leave you chasing fuel issues when the real problem is electrical or safety-related.
Common causes:
-
Weak battery or poor terminal connections.
-
PTO switch, neutral start switch, or seat/interlock issue.
-
Fuel shutoff, air in fuel, clogged filter, or water separator issue.
-
Glow/cold-start issues in low temperatures.
Basic checks:
-
Confirm PTO is off, transmission/range controls are in the correct start position, and the operator presence/safety conditions are satisfied.
-
Inspect battery posts and ground connections for looseness or corrosion.
-
Check fuel level, fuel shutoff position, and whether the water separator or fuel filter needs service.
-
If it cranks but will not fire, move toward fuel supply and air-in-fuel checks before replacing electrical parts.
4.2 John Deere 1025R cut-quality problems
If your John Deere 1025R mows unevenly, leaves strips, or the deck struggles to stay at speed, the issue is usually setup, blade condition, belt condition, or PTO operation rather than the tractor engine itself. Ignoring cut-quality problems can overload the deck drive, wear belts faster, and leave poor results every time you mow.
Common causes:
-
Dull, bent, or unbalanced blades.
-
Worn or slipping deck belt.
-
Incorrect deck-height setting or uneven deck adjustment.
-
PTO engagement at unsuitable engine speed or belt contamination.
Basic checks:
-
Inspect blades for damage, looseness, or heavy wear before mowing again.
-
Check belt condition, pulley alignment, and buildup under the deck.
-
Verify tire pressures and deck level before blaming the deck itself.
-
Engage PTO at the procedure recommended in the manual and mow at appropriate engine speed.
4.3 Vibration and noise on a John Deere 1025R
New vibration, squeal, or knocking on a John Deere 1025R usually means something is loose, worn, out of balance, or short on lubrication. This matters because vibration can quickly damage belts, bearings, driveline joints, and even mounting hardware if you keep running the tractor.
Common causes:
-
Damaged mower blades or debris wrapped around spindles.
-
Loose wheel hardware or implement mounting hardware.
-
Worn or dry MFWD/main driveshaft grease points.
-
Fan belt wear or pulley noise.
Basic checks:
-
Shut the tractor down and inspect visible rotating parts before restarting.
-
Check wheel bolts, implement pins, and deck mounting points.
-
Grease required driveline points if service is due.
-
If the noise comes from inside the transmission, front axle, or PTO driveline, stop and escalate the repair.
4.4 Overheating and leaks
A hot-running John Deere 1025R or one with visible fluid leaks should not be treated as a minor nuisance. Overheating can damage the engine, while coolant, fuel, and hydraulic leaks create fire risk, contamination, and rapid component failure.
Common causes:
-
Dirty radiator, grille screens, or transmission/fuel cooling fins.
-
Low coolant or deteriorated radiator hoses/clamps.
-
Fan belt wear or poor cooling airflow.
-
Hydraulic hose, fuel filter, or clamp leaks.
Basic checks:
-
Clean front and side grille screens and inspect cooling fins.
-
Check coolant level only when the engine is cool.
-
Inspect upper and lower radiator hoses, clamps, and cap condition.
-
Repair any fuel leak before further operation, even if the leak seems minor.
4.5 John Deere 1025R transmission and drive problems
If the John Deere 1025R moves weakly, hesitates, loses pulling power, or feels noisy through the driveline, start with fluid level, filter service history, suction screen condition, and driveline lubrication. Hydrostatic and front axle problems become expensive when owners continue to operate with contaminated oil or low fluid.
Common causes:
-
Low transmission/hydraulic oil level.
-
Restricted transmission filter or dirty suction screen.
-
Front axle oil neglect.
-
Linkage or traction-use issues rather than internal failure.
Basic checks:
-
Check transmission oil level before diagnosing deeper faults.
-
Review whether the 50-hour or 200-hour transmission service has been completed.
-
Inspect for leaks around filters, housings, and axle seals.
-
If drive loss is severe or accompanied by metallic noise, dealer diagnosis is the safer choice.
4.6 Electrical problems
Electrical faults on a John Deere 1025R often show up as no-start complaints, dead lights, inoperative PTO engagement, or intermittent operation that changes when you move a lever or sit down differently. Because the tractor uses relays, fuses, battery cables, and interlock switches, many “major” electrical problems turn out to be basic connection or switch faults.
Common causes:
-
Weak battery or dirty terminals.
-
Blown fuse or bad relay.
-
Failing PTO switch AM127393 or neutral start switch MIA881067.
-
Harness damage, moisture, or loose connectors.
Basic checks:
-
Start with battery condition and terminal cleanliness.
-
Check fuses and relays before replacing larger parts.
-
If the PTO will not engage, inspect the PTO switch and related safety conditions first.
-
For repeated intermittent faults, dealer electrical testing is often faster than random parts replacement.
Summary:
Common 1025R problems
John Deere 1025R hydro transmission weak fix
A weak hydrostatic drive on a John Deere 1025R is most often caused by low/incorrect hydraulic-transmission oil, a restricted hydraulic filter or suction screen, or an external control/traction issue—not automatically a failed hydro unit. Start with the inexpensive checks before considering transmission repair. Deere specifies a shared transmission/hydraulic system using Hy-Gard fluid, with an approximate capacity of 12.3 L (3.3 US gal), and lists both transmission-oil checks and suction-screen service in the operator’s manual.manuals.deere+1
Check these first
-
Make sure it is really a hydro problem.
Test on level ground with the engine at normal working speed, not idle. Use low range for heavy pulling, loader work, climbing, or ground-engaging jobs. A small 1025R will feel weak in high range under a substantial load even when it is mechanically sound. -
Release the parking brake fully.
A partially applied brake can make the tractor seem underpowered and can overheat or damage components. Check that the brake linkage returns freely. -
Check MFWD and traction conditions.
Engage mechanical front-wheel drive when traction is poor, climbing, pushing into a pile, or working with a loaded loader. If the rear tyres spin easily, the issue may be lack of traction/ballast rather than weak hydrostatic power. -
Inspect the hydro pedals and linkage.
With the engine off and key removed, make sure forward/reverse pedals move freely and return correctly. Mud, corrosion, binding pivots, or a bent/loose linkage can prevent the hydro control from reaching full stroke. -
Check for a brake or driveline drag.
Safely jack or inspect only as appropriate; a dragging brake, damaged wheel bearing, seized implement, or PTO-driven attachment can create an apparent loss of travel power.
Service the hydraulic system
The 1025R’s hydrostatic transmission and hydraulics share the same oil supply, so poor fluid condition or restricted flow can show up as weak travel drive, slow loader/three-point response, or hydraulic noise.
Oil level and condition
-
Park on level ground, lower implements, stop the engine, and follow the exact dipstick/check procedure for your serial-number range in the operator’s manual.
-
Use the approved Hy-Gard transmission/hydraulic oil or an oil specifically documented as meeting the relevant John Deere specification. Do not mix in generic hydraulic oil without confirming compatibility.
-
Investigate immediately if the oil is:
-
Milky or foamy.
-
Burnt-smelling or extremely dark.
-
Full of metallic sparkle/debris.
-
Low enough that the transmission may have drawn air.
-
Low oil, aerated oil, or the wrong viscosity can reduce hydrostatic performance, particularly after warming up.
Filter and suction screen
John Deere lists hydraulic filter LVA16054 for the 1025R, with replacement after the first 50 hours and then every 200 hours. The official operator’s manual also includes procedures for changing the transmission oil/filter and removing/installing the oil suction screen.manuals.deere+1
If service history is unknown, a sensible corrective service is:
-
Drain the oil according to the manual.
-
Replace the hydraulic/transmission filter with the correct part.
-
Remove, inspect, and clean the suction screen as specified.
-
Refill with the correct approved oil.
-
Run at low load and cycle steering, loader, three-point hitch, and travel controls gently to confirm normal operation and remove any air introduced during service.
Use clean containers and keep dirt out of the system. If the suction screen or drained oil contains metal particles, stop there and get a dealer or experienced hydrostatic-transmission technician to diagnose it; simply refilling it may disguise a failing pump, motor, or internal component.
Match the symptom
Important 1025R specifics
The 1025R manual includes dedicated sections for hydrostatic-transmission operation, transmission-oil level checks, oil/filter changes, and suction-screen service. Deere’s current technical manual also has separate diagnostic sections for the drive/transmission and hydraulic systems, which is significant: once basic fluid, filter, linkage, brake, and range checks are exhausted, diagnosis requires measured system tests rather than guesswork.manuals.deere+1
Also check cooling. The official maintenance schedule includes cleaning radiator, fuel-cooler, and transmission-cooling fins. Restricted cooling can make a hydrostatic system feel progressively weaker during longer work periods.manuals.deere
When to stop using it
Stop heavy operation and arrange professional diagnosis if you find:
-
Metal flakes or substantial debris in oil/filter/suction screen.
-
Persistent whine, growl, banging, or sudden drive loss.
-
Weak drive in both directions after correct oil/filter/screen service.
-
A tractor that is strong when cold but repeatedly loses drive hot.
-
Overheating transmission/hydraulic oil.
-
Repeated low oil level or an active hydraulic leak.
A workshop should then carry out the appropriate drive-system pressure, charge-flow, relief-valve, and linkage/control tests. The Deere technical manual specifically includes transmission and hydraulic operational checks, tests, and adjustments for the 1023E/1025R/1026R family.
How to check John Deere 1025R transmission fluid level
To check the transmission/hydraulic oil level on a John Deere 1025R, park on level ground, lower the loader and three-point hitch, shut the engine off, and check the dipstick when the oil is cold—ideally before the tractor has been used that day. The oil should sit between the dipstick marks.manuals.deere
Step-by-step
-
Park the tractor on level ground.
-
Put the transmission/range in neutral and apply the parking brake.
-
Lower the loader, three-point hitch, mower deck, or other mounted implements fully to the ground.
-
Stop the engine and remove the key.
-
Allow the tractor to stand until the transmission oil is cool. Deere’s guidance is to check it cold where possible, such as first thing in the morning after it has stood overnight.manuals.deere
-
Locate the transmission/hydraulic oil dipstick and filler opening at the rear of the tractor, behind/around the operator’s seat area.
-
Clean dust and debris from around the dipstick/filler opening before removing it. This prevents contamination entering the shared hydrostatic transmission and hydraulic system.
-
Unscrew and remove the dipstick.
-
Wipe it clean with a lint-free rag.
-
Screw the dipstick fully back in, then remove it again.
-
Read the oil level. It should be between the marks on the dipstick.manuals.deere
-
If low, add the correct approved John Deere Hy-Gard transmission/hydraulic oil slowly through the filler neck, then wait briefly and recheck.
Important details
-
Do not check with the loader or three-point hitch raised: that can leave oil in cylinders and give a misleading low reading.
-
Do not overfill. Add a small amount at a time, reinstall the dipstick, and recheck.
-
The 1025R uses a common reservoir for hydrostatic-transmission and hydraulic functions, so low oil can contribute to weak travel drive, noisy hydraulics, slow steering, or a slow loader/three-point hitch.
-
The approximate system capacity is 12.3 L (3.3 US gal), but do not use capacity as a fill target during a top-up; use the dipstick level instead.tractorgearbox
-
If the oil is milky, foamy, has a burnt smell, or contains metallic debris, do not simply top it up. Those signs call for inspection and likely fluid/filter/suction-screen service.
If the level is low
Inspect for the reason before repeatedly adding oil:
-
Hydraulic hose, fitting, quick-coupler, filter, or axle-seal leaks.
-
A recently removed/reinstalled loader or rear hydraulic implement with a loose coupler.
-
A missed 200-hour transmission/hydraulic oil-and-filter service.
-
Water contamination after storage or washing.
John Deere specifies transmission/hydraulic filter LVA16054 and advises replacement after the first 50 hours, then every 200 hours; the operator’s manual also includes suction-screen servicing.
The John Deere 1025R is owner-serviceable for many routine tasks, but it is still a diesel hydrostatic compact tractor with hydraulics, safety interlocks, PTO systems, and drivetrain service points that can become costly if handled carelessly. The usual line is simple: if the job involves routine filters, fluids, belts, blades, basic switches, lubrication, or visible bolt-on parts, it is often a realistic DIY task; if it involves internal transmission work, fuel injection, hydraulic diagnosis under pressure, electronic diagnostics, or structural safety parts, dealer service is the safer route.
Good DIY jobs
-
Engine oil and oil filter service.
-
Air filter and fuel filter replacement.
-
Battery cleaning or replacement.
-
Cooling screen cleaning and radiator hose inspection.
-
PTO switch or other accessible external switch replacement.
-
Deck blade and deck belt service on equipped mowing setups.
Advanced DIY or dealer jobs
-
Transmission oil and filter service with suction screen cleaning.
-
Front axle oil service.
-
Hydraulic coupler, SCV, or loader hydraulic diagnosis.
-
No-start diagnosis involving multiple interlocks or harness testing.
-
Fuel injection or high-pressure diesel system work.
Skill level guide
-
Beginner: battery care, air filter checks, engine oil checks, cooling-screen cleaning, basic visual inspections.
-
Intermediate: oil and filter service, fuel filter changes, blade swaps, belt replacement, accessible switch replacement.
-
Advanced: transmission/hydraulic service, driveline lubrication strategy, electrical diagnosis with a meter, front axle service, deck setup and leveling.
Parts needed for a John Deere 1025R, OEM vs aftermarket, and what information you need
Before ordering parts for a John Deere 1025R, gather the full tractor model, Product Identification Number, engine model and serial, and the exact mower deck or attachment version if the tractor is equipped with one. Deere’s operator’s manual includes product identification information, and the air filter section even changes by serial-number break, which is why serial-specific accuracy matters.
Use the table below as a starting point for common service and repair parts that frequently come up on this model. Always cross-check by PIN and attachment configuration before ordering.
OEM parts make the most sense for belts, safety switches, interlock-related items, fit-sensitive hydraulic or cooling components, and any part tied to a serial-number break. Aftermarket parts are usually more acceptable for batteries, some filters, and certain wear items, but only when the supplier clearly cross-references the 1025R and the exact attachment or serial range you have.
Where to find parts diagrams and service manuals
The most useful sources for John Deere 1025R owners are the official operator’s manual, Deere’s parts catalog and owner-support pages, Deere Technical Publications, and a Deere-focused parts site that simplifies maintenance-kit lookups. Each source solves a different problem, so it helps to use them together rather than relying on one site alone.
-
John Deere operator’s manual: best for maintenance intervals, operating procedures, troubleshooting categories, identification info, and safety instructions.
-
Deere owner support for 1025R: useful for current owner-support navigation and parts purchasing tied to the model.
-
John Deere illustrated parts lookup: best for exploded diagrams and serial-sensitive part confirmation.
-
Deere Technical Information Store: useful starting point for official publications and manuals.
-
Green Farm Parts 1025R maintenance guide: handy for quick maintenance-part lookups and common repair parts.
How to locate model, serial, and engine numbers on the John Deere 1025R
These numbers matter because Deere parts can change by serial-number break, by engine configuration, and by the attachment installed on the tractor. If you order by “1025R” alone, you increase the odds of getting the wrong filter, switch, belt, or deck-related part.
-
Find the tractor Product Identification Number plate and record it exactly as shown. Deere includes product identification information and record-number sections in the operator’s manual.
-
Record the full tractor model as marketed and as shown on the identification tag.
-
Locate and note the engine model and serial number from the engine identification label before ordering engine-specific parts.
-
If a mower deck, loader, or other attachment is fitted, record that attachment’s model and serial information as well.
-
Take clear photos of all tags so you can verify numbers while ordering online or at the dealer counter.
Buying John Deere 1025R parts online and in physical stores
The smartest buying strategy is to confirm the OEM number first, then compare sources rather than shopping only by description. Compact tractors often have serial breaks and attachment-specific variations, so a cheap part with a vague listing can waste more time than it saves.
-
Online: use the official Deere owner-support and parts-catalog pages first, then compare with Deere-focused sellers once the OEM number is confirmed. Useful starting points include shop.deere.com/us/ownersupport/1025r, partscatalog.deere.com, and greenfarmparts.com.
-
Dealer counter: usually best for serial-specific cooling, hydraulic, electrical, driveline, and safety-system parts.
-
Retail stores: acceptable for common consumables such as batteries and some filters only when the packaging clearly lists the John Deere 1025R or a verified OEM cross-reference.
Step-by-step fitting guide for common John Deere 1025R parts
These are four of the most practical owner-level jobs on the John Deere 1025R because they affect starting, reliability, power, and safe operation. Always park on level ground, lower attachments, remove the key, and let hot components cool before starting work.
Replacing the John Deere 1025R air filters
A restricted air filter can cause power loss, excess smoke, and poor efficiency, and Deere calls for routine inspection and replacement of the air filter elements.
-
Open the hood and locate the air cleaner housing.
-
Release the housing clips and remove the outer primary element carefully.
-
Inspect the primary and inner secondary element; replace with M131802 and M131803 as needed rather than blowing out badly contaminated elements.
-
Wipe the housing clean and check the air intake hose for damage.
-
Reassemble the housing carefully so the seal seats properly.
Changing the John Deere 1025R fuel filters
Fuel starvation, rough running, and crank-no-start complaints often trace back to neglected fuel filters or water contamination in diesel fuel. Deere includes water separator and fuel filter service in the maintenance section.
-
Shut the tractor off and clean around the filter area before opening the fuel system.
-
Drain any water separator if required and remove the old filter(s).
-
Install the replacement filter, such as AM116304 or M801101 where applicable to your configuration.
-
Restore fuel flow and follow the correct restart procedure so air is cleared from the system.
-
Check carefully for leaks before putting the tractor back under load.
Replacing the John Deere 1025R PTO switch
A failed PTO switch can leave the mower or other PTO-driven attachment completely inoperative even when the rest of the tractor seems normal. This is one of the simpler electrical repairs if the fault is confirmed at the switch itself.
-
Turn the key off and disconnect battery power if you want the safest setup for electrical work.
-
Access the switch in the control console and release it from the panel as designed.
-
Unplug the harness connector and compare the old switch to the new AM127393 part.
-
Install the replacement switch and reconnect the harness securely.
-
Test PTO operation only after confirming all safety conditions are met.
Servicing the John Deere 1025R transmission filter and oil
Hydro response and driveline life depend heavily on clean oil, a good filter, and a clean suction screen, which is why this is such an important service on the 1025R. It is more involved than an engine oil change, so owners should only do it if they are comfortable handling fluids, access issues, and cleanup.
-
Warm the machine slightly, park safely, and position a large drain pan.
-
Drain the transmission/hydraulic oil according to the manual.
-
Replace the transmission filter LVA16054 and remove/clean the oil suction screen if your service interval calls for it.
-
Refill with the specified oil and capacity guidance from the operator’s manual.
-
Recheck level, inspect for leaks, and verify normal drive and hydraulic response.
Maintenance to prevent John Deere 1025R problems reoccurring
Most repeat John Deere 1025R problems come from skipped inspections rather than rare catastrophic failures. Deere’s maintenance sections emphasize daily checks, cooling-system cleaning, scheduled filter changes, lubrication, and safety-interlock testing because those habits prevent many of the “sudden” problems owners experience.
Focus areas:
-
Starting reliability: keep the battery clean, test the safety interlock system, and stay current on fuel filter service.
-
Engine and cooling health: monitor oil level, coolant level, belts, radiator hoses, and cooling screens/fins.
-
Drive performance: check transmission oil level, keep up with transmission filter service, and lubricate driveline points.
-
PTO and mowing reliability: inspect deck belts, blades, and PTO switch operation before a failure strands you mid-job.
-
Electrical reliability: protect terminals, fuses, and connectors from corrosion and vibration.
John Deere 1025R maintenance schedule and year-round checklist
The 1025R operator’s manual includes maintenance intervals from daily service through 6000 hours, with service-record sections for 50-hour, 200-hour, 400-hour, 600-hour, 1000-hour, 2000-hour/two-year, and 6000-hour/six-year work. The list below condenses the practical owner-level items most relevant to homeowners in the USA and Canada.
Daily / before each use
-
Check engine oil level.
-
Check coolant level.
-
Check transmission oil level.
-
Clean front and side grille screens if needed.
-
Inspect tires, wheel hardware, and visible leaks.
-
Test the safety interlock system before startup.
Every 50 hours
-
Change transmission oil and filter where required by the schedule for early service points. Deere provides service-record entries for every 50 hours.
-
Lubricate MFWD driveshaft and main driveshaft if due.
-
Check wheel bolts and hardware.
Every 200 hours or yearly
-
Change engine oil and filter.
-
Check/service air filter system and replace if required.
-
Change transmission oil and filter if due under your schedule.
-
Clean radiator, fuel, and transmission cooling fins.
-
Inspect battery and electrical system.
Every 400 hours
-
Replace fuel filter(s).
-
Replace air filter elements as required by the maintenance guidance and serial range.
-
Review alternator belt condition and cooling-system components.
Every 600 hours and beyond
-
Follow the operator’s manual for longer-interval items listed in the 600-hour to 6000-hour maintenance charts.
-
Record service dates and hours so you do not lose track of axle, coolant, and other interval-based work.
Seasonal checklist
-
Spring: inspect battery, filters, tires, mower deck condition, and cooling system before mowing season.
-
Mid-season: clean cooling fins/screens more often in dusty mowing work and recheck blades, belts, and grease points.
-
Fall or pre-winter: service fuel system, inspect block-heater/cold-weather aids if equipped, and prepare for storage or snow attachments.
Repair, upgrade, or replace?
For a John Deere 1025R, repair usually makes sense when the tractor is structurally sound, starts and drives well overall, and the issue is isolated to a maintenance item, switch, hose, battery, belt, filter, or deck-related wear part. Upgrade makes more sense when the machine is healthy but your work now calls for different attachments, ballast, lighting, tires, or mower configuration, while replacement becomes easier to justify when major transmission, hydraulic, engine, or structural repairs stack up against the value and downtime of the tractor.
Repair if…
-
The fault is limited to normal wear items or an external bolt-on component.
-
The tractor has a known service history and the rest of the machine is solid.
-
You can fix the issue without entering major driveline, hydraulic, or engine internals.
Upgrade if…
-
The tractor works well but needs better capability for your property.
-
You are repeatedly hitting limits caused by tires, ballast, lighting, or attachment setup rather than true failure.
-
A deck or attachment change would solve the real problem better than repeated repair.
Replace if…
-
The machine has severe hydro, engine, or hydraulic damage.
-
Multiple high-cost systems need work at the same time.
-
The repair estimate approaches the practical value of the tractor or no longer fits your needs.
Expanded troubleshooting FAQ
1. Why will my John Deere 1025R not start?
Most no-start complaints on a John Deere 1025R come down to one of four areas: battery condition, safety interlock status, fuel delivery, or cold-start procedure. Start by confirming PTO-off and correct starting position, then inspect battery terminals, fuel supply, and any switch-related fault before buying major parts.
2. Why does my John Deere 1025R click but not crank?
A click with no crank usually points to weak battery power, bad cable connections, starter-circuit voltage loss, or an interlock issue that allows partial circuit activity but not a proper start. Clean and tighten the battery connections first, then work through the PTO and neutral-start circuit before assuming the starter itself has failed.
3. Why does my John Deere 1025R crank but not fire?
If the engine cranks normally but will not fire, fuel supply is high on the suspect list. Check fuel level, filter condition, water separator status, and whether air entered the system during recent service, because diesel fuel problems are more common than catastrophic engine issues on an otherwise healthy tractor.
4. Why is my John Deere 1025R hard to start in cold weather?
Cold temperatures can reduce battery output, thicken fluids, and make diesel fuel systems less forgiving, especially if maintenance is overdue. Use the manual’s cold-weather starting guidance, keep the battery strong, and make sure filters and fuel quality are not working against you.
5. Why does my John Deere 1025R start and then stall?
A start-then-stall condition often means the tractor gets initial fuel but cannot maintain supply, or that a safety/interlock issue is interrupting operation. Dirty fuel filters, water contamination, loose electrical connections, and operator/switch-related faults are all worth checking before deeper diagnosis.
6. Why is my John Deere 1025R losing power under load?
Loss of power under mowing or loader work often comes from restricted air or fuel flow rather than engine wear. Check the air filters, fuel filters, cooling cleanliness, and whether the tractor is being asked to work with overdue maintenance or partially plugged screens.
7. Why is my John Deere 1025R smoking more than usual?
Extra smoke can come from restricted airflow, fuel-quality issues, overloading, or an engine that is not reaching or holding normal operating conditions. A dirty air filter set or unresolved fuel-system problem is a simpler and more common cause than internal engine failure.
8. Why does the PTO on my John Deere 1025R not engage?
Start with the easy checks: correct PTO selection, proper operating procedure, and the safety conditions that allow PTO engagement. If those are correct, the PTO switch, wiring, or an interlock issue becomes much more likely than a sudden mechanical PTO failure.
9. Why is the PTO switch on my John Deere 1025R a common complaint?
PTO switches are external electrical parts used constantly, so they naturally see wear and contamination over time. Because the switch is also central to deck operation, owners notice failure immediately when the attachment stops engaging, which makes it seem even more common.
10. Why does my John Deere 1025R mower leave strips of grass?
Strips usually mean the deck is not cutting evenly across its width, the blades are dull or bent, or the deck is not level side-to-side and front-to-rear. Tire pressure and deck setup matter more than many owners realize, so fix those basics before replacing deck parts.
11. Why is the cut uneven on my John Deere 1025R?
Uneven cut quality often traces back to deck level, tire pressure, blade wear, or deck buildup. On a tractor-platform mower like the 1025R, the mowing system depends on both the deck and the tractor setup being correct.
12. Why are my John Deere 1025R blades vibrating?
Blade vibration usually comes from bent blades, a blade that lost balance after sharpening, loose hardware, or debris packed around the spindle area. Stop mowing until you inspect it, because continued use can damage spindle bearings and deck hardware.
13. Why does my John Deere 1025R squeal when I mow?
A squeal during mowing often points to a slipping deck belt, a pulley issue, or contamination on the belt path. If the sound is closer to the engine, inspect the alternator/fan belt as well, because belt noise is not always from the deck alone.
14. Why is my John Deere 1025R overheating?
The first things to suspect are blocked screens, dirty cooling fins, low coolant, or reduced airflow. Compact tractors doing loader work or mowing in dusty conditions can plug cooling passages faster than owners expect, so cleaning is often the first fix.
15. Why is my John Deere 1025R leaking coolant?
Coolant leaks often come from aging hoses, loose clamps, a weak radiator cap, or a disturbed connection after service. Fix coolant leaks early because even a small seep can become an overheating problem under load.
16. Why is my John Deere 1025R leaking hydraulic oil?
Hydraulic leaks can come from hoses, couplers, filter seals, or connection points around the transmission and hydraulic system. Treat pressurized leaks seriously, because hydraulic fluid under pressure can be dangerous and the operator’s manual specifically warns about high-pressure fluids.
17. Why does my John Deere 1025R move weakly or slowly?
Weak movement usually means checking the transmission/hydraulic oil level and service history first. Low oil, a restricted filter, overdue suction-screen cleaning, or air entering the system after service can all reduce hydrostatic performance.
18. Why will my John Deere 1025R not drive at all?
No drive can be as simple as an operating/control issue or as serious as a hydrostatic problem, so start with the basics before assuming the worst. Verify range selection, parking brake release, fluid level, and obvious leaks, then stop if the tractor still will not move normally.
19. Why is the transmission noisy on my John Deere 1025R?
Hydro or driveline noise often means low fluid, contamination, overdue service, or a lubrication issue in related driveline parts. If the noise is new and strong, avoid hard use until fluid condition and service status are confirmed.
20. Why does my John Deere 1025R front axle make noise?
Front axle noise commonly points to oil level neglect, wear, or driveline issues upstream or downstream of the axle. The 1025R maintenance schedule includes front axle oil checks and changes for a reason, so do not ignore those intervals.
21. Why is my John Deere 1025R battery always going flat?
Frequent battery discharge can result from poor charging, corroded terminals, a battery reaching end of life, or the tractor sitting for long periods without support charging. Start with terminal cleaning and charging-system checks before replacing multiple electrical parts.
22. Why do the lights on my John Deere 1025R stop working?
Lighting problems usually trace to a bulb, fuse, relay, switch, or connection issue rather than a major harness failure. Deere includes bulb, fuse, and relay service in the electrical maintenance section, which tells you these are expected wear-and-service items.
23. Why does my John Deere 1025R blow fuses?
A blown fuse usually means there is a short, a pinched wire, moisture intrusion, or a component pulling too much current. Replacing the fuse without finding the cause only delays the next failure, so inspect the affected circuit and recent repair areas carefully.
24. Why does my John Deere 1025R feel weak in 4WD?
Poor traction in MFWD is not always a mechanical failure. Tire condition, ballast, surface conditions, and correct engagement all affect the result, so check those factors before assuming an internal front-drive problem.
25. Why does my John Deere 1025R ride rough or feel unstable?
Incorrect tire pressure, ballast mismatch, loose hardware, or attachment setup can make a compact tractor feel harsher and less stable than normal. Deere devotes separate sections to tire pressure, ballast, and wheel hardware because these basics directly affect safety and performance.
26. Why does my John Deere 1025R make a rattling sound underneath?
Under-tractor rattles can come from PTO shielding, driveline hardware, mower deck mounting points, or loose heat shields and brackets. Inspect external hardware first, because many rattles come from parts that are accessible without disassembly.
27. Why does my John Deere 1025R use more fuel than expected?
Higher fuel use often tracks back to restricted air intake, extra regeneration/operating load factors, poor mowing setup, dragging implements, or an engine working harder because maintenance has slipped. Before blaming the engine, restore filters, cooling airflow, and attachment setup to known-good condition.
28. How often should I service my John Deere 1025R?
Use the official maintenance chart, not guesswork. Deere provides daily checks plus interval-based service at 50, 200, 400, 600, 1000, 2000/two-year, and 6000/six-year points, so the right answer depends on both hours and calendar time.
29. How often should I change the oil on a John Deere 1025R?
The operator’s manual and Deere-focused maintenance references point owners to scheduled oil and filter changes rather than “whenever it looks dirty.” For most homeowners, the practical habit is to track hours carefully and combine hour-based service with annual review if usage is light.
30. How often should I change the hydraulic or transmission oil in a John Deere 1025R?
This is one of the most important interval items on the tractor because the hydrostatic drive and hydraulics depend on clean fluid. Follow the model’s official schedule and service the filter and suction screen as required rather than waiting for symptoms to appear.
31. When should I replace the air filters on my John Deere 1025R?
The air system should be checked routinely, with replacement based on the maintenance chart, restriction condition, and actual operating environment. Dusty mowing and loader work can shorten real-world service life even if the maximum interval has not yet arrived.
32. When should I replace the fuel filters on my John Deere 1025R?
Deere-focused maintenance references list the fuel filters as 400-hour and annual service items, and the operator’s manual includes fuel filter replacement in the maintenance section. If you have contaminated fuel, poor starting, or power loss, you may need to service them sooner.
33. Can I use aftermarket parts on my John Deere 1025R?
Yes, but choose carefully. Aftermarket can be reasonable for batteries and some consumables, while OEM is usually the safer choice for belts, switches, safety-related items, and anything with tight fit or serial-break sensitivity.
34. Is the John Deere 1025R a realistic DIY tractor?
For routine maintenance and many external repairs, yes. The operator’s manual provides a wide range of owner-level service tasks, but the machine still has enough hydraulic, diesel, electrical, and drivetrain complexity that some jobs are best left to a dealer or a very experienced owner.
35. When should I stop troubleshooting my John Deere 1025R and call the dealer?
Stop when the problem involves high-pressure fuel or hydraulics, repeated electrical faults you cannot isolate, internal driveline noise, loss of braking, overheating that returns after basic fixes, or anything that compromises safe operation. That is the point where dealer diagnosis is usually cheaper than guessing.
John Deere 1025R common hydraulic system issues and fixes:
Common hydraulic issues on the John Deere 1025R usually fall into a few patterns: low/contaminated oil, filter or suction restriction, air in the system, coupler/“power beyond” loop problems, and, less often, pump or valve faults.
Key John Deere 1025R hydraulic symptoms
Owners typically report: slow loader lift, weak bucket curl, three‑point hitch drifting down, delayed steering, noisy pump, hot hydraulic oil, and loader or third‑function not working at all.
These point first to fluid level/condition, filter restriction, air intrusion, or connection issues long before true pump failure.
1. Weak or slow loader / hitch
What it looks like: Loader arms and bucket curl move slowly or struggle to lift normal loads, and the three‑point hitch may hesitate or feel spongy.
Why it matters: Running with poor flow or cavitation can overheat and damage the pump and valves.
Common causes:
-
Low hydraulic / transmission oil level
-
Old or contaminated oil (dark, burnt smell, or milky from water)
-
Restricted hydraulic/transmission filter
-
Air in the system from loose fittings or suction leaks
-
Early pump wear or a relief valve stuck partly open
Basic owner fixes:
-
Check hydraulic/transmission oil level and top up with the correct low‑viscosity Hy‑Gard type oil if low.
-
Inspect oil on the dipstick; if it looks milky (water contamination) or badly degraded, plan a full drain and refill.
-
Replace the hydraulic/transmission filter and then re‑test loader and hitch speed.
-
After any fluid change, cycle loader and hitch fully several times to help purge air; recheck level.
-
If lift is still weak and oil/filter are fresh, pressure testing at the dealer is the next step to rule out pump or relief‑valve issues.
2. No lift / one function dead (loader, 3‑point, or third function)
What it looks like: Steering might still work, but the loader, 3‑point, or a front third‑function circuit will not move at all.
Why it matters: This is often a routing or coupler problem; forcing controls can damage couplers or hoses.
Common causes:
-
Power‑beyond or loader loop not completed (one quick‑coupler not fully seated)
-
Quick‑coupler pushed in but not latched, blocking flow
-
Third‑function valve stuck from long periods of non‑use
-
Wrong coupler pairing after reinstalling loader or backhoe
Basic owner fixes:
-
Shut the tractor off, move the SCV/joystick through all positions to release residual pressure, then inspect every quick‑coupler.
-
Unplug and firmly reconnect each hydraulic coupler, listening/feeling for a positive snap, especially on the power‑beyond loop.
-
Make sure the “loop” hoses that complete the circuit (when an attachment is removed) are correctly connected.
-
If a third‑function has sat unused, exercise it repeatedly once flow is restored; if it is still dead, have the valve checked.
3. Hitch or loader drifting down
What it looks like: Loader arms or 3‑point hitch slowly settle when the control lever is in neutral and the tractor is running (and sometimes even when off).
Why it matters: Drift indicates internal leakage; if severe, it can become a safety hazard under a raised load.
Common causes:
-
Internal leakage in control valve or cylinder
-
Contamination or wear in valve spools
-
Incorrectly adjusted or worn rockshaft/hitch components
Basic owner steps:
-
Confirm there are no external leaks at cylinders or fittings.
-
Check that the control lever really returns to neutral and is not lightly held out of detent.
-
If drift continues and is fast, it usually needs dealer diagnosis for valve or cylinder bypass.
4. Pump noise and hot hydraulic oil
What it looks like: Whining or growling from the transmission/hydraulic area, especially under load, and the oil gets very hot in tough work.
Why it matters: Noise plus heat suggests cavitation, low oil, or restriction that can quickly shorten pump life.
Common causes:
-
Low oil level or suction leaks admitting air
-
Severely restricted filter or clogged suction screen
-
Oil badly broken down or thinned
-
Water in oil (milky fluid) from outdoor storage and condensation
Basic owner fixes:
-
Check level and condition immediately; if oil is milky or heavily contaminated, drain and refill.
-
Replace the hydraulic/transmission filter and, when due per the manual, clean the suction screen.
-
Use only the recommended low‑viscosity Hy‑Gard transmission/hydraulic oil (e.g., TY22000 / TY22035).
-
If noise continues with fresh oil and filter, avoid heavy work and have pressure and flow checked.
5. Water‑contaminated hydraulic oil
What it looks like: Oil on the dipstick or in the drain pan looks “milky” or coffee‑colored instead of clear.
Why it matters: Water in hydraulic oil destroys lubricity, promotes rust, and can cause serious pump and valve damage.
Typical causes and fix (real‑world example):
-
Parking the tractor outside without adequate protection allows water ingress and condensation over time.
-
Recommended fix is to fully drain the transmission/hydraulic sump, refill with fresh low‑viscosity Hy‑Gard, run for a short period, then drain again and clean the suction screen to flush residual water.
-
Use a large enough drain pan (the 1025R system holds around 13 quarts) and keep the fill area clean to avoid new contamination.
6. General 1025R hydraulic troubleshooting checklist
If you have any hydraulic complaint on a John Deere 1025R, a sensible owner‑level sequence is:
-
Verify all quick‑couplers are fully seated and the power‑beyond/loader loop is complete.
-
Check hydraulic/transmission oil level and inspect its appearance on the dipstick.
-
Replace the hydraulic/transmission filter if service is due or you suspect restriction.
-
Inspect for external leaks at hoses, fittings, cylinders, and the filter area.
-
Cycle loader and hitch fully several times to purge air, then recheck level.
-
If symptoms remain—especially severe drift, no lift with correct coupler connections, or persistent pump noise—book dealer diagnostics for pressure and flow testing.
How to check for hydraulic leaks on 1025R fittings
To check for hydraulic leaks on John Deere 1025R fittings, work methodically and safely: clean everything first, then inspect under low pressure, then under working pressure, and never use bare hands to probe suspected high‑pressure leaks.
Safety first
-
Park on level ground, lower loader and implements, set the brake, and shut the engine off.
-
Let hot components cool and wear eye protection and gloves.
-
Never run fingers along a pressurized hose or fitting; use cardboard or paper to check for fine spray leaks to avoid injection injuries.
1. Clean fittings and surrounding areas
Leaks are much easier to find on a clean tractor.
-
Use a brush and shop towels to remove built‑up dirt and oil around couplers, elbows, and hose crimp ends.
-
On the 1025R, pay particular attention to loader quick‑couplers at the right front, steering cylinder area, and filter/line area under the tractor, where debris can pack in.
-
If you had a recent leak or spill, clean off old fluid so you can see fresh wet spots later.
2. Static inspection with engine off
With no pressure in the system, look for obvious issues first.
-
Walk the tractor front to back, checking every hose end, tee, elbow, and quick‑coupler for fresh oil film, drips, or a wet “halo” around threads.
-
Look under the tractor at the transmission filter and nearby lines – small objects like rocks can loosen the filter and cause a leak, as shown in real 1025R examples.
-
Inspect quick‑couplers for damaged O‑rings, cracked housings, or couplers sitting crooked in their blocks.
If you already see wet fittings or a steady drip with the machine off, plan on tightening, reseating the coupler, or replacing O‑rings after depressurizing and cleaning.
3. Check quick‑couplers and loader connections
Quick‑couplers are a common 1025R leak source, especially around the loader stack and any rear or third‑function kit.
-
Verify each coupler is fully seated: pull back the collar, push the male tip in firmly, then release the collar and tug lightly to confirm it is locked.
-
Make sure any “loop” hoses (power‑beyond return when an attachment is off) are connected correctly and not cross‑connected; mis‑routed or partially seated couplers can cause leaks when you move the joystick.
-
If a coupler continues to seep, inspect the face for nicks and the internal O‑ring; replacing couplers and O‑rings follows the general process used on Deere SCVs (remove snap ring, change O‑rings and backup rings, reinstall coupler).
4. Dynamic leak check under light pressure
Once everything is clean and visually inspected, you can look for leaks with the system running.
-
Start the engine and set low–mid throttle.
-
Slowly move the loader joystick and 3‑point lever through all positions, watching each hose and fitting you just cleaned.
-
Use a piece of cardboard or paper held near (not against) suspect fittings to pick up fine spray or weeping leaks; a wet mark on the cardboard shows the leak location.
-
Pay attention to areas that drip only when you operate a specific function (e.g., bucket curl, steering at full lock) – that isolates which circuit is affected.
If you see a brief “stream” or drip from a specific fitting right after shut‑down or when cycling a function, that fitting, O‑ring, or short hose section is likely the culprit.
5. What you can fix vs dealer work
Owner‑level fixes on 1025R fittings:
-
Retighten slightly loose threaded fittings after cleaning the seat area.
-
Reseat or replace leaking quick‑couplers and damaged dust caps.
-
Replace accessible hose assemblies that are wet at the crimp.
Dealer‑level jobs:
-
Leaks at pump housings, valve blocks, or hard‑to‑reach steering and rockshaft connections.
-
Any leak that appears to be at a cracked casting or requires depressurizing major circuits