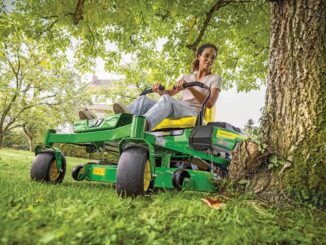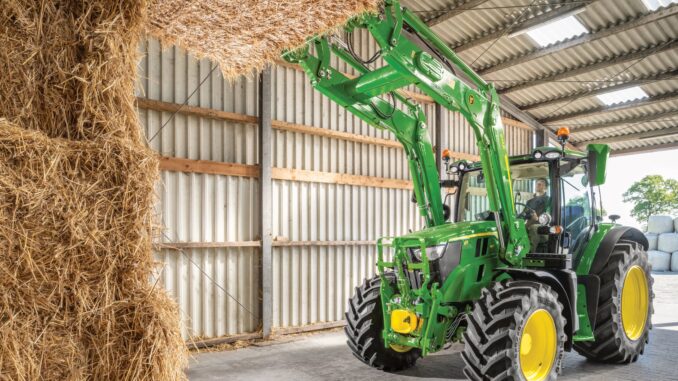
John Deere compact tractors are mostly used for mowing, towing, loader work, and light field duties, but they only stay reliable if their parts and maintenance needs are really understood.
This guide provides a practical framework for looking after most John Deere compact and compact utility tractors, looking in detail at common problems, symptoms, and fixes that can be applied to the relevant tractor. This guide will also include some models that are considered more heavy duty models
For Detailed Guide to Specific Models please click links to series guides below.
John Deere Compact Tractor Models by Series
1. John Deere Compact Tractors: Systems and Key Parts
1.1 Main systems on a John Deere compact tractor
Most compact and compact utility John Deere tractors — whether a 4100‑series, 4000 Twenty series, 2R/3R, or older 670–1070 models — share the same core systems.
Engine
| Series / Model | Engine type / hp band | Key components to cover | Common owner checks / issues | Link to detailed engine post |
|---|---|---|---|---|
| 1 Series (1025R) | 3‑cyl diesel, ~25 hp | Injection, air intake, cooling, lubrication | Hard starting, smoke, overheating, oil changes | See Series Guide Below |
| 2 Series (2032R) | 3‑cyl diesel, ~32 hp | Fuel filter layout, radiator, thermostat | Power loss under load, air filter blockage | See Series Guide Below |
| 3E Series (3038E) | 3‑cyl diesel, ~38 hp | Injection pump, turbo (if fitted), cooling paths | Rough running, fuel contamination, cooling system clogs | See Series Guide Below |
| 3R Series (3046R) | 4‑cyl diesel, ~46 hp | EGR/emissions gear (if fitted), sensors | John Deere 4020 Parts | See Series Guide Below |
| 4M Series (4044M) | 4‑cyl diesel, ~44 hp | Cooling package, fan drive, oil cooler | Overheating during loader work, fan belt wear | See Series Guide Below |
| 4R Series (4066R) | 4‑cyl diesel, ~66 hp | High‑load cooling, emissions system | Regeneration issues, high‑hour injector wear | See Series Guide Below |
| 4000 Ten (4310) | 3‑cyl diesel, ~32 hp | Mechanical injection, radiator, oil system | Hard starts, white smoke, radiator plugging | See Series Guide Below |
| 670–1070 Series | 3‑cyl diesel, ~19–40 hp | Simple fuel system, basic cooling | Cold‑start problems, fuel filter neglect, fan belt slack | See Series Guide Below |
-
Engine: Small diesel engine with mechanical or electronic fuel injection, air intake system, cooling system (radiator, water pump, thermostat, hoses), and lubrication system.
John Deere Drive Train and Transmission
| Series / Model | Transmission type | Components to highlight | Typical symptoms / faults | Link to transmission post |
|---|---|---|---|---|
| 1 Series (1025R) | HST (2‑range) | Hydro pump/motor, pedals, range selector | Loss of drive, weak in one range, pedal creep | See Series Guide Below
|
| 2 Series (2025R) | HST | HST unit, suction screen, filters | Whine, slow response after fluid change | See Series Guide Below |
| 3E Series (3025E) | HST | Charge pump, filter, suction screen | Jerky movement, noisy operation, overheating oil | See Series Guide Below |
| 3D Series (3035D) | Gear | Clutch, gears, shift linkages | Grinding gears, popping out of gear | See Series Guide Below |
| 3R Series (3033R) | HST | Electronic cruise, pedal linkages | Cruise control faults, uneven pedal feel | See Series Guide Below |
| 4M Series (4052M) | HST | HST cooling, filters, axle interfacing | Weak pulling power on hills, hot transmission | See Series Guide Below |
| 4R Series (4066R) | HST / PowrReverser (if) | Reverser clutch packs, shuttle lever | Harsh shifting, delayed engagement | See Series Guide Below |
| 4000 Ten (4510) | PowrReverser / SyncRange | Clutch, reverser valve, synchronisers | Won’t move in F/R, clutch drag | See Series Guide Below |
-
Drivetrain and transmission: Gear, power‑reverser, or hydrostatic transmission, clutch packs, final drives, and differentials that transmit power to the wheels.
John Deere Hydraulic System
-
Hydraulic system: Hydraulic pump, valves, lines, cylinders, 3‑point hitch, and loader circuits for implements and steering.
John Deere PTO – Power Take Off
-
PTO (power take‑off): Rear and sometimes mid‑PTO to drive mowers, tillers, and other attachments.
John Deere Electrical Systems
John Deere Chassis, Steering and Brakes
-
Chassis, steering, and brakes: Axles, power steering, brakes, and front axle pivot; these influence stability and safety more than many owners realise.
1.2 John Deere Manuals, quick‑reference guides, and part numbers
Before doing any repairs or maintenance, owners need to have the right documentation to hand.
-
John Deere operator’s manual: Covers daily checks, basic maintenance intervals, fluid capacities, and safety procedures.
-
Technical/service manuals: Go much deeper with system theory, diagnostics, test procedures, and repair steps for specific series such as 4200/4300/4400, 4510/4610/4710, 670–1070, and later compact models.
-
Quick‑reference guides: John Deere publishes model‑specific sheets listing maintenance intervals and common part numbers (filters, oils, belts) for compact utility tractors.
-
Aftermarket manuals: Haynes and similar workshop manuals can be helpful for general servicing and repair techniques.
2. John Deere Routine Maintenance Tasks
Most expensive failures on John Deere compact tractors tend to trace back to skipped or delayed routine maintenance.
2.1 Daily and pre‑use checks
Simple checks before using the tractor catch many issues early.
-
Engine oil level and condition: Check dipstick with tractor on level ground; oil should be between marks, not milky or heavily diluted.
-
Coolant level: Inspect expansion tank/radiator (when cool) for correct level and signs of leaks or contamination.
-
Fuel level and water in fuel: Ensure enough clean fuel; drain any visible water from water separator bowls.
-
Hydraulic/transmission oil level: Check with dipstick or sight glass according to manual, particularly before loader or PTO work.
-
Tyre condition and pressures: Uneven wear or low pressure can affect traction and steering.
-
Visual walk‑around: Look for leaks, loose pins/clips on 3‑point and loader, damaged hoses, and worn or missing guards.
2.2 Fluid and filter change intervals
Fluids and filters are an integral part of any tractor’s major systems.
Typical intervals
-
Engine oil and filter: Often every 200 hours or annually, with a shorter first change around 50 hours on new machines.
-
Fuel filters: Commonly every 200–400 hours, sooner if you have dirty fuel or water contamination issues.
-
Air filter: Inspect at each service and replace when indicator shows restriction or element is dirty; dusty work may require frequent changes.
-
Hydraulic and transmission oil: Often 400–600 hours, including suction screen and filter service on hydrostatic machines.
-
Front axle oil: Typically every 400–600 hours or a set number of years, depending on use.
-
Coolant: Commonly every few years depending on coolant type, to maintain corrosion protection.
2.3 Step‑by‑step service overview
While every tractor has its own specific service schedule, the overall pattern for a full service is similar.
-
Warm up the engine briefly, park on level ground, secure with parking brake, and chock wheels.
-
Change engine oil and filter, using correct grade oil and torque for the drain plug and filter.
-
Replace engine air filters, ensuring the new element seals properly and airbox is clean.
-
Service fuel filters and bleed the system to remove air after replacement.
-
Drain and refill transmission/hydraulic oil, replace filters, and clean suction screens as specified.
-
Check coolant and top‑up or replace if required, bleeding trapped air from the system.
-
Grease all zerks on steering, loader, 3‑point, and driveline as directed by the manual.
3.John Deere Common Engine Problems and Fixes
Engine issues on compact John Deere tractors often show up as hard starting, loss of power, smoke, or overheating. This section gives generic causes and repairs, with links to specific models.
| Symptom / problem | Likely causes (owner‑level) | What the owner should check or do | Link to Detailed Post |
|---|---|---|---|
| Hard starting (especially cold) | Weak battery, poor connections, air in fuel, old/blocked fuel filter, glow‑plug fault | Check battery voltage and terminals, inspect/replace fuel filter, bleed fuel system, test glow‑plug/heater circuit | See Series Guide Below |
| No‑start, no crank | Flat battery, bad starter relay, faulty key switch, safety switch not made | Verify battery, test main fuses/relays, wiggle/check seat/PTO/neutral switches, inspect starter wiring | See Series Guide Below |
| No‑start, cranks but won’t fire | Empty tank, blocked fuel filter, water/air in fuel, fuel shut‑off not opening | Confirm fuel level, drain separator, replace filters, bleed lines, verify electric fuel shut‑off solenoid operation | See Series Guide Below |
| Hard starting when hot | Weak starter, high resistance in cables, marginal injection timing or low compression | Check hot cranking speed, inspect battery cables/earths, note hours and service history | See Series Guide Below |
| Rough idle / hunting | Dirty fuel, partially blocked injectors, air leaks, uneven cylinder contribution | Replace fuel filters, run clean fuel, check for leaks at lines, listen for misfiring cylinder | See Series Guide Below |
| Loss of power under load | Blocked air filter, restricted fuel flow, dirty fuel filter, dragging brakes, overheating | Inspect/clean air filter, replace fuel filter, confirm brakes are not binding, watch temp gauge under load | See Series Guide Below |
| Black smoke under load | Restricted air intake, over‑fuelling (injector issues), heavy overload | Clean/replace air filter, check intake piping, lighten load, note fuel consumption and hours | See Series Guide Below |
| White smoke on cold start | Unburnt fuel (cold cylinders), weak glow‑plugs, low compression on high‑hour engines | Verify glow‑plug operation, use correct cold‑start procedure, check oil/maintenance history | See Series Guide Below |
| White smoke when hot / under load | Coolant entering cylinders (possible head gasket), injector issues | Check coolant level and use, inspect for coolant loss, oil contamination, or bubbles in radiator | See Series Guide Below |
| Blue smoke (oil burning) | Worn rings, valve guides/seals, over‑filled crankcase | Confirm oil level, review hours and service history, check for breather restriction | See Series Guide Below |
| Engine overheating | Blocked radiator fins/screen, low coolant, faulty thermostat, slipping fan belt | Clean radiator and screen, top up coolant, inspect hoses and leaks, check belt condition and tension | See Series Guide Below |
| Gradual coolant loss (no obvious leak) | Small hose leaks, radiator pin‑holes, weeping water pump, head gasket starting to fail | Pressure‑test cooling system, inspect hose ends/radiator, check oil for coolant contamination | See Series Guide Below |
| Oil pressure warning / low reading | Low oil level, wrong oil grade, clogged filter, failing oil pump | Check level and grade, replace filter, listen for noise, avoid running under load until resolved | See Series Guide Below |
| Excessive engine noise (knock / rattle) | Low oil, worn components, loose mounts or accessories | Verify oil, localise noise (top vs bottom end), inspect engine mounts, pulleys, fan | See Series Guide Below |
| Fuel knock / diesel “clatter” increase | Poor fuel quality, injector wear, incorrect timing (older mechanical engines) | Try fresh quality diesel, add basic cleaner, review injector service history | See Series Guide Below |
| Engine stalls under sudden load | Governor response issues, fuel starvation, blocked filters, operator technique | Replace filters, check throttle/cable linkage, avoid sudden overload until fixed | See Series Guide Below |
| Excessive crankcase fumes (blow‑by) | Worn piston rings/cylinders, blocked breather/PCV | Check breather hose and filter, observe fumes at oil fill, note hours and performance | See Series Guide Below |
| Fuel consumption higher than normal | Clogged air filter, dragging brakes, under‑inflated tyres, injector wear | Clean air filter, check brakes/tyres, record fuel per hour vs typical specs | See Series Guide Below |
| Oil contamination (milky or diesel‑thin) | Coolant mixing (head gasket, cooler), fuel leaking into oil (injector pump issues) | Inspect oil on dipstick and cap, stop heavy use, plan compression/cooling tests or professional diagnosis | See Series Guide Below |
| Random power loss then recovery | Intermittent fuel blockage, loose electrical feed to fuel shut‑off, tank vent blockage | Check tank cap venting, inspect wiring to fuel solenoid, inspect lines and pick‑up for debris | See Series Guide Below |
3.1 Hard starting or no‑start
Symptoms include extended cranking, failure to start, or needing ether or excessive throttle to fire.
Likely causes:
-
Weak or discharged battery (slow cranking).
-
Faulty starter or poor electrical connections.
-
Air in diesel fuel system after filter changes or running out of fuel.
-
Blocked fuel filters or contaminated fuel.
-
Glow plug or intake heater issues on cold starts, depending on model.
Basic troubleshooting steps:
-
Test battery voltage and charge; clean battery terminals and check main grounds.
-
Inspect main fuses and relays for the starter circuit.
-
Check fuel level and quality; replace filters if clogged and bleed the system as per the service manual.
-
Verify glow plug operation where fitted; on some models, check relevant fuses and relays.
3.2 Loss of power, rough running, or smoke
Under load, diesel compact tractors should deliver steady power; when they do not, look at fuel, air, and cooling.
Potential causes:
-
Restricted air filter causing black smoke and power loss.
-
Clogged fuel filters or weak lift pump leading to fuel starvation.
-
Overheating from plugged radiator fins or low coolant, triggering power reduction or damage.
-
Injection or timing issues in higher‑hour engines.
Basic fixes:
-
Inspect and clean or replace the air filter element.
-
Replace fuel filters and check for kinked or leaking fuel lines.
-
Clean radiator and screen; ensure coolant is correct and system is bled.
-
For persistent injection issues, consult a technical manual or dealer‑level diagnostics.
Specific models sometimes have known EGR or cooling‑related weaknesses; use your internal links to direct readers to those case studies without cluttering this general guide.
3.3 Overheating problems
Overheating can quickly turn into head gasket or engine failure if ignored.
Common reasons:
-
Dirty radiator or chaff screen restricting airflow.
-
Low coolant level or incorrect coolant mix.
-
Faulty thermostat or water pump.
-
Heavy load with blocked radiator and high ambient temperature.
Owner actions:
-
Shut down and cool the tractor safely if the temperature gauge climbs into the red.
-
Clean radiator fins and screens with air (or gentle water) from the fan side outward.
-
Top up coolant, then pressure test if leaks are suspected.
-
Check belt tension driving the water pump and fan.
Your model specific posts can explain, for example, the exact radiator cleaning access for a John Deere 4×10 series or how to replace thermostats on a given engine.
4. John Deere Transmission and Drivetrain Issues
John Deere compact tractors commonly use hydrostatic transmissions (HST) or gear/power‑reverser set‑ups. They are robust when serviced correctly but can fail expensively if oil, filters, or suction screens are neglected.
4.1 John Deere Hydrostatic transmission problems
Symptoms include loss of drive, noisy operation, poor performance in one direction, or jerky movement.
Possible causes:
-
Low or incorrect transmission/hydraulic oil.
-
Clogged suction screen or filters.
-
Air in the system after fluid changes.
-
Worn pedal linkages or internal hydrostatic components.
Owner‑level checks:
-
Verify oil level and type; correct it if low or incorrect.
-
Change transmission filter(s) and clean suction screen at recommended intervals.
-
Purge air by cycling the transmission gently after service, following the manual.
-
Inspect external linkages and safety switches (seat switch, range selector) for correct operation.
Your model pages can document known failures (such as specific clutch packs or lubrication valve issues highlighted by independent mechanics) and link from here for owners of those tractors.
4.2 John Deere Gear and power‑reverser transmission issues
Gearboxes and power‑reversers are usually reliable but can suffer from grinding, popping out of gear, or poor clutch performance.
Common issues:
-
Incorrect clutch adjustment or worn clutch plates.
-
Low or contaminated gearbox oil.
-
Misadjusted shift linkages.
Basic maintenance:
-
Keep oil at the correct level and change at intervals with the specified fluid.
-
Adjust clutch and linkages to factory spec as per manual.
-
Avoid aggressive shifting, especially under load or without stopping the tractor.
Again, instead of listing every model here, link the transmission type (for example, “power‑reverser on 4510/4610/4710”) to in‑depth articles covering real‑world problems and rebuild stories.
4.3 John Deere Front axle, steering, and brakes
The front axle on a compact tractor works hard under loader use and tight turning.
Look out for:
-
Oil leaks at axle seals or centre pivot.
-
Play in kingpins, tie‑rod ends, or steering joints.
-
Weak brakes or uneven braking.
Basic owner actions:
-
Check and top up front axle oil; change on schedule with correct gear oil.
-
Grease front end pivot and steering components as recommended.
-
Inspect brake linkages and adjustments, referring to the technical manual for settings.
Model‑specific posts could cover, for example, the exact steering knuckle rebuild process for a 4000‑series compact, with this section simply signposting those resources.
5. John Deere Hydraulics, 3‑Point Hitch, and Loader Problems
Hydraulic performance directly affects your loader, three‑point hitch, and often steering. When these systems slow down, get noisy, or stop working, you need a logical diagnostic approach.
5.1 Slow or weak hydraulics
Typical symptoms are slow loader operation, weak lift, or a 3‑point hitch that struggles to raise implements.
Likely causes:
-
Low hydraulic oil level.
-
Clogged hydraulic filter or suction screen.
-
Air in hydraulic system after a fluid change.
-
Worn pump or internal leaks (for example, through valve spools or cylinders).
Owner steps:
-
Confirm oil level and correct any leaks.
-
Replace hydraulic filter and clean suction screen; verify that the correct oil type is in use.
-
Bleed air by cycling hydraulic functions slowly several times.
-
Inspect hoses and cylinder seals for external leaks.
You can insert a simple sentence such as “Owners of the John Deere 4×10 series, see our detailed hydraulic troubleshooting guide here” and link that phrase rather than adding a long raw URL list.
5.2 3‑point hitch problems
A faulty 3‑point hitch can be dangerous when it drops unexpectedly or frustrating when it refuses to lift.
Common symptoms:
-
Hitch will not lift or is very slow.
-
Hitch leaks down over time when loaded.
-
Jerky or uneven hitch movement.
Basic checks:
-
Verify hydraulic oil level and condition.
-
Check position and draft control levers are correctly set and not binding.
-
Inspect lift arms, linkages, and top link for damage or incorrect geometry.
Detailed fixes (such as internal rock‑shaft valve repairs) should be on your model pages and technical tear‑downs, with this hub article linking them.
5.3 Loader issues
Loaders are often dealer‑installed but depend on the tractor’s hydraulic system.
Typical problems:
-
Loader will not lift, curls but will not raise, or only works in one direction.
-
One joystick function is dead while others work.
-
Loader drifts down when valve is in neutral.
Owner checks:
-
Confirm quick‑couplers for loader circuits are fully seated and not swapped.
-
Look for damaged hoses, particularly near pivot points.
-
Inspect joystick and valve linkages.
Use internal links from here to model‑plus‑loader combinations where you show pictures of coupler routing and valve locations.
6. John Deere Electrical and Electronic Faults
Modern compact John Deere tractors combine traditional electrics with electronic controllers and CAN‑bus wiring, which can lead to error codes and intermittent faults.
6.1 Dead battery, no crank, or intermittent starting
Electrical issues are one of the most frequent complaints.
Core checks:
-
Battery: Verify state of charge and test for voltage drop during cranking.
-
Terminals and earth points: Clean corrosion and ensure tight connections.
-
Main fuses and relays: Check for blown fuses or weak relays feeding the starter circuit.
-
Safety switches: Seat switch, PTO safety, and neutral or range switches can block cranking if faulty.
Your model‑specific posts can diagram the exact locations of fuses and safety switches on each series.
6.2 Charging problems
If the alternator is not charging, you will see warning lights, dim lamps, or eventual no‑start.
Likely causes:
-
Worn alternator or voltage regulator.
-
Loose or broken drive belt.
-
Damaged wiring and connectors.
Owner checks:
-
Inspect belt condition and tension.
-
Verify alternator output with a voltmeter at the battery.
-
Check harness plugs for corrosion or damage.
You can keep this section concise and link to model‑level posts that step through alternator replacement or belt routing.
6.3 Error codes, sensors, and CAN‑bus issues
On newer models, the dash or display may show error codes when CAN‑bus connectors or sensors misbehave.
Common problems:
-
Random error codes due to corroded CAN‑bus connectors, especially around spools and fuse boards.
-
Faulty position sensors or pressure sensors feeding the ECU.
Basic owner‑level steps:
-
Inspect harness connectors associated with the error code and clean corrosion.
-
Ensure connectors are fully seated and wiring is not pinched or damaged.
-
If codes persist, consult the technical manual or dealer diagnostics for sensor testing.
From an SEO perspective, you can create one “John Deere compact tractor fault codes” pillar and multiple model‑specific code guides, all linked from this subsection without overloading any single paragraph.
7. John Deere Seasonal Maintenance and Storage
Seasonal preparation is a good context for more internal links, such as “Winterising your John Deere 1‑series” or “Summer mowing setup for the 3E‑series.”
7.1 Winter preparation
Cold weather is hard on batteries, fuel systems, and hydraulics.
Key tasks:
-
Use winter‑grade diesel and consider additives to reduce waxing and moisture.
-
Ensure the battery is fully charged; consider a maintainer for long lay‑ups.
-
Verify coolant protection level for expected temperatures.
-
Keep tyres properly inflated and check lights and safety equipment.
Model‑specific posts can describe block heaters, cold‑start aids, and any model quirks in freezing conditions.
7.2 Summer and mowing season
Dust, grass seeds, and high ambient temperatures create their own challenges.
Tasks to focus on:
-
Clean radiator screens and air filters more often.
-
Inspect mower decks, belts, and blades; check PTO operation.
-
Grease mower spindles, loader pins, and 3‑point joints.
Here you can add short “For mower‑specific maintenance on [MODEL], see our full deck guide” links for each popular mower tractor.
7.3 Long‑term storage
If the tractor will sit for months, a little planning avoids many problems.
Recommended steps:
-
Store with a full tank of treated fuel to minimise condensation.
-
Change engine oil before storage to remove contaminants.
-
Disconnect or maintain the battery.
-
Park under cover if possible and protect tyres from sunlight.
You can link here to any “tractor storage checklist” posts or printable PDFs you host.
8. John Deere Parts, Upgrades, and Sourcing Components
A big part of keeping compact John Deere tractors productive is knowing where to get parts and when upgrades make sense.
8.1 Genuine John Deere parts vs aftermarket parts
John Deere and aftermarket suppliers both offer filters, belts, and wear parts.
General guidance:
-
Use genuine or high‑quality filters and fluids for engine and hydraulic systems; these are critical for long life.
-
For non‑critical items (such as cosmetic panels), good‑quality aftermarket can be acceptable.
In each model‑specific post, you can safely include part number tables and trusted suppliers, then link those posts here under headings like “Parts list and diagrams for the John Deere 4×00 series.”
8.2 Wear parts and preventative replacements
Some parts should be replaced on condition; others on a schedule.
Typical wear items:
-
Belts and hoses: Replace if cracked, glazed, or swollen.
-
Filters: Replace at or before recommended hours.
-
Bushings and pins: Monitor for looseness on loaders and 3‑point hitches.
-
Tyres: Watch for cracks, sidewall damage, and deep cuts.
Your model posts can include photo‑based “when to replace” examples that this hub article references.
8.3 Popular owner upgrades
Some owners choose upgrades that indirectly reduce repair costs or improve usability.
Common upgrades:
-
Better work‑lights and wiring improvements for reliability and visibility.
-
Additional hydraulic remotes for rear implements.
-
Tyre changes (R4, R1, turf) to better match usage and reduce soil damage.
Each upgrade mentioned here is an opportunity to internally link to a dedicated article for each model or series, again keeping link density in each paragraph low.
9. Basic Troubleshooting John Deere Workflow for Owners
Rather than chasing random fixes, owners should follow a structured approach.
9.1 Symptom‑first approach
Teach readers to start with what they see and hear:
-
Identify the main symptom: no‑start, poor performance, strange noises, leaks, warning lights, or error codes.
-
Note when it happens: only cold, only hot, under load, or intermittently.
-
List any recent changes: fuel filter replacement, hydraulic service, wiring repairs, or new attachments.
9.2 Check basics before advanced faults
Many issues have simple causes.
Checklist:
-
Fuel, air, and battery condition.
-
Fuses, relays, and safety switches.
-
Oil and coolant levels.
-
Obvious leaks, loose connectors, or physically damaged parts.
Encourage owners to rule out these basics before assuming injection pump or major internal failure; link deeper diagnostics to specific model posts where you have space for test procedures.
9.3 When to call a professional
Some repairs require dealer tools, heavy lifting equipment, or safety‑critical procedures.
Examples include:
-
Major internal engine or transmission repairs.
-
ECU or CAN‑bus diagnostics that need specialised readers.
-
Complex hydraulic valve body or steering system rebuilds.