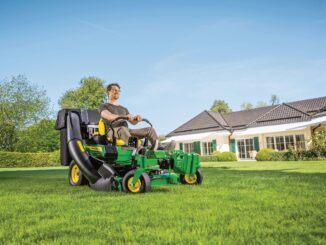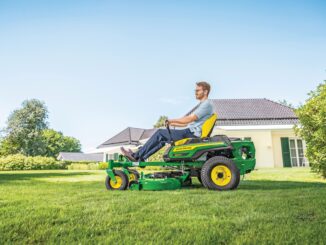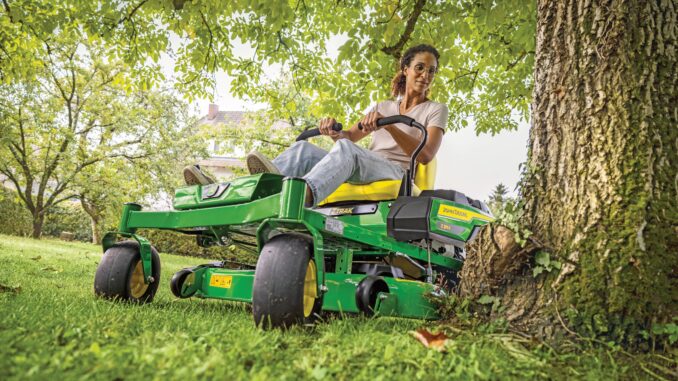
A John Deere lawn and garden tractor should hopefully run for ages if maintenance is thought of and treated as a system: regular checks, a sensible service schedule, and fast responses to small faults before they snowball.
For Repair Guide, Serial Number Lookup Guide and Winter Maintenance Guide on Specific Models, please click through on the Series Link below:
| Z Series | |||
| John Deere Z200 | John Deere Z300 | John Deere Z400 | John Deere Z500 |
| John Deere Z700 | John Deere Z800 | John Deere Z900/ProZtrak | |
| 100 Series | |||
| John Deere 100 | John Deere 200 | John Deere 300 | John Deere 400 |
| John Deere 700 | |||
| X300 Series | |||
| John Deere X300 | John Deere X500 | John Deere X700 | |
| F Series | |||
| John Deere F500 | John Deere F900 | ||
| L,GX,RX,LX,S Series | |||
| John Deere L100 | John Deere GX | John Deere RX | John Deere LX |
| John Deere S200 |
1.John Deere Service Intervals, Basics, and Tools
John Deere’s own quick‑reference guides and manuals lay out service intervals for oil, filters, spark plugs, belts, and greasing, and those patterns are similar across most ride‑on lawn and garden tractors. Below is a general guide, followed by guides to specific models
Core service schedule covering models generally
-
Every use: Visual walk‑around, check engine oil level, look for fuel or oil leaks, check tyre pressures, test brakes and safety switches.
-
Every 25 hours: Clean or replace air filter pre‑cleaner, inspect blades and belts, grease key chassis and steering points where fitted.
-
Every 50 hours: Change engine oil, check battery terminals, clean cooling fins and screens, inspect deck spindles and idlers.
-
Every season or 100 hours: Replace engine oil and filter, replace fuel and air filters, check and replace spark plugs as needed, adjust or replace drive and deck belts, check wheel bearings and steering joints.
-
As specified in the manual: Transmission/hydrostatic oil and filter changes, valve clearance checks, front axle oil changes on some garden tractors.
| Things to check | Typical interval | Symptoms if neglected | Link to model‑specific guide |
|---|---|---|---|
| Engine oil change | Every 50–100 hours / yearly | Hard starting, noisy engine, overheating | See Series Guide Below |
| Engine oil + filter change | Every 100 hours / yearly | John Deere x350 Parts | See Series Guide Below |
| Air filter service | 25 hours (inspect), 100 hours (replace) | Loss of power, black smoke, surging | See Series Guide Below |
| Fuel filter replacement | 100 hours / yearly | Stalling under load, hard starting | See Series Guide Below |
| Spark plug inspection/replacement | 100 hours / 2 years | Misfire, poor fuel economy, hard start | See Series Guide Below |
| Deck spindle greasing | 25–50 hours | Noisy deck, spindle bearing failure | See Series Guide Below |
| Steering system greasing | 25–50 hours | Heavy steering, rapid wear | See Series Guide Below |
| Hydrostatic oil/filter (where serviceable) | 200–300 hours (check manual) | Loss of drive, noisy transmission | See Series Guide Below |
Essential tools and consumables
Most jobs only need basic hand tools plus a few mower‑specific extras.
-
Socket set and spanners, screwdrivers, pliers, torque wrench for critical fasteners (blades, wheels).
-
Oil drain pan, funnel, filter wrench, grease gun with quality lithium or moly grease.
-
Blade removal tool or block of wood, blade balancer, and a decent angle grinder or bench grinder for sharpening.
-
Multimeter and test light for electrical troubleshooting, plus a basic battery charger.
-
PPE: gloves, eye protection, hearing protection, and wheel chocks/stands when working under the tractor or deck.
| Item / tool | Purpose | Notes for owners | Example model use case |
|---|---|---|---|
| Socket set and spanners | General fastener removal | Include metric and SAE where relevant | See Series Guide Below |
| Torque wrench | Correct blade and wheel tightening | Prevents over‑tightening and stripping | See Series Guide Below |
| Oil drain pan + funnel | Clean fluid changes | Reduces spills and contamination | See Series Guide Below |
| Grease gun | Lubricating spindles and joints | Use quality lithium or moly grease | See Series Guide Below |
| Multimeter | Electrical fault‑finding | Battery, charging, safety circuits | See Series Guide Below |
| Blade balancer | Check balance after sharpening | Reduces vibration and spindle wear | See Series Guide Below |
2. John Deere Engine and Starting Problems
Engine and starting issues are the most searched‑for problems on lawn and garden tractors and an ideal place to link to many models that share similar engines. Below is a general guide, followed by guides to specific models
Common starting symptoms
-
No crank at all (turn key, nothing happens or only a click).
-
Cranks but will not fire, or only fires with choke or starting fluid.
-
Starts cold, but refuses to restart hot or vice versa.
Each of these patterns can be a sub‑heading in your model posts; link them back here as “see the general John Deere starting guide”.
Likely causes and DIY checks
-
Battery and connections
-
A weak or sulphated battery is a top cause of no‑start, especially after winter storage.
-
Check open‑circuit voltage and voltage while cranking; clean and tighten terminals and grounds, and replace the battery if it sags badly while cranking.
-
Inspect and reseat the main fuses and any inline fuse holders near the battery.
-
-
Safety interlocks and ignition switch
-
Seat switch, brake/clutch switch, and PTO switch all have to be in the right position or the engine will not crank or fire.
-
Wiggle the PTO switch and pedals while holding the key to “start”; intermittent contacts will often show up here.
-
If you have repeated no‑crank but good battery, the ignition switch and starter relay are prime suspects.
-
-
Fuel delivery
-
Old fuel, blocked filters, and perished fuel lines cause hard starting, dying under load, and surging.
-
Replace inline fuel filters at least yearly; check for air bubbles in transparent lines and cracked hoses allowing air in.
-
Clean the tank outlet and consider using a fuel stabiliser before storage.
-
-
Spark and carburettor
-
Worn spark plugs or leads cause misfire, hard starts, and loss of power.
-
Remove and inspect the plug; dry, sooty, or oil‑fouled tips need attention, and recurring fouling may point to deeper engine wear.
-
Many Kawasaki/Briggs single and V‑twin engines used on Deere lawn tractors suffer from varnished carburettors if left with stale fuel; cleaning jets and passages often cures poor running.
-
| Symptom | Likely cause(s) | Basic checks to perform | Link to detailed model guide |
|---|---|---|---|
| No crank, no click | Flat battery, poor connections, safety switch fault | Battery voltage, clean terminals, check seat/brake switch | See Series Guide Below |
| Click but no crank | Weak battery, failing starter, bad solenoid | Load‑test battery, check starter feed | See Series Guide Below |
| Cranks but will not start | No fuel, no spark, safety circuit issue | Fuel level, filter, spark at plug | See Series Guide Below |
| Starts then stalls | Blocked fuel filter, dirty carb, vacuum leak | Replace filter, inspect fuel lines | See Series Guide Below |
| Rough idle, surging | Dirty carb jets, stale fuel, air leak | Carb clean, check intake gaskets | See Series Guide Below |
| Loss of power under load | Clogged air filter, fuel restriction, valve wear | Air filter, fuel flow, compression test | See Series Guide Below |
3. John Deere Fuel System Care and Problems
Because so many John Deere residential tractors sit for long periods between uses, fuel problems are common and relatively easy to fix. Below is a general guide, followed by guides to specific models
Preventive fuel maintenance
-
Use fresh fuel and avoid stale petrol; old ethanol blends attract moisture and form varnish in carburettors.
-
For storage beyond 30–60 days, top off the tank and use a stabiliser or drain the system completely, depending on the engine manufacturer’s recommendation.
-
Replace fuel filters every season or 100 hours, and inspect them visually for dirt or air bubbles.
Typical fuel‑related symptoms
-
Engine hunts or surges at steady throttle, often caused by restricted jets or vacuum leaks.
-
Engine dies when engaging blades or climbing a hill, pointing to limited fuel flow or dirty filters.
-
Fuel leaking around the carburettor bowl or from cracked fuel lines.
4. John Deere Electrical System and Battery Issues
Electrical faults show up as starting problems, dead batteries, or intermittent cutting out; many are simple wiring or charging issues you can fix without a dealer. Below is a general guide, followed by guides to specific models
Charging system basics
-
Residential John Deere tractors use simple alternators or stators to keep the battery topped up while running.
-
If the battery repeatedly goes flat, check voltage across the battery with the engine running; if it does not rise above standing voltage, suspect alternator, regulator, or wiring.
Common electrical problems
-
Battery drains when parked: often due to a failing regulator/rectifier or aftermarket add‑ons wired permanently live.
-
No charge light, dim or flickering headlights, or warning symbols on more advanced dashboards.
-
Corroded connectors and earth points, especially on tractors stored outdoors or washed aggressively.
Practical checks
-
Inspect and clean main earth points from battery to chassis and engine.
-
Trace the charging circuit wiring looking for rubbed insulation, green corrosion, or loose plugs.
-
Use dielectric grease on reconnected plugs in damp climates to slow future corrosion.
| Symptom | Likely cause(s) | Test / measurement | Model‑specific deep dive |
|---|---|---|---|
| Battery repeatedly flat | Failing battery, parasitic draw, no charge | Voltage drop test, charge rate test | See Series Guide Below |
| Headlights dim at idle | Weak charging system, loose belt (where belt‑driven) | Measure voltage at idle/high rpm | See Series Guide Below |
| Dashboard warning icons lit | Regulator fault, sensor issue | Check codes (where available), test regulator | See Series Guide Below |
| Blown main fuse | Shorted wiring, chafed loom | Inspect harness, test circuits | See Series Guide Below |
| No power to PTO clutch | Failed PTO switch, broken wire, bad relay | Voltage at clutch, switch continuity | See Series Guide Below |
5. John Deere Mower Deck, Blades, and Belt Issues
Uneven cutting, noise, and belt failures are among the most common complaints on John Deere lawn tractors and are heavily covered in troubleshooting guides. Below is a general guide, followed by guides to specific models
Deck maintenance essentials
-
Clean the deck underside regularly to prevent grass buildup, corrosion, and airflow problems; many owners only do this at season’s end, but mid‑season cleaning pays off.
-
Inspect deck hangers, wheels, and the height mechanism for play or damage; worn parts cause scalping and uneven cuts.
-
Grease spindle bearings and idler pivots where fittings are provided, following the intervals in the manual.
| Symptom | Likely cause(s) | Owner checks | Link to specific model fix |
|---|---|---|---|
| Uneven cut left to right | Deck not level, bent hanger, tyre pressure mismatch | Level deck, check pressures, inspect hangers | See Series Guide Below |
| Scalping on bumps | Deck set too low, worn gauge wheels, fast ground speed | Raise deck, inspect wheels, slow down | See Series Guide Below |
| Poor discharge / mulching | Dull blades, packed deck, wrong blades | Sharpen/replace blades, clean deck | See Series Guide Below |
| Excessive vibration | Bent blade, damaged spindle, unbalanced blades | Inspect blades, check spindle runout | See Series Guide Below |
| Belt squeal or slip | Worn belt, weak tension spring, oily pulleys | Replace belt, clean pulleys, inspect idlers | See Series Guide Below |
John Deere blade care and problems
-
Dull, nicked, or bent blades tear grass instead of cutting and leave brown tips and ragged stripes.
-
Sharpen blades evenly and keep them balanced; an out‑of‑balance blade will cause vibration, noise, and premature spindle bearing wear.
-
Replace blades that are badly thinned by rust, heavily bent, or cracked around the bolt hole.
Belt tracking, slipping, and breakage
-
Belts slip or jump off if idler pulleys seize, tension springs weaken, or debris prevents proper routing.
-
Repeated belt failures on the same model often point to bent pulleys, misaligned spindles, or incorrect belt specification.
-
Check all pulleys spin freely and run true; replace any that wobble or feel rough.
| Component | What to inspect | Service action | Model‑focused how‑to |
|---|---|---|---|
| Primary deck belt | Cracks, glazing, correct routing | Replace if worn, verify diagram | See Series Guide Below |
| Idler pulleys | Free rotation, noise, play | Replace noisy or loose pulleys | See Series Guide Below |
| Deck spindles | Noise, end‑play, grease points | Re‑grease or replace bearings/spindles | See Series Guide Below |
| Deck lift links | Bent parts, excessive play | Straighten/replace, re‑level deck | See Series Guide Below |
6. John Deere Drive System, Transmission, and Clutch
Whether your John Deere lawn tractor uses a manual or hydrostatic transmission, drive problems quickly stop work, so proactive maintenance is important. Below is a general guide, followed by guides to specific models
Hydrostatic drive basics
-
Many modern Deere lawn and garden tractors use sealed hydrostatic transaxles that are marketed as “maintenance‑free”, but some still have serviceable oil and filters.
-
Always check the manual or quick reference guide; over‑full, low, or contaminated oil can cause noise, loss of speed, or overheating.
Common drive symptoms
-
Tractor moves slowly, especially up slopes, or loses drive after warming up.
-
Jerky movement when starting or changing direction, often due to worn linkages or air in the system.
-
Manual‑drive models may show clutch slipping, grinding gears, or difficulty engaging some ranges.
DIY checks and fixes
-
Make sure the freewheel/bypass lever is pushed fully in; if it is left partly open after rolling the tractor, the transmission will feel weak or not move at all.
-
Inspect drive belts for glazing, stretching, or contamination; the hydrostatic unit is only as good as the belt driving it.
-
Adjust linkages between the pedal/lever and transmission to restore full range of motion where the manual permits.
| Symptom | Possible cause | Checks you can do | Link to model‑specific article |
|---|---|---|---|
| Sluggish drive uphill | Worn drive belt, low hydro oil, tired transaxle | Inspect belt, check for leaks, oil level (if serviceable) | See Series Guide Below |
| Stops moving when hot | Hydrostatic oil breakdown, internal wear | Confirm freewheel lever position, check cooling/fins | See Series Guide Below |
| Jerky forward/reverse | Worn linkage, air in system | Inspect pedal/linkage, cycle drive to purge air | See Series Guide Below |
| Manual clutch slipping | Worn clutch, mis‑adjusted linkage | Check pedal free play, inspect friction surfaces | See Series Guide Below |
| Tractor rolls in gear | Brake/clutch out of adjustment, transaxle fault | Adjust linkages, inspect brake shoes | See Series Guide Below |
7. John Deere Steering, Suspension, and Tires
Loose steering, pulling to one side, and rapid tyre wear are common on older or heavily‑used John Deere lawn tractors.
Steering wear points
-
Tie‑rod ends, sector gears, and bushings gradually wear, leading to steering play and difficulty holding a straight line.
-
Greasing kingpins and steering joints where fittings exist slows this wear significantly and should be part of the regular service schedule.
| Symptom | Likely cause(s) | Inspection points | Model‑specific steering guide |
|---|---|---|---|
| Excessive play at steering wheel | Worn sector gear, tie‑rod ends, bushings | Check joints, steering shaft, gear wear | See Series Guide Below |
| Tractor pulls to one side | Toe‑out, bent spindle, uneven pressure | Check tyre pressures, measure toe‑in | See Series Guide Below |
| Heavy steering | Dry kingpins, low front tyre pressure | Grease kingpins, set correct pressure | See Series Guide Below |
| Front tyres wearing quickly | Misalignment, constant tight turns | Correct toe, review operating habits | See Series Guide Below |
John Deere tire pressure and wear
-
Incorrect tire pressure affects cut quality, traction, and ride comfort; front and rear tyres often require different pressures.
-
Low pressure can lead to sidewall cracking and rim damage, while over‑inflation causes bouncing and poor grip.
John Deere Alignment and front axle
-
Bent spindles and worn front axle pivots can cause the tractor to wander or cut lower on one side.
-
Basic toe‑in checks and spindle replacement are within DIY reach on most models, following manual procedures.
Steering and tyre‑related issues are a good hook for model posts where users commonly complain about “wandering steering” or “pulling left when mowing”.
8. John Deere Brakes and Safety Systems
Safe stopping and properly functioning interlocks are critical on sloping gardens and when using attachments. Below is a general guide, followed by guides to specific models
Brake maintenance
-
Mechanical brakes rely on clean, adjusted linkages; worn linings or oil contamination reduce performance.
-
Check pedal free play, linkages, and any adjusters shown in the manual; keep moving parts lubricated but avoid contaminating friction surfaces.
Safety interlocks and shutdowns
-
Seat, PTO, brake, and reverse safety switches are designed to shut down the engine or blades in unsafe conditions; when they fail, you may see nuisance shutdowns or no‑start.
-
Test each switch in turn (for example, does the engine cut if you get off the seat with the PTO engaged, as specified in the manual?).
9. John Deere Attachments, PTO, and Hydraulics (Garden Tractors)
Heavier John Deere garden and lawn tractors with front loaders, rear PTOs, or hydraulic lift systems share many of the same hydraulic principles as compact tractors, just on a smaller scale. Below is a general guide, followed by guides to specific models
John Deere PTO drive issues
-
Mechanical or electric PTO clutches can slip, chatter, or fail to engage if belts are worn, clutches are out of adjustment, or electrical supply is weak.
-
Check PTO air gap where adjustable, inspect wiring to the PTO clutch, and confirm voltage at the clutch when switched on.
| Symptom | Likely cause(s) | Checks | Model‑specific PTO article |
|---|---|---|---|
| PTO will not engage | Bad PTO switch, no power at clutch, blown fuse | Voltage at clutch, switch continuity | See Series Guide Below |
| PTO engages but slips | Worn clutch, incorrect air gap, oily surfaces | Check air gap, clean friction surfaces | See Series Guide Below |
| Excessive PTO noise | Worn bearings, misaligned pulleys | Inspect idlers, listen for bearing noise | See Series Guide Below |
John Deere Hydraulic lift and steering problems
-
Slow or weak lifts, noisy pumps, and hot hydraulic oil typically point to low oil, dirty filters, or internal leakage.
-
Check hydraulic reservoir levels, change filters at recommended intervals, and inspect for external leaks at hoses and cylinders.
10. John Deere Seasonal Storage and Long‑Term Care
Good storage habits reduce many of the fuel, battery, and corrosion problems that plague John Deere lawn and garden tractors that only see seasonal use. Below is a general guide, followed by guides to specific models
Pre‑storage steps
-
Clean the tractor thoroughly, including the deck underside, and let it dry before storage.
-
Change oil and filters so corrosive combustion by‑products do not sit in the crankcase all winter.
-
Treat fuel with stabiliser and run the engine long enough to pull treated fuel through the system, or drain the system according to engine guidance.
-
Disconnect or remove the battery and keep it on a maintenance charger if stored for several months.
| Task | Why it matters | When to do it | Model‑specific storage guide |
|---|---|---|---|
| Full clean including deck | Prevents corrosion, improves airflow | End of mowing season | See Series Guide Below |
| Oil and filter change | Removes acidic, contaminated oil | Before long storage | See Series Guide Below |
| Fuel stabiliser / drain | Prevents varnish and blocked jets | For storage over 30–60 days | See Series Guide Below |
| Battery removal / maintainer | Reduces sulphation and failure | For 2+ months of storage | See Series Guide Below |
Spring recommissioning
-
Charge and reinstall the battery, check tyre pressures, and inspect belts, hoses, and wiring for damage.
-
Replace air and fuel filters if they are near the end of their service life and check all fluid levels before first start.
| Task | What to check | Notes | Model‑specific spring guide |
|---|---|---|---|
| Battery charge and install | Voltage, terminal condition | Clean and tighten before use | See Series Guide Below |
| Fluids and filters | Oil level, fuel filter, air filter | Replace if near end of life | See Series Guide Below |
| Tyre pressures | Set to spec for best cut and traction | Adjust before first mow | See Series Guide Below |
| Blade condition | Sharpness, damage, balance | Sharpen or replace as needed | See Series Guide Below |
11. When to Call a Dealer or John Deere Dealer
Not every job is a DIY task; knowing when to stop saves time and prevents expensive damage.
-
Internal engine failures (knocking noises, metal in oil, severe oil burning) usually require professional tools and experience.
-
Transmission internal repairs, complex electrical faults on newer electronically‑controlled machines, and structural frame or axle cracks are also best left to a dealer or specialist.
-
However, you can still create value by helping owners identify symptoms, perform basic checks, and go to the dealer with good information.
Below is a general guide, followed by guides to specific models