1. Introduction
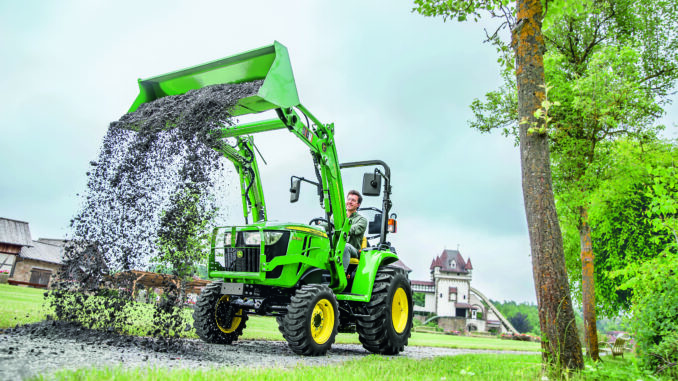
Front‑loader attachments change the character of a compact or utility tractor into a machine that is able to do all types of lifting, digging, and material‑handling work.
While the loader frame and hydraulic cylinders provide the power, the bucket attached to the front‑end determines exactly what the compact tractor can do.
From moving loose mulch to ripping out tree stumps, the choice of bucket (or alternate attachment) shapes productivity, fuel consumption, and wear on the tractor itself.
This guide explains what front‑loader buckets are, how to decide which one to buy, and practical tips for selecting, using, and maintaining the right bucket for your farm, landscaping, or construction tasks.
2.Front‑Loader Bucket Analysed
| Component | Function | Typical Materials |
|---|---|---|
| Bucket Body | Holds material; defines capacity and shape | Heavy‑gauge steel (10–12 mm) or reinforced alloy |
| Sidewalls / Lip | Prevent spillage; aid digging | Reinforced steel plates, sometimes with wear pads |
| Bottom Plate | Provides structural rigidity, resists abrasion | Hardened steel or wear‑resistant steel (AR‑400) |
| Mounting Points (Pins / Quick‑Attach) | Connect bucket to loader arms; allow rapid change‑over | Steel pins, universal quick‑attach couplers |
| Hydraulic Lift Pins | Transfer hydraulic force from loader arms to bucket | High‑strength steel, often heat‑treated |
| Optional Features | Tailored to specific jobs (e.g., teeth, pry bars) | Swappable steel teeth, pry bar brackets, skid shoes |
Understanding each piece helps you evaluate durability, compatibility, and the suitability of a bucket for a given task.
3. Bucket Types & Their Primary Uses
| Bucket Type | Shape & Key Characteristics | Ideal Applications |
|---|---|---|
| Standard (Flat‑Bottom) Bucket | Rectangular, flat bottom, moderate sidewall height | General purpose material handling – sand, gravel, topsoil, mulch |
| Heavy‑Duty (Ripper) Bucket | Reinforced bottom plate, extra‑thick sidewalls, optional teeth | Breaking compacted soil, rock, demolition debris |
| Pallet Fork / Palletizer | Two parallel forks, sometimes with a small lip | Lifting pallets, crates, large bags; warehouse‑style loading |
| Grapple Bucket | Curved jaws with teeth, often hydraulic or manual opening | Tree stump removal, brush clearing, scrap metal handling |
| Snow Bucket | Wide, shallow profile with a curved front lip | Snow plowing, pushing, and light snow removal |
| Mulch / Compost Bucket | Slightly tapered, with a small rear lip for easy discharge | Mulching, compost turning, garden clean‑up |
| Rock Bucket | Reinforced bottom, serrated teeth, high sidewalls | Moving large rocks, boulders, or hard‑packed aggregate |
| Stump Bucket | Narrow, deep profile with a sharp front edge | Pulling and extracting tree stumps |
| Quick‑Attach Bucket | Uses a universal quick‑attach system (UQA) for fast swaps | Situations where multiple bucket types are needed in a day |
Choosing the right bucket begins with matching its geometry and reinforcement to the material you’ll be moving.
4. Selecting the Right Bucket
4.1 Load Capacity vs. Tractor Lift Capacity
Every tractor has a rated lift capacity (often expressed in pounds or kilograms) at a given radius from the pivot point. Bucket capacity is usually quoted in cubic feet (or liters) and a corresponding weight when filled with a typical material (e.g., sand ≈ 100 lb/ft³).
Rule of thumb:
Bucket load (full) ≤ 85 % of tractor’s rated lift capacity.
Exceeding this limit stresses hydraulic cylinders, reduces stability, and can cause premature failure.
4.2 Working Width & Reach
- Working Width = bucket width + sidewall clearance.
- Reach (or radius) = distance from the tractor’s centerline to the bucket’s farthest point.
A wider bucket moves more material per pass but may require a larger turning radius and can interfere with obstacles. Choose a width that balances efficiency with maneuverability.
4.3 Material Hardness & Abrasion
- Soft materials (sand, mulch) → standard steel bucket suffices.
- Hard, abrasive materials (rock, gravel, frozen soil) → hardened bottom plate, wear‑resistant steel, or replaceable wear pads are advisable.
4.4 Soil Conditions
- Loose, dry soil → flat‑bottom bucket works well.
- Compacted or wet soil → consider a ripper bucket with teeth or a bucket equipped with a pry bar to break up clods.
4.5 Quick‑Attach vs. Pin‑Mount
- Quick‑Attach (UQA) systems enable swapping buckets in under a minute, ideal for contractors who need multiple bucket styles daily.
- Pin‑Mount (traditional 3‑pin) provides a stronger mechanical connection, better for heavy‑duty work where maximum load transfer is essential.
4.6 Cost of Ownership
Factor in not just purchase price but also:
- Replacement wear parts (teeth, skid shoes)
- Maintenance (lubrication, bolt torque checks)
- Potential downtime if the bucket is underspecified for the job
A modestly higher upfront cost for a bucket built to the right spec often saves money in the long run.
5. Bucket Accessories & Enhancements
| Accessory | Purpose | Typical Use Cases |
|---|---|---|
| Skid Shoes / Wear Pads | Protect bucket bottom from gouging in hard ground or ice | Snow removal, rocky terrain |
| Replaceable Teeth | Extend bucket life when digging into hard material | Rock bucket, ripping compacted soil |
| Pry Bar / Digging Edge | Assist in breaking up clods, pulling roots | Garden work, orchard cleanup |
| Bucket Liners | Reduce material sticking, simplify cleaning | Mulch, compost, sticky soils |
| Hydraulic Flow Control Valves | Fine‑tune bucket tilt speed for delicate loads | Precise placement of seedlings, fragile objects |
| Sidewall Reinforcement Brackets | Increase sidewall strength for high‑side‑load tasks | Loading uneven piles, stacking logs |
| Quick‑Detach Coupler | Swap between bucket and other front‑end tools (e.g., fork, palletizer) | Multi‑task operations on a single day |
Most manufacturers sell these accessories as part of a bucket package, but they can also be sourced aftermarket. Ensure compatibility with your bucket’s mounting system.
6. Safety Considerations
- Check Load Limits – Never exceed the tractor’s rated lift capacity. Overloading can tip the machine forward (the “front‑end flip”).
- Secure Mounting – Verify that all pins, bolts, and quick‑attach latches are fully seated and torqued to the manufacturer’s specification before operation.
- Maintain Visibility – Use a bucket with a clear sidewall or a rear window when possible; add a camera if the bucket blocks sight lines.
- Watch for Swing Radius – The bucket swings outward as it lifts. Keep personnel and obstacles outside the swing path.
- Ground Stability – Operate on firm ground; soft or sloped surfaces can cause the loader to sink or tip.
- Hydraulic Pressure – Do not operate the loader if hydraulic fluid is low or contaminated; pressure loss can lead to uncontrolled bucket drop.
- Emergency Shut‑off – Familiarize yourself with the tractor’s emergency stop and hydraulic lock‑out controls.
Following these guidelines reduces the risk of injury, equipment damage, and costly downtime.
7. Practical Applications
| Scenario | Recommended Bucket | Why It Fits |
|---|---|---|
| Landscaping – moving mulch & topsoil | Standard flat‑bottom bucket (30‑40 gal) | Large volume, smooth discharge, minimal wear |
| Construction – loading gravel | Heavy‑duty rock bucket with teeth | Handles abrasive material, reinforced bottom |
| Winter – clearing driveways | Snow bucket with wide lip | Shallow profile pushes snow efficiently |
| Orchard – removing tree stumps | Stump bucket with narrow profile & sharp edge | Penetrates root mass, pulls stumps cleanly |
| Farm – transporting pallets of feed | Pallet fork attachment | Securely lifts pallets without needing a separate forklift |
| Brush clearing – pulling logs & branches | Grapple bucket with hydraulic jaws | Grabs irregular objects, reduces manual labor |
| Composting – turning piles | Mulch/compost bucket with rear lip | Allows easy dumping and gentle material handling |
Selecting the bucket that aligns with the primary task maximizes productivity and prolongs both bucket and tractor life.
8. Buying Guide – What to Look For
- Compatibility Chart – Most manufacturers publish a matrix linking bucket models to tractor series (e.g., “Fits Kubota M Series, 20‑hp to 45‑hp”). Verify your tractor’s model and hydraulic flow rating.
- Hydraulic Flow Requirement – Some heavy‑duty buckets demand higher flow (≥ 15 gpm). Ensure your tractor’s pump can meet this demand; otherwise performance suffers.
- Warranty & Service Network – Opt for brands that offer a minimum 2‑year warranty and have local service centers.
- Interchangeability – If you anticipate swapping between bucket types, prioritize a quick‑attach system.
- Weight Distribution – Choose a bucket whose center of gravity sits close to the loader’s pivot point; this improves stability.
- Aftermarket vs. OEM – Original Equipment Manufacturer (OEM) buckets guarantee fit but can be pricier. Reputable aftermarket options may save money but verify user reviews for durability.
- Price vs. Lifecycle Cost – Compare the initial cost against expected wear‑part replacement frequency. A slightly higher‑priced bucket with replaceable teeth may be cheaper over five years.
9. Maintenance Checklist
| Frequency | Task | Details |
|---|---|---|
| Daily (pre‑run) | Visual inspection | Look for cracked welds, missing pins, oil leaks |
| Weekly | Tighten mounting bolts | Use torque wrench to spec (usually 70–90 Nm) |
| Monthly | Lubricate pivot points | Apply high‑temperature grease to lift pins |
| Quarterly | Inspect wear parts | Replace worn teeth, skid shoes, or liners |
| Annually | Full hydraulic flush | Remove contaminants that could damage seals |
| As needed | Paint & corrosion protection | Touch‑up rust spots with rust‑inhibiting paint |
A disciplined maintenance routine keeps the bucket performing at peak efficiency.
FAQ
1️⃣ General / Getting Started
Q1. What is the difference between a “standard” bucket and a “heavy‑duty” bucket?
Answer: A standard bucket has a flat bottom and thin sidewalls, suitable for loose, non‑abrasive material (sand, mulch, topsoil). A heavy‑duty bucket features a reinforced bottom plate, thicker sidewalls, and often welded or bolted teeth. It is built to withstand impact and abrasion from rock, gravel, or compacted soil.
Q2. How do I know which bucket width fits my tractor?
Answer: Measure the distance between the loader’s mounting points (the “rack width”). Most manufacturers list the maximum bucket width that can be mounted without interfering with the tractor’s frame or steering components. As a rule, leave at least 2–3 inches of clearance on each side.
Q3. Can I use a bucket on a loader that was originally sold with a fork attachment?
Answer: Yes, provided the loader uses a compatible quick‑attach or 3‑pin system. Verify that the bucket’s mounting hardware matches the loader’s interface. Some loaders require a conversion bracket; check the dealer’s compatibility chart.
2️⃣ Capacity & Performance
Q4. How do I calculate the maximum safe load for my bucket?
Answer:
- Determine the bucket’s filled weight (capacity × typical material density).
- Compare this figure to the tractor’s rated lift capacity at the bucket’s radius (distance from the tractor’s centerline to the bucket’s farthest point).
- Keep the load ≤ 85 % of the rated capacity to preserve a safety margin for dynamic forces.
Q5. My tractor is rated for 800 lb at a 24‑inch radius. What bucket size can I safely use?
Answer:
- First, decide the material. For sand (≈ 100 lb/ft³), a 6‑ft³ bucket would weigh ~600 lb when full, which is 75 % of the 800 lb limit—acceptable.
- Ensure the bucket’s radius does not exceed 24 in; a 30‑in wide bucket typically sits around a 22‑in radius, staying within limits.
Q6. Does a larger bucket always mean faster work?
Answer: Not always. Larger buckets carry more material per scoop, but they also increase the tractor’s swing radius and may require slower travel to avoid tipping. In tight spaces, a smaller bucket with quicker cycles can be more efficient.
3️⃣ Hydraulic & Power Considerations
Q7. My bucket feels “slow” when lifting. What could be wrong?
Answer: Possible causes:
- Insufficient hydraulic flow (check pump GPM rating vs. bucket requirement).
- Low hydraulic fluid level or contaminated fluid.
- Clogged hydraulic filter.
- Worn or damaged lift pins causing friction.
Q8. Do I need a larger hydraulic pump for a heavy‑duty bucket?
Answer: If the bucket’s specifications call for > 15 gpm flow or higher pressure than your tractor’s pump supplies, upgrading the pump or adding a flow‑control valve will prevent sluggish performance and protect the hydraulic system.
Q9. Can I use a bucket with a hydraulic tilt function on a tractor that lacks tilt control?
Answer: Most front‑loader buckets rely on the tractor’s hydraulic tilt circuit. Without tilt control, the bucket will stay fixed, limiting its usefulness. Adding a separate hydraulic tilt valve (often sold as a “tilt kit”) can retrofit the capability.
4️⃣ Attachments & Accessories
Q10. When should I install skid shoes on my bucket?
Answer: Skid shoes protect the bucket bottom when operating on hard surfaces (rock, packed snow, icy ground). They are recommended for:
- Snow removal on compacted pavement.
- Rock or gravel work.
- Winter operations where the bucket may dig into frozen soil.
Q11. How often should I replace bucket teeth?
Answer: Inspect teeth after every 30–50 hours of heavy rock work. Replace when wear exceeds 30 % of the original profile or when cracks appear. For lighter duties (soil, mulch), teeth may last 150+ hours.
Q12. What is a “quick‑attach” bucket and how does it differ from a pin‑mount bucket?
Answer: Quick‑attach (UQA) uses a universal coupling that locks the bucket in place with a lever or latch, allowing tool changes in under a minute without tools. Pin‑mount uses three solid pins that require a wrench to remove. Quick‑attach is faster but may have a slightly lower load‑transfer rating; pin‑mount is sturdier for maximum‑load applications.
5️⃣ Safety & Operational Practices
Q13. What is the “front‑end flip” and how can I avoid it?
Answer: When a loaded bucket is lifted too high or moved too quickly, the tractor’s center of gravity shifts forward, causing the rear wheels to lose traction and the machine to tip forward. To avoid:
- Keep loads ≤ 85 % of lift capacity.
- Raise the bucket slowly and keep the load low until the tractor is moving.
- Maintain a stable, level surface.
Q14. Should I wear any special PPE when operating a front‑loader bucket?
Answer: Yes. Recommended PPE includes:
- Hard hat (for overhead debris).
- Safety glasses or face shield.
- Steel‑toe boots with good traction.
- Gloves (hydraulic fluid can be hot).
Q15. How far should I stay from the bucket’s swing arc?
Answer: At least one bucket width away from the outermost point of the swing arc. For a 30‑in bucket, stay ≥ 30 in from the projected path. Use spotters when working near personnel.
6️⃣ Maintenance & Longevity
Q16. What are the signs of a failing hydraulic cylinder on a bucket?
Answer:
- Slow or jerky lift motion.
- Visible fluid leaks around the cylinder base.
- Unusual noises (whining or grinding).
Q17. How do I properly store a bucket during the off‑season?
Answer:
- Clean the bucket thoroughly (remove soil, mud, and debris).
- Dry it completely to prevent rust.
- Apply a light coat of rust‑inhibiting oil or spray.
- Store in a dry, sheltered area—preferably indoors or under a cover.
Q18. Is it okay to weld repairs onto a bucket?
Answer: Minor welds for small cracks can be performed by a qualified welder, but the bucket’s structural integrity must be re‑tested. For major damage, replace the bucket; welding may compromise the load rating.
7️⃣ Compatibility & Purchasing
Q19. My tractor is a 2022 Kubota M7000. Which bucket families are compatible?
Answer: The M7000 uses a universal quick‑attach (UQA) system and supports buckets up to 36 in width, 800 lb lift capacity, and 15 gpm hydraulic flow. Look for buckets labeled “UQA‑compatible” and verify the lift capacity rating does not exceed 800 lb.
Q20. Should I buy an OEM bucket or an aftermarket one?
Answer: OEM buckets guarantee perfect fit and often come with a longer warranty, but they are pricier. Reputable aftermarket brands can be more affordable; ensure they have positive user reviews for durability and that they provide a comparable warranty (≥ 2 years).
Q21. How can I confirm that a bucket’s hydraulic flow requirement matches my tractor?
Answer: Check the bucket’s spec sheet for “Hydraulic Flow (GPM)” and compare it to your tractor’s pump rating (found in the owner’s manual). If the bucket requires 12 gpm and your tractor pumps 10 gpm, you’ll experience reduced performance; consider a higher‑flow pump or a bucket with lower flow demand.
8️⃣ Troubleshooting
Q22. The bucket won’t tilt back down after a lift. What should I do?
Answer:
- Verify hydraulic fluid level and temperature.
- Check for a blocked tilt valve or stuck latch on a quick‑attach system.
- Inspect the hydraulic hoses for kinks or damage.
- If the problem persists, shut down the machine and consult a qualified service technician.
Q23. My bucket is leaking water when I use it for snow removal. Is this normal?
Answer: Some water ingress can occur through seams, especially in older buckets. Inspect the bucket’s welds and seams; apply a waterproof sealant or replace the bucket if the leak is severe.
Q24. The bucket’s sidewalls are bending under load. What caused this?
Answer: Likely the bucket is overloaded beyond its design rating, or the sidewalls are fatigued from repeated heavy use. Reduce the load, and if the deformation persists, replace the bucket—bent sidewalls compromise safety.
9️⃣ Advanced Topics
Q25. Can I add a hydraulic “dig” function to a standard bucket?
Answer: Yes. Some manufacturers sell a “dig kit” that adds a hydraulic tilt actuator and a set of teeth to convert a flat‑bottom bucket into a semi‑digging bucket. Installation requires hydraulic plumbing and may affect the bucket’s load rating.
Q26. How does bucket pitch affect material discharge?
Answer: Pitch (the angle of the bucket’s front lip) determines how material slides out. A steeper pitch (10–15°) aids quick discharge of loose material, while a flatter pitch retains material better for transport. Choose based on whether you need rapid dumping or controlled placement.
Q27. Is it possible to retrofit a quick‑attach system onto a legacy 3‑pin bucket?
Answer: Some aftermarket kits provide a conversion plate that bolts onto the 3‑pin holes, adding a quick‑attach interface. Verify that the conversion kit is rated for the same load capacity as the original bucket.
10️⃣ Warranty & Support
Q28. What should I look for in a bucket warranty?
Answer:
- Minimum 2‑year coverage for structural defects.
- Inclusion of wear‑parts (teeth, skid shoes) for at least 1 year.
- Clear return‑to‑sender policy for defective units.
- Availability of local service centers for repairs.
Q29. Who do I contact if my bucket fails during operation?
Answer: Contact the dealer or the bucket manufacturer’s customer‑service line. Have the model number, serial number, and purchase receipt ready. If the failure poses a safety hazard, cease use immediately and arrange for professional inspection.
Q30. Are there online resources for troubleshooting specific bucket models?
Answer: Many manufacturers host PDF manuals, parts diagrams, and video tutorials on their websites. Additionally, user forums (e.g., TractorBy.com community, agricultural equipment groups) often share real‑world experiences and fixes.
11. Summary
Front‑loader buckets are the defining element that translates a tractor’s raw power into useful work. By understanding bucket anatomy, matching capacity to your tractor’s lift rating, and selecting the right shape and reinforcement for the material you’ll handle, you can:
- Boost productivity – Move more material per pass.
- Extend equipment life – Avoid overloading and premature wear.
- Enhance safety – Maintain stability and proper hydraulic function.
Invest time in evaluating quick‑attach versus pin‑mount systems, consider accessories that protect high‑wear areas, and adopt a regular maintenance schedule. When you pair the correct bucket with your tractor, you unlock a flexible, efficient tool that serves farms, landscaping crews, construction sites, and winter‑maintenance teams alike.
Next Steps
- Identify your primary tasks (e.g., moving mulch, digging rock).
- Check your tractor’s specs – lift capacity, hydraulic flow, and compatible mounting system.
- Select a bucket that satisfies the capacity‑to‑lift ratio and includes any needed accessories (teeth, skid shoes, etc.).
- Purchase from a reputable dealer that offers warranty and service.
- Implement the maintenance checklist to keep the bucket in top condition.