John Deere 1025R Snow Blower Guide: Fitment, Setup and Winter Care
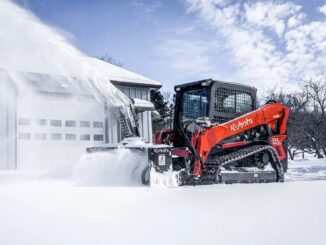
The John Deere 1025R can operate a front-mounted snow blower when equipped with the correct hitch, PTO drive components, hydraulic connections and ballast. Deere’s 47- and 54-inch Quick-Hitch snow blowers are documented options, but a used blower is not necessarily a complete installation package. Confirm both tractor and attachment identification before buying.crossimplement
This diesel, hydrostatic subcompact tractor can remain in service throughout winter or enter seasonal storage. For snow removal, the priorities are verified attachment fitment, dependable cold starting, warm hydraulic oil and adequate traction. This guide covers blower selection, installation checks, operating technique, troubleshooting and storage.
And See:
- John Deere Snowblower Serial Number Guide
- John Deere Snowblower Traction and Ballast Guide
- John Deere Snowblower Pre-Season Checklist
- John Deere Snowblower: Fuel, Batteries and Cold Weather Starting Guide
- John Deere Snowblower Complete Safety Guide
- John Deere Snowblower Complete FAQ Guide
John Deere 1025R Snow Blower Compatibility
The 1025R is the tractor, not the snow blower’s model number. Record its product identification number and the blower’s separate identification plate before ordering mounting components, driveline parts or shear bolts.
Deere’s operator’s manual identifies 47- and 54-inch Quick-Hitch snow blowers as compatible with the 1025R. These widths are approximately 119 and 137 cm. However, compatibility depends on having the correct supporting equipment, not simply matching the clearing width.crossimplement
| Option | Main consideration | What to verify |
|---|---|---|
| 47-inch Quick-Hitch blower | Narrower clearing path for restricted areas | Exact blower identification, tractor fitment and complete mounting package |
| 54-inch Quick-Hitch blower | Wider clearing path for driveways and open areas | Required hitch, drive components, ballast and storage clearance |
| Other front-mounted blower | Different mounting systems may look similar | Written compatibility for the tractor and attachment |
| Rear-mounted blower | Changes operating direction and weight distribution | PTO requirements, hitch geometry, shaft length, lift capacity and manufacturer approval |
Do not confuse a front three-point-mounted blower with a Quick-Hitch blower. Deere also lists a 54-inch Heavy-Duty blower using a front three-point hitch; the shared width does not establish interchangeable mounting or fitment.deere
What a front installation requires
The documented Quick-Hitch system calls for a front hitch, attaching support, front PTO drive arrangement and dual selective control valve connections. The selective control valve, or SCV, directs hydraulic oil to attachment functions. Some components may already be installed on the tractor.crossimplement
Before purchasing, have the dealer identify:
-
The correct tractor-side support and hitch.
-
The complete drive route from the mid-PTO to the blower.
-
Required shafts, bearings, guards and lift stops.
-
Hydraulic hoses, extensions and couplers.
-
Chute rotation and deflector controls.
-
Required ballast.
-
Any necessary mower-deck or loader removal.
A seller’s “fits 1025R” description does not confirm that these items are included.
Choosing a Blower for Your Driveway
The documented Quick-Hitch blowers use a tractor-powered arrangement rather than a separate onboard engine. Their suitability depends on snow conditions, maneuvering space and the complete tractor setup—not width alone.
A two-stage blower uses an auger to gather snow and an impeller to discharge it. This separates collection from throwing, making the design useful for deeper accumulations. A single-stage walk-behind generally suits lighter work on suitable surfaces; a third-stage mechanism on some standalone machines is not a required feature for this tractor installation.deere
Paths, short drives and confined areas
A walk-behind blower may be more practical where gates, parked vehicles, steps or tight corners restrict tractor access. It also avoids seasonal attachment changes when only a small area needs clearing.
Measure the complete machine and attachment envelope, not just clearing width. Allow room for turning, chute movement and safe discharge.
Acreage and long driveways
A tractor-mounted blower becomes more useful where repeated storms leave banks that cannot be pushed farther aside. Select a setup that matches the driveway’s width, slope, surface and available turning areas.
For wet snow or dense plow berms, capacity depends heavily on ground speed. A wider blower does not justify forcing more snow into the intake than the tractor and attachment can process.
Gravel driveways
Raise the scraper clearance using the blower’s skid-shoe adjustment procedure. Deere’s Quick-Hitch manual provides separate settings for smooth surfaces and gravel or rough ground. Do not copy another owner’s setting without checking your attachment.crossimplement
Remove loose objects before snowfall and mark culverts, drainage edges, rocks and posts. Gravel can become dangerous projectiles, particularly before the driveway develops a firm winter base.
John Deere 1025R Installation and Preseason Checks
Complete installation on firm, level ground with the attachment supported as instructed. Stop the engine, remove the key and relieve hydraulic pressure before making connections.
Inspect the complete drive system
Check:
-
PTO couplers for positive engagement.
-
Shaft guards and freely rotating shielding.
-
Universal joints and telescoping sections.
-
Correct shaft routing and support.
-
Hitch locking pins.
-
Hydraulic hose routing through the full lift range.
-
Gearbox leakage and lubricant level.
-
Auger, impeller, scraper and skid-shoe condition.
Do not improvise PTO adapters, shorten shafts without the specified procedure or fabricate mounting brackets to overcome a mismatch.
For the documented Quick-Hitch blower, the hitch must be locked against angling. Swinging this attachment as though it were an angle blade can damage its driveline. Correct lift limits also protect the shaft.crossimplement
Check the blower’s drive arrangement
Production differences matter. Deere’s Quick-Hitch manual distinguishes exposed-chain and enclosed-chain drive arrangements, with different maintenance procedures. Identify the actual system before adjusting tension or adding lubricant.crossimplement
Keep the specified replacement shear bolts available. Never substitute a stronger bolt: the protective fastener is intended to fail before an obstruction causes more expensive damage.
Traction and Ballast for the John Deere 1025R
Ballast and traction solve different problems. Chains improve tire grip; correctly positioned weight helps maintain stability, steering and braking with a heavy attachment.
The Quick-Hitch blower manual specifies required ballast and lists additional traction measures. Use the instructions matching your blower and tractor configuration rather than a universal weight recommendation.crossimplement
Tire chains and tire selection
Rear chains can improve grip, but correct sizing and clearance are essential.
-
Two-link ladder chains generally provide more frequent cross-chain contact than four-link patterns.
-
Diamond patterns offer a different contact arrangement that may improve continuity of grip.
-
Rubber traction systems may reduce surface marking, but performance and fit vary.
-
Turf, industrial and all-terrain tires have different compromises; tread appearance alone does not establish ice performance.
Confirm clearance around fenders, axle components, hoses and hitch parts. Inspect again after installation and initial low-speed operation. Chains can damage decorative paving, sealed surfaces and exposed concrete edges.
Do not add front chains, studs or wheel spacers without confirming approval and clearance.
Choosing and positioning weight
Wheel weights, approved rear ballast and suitable liquid tire ballast are possible measures, but they are not automatically interchangeable. Follow the specified ballast arrangement and stay within tire, axle and machine limits.manuals.deere+1
A rear implement is not automatically an adequate substitute for prescribed ballast. Its weight, leverage and transport position all matter.
Four-wheel drive does not remove the need for careful braking. Avoid engaging differential lock while a wheel is spinning rapidly or while trying to make a tight turn; follow the tractor’s operating instructions.
Preparing the John Deere 1025R for Cold Starts
The 1025R needs diesel-specific preparation, not gasoline storage advice. Check the fuel system, battery, lubrication and cooling system before the first severe freeze.
Winter diesel and anti-gel
Buy fresh, seasonally appropriate diesel from a reliable supplier. Summer fuel remaining in the tractor or transfer tank may have inadequate cold-flow performance for a sudden temperature drop.
No. 2 diesel generally offers higher energy content, while No. 1 diesel can improve cold-weather flow. A supplier-prepared winter blend may be appropriate, but there is no universal blending ratio for every location or fuel batch.
Cloud point is the temperature at which wax crystals begin appearing. Those crystals can restrict a filter before the entire fuel supply stops flowing; pour point alone therefore does not describe whether an engine will keep running. Biodiesel content also affects cold-weather behavior.
Use only a compatible conditioner at its labeled rate, normally before the fuel reaches its wax-forming temperature. Anti-gel is preventive treatment, not a guarantee that already plugged filters will recover. Follow Deere’s fuel guidance for the applicable tractor.manuals.deere
Also:
-
Check and drain accumulated water using the separator procedure.
-
Replace the fuel filter when due.
-
Inspect the cap, vent and storage containers.
-
Keep water and dirt out of transfer equipment.
-
Investigate recurring contamination rather than repeatedly adding chemicals.
Never add gasoline, alcohol or unapproved solvents to diesel.
If fuel has already gelled
Stop repeated starting attempts. Move the tractor safely into a suitable warm area if possible, without running it in an enclosed building.
Have the fuel and filters assessed, warm the system safely and follow approved recovery instructions. Keep flames, torches and improvised heaters away from fuel components. Do not loosen injection lines as a troubleshooting shortcut.
Battery maintenance
Clean the battery case and terminals, inspect grounds and cables, and confirm that the hold-down is secure. Check electrolyte only if the installed battery is serviceable.
Fully charge the battery before storage and use a maintainer compatible with its chemistry. Do not assume that every replacement battery accepts the same charging program.
Disconnect the battery where appropriate to prevent accessory drain. Store a removed battery upright in a protected, dry, ventilated location, and never charge a frozen, cracked, swollen or leaking battery.
Fluids, Cooling and Hydraulic Warm-Up
Cold oil flows less readily, which can slow engine lubrication, hydrostatic response and attachment movement. Verify approved fluids against the temperature charts in the tractor and blower manuals.
Engine, transmission and hydraulic fluids
Inspect the engine oil, transmission/hydraulic oil and front-axle lubricant using their individual checking procedures. Do not assume that every compartment uses the same fluid.
Change overdue or contaminated oil before storage. Keep the transmission/hydraulic system at the specified level, not above it.
Do not install an “arctic” hydraulic fluid or mix products merely because a container claims better cold flow. Unverified conversions can affect lubrication, seals and hydrostatic performance.
Grease the specified tractor and attachment fittings, including applicable driveline joints and auger-shaft points. Use compatible products and the attachment’s actual service schedule.
Coolant protection
The liquid-cooled engine needs adequate freeze protection before a cold snap. Check level only when safe and never remove a hot pressure cap.
Inspect:
-
Radiator and recovery tank.
-
Hoses, clamps and cap.
-
Cooling screens and radiator fins.
-
Coolant condition and service age.
-
Heater hoses, where fitted.
Test freeze protection with a tester suitable for the coolant. Use the specified coolant and concentration; neither a universal 50/50 instruction nor extra concentrate is a substitute for the manual.
Inspect any approved engine-heater cord before use, keep connections dry and disconnect it before moving.
Warming the hydrostatic system
Follow the tractor’s cold-start and hydraulic warm-up instructions. Use its starting aids as designed and do not use starting fluid unless explicitly permitted.
Allow gradual warm-up, then test steering and cycle permitted hydraulic functions slowly without a heavy load. Avoid immediate full-speed operation or repeated operation against hydraulic stops. Deere provides separate engine and hydraulic warm-up procedures for this tractor family.manuals.deere
Operating the Snow Blower Safely and Effectively
Once the tractor is warm, use the PTO engagement procedure and operating speed specified for the attachment. Reduce travel speed—not arbitrarily the blower’s working speed—when snow becomes harder to process.
The documented Quick-Hitch operating procedure uses float to let the lowered blower follow the surface. Apply the instructions for your particular hitch and blower rather than assuming all systems operate identically.crossimplement
Match travel speed to conditions
-
Begin slowly in unfamiliar snow.
-
Take narrower passes through dense accumulations.
-
Avoid ramming frozen banks.
-
Keep discharge away from people, buildings, vehicles and roads.
-
Stop when blowing snow obscures hazards.
-
Disengage the PTO for transport.
Wet snow can clog even a correctly maintained blower. Inspect the chute, scraper, skid settings and drive condition before assuming the tractor lacks power.
Clear blockages without reaching inside
-
Stop travel and disengage the PTO.
-
Lower the attachment and apply the parking brake.
-
Stop the engine and remove the key.
-
Wait for all movement to stop and follow the isolation procedure.
-
Clear the blockage with a suitable clean-out tool.
Never put hands into the chute, auger or impeller. Packed material can retain stored force even after power is stopped.crossimplement
Control on ice and slopes
Use slower travel speeds and allow greater stopping distance. Avoid abrupt hydrostatic pedal changes, sudden turns and uncontrolled coasting.
Keep the blower low enough for stable travel while maintaining necessary clearance. Follow tractor and attachment slope restrictions; do not clear steep or unsafe slopes.
Use the seat belt with the ROPS correctly positioned as instructed. A weather enclosure is not rollover protection, and no passenger should ride on the tractor.
Daily John Deere 1025R Winter Checklist
Before starting
-
Check for leaks, damaged hoses and wiring.
-
Inspect applicable fluid levels and fuel condition.
-
Check the water separator.
-
Inspect tires, chains, wheel hardware and ballast.
-
Clear steps, lights, controls and cooling openings.
-
Confirm hitch locks, PTO connections and guards.
-
Check lights and safety interlocks.
During warm-up
-
Use the prescribed starting sequence.
-
Watch warning indicators.
-
Warm the engine and hydraulic system gradually.
-
Check steering, brakes, lift and chute response.
-
Stop if abnormal noise or poor response persists.
While working
-
Monitor temperature and warning indicators.
-
Watch for vibration, chatter or declining throwing performance.
-
Recheck chain clearance and ballast security.
-
Keep bystanders outside the work and discharge areas.
At shutdown
-
Follow the blower’s procedure for clearing residual snow before stopping.
-
Lower the attachment.
-
Remove the key and wait for movement to stop.
-
Remove packed snow and corrosive residue.
-
Inspect for new damage or leaks.
-
Connect approved heaters or maintainers only after safe parking.
The Quick-Hitch manual calls for running the blower after clearing to help prevent auger and impeller freeze-up. Perform this only outdoors, from the operating position and with the discharge area clear.crossimplement
Other Attachments, Visibility and Operator Comfort
A blade may be more convenient for frequent light snow where banks have room to grow. A blower becomes more useful where snow must be moved beyond those banks.
Deere offers a compatible front Quick-Hitch arrangement for certain blades, brooms and blowers, but each attachment still needs its own fitment verification. A loader-mounted pusher, rear blade or spreader also requires separate approval for its mount, weight and controls.deere
Do not use a blower as a ram or a loader bucket as an improvised high-speed plow. Angle blades can push a light tractor sideways when the cutting edge encounters dense snow or an obstruction.
For spreaders, check material suitability, hitch loading and electrical demand. Remove salt residue promptly using an appropriate cleaning method, then dry and lubricate the affected equipment.
The 1025R’s operator protection and visibility depend on its actual configuration. A suitable enclosure can reduce exposure, but heater, wiper and lighting installations must not obstruct controls, compromise ROPS or overload the electrical system.
Keep clothing close-fitting around rotating equipment. Use insulated boots, gloves that preserve control feel, and suitable hearing and eye protection. Stop work if fogging, drifting snow or cold stress prevents safe operation.
Troubleshooting John Deere 1025R Winter Problems
| Symptom | Likely causes | Safe first checks | When professional service is needed |
|---|---|---|---|
| Engine cranks slowly | Low battery charge, poor connections, unsuitable oil | Check charge, terminals, grounds and approved oil grade | Persistent starter faults, damaged battery or overheating cables |
| Cranks but will not start | Starting procedure, fuel restriction, battery weakness | Check controls, starting-aid sequence and winter fuel | Repeated failure or suspected injection fault |
| Starts then loses power | Waxed filter, water, contaminated fuel | Inspect separator and fuel history | Repeated plugging or unresolved restriction |
| Hydraulics remain slow | Cold oil, incorrect level, fluid problem | Warm correctly and check specified level | Persistent weakness, noise, leakage or pressure fault |
| Blower clogs repeatedly | Excessive feed rate, wet snow, obstruction, drive fault | Isolate power; inspect chute and reduce ground speed | Persistent vibration, gearbox or impeller damage |
| Auger section stops | Failed shear bolt, obstruction | Isolate power and inspect protective fasteners | Bent components or repeated unexplained failures |
| Chains strike components | Incorrect size, tension or clearance | Stop and inspect installation | Approval or clearance cannot be established |
| Tractor spins or steers poorly | Ice, unsuitable ballast, excessive load | Check setup and reduce bite | Safe control cannot be restored |
| Battery loses charge | Accessory drain, weak battery, charging fault | Charge and inspect permitted connections | Complex electrical diagnosis is required |
| Blower vibrates severely | Ice buildup, debris, bent or loose components | Stop immediately and inspect after isolation | Damage, imbalance or continued vibration |
Never investigate a pressurized hydraulic leak with bare hands. Hydraulic injection is a medical emergency. Fuel-injection repairs, internal hydrostatic work, structural cracks and unsafe attachment modifications belong with qualified technicians.
Storing the John Deere 1025R and Its Snow Blower
If the tractor remains active, maintain it between storms. If it will be unused for an extended period, follow the storage procedure instead of periodically starting it for a brief idle.
Tractor storage checklist
-
Remove dirt, grass, salt and nesting material.
-
Clean cooling screens and engine-compartment debris.
-
Let the machine dry and cool fully.
-
Correct leaks and complete due maintenance.
-
Prepare diesel using the manual’s storage procedure.
-
Use approved conditioner and circulate it as directed.
-
Follow the specified tank-fill recommendation while leaving required expansion space.
-
Charge and disconnect or maintain the battery as appropriate.
-
Lubricate fittings and protect exposed metal.
-
Park on a dry, level surface and lower attachments.
-
Chock wheels and follow the parking procedure.
Remove food sources and inspect likely rodent entry points. Any temporary intake or exhaust protection must be clearly tagged for removal before starting.
Use a fitted, ventilated cover rather than sealing moisture beneath plastic.
Blower storage checklist
Clean away snow, salt and debris, then dry the attachment. Inspect the scraper, skid shoes, auger, impeller, hoses and protective fasteners.
Lubricate according to its drive arrangement, repair paint damage and protect bare metal. Cap hydraulic connections and support the detached shaft on its designated holder.
Store on stable blocks or an approved stand, clear of damp ground. “Raised for storage” means mechanically supported—not suspended by hydraulic pressure. Deere’s blower manual specifically addresses cleaning, corrosion protection and supported storage.crossimplement
Returning to service
Remove covers and tagged plugs, inspect for rodents, and check fluids, battery connections, tires, hoses and guards.
Test lights and interlocks, start without heavy load, and check steering, brakes and attachment functions in a clear area. Reinspect for leaks after warm-up.
Frequently Asked Questions
Can a John Deere 1025R run a 54-inch snow blower?
Yes. Deere documents a compatible 54-inch Quick-Hitch blower, provided the tractor has the correct support, hitch, drive components, hydraulic connections and ballast. Verify the exact blower rather than buying by width alone.crossimplement
Is a 47-inch or 54-inch blower better?
Choose around access, storage, snow conditions and complete installed cost. The wider blower clears more width per pass, but confined areas may favor the narrower option.
Can I buy only the used blower attachment?
Only if the tractor already has every required component or you budget for the missing parts. Obtain an itemized installation list before purchase.
How much rear ballast does the 1025R need?
Use the ballast instructions for the actual tractor and blower combination. Chains, wheel weights and a rear implement should not be treated as automatic substitutes for prescribed ballast.
Why does the blower keep breaking shear bolts?
Possible causes include hidden objects, frozen obstructions, excessive feed rate or mechanical damage. Use only the specified replacement fasteners and investigate repeated failures.
Should I add anti-gel after the tractor stops?
Preventive treatment normally belongs in suitable fuel before wax formation. Once restriction occurs, follow an approved recovery procedure rather than assuming more additive will restore flow.
How long should the tractor warm up?
Follow the applicable engine and hydraulic warm-up procedures. Temperature, fluid condition and starting aids affect readiness; normal steering, braking and hydraulic response matter more than a universal timer.
Should I leave the blower raised overnight?
No. Lower it safely before leaving the tractor. Use approved mechanical support if a detached attachment must remain clear of wet ground.
Complete Repairs Before the Next Storm
Confirm the entire attachment package before purchasing, then resolve worn driveline parts, weak batteries, unsuitable fuel and questionable ballast before severe weather.
Keep the tractor manual, blower manual and identification numbers together. Their setup and maintenance instructions—not appearance, attachment width or another owner’s configuration—should govern safe winter operation.