
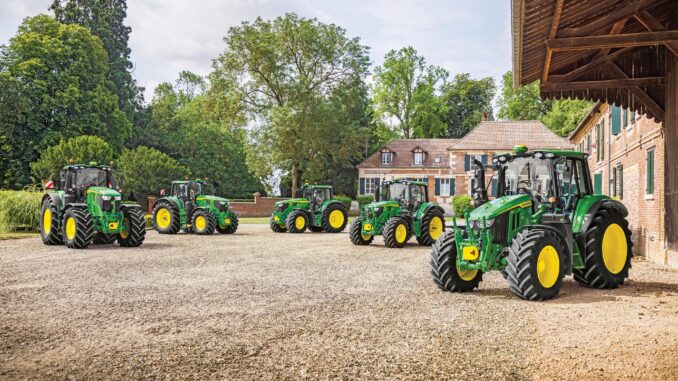
The John Deere 2440 is a classic utility tractor built for serious property work, livestock chores, hay operations, loader work and light-to-medium field use. Its 3.6L four-cylinder diesel engine, mechanical drivetrain and straightforward hydraulic system make it a durable machine, but age, wear and previous repairs mean that careful troubleshooting is essential.
This John Deere 2440 repair guide covers common faults, practical maintenance, parts ordering, manuals, diagrams and realistic DIY repair limits. It is written for owners who are comfortable servicing filters, fluids, belts, batteries and basic linkage issues, while recognizing when engine, transmission, hydraulic or injection-pump work belongs with an experienced tractor technician.
General overview of the John Deere 2440
The John Deere 2440 is part of Deere’s 2040-series utility tractor family. Depending on year, serial number and market specification, tractors may have variations in transmission, hydraulic equipment, front axle arrangement, PTO configuration and operator-station details. Do not order parts solely by the decal on the hood; confirm the tractor’s serial number and installed equipment first.
Most John Deere 2440 tractors use a naturally aspirated four-cylinder diesel engine of approximately 3.6 litres. Common drivetrain configurations include collar-shift, Hi-Lo and reverser-equipped versions, so clutch, transmission and linkage parts can differ substantially between tractors.
The main systems owners will encounter include:
-
Diesel engine, fuel tank, sediment bowl, filters, injection pump and injectors
-
Air intake system, oil-bath or dry-element filter arrangements depending on tractor specification
-
Cooling system with radiator, fan belt, thermostat, hoses and water pump
-
Electrical system with battery, starter, alternator, wiring, lights and safety-related switches
-
Dry clutch and transmission system
-
Hydraulic pump, steering, remote valves, three-point hitch and rockshaft system
-
PTO, differential lock, rear brakes and final drives
-
Front axle, steering linkage, wheel bearings and tires
Common John Deere 2440 service parts owners often buy include:
-
Engine oil filter
-
Primary and secondary air-filter elements
-
Fuel filters and sediment-bowl seals
-
Hydraulic or transmission filter
-
Fan and alternator belt
-
Battery cables and battery
-
Starter solenoid or starter-motor repair parts
-
Thermostat, radiator hoses and coolant clamps
-
PTO shield hardware, clutch linkage pins and hydraulic hose seals
-
Brake linkage components and light bulbs
John Deere 2440 troubleshooting approach
Start with the symptom rather than replacing the part that seems most likely. On an older diesel tractor, a no-start condition may be caused by a weak battery, corroded ground cable, restricted fuel supply, air entering the fuel system, a shutoff linkage problem or an engine mechanical issue. Replacing an injection pump before checking the basics can become expensive very quickly.
The most common John Deere 2440 symptom groups are:
-
Engine cranks slowly, does not crank or will not start
-
Engine starts but smokes, lacks power, surges or stalls
-
Hydraulic steering, remotes or three-point hitch operate slowly
-
PTO does not engage, slips or makes noise
-
Tractor will not move correctly, jumps out of gear or has clutch trouble
-
Engine overheats, loses coolant or leaks oil
-
Electrical charging, lighting or starter problems
-
Brake, steering, front-end and vibration complaints
Before dismantling anything, record the exact symptom, operating temperature, engine speed, selected gear, hydraulic function being used and whether the problem is constant or intermittent. This information makes diagnosis much more accurate.
John Deere 2440 immediate repair needs
Some John Deere 2440 problems should be corrected before the tractor is used again. Continuing to operate with low oil pressure, overheating, a damaged steering system, brake failure or a major hydraulic leak can turn a manageable repair into engine, transmission or hydraulic-system damage.
Starting and no-crank problems
A diesel that does not crank, cranks slowly or starts only intermittently is often an electrical or cable problem. However, repeated long cranking can flatten the battery, overheat cables and damage a weak starter.
Common causes include:
-
Weak or discharged battery
-
Loose, corroded or undersized battery cables
-
Poor chassis or engine ground connection
-
Failed starter solenoid
-
Worn starter motor
-
Faulty ignition-switch circuit
-
Neutral-start or safety-switch issue where fitted
-
Sticking fuel shutoff linkage
-
Air in the diesel fuel system
Basic checks:
-
Check battery voltage and inspect both battery terminals.
-
Clean and tighten the ground cable where it attaches to the tractor.
-
Confirm the transmission and PTO controls are in the correct safe position.
-
Check that the fuel shutoff control is fully in the run position.
-
Inspect the sediment bowl and fuel supply for water, dirt or restricted flow.
Stop and seek professional help if the starter makes a heavy clunk, cables become hot, the engine appears seized or the tractor cranks but produces no fuel at injector lines after basic bleeding procedures.
Engine overheating and coolant loss
An overheating John Deere 2440 may show a rising temperature gauge, steam, coolant smell, power loss or coolant pushed from the radiator. Do not remove the radiator cap while the engine is hot.
Common causes include:
-
Dirty radiator core or blocked grille screen
-
Loose or worn fan belt
-
Low coolant level
-
Collapsed radiator hose
-
Sticking thermostat
-
Damaged water pump
-
Internal coolant leak
-
Incorrect coolant mix
-
Engine operating under excessive load
Basic checks:
-
Let the engine cool completely.
-
Check coolant level and inspect the radiator cap seal.
-
Clean chaff, dirt and oil from the grille and radiator fins.
-
Inspect the fan belt for cracking, glazing and proper tension.
-
Look for wet hose connections, coolant stains or pump seepage.
Do not continue working if coolant is boiling, the oil appears milky, the engine loses coolant without an external leak or there is continuous white exhaust smoke after warm-up.
Hydraulic and steering failures
Slow steering, weak remotes, a three-point hitch that will not lift or noisy hydraulics can indicate low oil level, incorrect oil, clogged filtration, air leaks, a failing pump, suction restriction or internal leakage. Hydraulic failure can also make the tractor difficult or unsafe to control.
Common causes include:
-
Low transmission-hydraulic oil level
-
Incorrect fluid type
-
Plugged hydraulic filter or suction screen
-
Suction-side air leak
-
Worn hydraulic pump
-
Sticking selective control valve
-
Internal rockshaft leakage
-
Contaminated oil from water ingress
-
Damaged hydraulic hose or coupler
Basic checks:
-
Park safely, lower implements and check the hydraulic oil level.
-
Inspect oil condition for foam, water contamination or burnt smell.
-
Look for leaking hoses, fittings, couplers and valve connections.
-
Confirm the implement is not overloaded or mechanically seized.
-
Compare steering and hitch performance at cold and fully warmed operating temperature.
A dealer or hydraulic specialist should test pump output and system pressure before expensive components are replaced.
Transmission, clutch and drive problems
A tractor that creeps with the clutch down, refuses to move, slips under load, jumps out of gear or produces transmission noise needs attention. Clutch and transmission repairs can require splitting the tractor, which is not a casual driveway repair.
Common causes include:
-
Clutch linkage out of adjustment
-
Worn clutch disc, pressure plate or release bearing
-
Low transmission-hydraulic oil
-
Internal transmission wear
-
Shift linkage wear or poor adjustment
-
Failed Hi-Lo or reverser-related components on equipped tractors
-
PTO or differential-lock linkage issue
-
Brake drag
-
Final-drive or differential damage
Basic checks:
-
Check oil level and inspect for metal particles or milky fluid.
-
Confirm the parking brake is fully released.
-
Inspect external clutch and shift linkage for loose pins or seized joints.
-
Test movement in each range and gear on level ground.
-
Stop immediately if there is grinding, banging, severe vibration or a sudden loss of drive.
Brakes, steering and front-end safety issues
Weak brakes, unequal braking, excessive steering play or a wandering front end are safety-critical. These faults are especially dangerous when using a loader, towing equipment or operating on slopes.
Common causes include:
-
Brake linkage adjustment issues
-
Worn brake components
-
Oil contamination in brake assemblies
-
Loose steering joints
-
Worn tie-rod ends
-
Excessive front wheel-bearing play
-
Incorrect tire pressures
-
Loose wheel hardware
-
Front axle pivot wear
Basic checks:
-
Check tire pressures and inspect tires for damage.
-
Inspect steering joints, tie rods and wheel hubs for visible looseness.
-
Test each brake pedal carefully at low speed in an open area.
-
Check that brake pedals return fully and linkages move freely.
-
Re-torque wheel hardware to the correct specification from the manual.
Do not use the tractor for road travel or loader work until steering and brake faults are repaired.
DIY or dealer repair decisions
The John Deere 2440 is mechanically serviceable, but many repairs require heavy lifting equipment, splitting stands, hydraulic pressure testing tools or diesel-fuel-system expertise. Good DIY work is usually maintenance, external adjustment and replacement of accessible wear parts. Internal engine, injection, transmission, clutch and hydraulic-pump repairs are usually advanced work.
Good DIY jobs
-
Checking and changing engine oil and filter
-
Servicing the air cleaner
-
Replacing fuel filters and bleeding the fuel system
-
Replacing radiator hoses, clamps and fan belts
-
Cleaning the radiator and grille screens
-
Replacing a battery, terminals or battery cables
-
Replacing bulbs, fuses and simple electrical connectors
-
Lubricating grease points and linkage pivots
-
Inspecting hydraulic hoses and replacing accessible external hoses
-
Adjusting external clutch, brake or throttle linkage where the manual provides a procedure
Advanced DIY or dealer jobs
-
Injection-pump diagnosis, calibration or removal
-
Injector testing and rebuilding
-
Clutch replacement requiring tractor splitting
-
Transmission, Hi-Lo, reverser or differential repair
-
PTO clutch and internal PTO repairs
-
Hydraulic-pump testing or replacement
-
Rockshaft internal repairs
-
Wet-brake repair
-
Engine overhaul, head-gasket replacement or sleeve and piston work
-
Steering-column, front-axle or final-drive rebuilds
Skill level guide
-
Beginner: Fluid checks, cleaning, grease service, battery inspection and visual leak checks
-
Intermediate: Filter changes, fuel bleeding, belt replacement, hose replacement and linkage adjustment
-
Advanced: Electrical diagnosis with a multimeter, cooling-system diagnosis, hydraulic pressure testing and brake adjustment
-
Dealer or specialist: Tractor splitting, injection-system calibration, internal hydraulic repairs and transmission work
John Deere 2440 parts and part numbers
Always collect identifying information before ordering. John Deere 2440 production changes, serial-number breaks and optional equipment mean that a part shown for one tractor may not fit another.
Confirm these details before buying:
-
Full tractor model: John Deere 2440
-
Tractor Product Identification Number or serial number
-
Engine serial number
-
Transmission type and optional Hi-Lo or reverser equipment
-
Two-wheel-drive or front-wheel-assist configuration where applicable
-
PTO configuration
-
Existing part number from the removed component
-
Dimensions, connector style and mounting arrangement for aftermarket parts
The following part references are useful starting points, but verify them against your tractor serial number and official parts catalog before ordering.
OEM parts are generally the safer choice for belts, hydraulic filters, seals, fuel-system parts, electrical switches, steering components, brake parts and any item where incorrect fit could damage the tractor or create a safety risk.
Quality aftermarket parts can be a sensible option for batteries, common filters, hoses, bulbs, some starter components and certain engine-service items. Buy from a supplier that lists a clear cross-reference and return policy, and compare the new part directly with the removed part before installation.
John Deere 2440 diagrams and manuals
Parts diagrams and manuals are essential on a tractor of this age. The operator’s manual helps with routine operation and maintenance, while the technical manual provides repair procedures, specifications, wiring information and system diagnosis.
Useful sources include:
-
John Deere Manuals and Training for official operator’s manuals, technical manuals and parts catalogs
-
John Deere Parts for current parts-catalog access, maintenance parts and dealer support
-
John Deere 2440 parts diagrams at Jacks Small Engines for exploded-view reference and visual component identification
-
John Deere 2440 parts at Cross Creek Tractor for aftermarket, rebuilt and replacement-part browsing
-
John Deere 2440 filters at NAPA for cross-referenced filter options
Use the official operator’s manual for lubrication, fluid specifications, controls and service intervals. Use the parts catalog to identify the correct component and serial-number break. Use a genuine technical manual or reputable reproduction technical manual for repairs involving torque specifications, hydraulic pressures, clutch adjustments, electrical circuits and engine work.
Avoid relying on a generic online chart when ordering internal hydraulic, clutch or transmission components. The correct catalog section for your exact serial number is more reliable than a broad “fits John Deere 2440” listing.
Finding John Deere 2440 serial numbers
Serial numbers identify the production range of your tractor and help determine the correct parts, manuals and service procedures. The engine serial number is equally important because engines and fuel-system components can have their own identification ranges.
Use this process:
-
Clean the tractor identification plate or stamped identification area before trying to read it.
-
Locate the tractor Product Identification Number on the tractor frame or identification plate, typically around the main tractor structure rather than on removable sheet metal.
-
Write the number exactly as shown, including letters, spaces and suffixes.
-
Locate the engine serial-number plate on the engine block and record the engine model and serial number.
-
Photograph the tractor ID plate, engine ID plate and the removed part before placing an order.
If the identification plate is damaged or missing, use casting numbers and existing part numbers only as supporting evidence. A John Deere dealer can often help narrow the correct serial range, but do not assume that a nearby serial number has identical parts.
Buying John Deere 2440 parts
The best buying strategy is to identify the exact OEM part number first, then compare OEM and aftermarket choices. This reduces incorrect orders, return shipping and downtime during hay season, winter feeding or loader work.
-
Online parts stores are useful for filters, batteries, hoses, belts, lighting parts and common service items. Check the part number, fitment notes and serial-number restrictions before purchasing
-
A John Deere dealer counter is usually the best source for hydraulic, PTO, transmission, clutch, brake and serial-number-sensitive components
-
Agricultural retail stores can be suitable for universal consumables such as grease, coolant, engine oil, battery terminals and some filters, provided the package explicitly cross-references your tractor or OEM part number
-
Salvage yards may be useful for sheet metal, castings, brackets, controls and hard-to-find used components, but inspect used driveline, hydraulic and electrical parts carefully
For official lookup and ordering support, begin with John Deere Parts. For manuals, use John Deere Manuals and Training. For cross-reference browsing, Cross Creek Tractor’s 2440 parts page can be useful.
John Deere 2440 common part fitting guide
Disconnect the battery ground cable before working near the starter, alternator or main electrical wiring. Park on firm level ground, lower any mounted equipment, set the parking brake and allow hot engine components to cool.
Replacing engine oil and filter
Fresh oil and a correct filter protect the diesel engine from wear, contamination and corrosion. Change oil only when the engine is warm enough for good drainage but not dangerously hot.
-
Park the tractor on level ground and place a suitable drain pan beneath the oil pan.
-
Remove the drain plug carefully and allow oil to drain completely.
-
Remove the old oil filter and confirm that its sealing gasket did not remain stuck to the engine.
-
Lightly oil the new filter gasket, install the new filter and tighten it according to the filter instructions.
-
Reinstall the drain plug with the correct sealing arrangement and refill with the oil grade specified in the manual.
-
Start the engine, check for leaks, shut it down and recheck the oil level after the oil has settled.
Servicing the air filter
A restricted air filter reduces power, increases fuel consumption and can cause excessive black smoke under load. Never run the John Deere 2440 without the correct air-cleaner components installed.
-
Shut down the engine and clean loose dirt from around the air-cleaner housing.
-
Open the housing carefully so debris does not fall into the intake tract.
-
Remove the primary element and inspect it for damage, heavy dirt or oil contamination.
-
Replace the primary element if it is damaged or at its service limit; do not strike it against a hard surface.
-
Inspect the secondary element and replace it only when required, following the manual’s guidance.
-
Refit the cover securely and check that all intake hoses and clamps seal correctly.
Replacing fuel filters and bleeding the system
Fuel-filter service prevents dirt and water from reaching expensive injection-system components. Air introduced during service must be removed before the engine will start and run correctly.
-
Turn off the fuel supply where equipped and clean the area around the filter housing.
-
Drain any water or sediment from the sediment bowl and remove the old filter element or elements.
-
Install the correct new seals and filter components without overtightening housings or fittings.
-
Open the fuel supply and use the tractor’s recommended bleeding procedure from the operator’s manual.
-
Crank the engine only as needed, allowing the starter to cool between attempts.
-
Check for leaks at the filter housing, bleed screws and fuel lines after the engine runs.
Replacing the fan or alternator belt
A slipping or cracked belt can cause poor battery charging, overheating and coolant circulation problems. Replace a belt that is frayed, glazed, oil-soaked or unable to maintain correct tension.
-
Allow the engine to cool and disconnect the battery ground cable if working close to the alternator terminals.
-
Inspect pulley grooves for rust, oil, sharp edges or accumulated debris.
-
Loosen the alternator adjustment hardware enough to remove the old belt.
-
Route the new belt exactly as the original was installed and ensure it sits fully in every pulley groove.
-
Adjust belt tension to the manual specification, then tighten all mounting hardware.
-
Run the engine briefly and recheck tracking, charging performance and belt tension.
John Deere 2440 maintenance priorities
Regular maintenance prevents many of the faults owners associate with an aging utility tractor. Clean air, clean fuel, correct fluid levels, a sound cooling system and properly adjusted controls are more important than installing upgrades or replacing parts at random.
Focus on these areas:
-
Starting reliability: Keep the battery fully charged, terminals clean and grounds tight
-
Fuel-system protection: Drain water and sediment, replace filters on schedule and keep fuel clean
-
Engine protection: Check engine oil and coolant before work, especially during hot weather or loader use
-
Cooling performance: Keep screens, radiator fins and fan-belt drive clean and in good condition
-
Hydraulic reliability: Maintain the correct oil level, use approved fluid and address leaks early
-
Drive performance: Inspect clutch, brake, shift and throttle linkages for wear or binding
-
Electrical reliability: Repair damaged wires, protect terminals and maintain charging-system performance
-
Safety: Inspect tires, wheel hardware, steering joints, brakes, lights, PTO shields and ROPS equipment where fitted
John Deere 2440 maintenance schedule
Always use the maintenance intervals in the operator’s manual that matches your tractor’s serial number. The schedule below is a practical owner checklist rather than a replacement for the official manual.
Before each use
-
Check engine oil level
-
Check coolant level only when the engine is cool
-
Check transmission-hydraulic oil level
-
Walk around the tractor for fuel, oil, coolant and hydraulic leaks
-
Inspect tires, wheel hardware, steering linkage and brake operation
-
Clean the grille, screens and visible radiator debris
-
Check fuel level and drain water or sediment if needed
Every 10 hours or daily
-
Lubricate grease points that see heavy loader, steering or hitch use
-
Inspect the air-cleaner restriction indicator where fitted
-
Check fan-belt condition and tension
-
Inspect hydraulic hoses and couplers
-
Check battery connections for looseness or corrosion
-
Inspect PTO shield and implement driveline guards before operating
Every 50 hours
-
Lubricate steering, axle, hitch and linkage fittings as specified
-
Inspect air-cleaner elements and intake connections
-
Check brake and clutch linkage operation
-
Inspect alternator and starter wiring
-
Check radiator hoses, clamps and coolant condition
-
Examine engine mounts, sheet-metal fasteners and exhaust hardware for looseness
Every 100 to 200 hours
-
Change engine oil and oil filter according to the official maintenance schedule and operating conditions
-
Service fuel filters and drain the fuel sediment bowl
-
Inspect or replace air-filter elements as required
-
Inspect the charging system and battery condition
-
Inspect transmission-hydraulic oil condition and filter-service requirements
-
Check wheel bolt torque and front-end wear
Yearly or seasonal
-
Change engine oil if the tractor has not reached its hour interval but has sat through a season
-
Test coolant protection and inspect the radiator cap
-
Inspect fuel lines for cracking, leaks and rubbing damage
-
Check brake function and adjust linkage if required
-
Check light operation and repair damaged wiring
-
Inspect all hydraulic hoses, especially near loader frames, steering components and moving linkages
Long-term service items
-
Replace coolant at the interval specified by the correct operator’s manual
-
Service transmission-hydraulic filters and oil according to the tractor’s transmission type and scheduled interval
-
Have injectors, injection timing, valve clearance and pump performance checked if starting, smoke or power symptoms develop
-
Inspect clutch, PTO and brake systems before heavy seasonal use
-
Check front axle, wheel bearings and steering joints before road travel or loader work
Repair, upgrade or replace?
A John Deere 2440 is often worth repairing because it is a capable, mechanically straightforward utility tractor with strong support from dealers, aftermarket suppliers and used-parts networks. The decision should be based on the tractor’s overall condition, not just the cost of the one failed component.
Repair if
-
The engine starts well, has acceptable oil pressure and does not consume excessive oil
-
Hydraulic functions work properly once basic service issues are corrected
-
The transmission, differential and PTO operate without severe noise
-
The tractor has sound tires, brakes, steering and structural components
-
The repair is limited to maintenance parts, electrical work, hoses, cooling parts or external linkage
Upgrade if
-
You need more hydraulic capacity for a modern loader or implement
-
You require a safer operator station, better lighting or improved seating
-
Your work now requires front-wheel assist, a cab or more horsepower
-
You need more transmission speeds or easier shuttle operation for repetitive loader work
-
You are spending substantial time on road transport or commercial tasks
Replace if
-
The tractor needs major engine, clutch, transmission and hydraulic repairs at the same time
-
Structural corrosion, unsafe brakes or severe steering wear make restoration uneconomical
-
Essential parts are unavailable or the machine has extensive prior modification
-
Downtime is costing more than a dependable replacement tractor
-
Your workload exceeds the John Deere 2440’s safe operating capacity
John Deere 2440 repair FAQ
1. Why will my John Deere 2440 not start?
Start with battery condition, cable connections, ground straps and fuel supply. A diesel needs adequate cranking speed, clean fuel and proper bleeding after filter work. Check the fuel shutoff linkage, sediment bowl and filters before suspecting the injection pump. If it cranks normally but does not deliver fuel at the injector lines after correct bleeding, seek diesel-system diagnosis.
2. Why does my John Deere 2440 crank slowly?
Weak batteries, corroded terminals, poor grounds and worn starter motors are common causes. Large diesel engines need high cranking current, so a battery that appears acceptable on a small machine may still fail under load. Clean every high-current connection, including the engine ground. Have the battery load-tested and inspect the starter if cables become hot.
3. Why does my John Deere 2440 start and then stall?
Fuel starvation is the most common cause. Check the tank outlet, sediment bowl, fuel filters, fuel lines and tank-vent function. A clogged filter or air leak can allow the engine to start on available fuel and then die. Bleed the system according to the operator’s manual after correcting the restriction.
4. Why is my John Deere 2440 hard to start when cold?
Cold starting may be affected by a weak battery, slow starter, thick oil, poor compression, restricted fuel flow or diesel-injection issues. Use the correct engine oil for local temperatures and make sure the battery and cables are in excellent condition. Do not use excessive ether, especially if the tractor has an intake-heating system. Persistent cold-start difficulty warrants compression and injector-system testing.
5. Why does my John Deere 2440 produce black smoke?
Black smoke usually indicates too much fuel for the available air. First inspect the air cleaner, intake hose connections and exhaust restriction. The tractor may also be overloaded, operating in too high a gear or have fuel-injection issues. If the air system is clean and smoke remains severe without a heavy load, have the injectors and injection pump checked.
6. Why does my John Deere 2440 produce white smoke?
White smoke can be unburned fuel from a cold engine, weak compression, incorrect injection timing, poor injector spray pattern or coolant entering a cylinder. Brief white smoke on a cold start may be normal in cool weather. Continuous white smoke after warm-up, coolant loss or rough running should be investigated promptly. Avoid heavy work until the cause is known.
7. Why does my John Deere 2440 overheat?
Check coolant level, radiator cleanliness, grille screens, fan-belt tension, thermostat function and radiator hoses. Chaff and oily dirt between the grille and radiator can restrict airflow even when the radiator looks clean from the outside. Do not keep working once the gauge indicates overheating. Repeated overheating can damage the head gasket, cylinder head and engine internals.
8. Why is coolant coming out of the radiator overflow?
An overfilled system, overheating, a faulty radiator cap, blocked radiator core or combustion gases entering the cooling system can force coolant out. Let the tractor cool completely before checking the level. Clean the radiator and inspect the belt and cap first. If the tractor still pressurizes quickly from cold or loses coolant without an external leak, have it tested for internal leakage.
9. Why does my John Deere 2440 lose engine oil?
External leaks often come from gaskets, seals, filter bases, valve-cover areas, oil lines or crankshaft-seal locations. Internal consumption may show as blue exhaust smoke and increasing oil use. Clean the engine first, then run it briefly to identify the source. Repair leaks early because oil can attract dirt, conceal other faults and create a fire risk near hot exhaust components.
10. Why does my John Deere 2440 have low oil pressure?
Stop the engine if oil pressure drops abnormally or the warning system indicates low pressure. Check the oil level and confirm the correct oil viscosity and filter were used. A faulty gauge or sender is possible, but do not assume that is the cause. Low pressure can also result from internal engine wear, a blocked pickup or pump trouble and requires testing.
11. Why is the hydraulic system slow when cold?
Cold hydraulic oil naturally moves more slowly, especially in low temperatures. If the problem improves after warming up, check that the tractor has the correct fluid and that it is not excessively thick or contaminated. If hydraulics remain slow after warm-up, inspect oil level, filtration and suction connections. A hydraulic pressure and flow test may be needed.
12. Why is my John Deere 2440 hydraulic system weak when hot?
Hydraulics that work when cold but weaken after warming often point to internal leakage, worn pump components or oil that is too thin, contaminated or low. Check the oil level and look for foaming. A clogged filter or suction issue can also affect performance. Do not replace a pump without confirming system pressure and flow with proper test equipment.
13. Why will the three-point hitch not lift?
Check transmission-hydraulic oil level, control-lever position, external linkage condition and whether the implement is overloaded or seized. Test the tractor with a known lighter implement if possible. If remote hydraulics and steering are also weak, suspect a broader hydraulic supply issue. If steering works but the hitch does not, rockshaft controls or internal hitch components may be involved.
14. Why does my John Deere 2440 power steering feel hard?
Low hydraulic oil, a plugged filter, air entering the suction side, a worn pump, steering-valve problems or front-end binding can cause hard steering. Check tire pressure and grease the front axle and steering joints first. Inspect the steering linkage for worn joints or physical damage. If steering becomes suddenly difficult, stop using the tractor until hydraulic and mechanical causes are checked.
15. Why does my John Deere 2440 leak hydraulic oil?
Hydraulic leaks commonly occur at hoses, couplers, fittings, valve connections, steering lines and shaft seals. Clean the area, then identify the exact leak with the system depressurized and the engine off where possible. Never search for a high-pressure leak with your hand. High-pressure hydraulic fluid can penetrate skin and requires emergency medical attention.
16. Why does my John Deere 2440 not move in gear?
Begin with the simplest external checks: parking brake released, clutch linkage operating, correct gear selection and adequate transmission-hydraulic oil. If the tractor has a Hi-Lo or reverser arrangement, verify its controls and linkage. A failed clutch, internal transmission fault or driveline problem may be involved if the engine runs normally but the tractor will not move. Do not force shift levers.
17. Why does my John Deere 2440 creep with the clutch pedal down?
Clutch drag can result from incorrect pedal free play, linkage wear, a warped clutch disc, release-bearing trouble or internal clutch contamination. Check the manual for the correct linkage adjustment before assuming the clutch needs replacement. If the tractor still creeps after adjustment, avoid operating near buildings, people or equipment. Clutch replacement may require splitting the tractor.
18. Why does my John Deere 2440 clutch slip under load?
A slipping clutch may show rising engine speed without a matching increase in ground speed, especially in high gear or while pulling an implement. Incorrect linkage adjustment can cause a clutch not to engage fully. Oil contamination, worn friction material or weak pressure-plate springs can also cause slip. Continuing to work a slipping clutch can damage the flywheel and pressure plate.
19. Why does my John Deere 2440 jump out of gear?
Worn shift linkage, loose detents, internal gear wear, bearing wear or incomplete gear engagement can cause a tractor to jump out of gear. First inspect accessible shift linkage for missing pins, excessive play or binding. Do not hold a lever in gear with force while working, as this can worsen internal damage. Internal transmission diagnosis may be required.
20. Why is my John Deere 2440 PTO not turning?
Check PTO control position, linkage adjustment, safety interlocks where applicable and whether the implement driveline is seized. Ensure the implement is disconnected before testing the tractor PTO cautiously. If the PTO engages but will not carry load, internal clutch or driveline components may be worn. PTO repairs can involve internal transmission work and should be diagnosed accurately first.
21. Why does the PTO on my John Deere 2440 slip?
PTO slip can be caused by control-linkage adjustment, worn clutch components, internal hydraulic or mechanical faults depending on configuration, or an overloaded implement. Inspect the implement first because a seized gearbox, wrapped material or damaged driveline can overload the PTO. Stop using it if there is burning smell, smoke or abnormal noise. Continued slipping can destroy expensive internal parts.
22. Why are the brakes weak on my John Deere 2440?
Check pedal linkage, return springs, brake adjustment and oil leakage around brake-related areas. Unequal braking may indicate different adjustment or wear from side to side. Test brakes only at low speed in an open area after service. If the tractor is used with a loader, on slopes or on the road, correct brake defects before further use.
23. Why does my John Deere 2440 pull to one side when braking?
One brake may be out of adjustment, contaminated, worn or mechanically binding. Check that both pedals move freely and return fully. Inspect the linkage for seized pivots and compare adjustment side to side according to the manual. Do not rely on the brake-lock feature to hide unequal braking; repair the cause.
24. Why does my John Deere 2440 have loose steering?
Loose steering can come from worn tie-rod ends, steering-arm joints, wheel bearings, front-axle pivot wear, steering-valve issues or loose mounting hardware. With the engine off and wheels chocked, have a helper move the steering wheel while you inspect for lost motion. Replace visibly worn steering joints rather than trying to compensate with adjustment. Loader use often accelerates front-end wear.
25. Why does my John Deere 2440 vibrate while driving?
Check tire condition, tire pressure, loose wheel hardware, damaged rims, front-end wear and driveline components. Vibration that changes with engine speed may come from the engine, fan, belt drive or accessory components. Vibration that changes with ground speed often points to tires, wheels, bearings or drivetrain parts. Stop immediately if vibration begins suddenly or is severe.
26. Why is my John Deere 2440 alternator not charging?
Start by checking the fan belt because a loose belt can prevent adequate alternator output. Then inspect battery terminals, ground connections, alternator wiring, fuse connections and the charge-warning circuit. Use a multimeter to compare battery voltage with the engine off and running. If voltage does not rise when running, the alternator, regulator or wiring requires diagnosis.
27. Why does my John Deere 2440 battery keep going flat?
A weak battery, poor charging system, corroded cables, parasitic electrical draw or short operating periods can all cause repeated discharge. Have the battery load-tested rather than relying only on open-circuit voltage. Confirm that the alternator is charging at operating speed. Clean and tighten both ends of positive and ground cables, including the engine-block ground.
28. Why does my John Deere 2440 starter click but not crank?
A single click commonly points to low battery power, poor cable connections or a failing solenoid. Repeated clicking often indicates voltage drop under load. Clean and tighten the battery terminals, ground strap and starter connections before replacing parts. If voltage reaches the starter correctly but it still will not turn the engine, the starter may need repair or replacement.
29. How often should I change John Deere 2440 engine oil?
Follow the interval in the operator’s manual for your serial-number range and adjust for severe service, dusty work, frequent short runs or long storage periods. Change oil at least annually if the tractor sees limited use. Always replace the filter when changing oil unless the manual specifically says otherwise. Check the oil level before each work session.
30. How often should I service the John Deere 2440 fuel filters?
Service intervals depend on the tractor’s manual, operating conditions and fuel quality. Drain water and sediment regularly, especially when the tractor is stored outdoors or fuel comes from a bulk tank. Replace filters sooner if power falls off, the engine surges or contaminated fuel is suspected. Always bleed the system properly after opening fuel lines or filter housings.
31. Can I use aftermarket filters on a John Deere 2440?
Yes, provided the filter is from a reputable manufacturer and cross-references precisely to the correct OEM part number for your serial number. Avoid unidentified filters with vague fitment claims. Fuel and hydraulic filtration are particularly important because poor filtration can damage costly injection and hydraulic components. Compare gasket shape, thread, height and bypass specifications where applicable.
32. What hydraulic oil should I use in a John Deere 2440?
Use the fluid specification listed in the operator’s manual for your exact tractor. The transmission, hydraulics, steering and related systems may share fluid, so using the wrong product can affect shifting, hydraulic performance and wet-brake operation. Do not mix unknown oils if it can be avoided. If the tractor’s oil is contaminated or its type is unknown, plan a proper service.
33. Can I repair hydraulic hoses myself?
You can remove and install accessible hoses if you can identify the correct fittings, routing and hose length. Have replacement hoses made by a reputable hydraulic-hose supplier when possible. Always relieve pressure, lower implements and use proper caps to keep dirt out of the system. Never use damaged, cracked or improvised hydraulic hose assemblies.
34. Is a John Deere 2440 worth restoring?
It can be, especially if the engine, transmission, hydraulic system and structural components are fundamentally sound. These tractors remain useful for chores, mowing, hay handling and moderate loader work. Restoration makes the most sense when repairs are phased, parts availability is good and the tractor has a clear role on the property. Price major engine, clutch and transmission work before committing.
35. When should I take a John Deere 2440 to a dealer?
Use a dealer or experienced tractor specialist when the repair involves tractor splitting, injection-pump calibration, injector testing, hydraulic pressure diagnosis, internal PTO repairs, transmission noise, major engine work or brake failure. These jobs need correct specifications, lifting equipment and diagnostic tools. A professional diagnosis before teardown can often save substantial parts cost and downtime.