
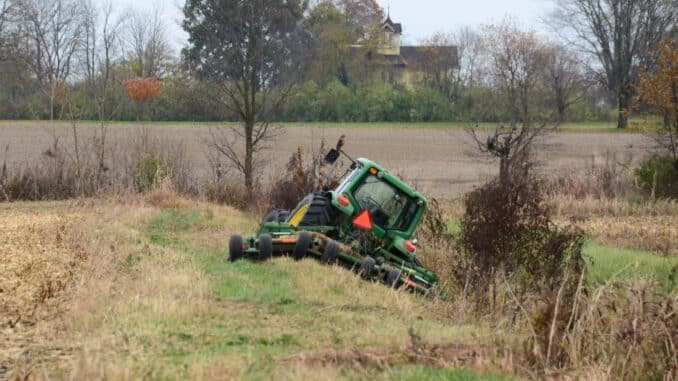
The term “John Deere 3000 Series’ normally leads owners to tractors such as the 3010 and 3020, which were built in the 1960s and early 1970s and use warning lamps rather than a modern ECU fault-code display.
Later Deere 3 Series compact tractors are very different machines and may use electronic controllers, stored diagnostic trouble codes and a diagnostic connector.
Verify the exact model and serial number before using a wiring diagram, parts catalogue or code list. The 3010 was produced from 1961 to 1963, while the 3020 followed from 1964 to 1972.
And See:
Quick answer
For an original John Deere 3010 or 3020, the practical diagnostic system is made up of warning lights, gauges, wiring checks and mechanical tests.
-
An oil-pressure warning light that remains on with the engine running means stop the engine and investigate.
-
A generator/charging warning light that stays on usually points to a charging-system, belt, wiring, regulator or generator/alternator issue.
-
A warning lamp that fails to illuminate during the key-on bulb check may indicate a failed bulb, poor connection, damaged wire or faulty sender—not necessarily a healthy system.
-
Later electronic Deere compact tractors can display controller codes, often written as an SPN and FMI combination; those codes must be matched to the exact tractor and controller. Deere’s published diagnostic tables warn that not every listed code applies to every application.manuals.deere
Identify the Tractor First
Before diagnosing a warning light or buying a scanner, record:
-
Tractor model: for example, 3010, 3020, 3032E, 3038E, 3033R or another model.
-
Tractor serial number from the identification plate.
-
Fuel type: gasoline, diesel or LP-gas where applicable.
-
Transmission and equipment type.
-
Whether the machine has its original electrical system or a conversion, such as a replacement alternator.
-
The exact symptom: lamp on continuously, lamp not working, intermittent warning, no crank, slow crank, battery discharge or blown fuse.
This distinction matters because an early 3010 or 3020 uses a conventional electrical system and dashboard lamps, while later Deere compact tractors can have electronic modules, sensors and communication wiring. A 3020 operator’s manual index specifically includes generator and oil-pressure indicator lights, reinforcing that these machines rely on lamp-based monitoring rather than a modern on-screen code reader.jensales
Safety Before You Begin
Electrical and warning-light faults can be symptoms of serious engine, charging or hydraulic problems.
-
Park on level ground, lower implements and apply the parking brake.
-
Place the transmission and PTO controls in their safe positions before working around the tractor.
-
Stop the engine before checking belts, battery terminals, generator wiring or starter connections.
-
Disconnect the battery ground cable before repairing damaged wiring.
-
Keep sparks, cigarettes and metal tools away from batteries and fuel.
-
Never bypass a fuse with wire, foil or an oversized fuse.
-
Do not continue operating if the engine oil-pressure warning lamp remains illuminated with the engine running.
-
Use an insulated multimeter and avoid allowing meter probes to bridge adjacent terminals.
Warning-Light Meanings
Engine Oil-Pressure Warning Light
Meaning: The lamp is intended to warn of low engine oil pressure or a fault in the warning-light circuit.
Stop operating immediately if:
-
The oil-pressure light stays on after the engine starts.
-
The light comes on while operating.
-
The engine develops knocking, rattling or unusual mechanical noise.
-
The dipstick shows a very low oil level.
First checks:
-
Shut down the engine safely.
-
Check engine oil level using the correct procedure for the tractor.
-
Look for external oil leaks, a damaged oil filter or loose sender wiring.
-
Inspect the wire at the oil-pressure sending switch for breaks, loose terminals or grounding damage.
-
If the lamp remains suspect, confirm actual oil pressure with a mechanical test gauge before assuming the sender is faulty.
Do not treat a flickering or failed oil lamp as merely an electrical nuisance. The warning circuit can fail, but genuine low oil pressure can cause major engine damage quickly. John Deere guidance for comparable tractor warning systems instructs operators to stop the engine and check oil level when the engine-oil-pressure warning illuminates while running.manuals.deere
Generator or Charging Warning Light
Meaning: On an original generator-equipped tractor, the lamp is part of the charging-system circuit. If it remains on after starting, the battery may not be receiving charge.
Common causes:
-
Loose, glazed, worn or broken drive belt.
-
Corroded battery terminals or ground strap.
-
Loose generator/alternator output wire.
-
Faulty voltage regulator.
-
Worn generator brushes or internal generator fault.
-
Failed alternator, if the tractor has been converted.
-
Burned-out warning bulb or damaged lamp wiring.
Practical checks:
-
With the engine stopped, inspect belt condition and tension according to the correct operator’s manual.
-
Clean and tighten battery connections.
-
Check the generator or alternator mounting and wiring terminals.
-
Use a multimeter to compare battery voltage with the engine stopped and running.
-
If voltage does not rise appropriately while running, test the charging system using the correct service procedure for the installed generator or alternator.
A warning lamp can be part of the charging circuit itself on older machinery. Do not replace it with an arbitrary LED or bypass it without confirming the wiring design.
Temperature, Filter and Other Lamps
The exact lamp arrangement varies by model, year and equipment. On later Deere tractors, published operator information identifies warning functions that can include high coolant temperature, high hydraulic/transmission oil temperature, low transmission/hydraulic pressure, restricted air cleaner, alternator trouble and hydraulic filter restriction.manuals.deere
For an early 3010 or 3020, use the operator’s manual for that exact serial-number group and equipment specification. Do not assume that a lamp layout from a later cab tractor matches an older row-crop tractor.
Common Fault-Code Troubleshooting
Early 3010 and 3020 Tractors
For original John Deere 3010 and 3020 tractors, troubleshoot the symptom and circuit, not a supposed ECU code.
Later Electronic 3 Series Tractors
Later Deere tractors may store diagnostic trouble codes in electronic controllers. These codes are commonly expressed with:
-
SPN: identifies the monitored parameter or component.
-
FMI: describes the fault condition, such as signal high, signal low, invalid data or abnormal operation.
Examples from Deere diagnostic information include SPN 28 for a throttle-related circuit with FMI 03 indicating a high voltage condition and FMI 04 indicating a low voltage condition. The correct response is to inspect the related sensor and wiring, then use the exact service information if the fault remains.manuals.deere
Do not publish or rely on a generic list of code meanings as a repair instruction. The same code format can appear across several Deere applications, but the fitted engine, controller software and electrical architecture determine whether it applies to a particular tractor.
A Better Fault-Code Method
When a later tractor displays a code:
-
Photograph the display before clearing anything.
-
Write down the full code, including controller name, SPN and FMI where shown.
-
Note whether the code is active, stored or intermittent.
-
Record operating conditions: cold start, hot engine, PTO engaged, transport mode, rain, wash-down or low battery.
-
Check battery condition, charging voltage, fuses, grounds and visible harness damage.
-
Look for rubbed-through wiring near hinges, steering components, exhaust heat, loader brackets and engine movement points.
-
Use the exact John Deere operator’s manual and technical manual for the tractor serial number.
-
Seek dealer-level diagnosis when the code concerns engine protection, fuel injection, transmission control, hydraulic control or CAN communication.
Diagnostic Connector and Scanner Guide
Do Early 3000-Series Tractors Have a Scanner Port?
An original 3010 or 3020 does not normally have a modern diagnostic connector for reading ECU fault codes. A generic OBD-II vehicle scanner is not a suitable tool for these tractors.
Useful diagnostic tools for an early tractor include:
-
Digital multimeter.
-
12-volt test lamp.
-
Battery load tester or battery tester.
-
Jumper leads used carefully and only for correct test procedures.
-
Mechanical oil-pressure gauge.
-
Wiring diagram for the exact tractor.
-
Basic hand tools and terminal-cleaning supplies.
Later Electronic Deere Tractors
Later electronic models may have a dedicated diagnostic connector. The connector style, location and supported scanner depend on the exact model and production configuration. Deere dealer-level interfaces are intended to connect equipment to diagnostic software for troubleshooting and service access.4tetradgroup
Before buying a scanner, confirm:
-
Exact Deere model and serial number.
-
Engine manufacturer and emissions equipment.
-
Connector type and physical location.
-
Whether the scanner supports Deere agricultural equipment rather than only road vehicles.
-
Whether it can read live data as well as stored codes.
-
Whether it has the necessary software coverage for the tractor’s controller.
A scanner is useful for finding electronic symptoms, but it does not replace electrical testing. A low battery, poor ground or corroded connector can create misleading sensor and communication codes.
Electrical Troubleshooting
Start With Battery and Grounds
Many apparent electrical faults begin with poor battery connections.
Check:
-
Battery case for cracks, swelling or electrolyte leakage.
-
Terminal clamps for corrosion and tightness.
-
Ground strap at both ends.
-
Positive cable at battery, starter and main connection points.
-
Cable damage hidden beneath insulation.
-
Battery voltage at rest and while cranking.
-
Voltage drop across cables and grounds under load.
A cable can look clean externally yet have corrosion inside the crimp or beneath insulation. Test voltage under load rather than relying only on appearance.
Check Fuses and Harness Condition
For tractors equipped with fuses:
-
Identify the correct circuit before removing a fuse.
-
Replace only with the specified rating.
-
If a replacement fuse fails immediately, find the short circuit before trying again.
-
Check harness sections near moving parts, sharp edges, hot exhaust components and aftermarket accessory wiring.
-
Inspect connectors for green corrosion, moisture, loose pins and broken locking tabs.
Test a Warning-Light Circuit
For a basic warning lamp that should illuminate with key on:
-
Confirm the bulb is intact.
-
Check for supply voltage at the lamp holder with the key in the appropriate position.
-
Inspect the wire from the lamp to the sender or regulator.
-
Check the sender connection and its ground path where applicable.
-
Use the correct wiring diagram before grounding a sender wire for a test, because circuit design varies.
Do not short wires together simply to “see what happens.” That can damage a regulator, wiring harness, gauge or electronic controller.
When to Stop and Call a Dealer
Stop operating and arrange professional diagnosis when there is:
-
Oil-pressure warning with engine running.
-
Severe overheating, steam or coolant loss.
-
Burning insulation smell, smoke or hot battery cables.
-
Repeated fuse failure.
-
Hydraulic or transmission warning accompanied by loss of drive or abnormal noise.
-
Electronic engine, fuel-system or communication code that returns immediately after basic checks.
-
Damage to the main harness, starter circuit, alternator wiring or battery cables.
Dealer-level diagnostic support is particularly appropriate for later tractors with controller communication faults. John Deere diagnostic references advise contacting a servicing dealer if listed corrective actions do not resolve an engine fault.manuals.deere
Common Mistakes to Avoid
-
Assuming “3000 Series” identifies one tractor or one wiring diagram.
-
Treating a warning lamp as a fault code without confirming the machine has an electronic controller.
-
Continuing to run the engine with an oil-pressure warning illuminated.
-
Installing a larger fuse to stop repeat failures.
-
Fitting an incorrect battery or connecting it with reversed polarity.
-
Replacing expensive components before checking connectors, grounds, fuses and battery condition.
-
Using automotive OBD-II equipment without proving Deere compatibility.
-
Clearing electronic codes before recording their full details and operating conditions.
-
Using a wiring diagram from a different model, year or electrical-system conversion.
Related John Deere Guides
-
Use a John Deere tractor serial-number lookup guide to identify the exact model and production group before ordering manuals or electrical parts.
-
Refer to a John Deere battery chart and replacement guide when slow cranking, repeated low-voltage warnings or charging faults are present.
-
Read a John Deere maintenance schedule guide to keep filters, belts, wiring checks and battery service from being overlooked.
-
See a John Deere tools for tractor maintenance guide for multimeter, test-lamp and mechanical-gauge recommendations.
-
Use a model-specific John Deere common-problems troubleshooting guide for starting, charging, fuel and hydraulic symptoms.
FAQs
Does a John Deere 3010 have digital fault codes?
Normally, no. An original 3010 uses conventional warning lamps and electrical circuits rather than a modern ECU display. Diagnose the lamp, sender, wiring and related mechanical system.
Does a John Deere 3020 have an OBD-II port?
No original 3020 was designed with an automotive OBD-II diagnostic port. Use the correct wiring diagram, meter tests and mechanical diagnostic procedures.
Why does the generator light stay on after the tractor starts?
Common causes include a loose belt, poor battery connection, faulty generator or alternator, regulator trouble, damaged wiring or a charging-system conversion issue.
What should I do when the oil warning light comes on?
Stop the engine promptly, check the oil level and inspect for obvious leaks or wiring damage. If the cause is not clear, verify real oil pressure with a mechanical gauge before operating again.
Can a weak battery create fault codes on a later Deere tractor?
Yes. Low voltage and poor grounds can affect sensors and controller communication. Check battery condition, charging output, cables and grounds before replacing sensors or modules.
Where is the diagnostic connector on a John Deere 3 Series tractor?
Location varies by model and year. Check the operator’s manual or technical manual for the exact tractor rather than relying on a connector location from another Deere model.
Can I use a generic code reader on a John Deere tractor?
Only if the scanner specifically supports that Deere model, controller and connector. A standard car OBD-II reader is not automatically compatible with agricultural equipment.
Conclusion
Start by confirming the exact John Deere model and serial number. For a 3010 or 3020, focus on warning lamps, wiring condition, battery connections, charging output and mechanical pressure tests—not digital code lists. For a later electronic Deere 3 Series tractor, record the complete displayed code and use model-specific technical information before clearing faults or replacing parts.