
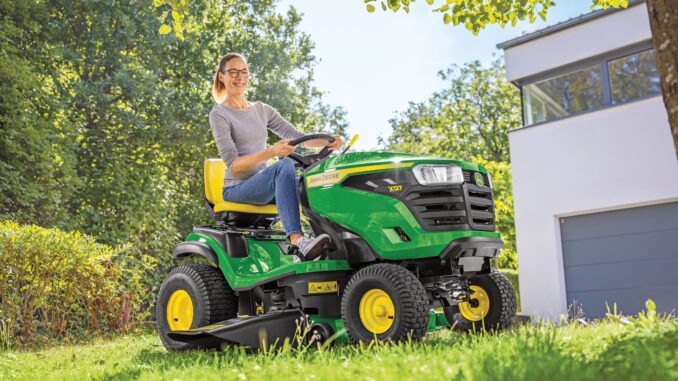
Introduction – John Deere S220 overview
The John Deere S220 is a 200 Series riding lawn tractor equipped with a 42‑inch Accel Deep mower deck, designed for residential homeowners who want a higher‑spec machine than entry‑level models but still within the mainstream big‑box lineup. It uses a gasoline engine, a hydrostatic drive, and an electric start system, making it well‑suited to 0.5–2 acre lawns with mixed terrain and regular mowing schedules.
This John Deere S220 Service and Repair Guide is written for DIY owners in the USA and Canada who are comfortable with basic tools and routine maintenance but need clear boundaries on what should still go to a dealer. You’ll find symptom‑first troubleshooting, common failure patterns, parts and diagrams references, DIY step‑by‑step jobs, maintenance schedules, and an expanded FAQ to cover the most common S220 issues.
General overview of the John Deere S220
The John Deere S220 sits above basic 100‑series style tractors and within the 200 Series lineup, typically sold through big‑box retailers and Deere dealers as a premium residential mower with improved deck design and a more robust frame and components. The 42‑inch Accel Deep deck focuses on better airflow, cut quality and bagging performance compared with older flat‑top decks, making it a good fit for homeowners who care about stripe quality and clipping dispersal.
Key systems on the John Deere S220 include the engine and fuel system (air filter, fuel filter, carburetion or fuel metering, oil system), mower system (42‑inch Accel Deep deck, blades, spindle assemblies, deck belt, tensioner and idlers), drive system (hydrostatic transaxle, drive belt, rear axle, tires), and electrical/safety system (battery, starter, ignition switch, solenoid, interlock switches, PTO switch). Common service parts owners buy for the S220 include the air filters (primary and secondary elements), oil filter, fuel filter, home maintenance kit, spark plug, mower blades, deck drive belt, traction drive belt, battery, key switch and common safety switches.
Troubleshooting approach for the John Deere S220
With the John Deere S220, diagnosis should always start with the symptom the owner sees, not with a guess at the failed part. Ask: what does the tractor do or not do—does it crank, does it fire and stall, does it vibrate, does it lose drive, or does it cut unevenly—then work logically from simple checks (fuel, battery, knobs, levers) through more detailed inspections (belts, filters, linkages).
Main symptom categories on the John Deere S220 lawn tractor include starting issues (no crank, cranks but will not start), running issues (surging, stalling, loss of power), cut quality problems (scalping, uneven cut, streaks, poor bagging), vibration and noise (deck vibration, rattles, squeals), overheating and leaks (engine running hot, burning smell, oil or fuel leaks), transmission/drive complaints (no movement, weak on hills, jerky drive) and electrical/safety switch issues (PTO not engaging, seat or brake switch preventing start, lights not working).
Emergency and immediate repair needs on the John Deere S220
Some John Deere S220 problems can wait until the weekend, but others need immediate attention because they affect safety or risk severe component damage. Anything involving fuel leaks, oil leaks onto hot surfaces, sudden loss of steering or braking, or violent deck vibration should be treated as stop‑use faults: shut the tractor down, diagnose and repair before mowing again.
Starting issues – John Deere S220
Owners usually notice starting faults as the tractor doing nothing when the key is turned, clicking only, slow cranking, or cranking but failing to fire. This matters because repeated cranking with poor electrical supply can damage the starter, flatten the battery, and mask underlying safety switch or fuel problems.
Common causes:
-
Battery discharged or failing.
-
Loose, corroded or damaged battery cables and grounds.
-
Faulty brake or seat safety switch not allowing start.
-
PTO switch left in “on” or faulty.
-
Poor fuel supply (old fuel, blocked fuel filter, closed shutoff).
Basic owner checklist:
-
Confirm PTO is off, brake pedal fully depressed, and operator is in the seat.
-
Check battery terminals for corrosion and tightness; clean and retighten if needed.
-
Measure battery voltage with a basic multimeter; recharge or replace if significantly low.
-
Inspect the fuel level and condition; if fuel is stale, plan to drain and replace.
-
Try starting again; if still no crank, suspect a safety switch, ignition switch or starter circuit, and consider dealer diagnostics.
Cut‑quality problems – John Deere S220
Cut‑quality complaints on the S220 often show up as uncut strips, scalping patches, uneven height between passes or poor bagging performance. This matters because most of the time, the deck is telling you about worn blades, mis‑leveling or incorrect deck setup rather than a “mystery” problem.
Common causes:
-
Dull, nicked or bent blades.
-
Deck not level side‑to‑side or front‑to‑back.
-
Tire pressures inconsistent between corners.
-
Deck belt slipping, worn or partially off pulleys.
-
Mowing too fast or at incorrect deck height for lawn conditions.
Basic owner checklist:
-
Check tire pressures, matching the recommended PSI at all four wheels.
-
Inspect blades for sharpness and straightness; replace if significantly worn or bent.
-
Use a deck leveling gauge to confirm side‑to‑side level; adjust linkages as required.
-
Inspect deck belt routing, condition and tension; replace if glazed or cracked.
-
Slow mowing speed one notch and test cut quality again before assuming deeper issues.
Vibration and noise – John Deere S220
Vibration and unusual noises show up as shaking in the steering wheel or seat, deck rattles, metal‑on‑metal scraping or squealing belts. Heavy vibration matters because it can indicate a failing blade spindle, bent blade or loose hardware, which can escalate into major deck damage.
Common causes:
-
Bent or unbalanced blades after striking rocks or roots.
-
Blade mounting bolts loose or missing.
-
Failing spindle bearings in deck housings.
-
Debris packed in deck shell or around pulleys.
-
Worn or misaligned deck belt and idlers.
Basic owner checklist:
-
Disengage PTO, shut down engine and remove key before inspecting the deck.
-
Check blades for straightness and balance; replace if bent or badly chipped.
-
Confirm blade bolts are tight and that any washers or spacers are correctly installed.
-
Clean packed grass from the underside of the deck and around pulleys.
-
Rotate pulleys and spindles by hand; if rough or noisy, plan spindle bearing replacement or dealer service.
Overheating and leaks – John Deere S220
Overheating on the S220 often presents as a burning smell, power loss under load or visible smoke from oil or grass on hot engine components. Oil and fuel leaks are serious because they can cause fires, contaminate belts and clutches, and indicate failing seals or fittings.
Common causes:
-
Dirty cooling fins and engine shrouds blocked with debris.
-
Low or old engine oil.
-
Fuel line cracks or loose clamps.
-
Oil filter or drain plug not fully tightened after service.
-
Grass buildup around muffler or engine block.
Basic owner checklist:
-
Stop mowing and allow the tractor to cool before investigating.
-
Check oil level with the dipstick; top up with correct grade if low.
-
Inspect fuel lines, filter and connections for wet spots or drips.
-
Remove debris from cooling fins, engine shrouds and muffler area.
-
If any leak is persistent or from within the engine, arrange dealer inspection.
Transmission and drive problems – John Deere S220
Drive complaints on the John Deere S220 usually appear as slow or no movement when the pedal is pressed, difficulty climbing small hills or jerky engagement. This matters because running the hydrostatic transaxle with a slipping drive belt or low fluid can lead to expensive failures.
Common causes:
-
Traction drive belt worn, loose or off pulleys.
-
Parking brake partially engaged or linkage stiff.
-
Transmission fan broken or packed with debris.
-
Hydrostatic unit reaching end of service life.
-
Rear tire inflation too low.
Basic owner checklist:
-
Confirm parking brake is fully released and linkages move freely.
-
Inspect the traction drive belt for wear, cracks and correct routing.
-
Clear debris around the transmission fan and rear axle.
-
Check tire pressures and correct them to specifications.
-
If drive remains weak or intermittent, plan for dealer hydrostatic diagnostics.
Electrical and safety‑switch issues – John Deere S220
Electrical and safety issues appear as intermittent cranking, starter clicking, PTO not engaging, or the engine cutting out when you release the brake or engage the blades. On the S220, these are often traced to interlock switches that are mis‑adjusted or failing rather than “mystery electronics.”
Common causes:
-
Seat switch failing or misaligned.
-
Brake switch not registering pedal position.
-
PTO switch internally worn or stuck.
-
Battery near end of life or poor ground connections.
-
Corroded connectors under the dash or near the frame.
Basic owner checklist:
-
Verify you are following the correct start sequence: brake on, PTO off, in seat.
-
Wiggle the seat slightly while trying to start to see if the seat switch is intermittent.
-
Inspect visible connectors under the seat and at the frame for corrosion.
-
Check battery and ground connections, cleaning and tightening as needed.
-
If symptoms persist, consider dealer testing of the interlock system with proper diagrams.
DIY or dealer? Repair decision guide for the John Deere S220
On the John Deere S220, the “line” between DIY and dealer work usually sits between bolt‑on components and anything that requires specialty tools, hydraulic presses, or electrical diagnostics beyond basic test equipment. If you can reach the part with simple tools, see it operate and verify it with a basic multimeter or visual inspection, it’s usually a candidate for owner repair; internal engine work, transmission internals and complex wiring are better left to a dealer.
Good DIY jobs on the John Deere S220:
-
Oil and filter changes.
-
Air and fuel filter replacement.
-
Spark plug replacement and home maintenance kit jobs.
-
Deck blade replacement and sharpening (with proper safety).
-
Deck belt replacement and basic deck leveling.
-
Battery replacement and cleaning electrical connections.
Advanced DIY or dealer jobs:
-
Hydrostatic transmission repair or replacement.
-
Internal engine repairs (valves, piston, governor).
-
Complex electrical diagnostics and harness repairs.
-
Steering gear repairs beyond simple linkages.
-
Spindle housing replacement if deck is damaged or riveted/pressed.
Skill level guide:
-
Beginner: Oil changes, air filter, fuel filter, spark plug, battery checks, tire inflation.
-
Intermediate: Deck removal, blade replacement, deck belt replacement, deck leveling, simple switch replacement.
-
Advanced: Transmission belt routing with tight clearances, spindle replacement, wiring diagnostics, hydrostatic or internal engine work.
Parts needed for John Deere S220 – OEM vs aftermarket
When ordering parts for your John Deere S220, always gather the full model name, product identification number (PIN), deck size (42‑inch Accel Deep deck) and, ideally, the engine’s model and serial number. This ensures you get the correct version of belts, filters and electrical parts, as running production changes can make similar‑looking parts incompatible.
Below is a typical service‑parts table for the John Deere S220 lawn tractor with 42‑inch deck (part numbers may vary by region and production run – always cross‑check against your PIN and official guides):
For the John Deere S220, OEM parts are strongly recommended for belts, safety‑critical components, deck hardware, and any fit‑sensitive items such as blades, spindles, and switches. Quality aftermarket parts can be acceptable for some filters, batteries and occasionally blades if they are clearly cross‑referenced for the S220, but be cautious: a wrong‑profile belt or off‑spec blade can produce vibration and poor cut quality.
Parts diagrams and service manuals for the John Deere S220
For full diagrams of the John Deere S220 tractor and 42‑inch Accel Deep deck, use a combination of official Deere resources and reputable third‑party parts sites. These sources let you see exploded views, confirm part numbers and understand how assemblies go together before you start work.
Useful links (insert as standard WordPress links):
-
John Deere S220 Owner Information page – official owner support, manuals, safety info, maintenance tips.
-
John Deere Technical Publications – search “S220” to buy or download the technical manual and detailed service content.
-
John Deere online parts catalog (JDParts) – parts diagrams and ordering links for S220 and its deck.
-
A reputable Deere‑focused parts retailer with a dedicated John Deere S220 section – often lists common parts bundles, belts and blades with cross‑references.
The operator’s manual is ideal for basic maintenance intervals, safety and day‑to‑day checks, while the technical manual provides step‑by‑step repair procedures and diagnostic flowcharts. Parts catalogs and S220‑specific pages on aftermarket sites are particularly valuable when you want to identify a belt, blade, spindle or switch by its diagram before ordering.
Locating model, serial and engine numbers on the John Deere S220
Correct model, PIN and engine information matter because John Deere often revises components mid‑production, and parts can differ between early and late S220 units, especially in electrical and drivetrain areas. Without these numbers, online catalogs and dealer systems may give you near‑matches that don’t fit or perform correctly.
Typical locations:
-
Tractor model label and PIN plate: Look on the tractor frame, usually under or near the seat, or on the rear fender area; it will list “S220” and your full PIN.
-
Deck model and serial: Check the top side of the 42‑inch Accel Deep deck shell; many have a decal or plate near one corner giving deck model and serial.
-
Engine model and serial: Find the engine plaque or stamp on the engine block or blower housing—often on the side of the engine, accessible with the hood up.
-
Battery and electrical labels: Some replacement parts, such as batteries, also carry compatibility labels; check them when matching replacements.
-
Record these details in your maintenance notes or a phone photo before ordering parts or visiting a dealer.
Buying John Deere S220 parts online and in stores
A good parts strategy for John Deere S220 owners is to use online sources for planned maintenance parts and common wear items, then rely on dealers for complex, PIN‑specific components or when you’re unsure about part revisions. Retail hardware and farm stores can bridge the gap for consumables like oil, filters and generic batteries—but only when the packaging clearly lists “John Deere S220” or the equivalent cross‑reference.
Typical approach:
-
Online: Search using “John Deere S220” plus the part type; confirm the OEM part number and check that the listing mentions your tractor PIN range or deck size.
-
Dealer counter: Best choice for hydrostatic/transmission parts, electrical harnesses, switches, and any part where diagrams and PIN history matter.
-
Retail stores: Acceptable for engine oil, grease, some filters and batteries, as long as labeling and fitment guides specify compatibility with the S220.
Useful URLs to include as links:
-
John Deere official site S220 owner info or lawn tractor parts page.
-
Deere Technical Publications search page for manuals.
-
One strong aftermarket site with a John Deere S220 parts category (belts, blades, filters).
John Deere S220 step‑by‑step fitting guide – common DIY jobs
Below are practical, high‑impact DIY jobs that most John Deere S220 owners can handle with basic tools. Always work on a level surface, engage parking brake, remove the key and disconnect the battery negative terminal when working near moving parts or electrical systems.
Changing the engine oil and filter – John Deere S220
This job improves engine life, reduces wear and helps starting performance.
-
Run the S220 for a few minutes to warm the oil, then park on level ground and shut it off.
-
Place a drain pan under the oil drain point; open the drain valve or remove the drain plug and allow the oil to flow out completely.
-
Remove the old oil filter, making sure the old gasket comes off with it; lightly oil the gasket on the new filter and install hand‑tight, then snug with a wrench per instructions.
-
Close the drain, then add the recommended grade of fresh oil (e.g., Turf‑Gard 10W‑30) up to the dipstick’s full mark.
-
Start the engine, let it run for 30–60 seconds, shut down and recheck the level, topping up if needed; check carefully for leaks around the filter and drain.
Replacing the air filters – John Deere S220
Fresh air filters support clean combustion, improve fuel economy and help starting reliability.
-
Lift the hood and locate the air cleaner housing on the engine.
-
Release the clips or screws holding the housing cover, then carefully remove the cover.
-
Pull out the primary and secondary air filter elements, noting their orientation.
-
Install the new secondary element first (if applicable), then the primary, ensuring they seat properly and seals are clean.
-
Refit the housing cover, secure the clips or screws, and check that there are no gaps or misaligned seals.
Changing the spark plug – John Deere S220
A fresh spark plug helps with easier starts and smoother running.
-
With the engine cool, remove the spark plug wire boot from the plug.
-
Use a spark plug socket and extension to unscrew the old plug from the cylinder head.
-
Check the new plug gap to match specifications, adjusting with a gap tool if needed.
-
Thread the new plug in by hand to avoid cross‑threading, then tighten with the socket to the recommended torque.
-
Reconnect the spark plug wire firmly and ensure it snaps into place on the plug terminal.
Changing the mower deck belt on the John Deere S220
Replacing a worn deck belt reduces slip and restores consistent cut quality.
-
Park the S220 on level ground, disengage PTO, set parking brake, shut off engine and remove key.
-
Lower the 42‑inch Accel Deep deck to its lowest position and, if recommended by the manual, remove the deck from the tractor to gain access.
-
Release belt tension and carefully note the routing of the old belt around pulleys and idlers; take photos if necessary.
-
Remove the old belt from all pulleys, inspecting pulleys and idlers for damage or rough bearings.
-
Install the new OEM deck belt along the original route, ensuring proper placement in belt guides and on pulleys; re‑engage tension, refit the deck, then test PTO operation briefly to confirm proper tracking.
Maintenance to prevent recurring problems on the John Deere S220
Regular maintenance on the John Deere S220 is the simplest way to prevent many of the starting, running and cut‑quality problems that show up mid‑season. Treat the S220 like a small car: it needs routine attention on fluids, filters and cleaning to keep both mechanical and electrical systems stable.
Focus areas:
-
Starting reliability: Keep the battery healthy, terminals clean, spark plug fresh and fuel system clear of stale fuel.
-
Cut quality: Maintain sharp blades, correct deck leveling, proper tire inflation and a clean deck underside to preserve airflow.
-
Fire and overheating prevention: Control debris buildup around the engine and muffler, clean cooling fins, and fix any oil or fuel leaks promptly.
-
Drive performance: Inspect drive belts, keep the transmission fan and axle area clear, and monitor tire wear and pressure.
-
Electrical reliability: Periodically check wiring looms for chafing, keep connectors free of corrosion, and inspect safety switches if starting becomes intermittent.
John Deere S220 maintenance schedule and checklist
The exact maintenance chart for the S220 is in the operator’s manual, but the typical pattern for 200 Series tractors gives a solid outline. Use this as a year‑round checklist and adjust intervals based on actual hours and conditions.
Daily / before each use
-
Check engine oil level and top up if needed.
-
Inspect for visible fuel or oil leaks under the tractor.
-
Verify tire pressures and overall appearance of the 42‑inch deck.
-
Confirm all safety systems work: brake, PTO switch and seat switch.
After approximately 8 hours (or once per mowing day)
-
Clean grass buildup from the deck top and underside as practical.
-
Check deck belt and idlers visually for debris and abnormal wear.
-
Inspect steering and brake linkages for binding or unusual play.
Every 25 hours
-
Grease key steering and deck pivot points, following lube chart.
-
Check battery terminals for corrosion; clean and protect if needed.
-
Inspect blades more closely for wear or damage; plan sharpening or replacement.
Every 50 hours or yearly
-
Change engine oil and replace oil filter.
-
Replace fuel filter and inspect fuel lines.
-
Clean or replace air filters (primary and secondary) depending on conditions.
-
Check deck level and adjust using a deck leveling gauge.
Every 100 hours or yearly for intensive use
-
Replace spark plug.
-
Perform more thorough inspection of drive belts (deck and traction).
-
Clean cooling fins and shrouds around the engine and muffler area.
Seasonal checklist – John Deere S220
Spring (pre‑season):
-
Perform oil and filter service if not done at end of last season.
-
Inspect blades and replace or sharpen before first mow.
-
Check battery charge and clean terminals.
Mid‑season:
-
Re‑check deck level, belt condition and cut quality.
-
Clean engine cooling and deck more thoroughly if mowing dusty or heavy grass.
Fall (end of season):
-
Change engine oil, especially before winter storage.
-
Add fuel stabilizer and run the engine briefly to circulate.
-
Clean tractor, deck and cooling areas; store under cover.
Repair, upgrade, or replace? John Deere S220
For the John Deere S220, the general rule is that routine wear items and moderate repairs are worth doing, while major drivetrain or engine failures may push you toward replacement depending on age and hours. Consider the tractor’s overall condition, frame and deck integrity, and whether upgrades (blades, seat, accessories) can extend useful life.
Repair if:
-
The fault is limited to belts, blades, filters, battery, simple switches or light electrical issues.
-
The frame, deck and engine are fundamentally sound with no serious rust or cracks.
-
Parts are reasonably priced and you enjoy DIY maintenance.
Upgrade if:
-
You want better cut quality with higher‑performance blades or improved bagging.
-
Comfort can be boosted with a better seat, steering wheel knob or accessories.
-
You plan to add attachments like carts or spreaders and need appropriate hitch hardware.
Replace if:
-
The hydrostatic transmission or engine has suffered major failure and the tractor is older or high‑hours.
-
The deck shell is severely rusted, cracked or bent beyond economic repair.
-
You need a larger cutting width or more power than the S220 can realistically provide.
Expanded troubleshooting FAQ – John Deere S220
1. Why will my John Deere S220 not start at all?
If your S220 will not crank or respond when you turn the key, start by checking basic safety conditions: parking brake engaged, PTO switch off and operator in the seat. A dead or weak battery, corroded terminals, or a failed seat or brake switch will often cause a complete no‑crank condition. Clean and tighten battery connections, test battery voltage, and verify safety switch operation. If power and switches test good, suspect the ignition switch, solenoid or starter and consider dealer diagnostics.
2. My John Deere S220 cranks but will not fire – what should I check?
A cranking S220 that will not fire usually points toward fuel or spark issues rather than the starter itself. Confirm you have fresh fuel, not old gasoline from last season, and check the fuel filter for blockage. Then inspect the spark plug for fouling or wear and ensure the plug wire is firmly connected. If the plug and fuel system look fine, consider carburetion issues or a flooded engine and follow the manual’s flood‑clear procedure before seeking dealer help.
3. Why does my John Deere S220 start then stall after a few seconds?
Starting and stalling often indicates restricted fuel flow, a partially blocked fuel filter, or venting issues in the fuel tank cap. Check that the fuel filter is clean and that fuel lines are not kinked or collapsing. Inspect the tank cap vent for blockage; running with a non‑vented or faulty cap can cause vacuum lock. Also look at the air filter—severely clogged elements can contribute to poor running and stalling under load.
4. The John Deere S220 runs rough and surges at idle – what is wrong?
Surging at idle or low throttle usually points to mixture and airflow problems. Clean or replace the air filters, and verify that there are no vacuum leaks around the intake and carburetor connection. Old fuel can cause varnish deposits in jets and passages, leading to surging; draining and replacing fuel, then using fresh gasoline, often improves performance. Persistent surging may require carburetor cleaning or adjustment, best done with guidance from the technical manual.
5. Why does my John Deere S220 lose power when mowing uphill?
Loss of power uphill can come from both the engine and hydrostatic drive. First, make sure the engine is serviced—clean air filter, fresh fuel and proper oil level. Then inspect the traction drive belt for wear or slippage, as a worn belt can cause the transmission to feel weak. Check tire pressures and tread, since low pressure reduces traction. If the tractor still struggles after these checks, the hydrostatic unit may be worn and need dealer evaluation.
6. My John Deere S220 battery keeps going flat – what’s the cause?
If the battery repeatedly discharges, consider both usage and charging. Short runs with the headlights on and frequent starts can drain a battery faster than the charging system replenishes it. Clean battery terminals, check cable connections and verify the alternator or charging circuit is functioning (a multimeter can show charging voltage while running). Also inspect for parasitic draws such as accessories left connected; if voltage remains low despite good charging, the battery may simply be at end of life.
7. Why does the John Deere S220 click but not crank when I turn the key?
Clicking without cranking typically means there is enough voltage to activate the solenoid but not enough current to spin the starter. Check for loose or corroded battery terminals and grounds; poor connections cause voltage drop under load. Test the battery with a multimeter under cranking conditions; a large voltage drop indicates a weak battery. If battery and connections are good, the starter motor or solenoid could be worn and may need replacement.
8. How do I improve cut quality on my John Deere S220?
Improving cut quality starts with sharp blades matched to the 42‑inch Accel Deep deck; dull or incorrect blades are the most common culprit. Verify deck level using a deck leveling gauge, checking both side‑to‑side and front‑to‑back pitch per the manual. Maintain tire pressures at recommended levels so the deck stays stable relative to the lawn. Finally, adjust ground speed—too fast mowing causes streaking and scalping, particularly on uneven ground.
9. Why is my John Deere S220 leaving uncut strips between passes?
Uncut strips often indicate one blade not cutting correctly or misaligned deck level. Inspect both blades for straightness and ensure they are properly installed and tightened. Check that the deck belt is routed correctly and not slipping, which could cause one spindle to slow or stop. Make sure your passes overlap slightly rather than butting directly; narrow overlap can leave “tramlines” if deck width and path do not align perfectly.
10. My John Deere S220 scalps the lawn in spots – how can I stop this?
Scalping is usually a combination of deck height, uneven ground and deck leveling. Raise the deck one notch and try again, especially on bumpy or sloped areas. Use the leveling procedure to ensure the deck isn’t tipped too far forward or heavily off side‑to‑side. Check tire pressures; a low tire on one corner effectively drops the deck on that side, increasing scalping risk. Mow slower on rough terrain to reduce bounce.
11. Why does my John Deere S220 vibrate heavily when the blades are engaged?
Heavy vibration with blades engaged almost always points to bent or unbalanced blades or failing spindle bearings. Inspect blades for damage from rocks or hard objects and replace rather than trying to straighten severely bent ones. Make sure blades are matched (correct S220 set) and installed with proper hardware in the correct orientation. Spin each spindle by hand with the belt off; if you feel roughness or hear grinding, the bearings likely need replacement or dealer service.
12. The deck on my John Deere S220 rattles loudly – what should I look for?
Loud deck rattles may come from loose hardware, worn idler pulleys or broken belt guides. Check all deck bolts, brackets and guards for tightness and integrity. Inspect idler pulleys and tensioners for play or wobble, replacing worn components. Ensure belt guides are intact and not rubbing on the belt due to misalignment. Removing debris from the deck shell can also eliminate stray rattles.
13. Why does the deck belt squeal or smoke on my John Deere S220?
Belt squeal and smoke indicate slippage or misalignment. Check belt tension and routing carefully; a misrouted belt or stuck idler can cause severe friction. Inspect pulleys for rust or buildup and clean as necessary. Replace belts that show glazing, cracking or significant edge wear, and avoid aftermarket belts that do not match the original profile. Always disengage PTO immediately if you see smoke to prevent damage.
14. My John Deere S220 engine smells hot and I see light smoke – is this normal?
A faint burning smell right after an oil change or heavy mowing can come from oil or grass on hot components, but consistent smoke is not normal. Inspect the muffler area and engine block for oil or fuel leaks; any leak onto hot surfaces is a safety concern. Clean grass and debris from around the engine and muffler to improve cooling. Check the oil level and cooling fins; if symptoms persist, have a dealer check for internal issues.
15. Why am I seeing oil spots under my John Deere S220 after it sits?
Oil spots under the S220 usually mean a leak at the oil pan, drain, filter gasket or a seal on the engine or transmission. Confirm the drain plug and filter are tight and that old gaskets were removed at the last service. Inspect the bottom of the engine and transmission housing for wet areas. Minor sweating can be monitored, but active dripping requires repair; ignoring leaks risks slipping belts and fire hazards.
16. The John Deere S220 seems to run hot in summer – what can I do?
In hot weather, the S220 relies heavily on clean cooling fins and unobstructed air flow through engine shrouds. Remove the hood and clean debris from fins and shrouds around the cylinder and head. Check engine oil level and quality; thin or old oil can worsen heat issues. Avoid mowing at full throttle and maximum load for extended periods if you suspect marginal cooling, and keep grass buildup away from the muffler.
17. Why won’t my John Deere S220 move even though the engine runs?
If the engine runs but the tractor will not move, first check that the parking brake is fully released. Inspect the traction drive belt for breakage, dislodging or extreme wear; a broken belt results in complete loss of drive. Verify that the transmission bypass or free‑wheel control (if fitted) isn’t accidentally engaged. If the belt and controls are correct but the tractor still doesn’t move, the hydrostatic transmission may need dealer attention.
18. My John Deere S220 moves, but is very weak on small hills – what’s wrong?
Weak drive on hills often indicates a worn traction belt or aging hydrostatic unit. Inspect the belt for glazing, cracking and slack and replace if in doubt. Check tire pressures and tread to ensure good traction. If performance remains poor, especially after servicing, the transmission may be losing efficiency; at that stage, weigh the cost of replacement against the tractor’s overall condition.
19. Why does the John Deere S220 jerk when I press the drive pedal?
Jerky drive can result from linkage stiffness, debris around the pedal mechanism or inconsistent belt tension. Lubricate pedal linkages and pivot points according to the lube chart. Make sure the traction belt is routed correctly and not grabbing due to misalignment or damaged pulleys. If mechanical items check out, minor jerkiness can sometimes be characteristic of worn hydrostatic internals and may require a professional assessment.
20. My John Deere S220 PTO will not engage – what should I check?
A non‑engaging PTO can stem from electrical or mechanical causes. Confirm the engine is running at adequate RPM and that you are seated with safety systems satisfied. Check the PTO switch for proper operation and look for damaged wiring to the PTO clutch. Verify that the clutch connector is secure and free of corrosion. If the clutch is receiving power but still fails to engage, the clutch itself may be worn and need replacement.
21. The John Deere S220 shuts off when I release the brake – why?
If the tractor shuts down when you release the brake, the seat switch or brake switch may not be signaling correctly to the interlock system. Make sure you remain seated as you release the brake; lifting off the seat will trigger shut‑down. Inspect the seat switch under the seat for loose mounting or damage and check visible brake‑switch linkage. Maladjusted or failed switches are cheap to replace and often solve this symptom.
22. My John Deere S220 lights don’t work – is this easy to fix?
Non‑functioning lights are usually straightforward. Check the bulbs or lamp assemblies first; replace any blown or damaged units. Inspect the wiring and connectors leading to the lights, looking for corrosion or broken wires. Confirm the light switch on the dash functions and that the battery voltage is sufficient. If wiring is intact but lights still fail, the switch or a fuse (if fitted) may need replacement.
23. How often should I change the oil on my John Deere S220?
For typical residential use, most S220 owners change oil annually or around every 50 hours of operation, with some guidance suggesting up to 100 hours under lighter conditions. Always follow your operator’s manual for exact intervals. Change more frequently if mowing in dusty, hot environments or if you frequently run near full load. Regular oil changes are one of the most important steps for engine longevity.
24. How often should I replace the air filters on my John Deere S220?
Air filter intervals depend heavily on dust and debris levels. As a baseline, inspect at every 25–50 hours and replace at least yearly. In dusty or sandy environments, you may need to replace both primary and secondary elements more frequently. A clogged filter restricts airflow, causes rich running and can shorten engine life, so err on the side of clean filters.
25. When should I change the mower blades on the John Deere S220?
Most homeowners find they need new blades once per season if mowing frequently, or sooner if blades strike rocks or other hard objects. Inspect blades at least every 25 hours for nicks, bends and thinning edges. Replace blades that cannot be safely sharpened or are bent, and make sure you install S220‑compatible blades with the correct profile for the Accel Deep deck.
26. Can I use aftermarket blades and belts on my John Deere S220?
You can use quality aftermarket blades and belts if they are clearly cross‑referenced to the John Deere S220 and its 42‑inch Accel Deep deck, but OEM parts generally offer the best fit and performance. Poorly matched aftermarket belts can slip, squeal or cause vibration, and off‑profile blades can degrade cut quality. When in doubt, choose OEM for belts and blades and reserve aftermarket for less critical items like some filters or batteries.
27. What size battery does the John Deere S220 use?
The S220 typically uses a 12‑volt lawn and garden battery specified by John Deere for USA and Canada markets. When replacing, match cold‑cranking amps (CCA) and physical dimensions to the original battery or to the part number recommended for the S220. Ensure terminals and polarity match the original layout to avoid wiring issues.
28. How do I know if the hydrostatic transmission on my John Deere S220 is failing?
Signs of hydrostatic failure include progressive loss of drive power, especially when hot, slow response to pedal inputs and excessive noise or whining from the rear axle area. If drive performance stays poor after replacing the traction belt, maintaining proper tire pressures and clearing debris around the transmission fan, suspect internal wear. Hydrostatic units are complex and typically require dealer replacement rather than DIY rebuilds.
29. My John Deere S220 jerks or cuts out when engaging PTO – what’s wrong?
Jerking or cutting out when engaging PTO can be an engine‑load issue or a safety interlock reaction. Make sure the engine is at proper RPM before engaging PTO, and avoid engaging under heavy grass load. Check for binding in the deck, stuck blades or seized spindles which can cause sudden load spikes. Also verify safety switches; if the system believes a condition has been violated, it may cut the engine when PTO is engaged.
30. How should I store my John Deere S220 over winter?
For winter storage, clean the tractor and deck thoroughly to remove grass and debris. Change the engine oil if it is due, top off fuel and add a quality fuel stabilizer, then run the engine briefly to circulate the treated fuel. Disconnect or remove the battery and store it in a cool, dry place on a maintenance charger if possible. Park the S220 under cover, ideally on a solid surface, and avoid leaving it outside exposed to moisture and freeze‑thaw cycles.
31. Why does my John Deere S220 smell like fuel after mowing?
A fuel smell after mowing can come from normal venting or from minor seepage around the fuel cap, lines or filter. Inspect all fuel hoses, clamps and the filter area for dampness or staining. Ensure the fuel cap is correctly tightened and its gasket is intact. If the smell is strong or accompanied by visible leaks, address it immediately to reduce fire risk.
32. Can I tow a small trailer with my John Deere S220?
The John Deere S220 can typically tow light garden carts or small utility trailers within the limits specified in the operator’s manual. Use the approved hitch point on the rear of the tractor and avoid overloading, especially on slopes. Excessive towing or heavy loads can strain the transmission and brakes, so stay within recommended weight and tow at low speed.
33. Why does my John Deere S220 steering feel loose or wandering?
Loose steering may result from wear in tie rods, steering gear or front‑axle bushings. Check front wheel bearings and their mounting first, then inspect steering linkages for play. Grease pivot points where specified and tighten any loose fasteners. If mechanical wear is significant, replacement parts may be required; steering components should be kept in good condition for safe operation.
34. How do I know which John Deere S220 parts apply to my serial number range?
Use your PIN in combination with official parts catalogs or dealer systems. Many parts listings include serial‑number breaks, showing which components apply to early or late production units. Input your PIN when searching online or provide it to your dealer to prevent ordering incompatible parts. When diagrams show multiple versions, always check the notes or serial ranges against your tractor.
35. What basic tool kit should a John Deere S220 owner have for maintenance?
A practical S220 tool kit includes a set of metric and SAE wrenches and sockets, a screwdriver set, a spark plug socket, pliers, a torque wrench for critical fasteners, a grease gun with appropriate grease and a basic multimeter for electrical checks. Add a deck leveling gauge and a safe blade‑handling method (such as a blade clamp or workbench setup) for cut‑quality work. With this kit, most routine S220 maintenance and minor repairs are within reach.
Common John Deere S220 hydrostatic transmission issues
The John Deere S220 uses a hydrostatic transmission (hydro) that gives smooth, pedal‑controlled drive but has its own predictable failure patterns. Most S220 drive complaints come down to belts, heat, contamination and plain wear, rather than a mysterious “bad transmission.”
This guide walks through the typical symptoms, root causes and realistic DIY checks for S220 owners, with clear pointers for when to stop and call a dealer.
How the S220 hydrostatic transmission works
On the John Deere S220, the engine drives a traction belt that spins the hydrostatic transaxle mounted at the rear of the tractor. Inside that transaxle, a hydraulic pump and motor convert engine power into smooth forward and reverse movement, controlled by the foot pedal. There’s usually a free‑wheel/bypass lever to allow pushing the tractor without engine power.
Because all drive power passes through oil inside the hydro, anything that affects belt drive, fluid condition or internal pump/motor health shows up as weak drive, jerky motion or complete loss of movement. Understanding that chain—engine pulley → traction belt → input pulley → hydro pump/motor → axle—is the starting point for sensible diagnostics.
Symptom 1 – S220 will not move at all
What it looks like
The engine starts and runs, but when you press the forward or reverse pedal the tractor either sits still or creeps a few inches and stops. You may or may not hear a whining or screeching noise from the rear.
Likely causes
-
Traction drive belt broken, off the pulleys or severely worn.
-
Transmission bypass/free‑wheel lever left in the “disengaged” position.
-
Input pulley or fan damaged or no longer turning the hydro.
-
Internal hydrostatic failure (pump/motor damage) after fluid loss or extreme wear.
DIY checks
-
Confirm the parking brake is fully released.
-
Check the bypass/free‑wheel lever on the rear of the tractor; make sure it is in the “drive” position as per the operator’s manual.
-
With the engine off, inspect the traction drive belt routing from the engine pulley back to the transaxle; look for missing, broken or slipped belt.
-
Rotate the engine pulley by hand and watch the rear input pulley; if it does not turn with the belt, investigate for stripped splines or pulley damage.
-
If the belt and bypass lever are correct but the tractor still will not move, treat it as internal hydrostatic failure and plan for dealer repair or transaxle replacement.
Symptom 2 – John Deere S220 moves, but is very weak
What it looks like
The S220 moves, but feels lazy or weak—especially on small hills, when turning sharply or after the transmission warms up. Forward and reverse may both feel sluggish, with the tractor slowing down quickly under any load.
Likely causes
-
Traction belt glazed, stretched or contaminated with oil/grease.
-
Debris around the transmission fan and case causing overheating.
-
Low or contaminated transmission fluid (on serviceable units).
-
Internal pump/motor wear inside the hydro from age or heat.
DIY checks
-
Inspect the traction belt for cracking, glazing or oil contamination; replace it if the sidewalls look shiny or cracked.
-
Clean grass, dirt and debris from around the transmission fan and housing to improve cooling.
-
Check rear tire pressures and tread; under‑inflated or worn tires exaggerate “weak” drive.
-
If the S220 has service ports and a fluid/filter maintenance procedure, follow the operator’s or technical manual to inspect fluid for dark, burnt or milky appearance and replace it with correct specification oil.
-
If drive remains weak after belt and cooling cleanup, assume internal wear—at that point, a dealer needs to test the transaxle and quote repair or replacement.
Symptom 3 – Jerky or inconsistent drive on the S220
What it looks like
The tractor lunges when you press the pedal, hesitates, or moves in fits and starts instead of smoothly. You may notice the behaviour more after storage, after a fluid change, or when the tractor is first used on a cold day.
Likely causes
-
Air trapped in the hydrostatic system after fluid loss or service (on units with serviceable fluid).
-
Sticky pedal or linkage that does not give smooth control.
-
Belt grabbing or snatching on damaged pulleys.
-
Internal valve or pump control issues in the transaxle.
DIY checks
-
Lubricate pedal pivots and linkages according to the S220 lube chart to rule out simple mechanical stickiness.
-
Inspect the traction belt and pulleys for damage, rust or contamination that might cause the belt to grab.
-
On serviceable hydros, perform the purging procedure described in the technical manual: with the tractor safely raised, engage the bypass, run the engine at low RPM, and slowly cycle the pedal forward and reverse several times to purge air, then recheck fluid level.
-
If jerky motion persists even after linkage lubrication, belt inspection and purging, treat it as an internal control or valve issue—best handled by a transmission specialist or John Deere dealer.
Symptom 4 – Whining, screeching or grinding noise from the rear
What it looks like
You hear a high‑pitched whine, screech or grinding sound from the hydro area when pressing the pedal. The noise may be loud enough that you instinctively back off the pedal. On some machines the tractor also fails to move, or moves briefly and then stops.
Likely causes
-
Traction belt slipping badly on pulleys (screeching).
-
Damaged input pulley or fan rubbing or spinning on worn splines.
-
Low fluid and cavitation inside the hydro (whining).
-
Internal bearing or gear damage in the transaxle (grinding).
DIY checks
-
Stop using the tractor immediately when loud noises occur; continued use can quickly finish a marginal transmission.
-
With the engine off, spin the rear input pulley and fan by hand—listen for scraping or roughness and check for side play.
-
Inspect the belt for glazing and verify that tensioners and idlers move freely and aren’t seized.
-
If your S220’s hydro is serviceable, check fluid level and condition; very low or burnt fluid is a strong sign of internal damage.
-
Grinding or loud whining that continues after obvious belt issues are fixed is a red flag for internal failure—this is dealer territory.
Symptom 5 – S220 creeps when “in neutral” or parked
What it looks like
With the pedal released, you notice the S220 slowly creeping forward or backward, especially on slight slopes. It may also be difficult to keep the tractor stationary when you think it is in neutral.
Likely causes
-
Neutral linkage or control arm on the hydro out of adjustment.
-
Internal neutral setting on the transaxle slightly mis‑set from wear or prior service.
-
Pedal return mechanism weak or sticky.
DIY checks
-
Check pedal return springs and linkages; ensure the pedal fully returns to its neutral stop.
-
Inspect the external hydro control arm and linkage position marks (if present) and compare with the neutral adjustment procedure in the technical manual.
-
Minor creep can sometimes be corrected via external linkage adjustments; follow the manual carefully to avoid over‑adjustment.
-
If creep persists after linkage correction, an internal neutral adjustment may be required—this is usually a dealer or hydro shop job.
Symptom 6 – S220 loses drive after running for a while
What it looks like
The tractor starts the session moving “OK,” but after 20–30 minutes of mowing, drive becomes weak, jerky or disappears. After cooling down, it may move again for a short time before failing.
Likely causes
-
Heat‑related fluid breakdown or thinning, especially with incorrect or old oil (on serviceable units).
-
Overheating of the hydro due to blocked cooling air and fan damage.
-
Internal pump/motor wear that shows up most clearly when hot.
DIY checks
-
Ensure cooling airflow around the transaxle is unobstructed, and that the cooling fan is intact and firmly attached.
-
Check for grass clippings, dust and debris packed around the case; clean thoroughly.
-
On serviceable hydros, inspect fluid quality and change it if it appears dark, burnt or contaminated; use the correct John Deere specification.
-
If drive still drops off significantly when hot, the internal components are likely worn—the usual fix is transaxle replacement rather than owner rebuild.
DIY vs dealer – realistic boundaries on S220 hydro work
For John Deere S220 owners, good DIY hydro‑related jobs include:
-
Inspecting and replacing the traction drive belt and checking pulleys.
-
Cleaning debris from the transmission area and fan.
-
Lubricating drive pedal and linkage pivots.
-
Verifying bypass lever position and basic adjustments.
Advanced DIY or dealer‑level work includes:
-
Internal hydrostatic fluid changes and purging on serviceable transaxles.
-
Neutral adjustment beyond simple linkage tweaks.
-
Diagnosing internal pump/motor wear, charge‑pump pressure and valve problems.
-
Full transaxle replacement.
If the tractor will not move, makes loud grinding or whining noises, or loses drive badly when hot despite a good belt and clean cooling area, it is generally time to let a dealer or transmission specialist evaluate the hydro. The labour, tools and test equipment required for internal hydro work usually exceed what makes sense for a homeowner.
Preventing hydrostatic transmission problems on the John Deere S220
Prevention revolves around three themes: keeping the drive belt healthy, protecting the hydro from heat and contamination, and respecting the tractor’s workload limits. Basic habits go a long way.
Key practices:
-
Drive belt care: Inspect the traction belt at least once per season; replace when cracked, glazed or contaminated with oil, and route it exactly per diagram.
-
Cooling and cleanliness: Keep the hydro case and fan clean; avoid letting grass build up around the rear of the tractor.
-
Reasonable loads: Don’t tow heavy loads or climb steep slopes beyond what the S220 is designed for; over‑loading shortens hydro life.
-
Fluid (if serviceable): Follow the manual for fluid and filter intervals, using only the correct specification oil; never mix types or run low.
Taking the time to check drive components whenever you notice small changes in performance often prevents the “sudden” major failure that strands the tractor mid‑season.
Step-by-step instructions for John Deere S220 drive belt replacement
The John Deere S220 uses a traction (transmission) drive belt between the engine pulley and the rear hydrostatic transaxle. Replacing this belt restores drive performance and is a realistic intermediate DIY job if you’re comfortable working under the tractor and removing the mower deck.
Below is a clear, owner‑focused step‑by‑step procedure you can use as a TractorsBy guide section or standalone how‑to. Always cross‑check the exact belt routing with your operator’s or technical manual diagrams before starting.
Safety and preparation
Before working on the S220 drive belt, make sure the tractor is secure and you have space and lighting to work underneath.
-
Park the tractor on a flat, solid surface.
-
Set the parking brake, disengage PTO and remove the ignition key.
-
Allow the engine and muffler to cool fully if the machine was recently used.
-
Wear eye protection and gloves; keep loose clothing and jewellery away from moving parts.
-
Assemble tools: basic socket set and wrenches, flat‑blade screwdriver, pliers, floor jack and axle stands or sturdy ramps, and a good work light.
Step 1 – Remove the mower deck
On the S220, the mower deck sits directly under the frame and blocks access to the drive belt. Removing the deck gives you room to reach the belt and rear pulleys.
-
Lower the 42‑inch deck to its lowest height setting.
-
Release the deck belt tension cable: pull the retaining pin at the cable bracket, slide the cable out of the bracket, and let the tension arm relax so the deck belt goes slack.
-
Carefully roll the deck belt off the engine pulley at the front of the tractor, working it out of the belt keepers/guards on both sides.
-
Remove the front deck hanger: pull the linchpins or clips securing the front draft arm, slide the arm out of its bracket and let the front of the deck rest on the ground.
-
At each side of the tractor, remove the rear deck lift links or hanger pins holding the deck to the lift arms.
-
Slide the deck out from under the tractor—for most owners, pulling it out the right‑hand side gives the most clearance.
Tip: Take a couple of photos of the deck linkage and belt routing before removal. They save time during reinstallation.
Step 2 – Jack and secure the tractor
You’ll need access underneath to reach the drive belt, rear pulleys and guards.
-
With the deck removed, position a floor jack under the front frame crossmember and lift the front slightly if you want extra clearance (optional but helpful).
-
Place axle stands or ramps under the front for support; never rely on the jack alone.
-
Move to the rear and jack under the frame just ahead of the rear axle, then support the tractor with stands or ramps so the rear wheels are just off the ground.
-
Double‑check stability by gently rocking the tractor—if there’s any movement, reposition the stands.
Step 3 – Remove shields and gain access to the drive belt
The S220 has guards and shields around the belt path to protect it from debris. These need to be removed or loosened.
-
Locate the belt guards and shields running along the underside from the engine pulley back to the transmission pulley.
-
Use the appropriate socket or wrench to remove the bolts and screws securing the shields; keep hardware organised for reassembly.
-
Take note of how each shield sits relative to the frame and belt path; a quick phone photo is useful here.
-
Once shields are off, you should be able to see the full traction drive belt running along the centreline, around idler pulleys and the rear transmission input pulley.
Step 4 – Release tension from the drive belt
The traction belt is held tight by a spring‑loaded idler or tensioner assembly. You must relieve tension before removing the belt.
-
Identify the drive‑belt tensioner idler pulley and spring assembly under the tractor (usually towards the rear of the belt run).
-
Using a wrench or socket, gently rotate the tensioner arm to relieve belt tension; depending on design you may pull the arm toward the front or rear of the tractor.
-
Once tension is off, slip the belt off the tensioner pulley, keeping clear of the spring path.
-
Slowly release the tensioner arm back to its resting position, making sure it does not snap back uncontrolled.
Step 5 – Remove the old drive belt
With tension released, you can now work the belt off all pulleys and guides.
-
Start at the rear: slip the belt off the hydrostatic transmission input pulley and any adjacent idlers or guides.
-
Move forward and remove the belt from mid‑frame idlers, keeping track of the original route around each pulley and guide.
-
At the front of the tractor, remove the belt from the engine drive pulley, feeding it clear of any belt keepers or guards.
-
Pull the old belt out from under the tractor completely and inspect it—look for glazing, cracking, frayed edges or oil contamination to confirm it needed replacement.
Tip: Lay the old belt next to the new one to confirm length and width match before installing.
Step 6 – Route and install the new drive belt
Correct routing is critical. Use your manual’s diagram along with the notes you made while removing the old belt.
-
Feed the new belt under the tractor from front to rear along the original path.
-
Start by looping the belt around the engine drive pulley at the front; ensure it sits fully in the pulley groove and passes inside any belt keepers.
-
Route the belt along the frame, wrapping it around any intermediate idler pulleys exactly as shown in the diagram—watch for “inside/outside” belt guide positions.
-
At the rear, place the belt around the hydrostatic transmission input pulley, ensuring it sits correctly in the grooves and does not twist.
-
Check the full belt run from front to rear for twists or mis‑routing before reapplying tension.
Step 7 – Re‑apply tension and check alignment
-
Using your wrench or socket, rotate the tensioner arm to its “belt‑tight” position as specified in the manual.
-
While holding the tensioner, slip the belt back over the tensioner idler pulley, then slowly let the arm move back against the belt, applying firm tension.
-
Confirm the belt sits squarely in all pulley grooves and is not rubbing on guards or frame components.
-
Spin the rear transmission pulley and front engine pulley slightly by hand (engine off) to verify the belt tracks smoothly and stays in its guides.
Step 8 – Reinstall shields, wheels and deck
Once the belt is correctly installed and tensioned, put the tractor back together.
-
Reattach all under‑tractor shields and belt guards using their original bolts and hardware; make sure no shield contacts the belt when tightened.
-
If you removed a rear wheel for access (as some owners do on the S220), reinstall it and torque the wheel nuts to the correct specification.
-
Lower the tractor off the stands or ramps and remove the jack.
-
Slide the mower deck back under the tractor and reconnect the rear lift links/hangers on both sides.
-
Reattach the front deck hanger arm and secure with linchpins or clips.
-
Route the deck belt over the engine pulley and through its belt keepers as originally, then re‑engage the deck belt tension cable and pin at the bracket.
Step 9 – Final checks and test drive
Before mowing, verify that everything operates smoothly and safely.
-
Visually inspect the new drive belt from above and below where possible, confirming alignment and clearance.
-
Start the engine with the tractor on level ground, keeping PTO disengaged.
-
Gently press the forward pedal and check for smooth engagement; repeat in reverse.
-
Listen for abnormal noises from the transmission area—squealing or grinding means you should stop and re‑inspect routing and tension.
-
Take a short, low‑speed test drive, including a small incline, then recheck under the tractor for any loose shields or debris.
If drive feels weak or noisy after correct belt installation, the issue may be inside the hydrostatic transaxle rather than the belt; at that point, it’s sensible to let a John Deere dealer or transmission specialist inspect the unit.