
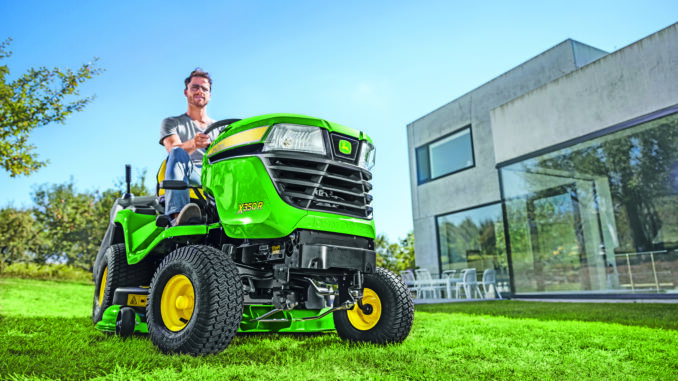
The John Deere E140 is a 100 Series lawn tractor aimed at homeowners who want a 48-inch mowing platform and simple, routine DIY service rather than heavy-duty estate or commercial capability. This guide is written for USA and Canada owners who want a practical, symptom-first reference covering troubleshooting, maintenance, common repairs, parts ordering, and realistic DIY limits.
Introduction to the John Deere e140
The John Deere E140 is a residential lawn tractor in Deere’s 100 Series range, typically equipped with a 48-inch mower deck and a V-twin gasoline engine for routine mowing and light yard work. It suits homeowners with medium to larger lawns who want more deck width than the smallest entry models, but who still expect straightforward owner maintenance.
This article follows a symptom-first structure because that is the quickest way for most owners to narrow down a fault without replacing good parts. It covers how the John Deere e140 is laid out, what commonly goes wrong, which jobs are realistic DIY repairs, what parts owners typically buy, how to maintain it through the year, and when dealer help is the better option.
General overview of the John Deere e140
The E140 sits in John Deere’s North American 100 Series lawn tractor lineup, which shares a familiar service pattern across the range: basic lubrication, regular engine service, deck inspection, battery care, and routine checks for debris buildup around hot and moving parts. That makes it a practical homeowner tractor, but not a machine designed for heavy commercial mowing or aggressive ground-engaging work.
The main systems owners need to understand are:
-
Engine and fuel system, including the air filter, spark plugs, oil, oil filter, fuel filter, and engine cooling fins.
-
Mower system, including the 48-inch deck, blades, deck belt, spindle areas, and deck-level setup.
-
Drive system, including the hydrostatic transmission, drive controls, bypass function, and traction-related components.
-
Electrical and safety system, including the battery, fuse, ignition/start circuit, PTO controls, and interlock switches.
Common service parts owners regularly buy for the John Deere e140 include the fuel filter AM116304, oil filter AM125424, air filter kit GY21056, spark plug M78543, and 48-inch deck drive belt GX21833. Deere-focused E140 maintenance listings also commonly reference Turf-Gard 10W30 oil TY22029, multi-purpose grease TY24416, and deck leveling gauge AM130907 for routine service and setup work.
Troubleshooting approach for the John Deere e140
Diagnosis should always start from the symptom the owner actually sees. On a John Deere e140, that usually means one of a few repeat complaints: it will not start, it starts but runs badly, it cuts poorly, it vibrates, it overheats, it leaks, it will not drive correctly, or an electrical function behaves inconsistently.
Starting from the symptom matters because different systems can produce similar frustration. For example, a weak cut can come from dull blades, a slipping deck belt, deck buildup, incorrect mowing speed, or poor deck level, and replacing random parts before checking those basics usually wastes time and money.
The main symptom categories on this model are:
-
Starting issues.
-
Running issues.
-
Cut-quality problems.
-
Vibration and unusual noise.
-
Overheating and leaks.
-
Transmission and drive problems.
-
Electrical and safety-switch problems.
Emergency and immediate repair needs
Some John Deere e140 problems should be dealt with immediately because they affect safe operation or can quickly damage other parts. Deere’s operator information warns owners to stop the tractor for abnormal vibration, missing or damaged safety shields, fuel leaks, and dangerous debris buildup around the muffler, engine, deck, and transmission areas because those conditions can create a fire risk or lead to more serious failures.
4.1 John Deere e140 starting issues
A no-start or no-crank problem usually looks simple from the seat, but it can involve interlock conditions, weak battery voltage, or cable problems rather than a serious engine failure. It matters because repeated failed starting attempts can flatten the battery, overheat weak connections, and send owners in the wrong direction.
Common causes:
-
Brake pedal not fully depressed.
-
PTO or mower engagement left on.
-
Weak or discharged battery.
-
Corroded or loose battery terminals.
-
Blown fuse.
-
Poor ground or starter-circuit connection.
Basic owner checks:
-
Confirm the brake pedal is fully depressed and the mower is disengaged.
-
Inspect battery terminals for corrosion and tightness.
-
Charge the battery fully or test with a known-good battery.
-
Check the fuse and visible wiring.
-
If it still will not crank, move on to starter-circuit diagnosis or dealer help.
4.2 Cut-quality problems on the John Deere e140
Cut-quality complaints usually show up as uneven mowing, ragged grass tips, strips left behind, clumping, or scalping. These issues matter because they often come from maintenance neglect rather than major parts failure, so they are usually worth addressing early.
Common causes:
-
Dull or bent blades.
-
Deck out of level.
-
Grass packed under the deck.
-
Worn or slipping deck belt.
-
Unequal tire pressure.
-
Mowing wet or overly tall grass.
Basic owner checks:
-
Set tire pressures evenly before checking deck level.
-
Clean the underside of the deck.
-
Inspect blades for sharpness, bends, and balance.
-
Check deck level carefully.
-
Inspect the deck belt for cracking, glazing, or frayed edges.
4.3 Vibration and noise
Abnormal vibration is one of the clearest stop-now warnings on this tractor. Deere’s operator guidance tells owners to stop and inspect the machine after striking an object or whenever abnormal vibration appears because blade, pulley, or spindle-related damage can get worse quickly.
Common causes:
-
Bent blade after impact.
-
Blade out of balance.
-
Loose blade hardware.
-
Damaged or slipping belt.
-
Debris wrapped around spindle or pulley areas.
Basic owner checks:
-
Shut the engine off, remove the key, and let moving parts stop.
-
Inspect the blades for bends, cracks, and looseness.
-
Check pulleys and belt condition.
-
Remove wrapped debris from the deck drive areas.
-
Do not continue mowing until the cause is found.
4.4 John Deere e140 overheating and leaks
Overheating, smoke, fuel smell, or visible leaks should be treated seriously because they can lead to engine damage or fire risk. Deere specifically warns that grass, leaves, and other debris around hot surfaces and moving parts can cause an equipment fire if not cleaned away.
Common causes:
-
Debris packed around cooling fins or muffler.
-
Low engine oil level.
-
Fuel leak at the line, filter, or tank/cap area.
-
Old fuel causing poor combustion.
-
Heavy mowing load in hot conditions.
Basic owner checks:
-
Let the tractor cool completely.
-
Clean debris from engine screens, cooling fins, muffler area, deck top, and transmission area.
-
Check engine oil level.
-
Inspect the fuel filter and visible fuel lines.
-
Stop using the machine until any raw fuel leak is fixed.
4.5 Transmission and drive problems
Drive complaints often feel like the tractor is weak, hesitant, or simply will not move properly. Some causes are simple, such as the bypass rod being in the wrong position or a brake issue, while others point to belt or hydrostatic transmission wear.
Common causes:
-
Parking brake partly applied or dragging.
-
Transmission bypass left in freewheel position.
-
Worn traction-related components.
-
Poor traction from tire issues.
-
Internal hydrostatic wear on higher-hour machines.
Basic owner checks:
-
Confirm the bypass rod is returned fully to the run position.
-
Make sure the parking brake is fully released.
-
Inspect the drive area for obvious belt damage or contamination.
-
Compare rear tire condition and inflation.
-
If slipping or weak pull continues, dealer diagnosis is usually sensible.
4.6 John Deere e140 electrical problems
Electrical faults on the E140 often appear as intermittent starting, dead lights, or inconsistent PTO and safety-switch behavior. Many of these faults turn out to be connection, battery, or switch problems rather than major component failure.
Common causes:
-
Corroded battery terminals.
-
Weak battery.
-
Blown fuse.
-
Loose wiring connectors.
-
Seat, brake, or PTO interlock faults.
Basic owner checks:
-
Clean and tighten battery connections.
-
Check the fuse.
-
Inspect visible connectors and switch plugs.
-
Test with a known-good charged battery.
-
Leave deeper intermittent wiring faults to a dealer if the simple checks do not solve it.
DIY or dealer? Repair decision guide
The normal repair line on the John Deere e140 is fairly clear. Routine maintenance, blade work, battery service, deck cleaning, filter replacement, spark plugs, and many basic belt jobs are realistic DIY work for homeowners, while hydrostatic transmission diagnosis, recurring electrical faults, internal engine work, and valve-clearance adjustment are more appropriate for experienced technicians or a Deere dealer.
Good DIY jobs
-
Engine oil and filter service.
-
Air filter replacement.
-
Fuel filter replacement.
-
Spark plug replacement.
-
Blade sharpening or replacement.
-
Deck cleaning and deck-level checks.
-
Battery terminal cleaning and basic battery replacement.
-
Basic deck belt replacement if you are comfortable removing the deck.
Advanced DIY or dealer jobs
-
Hydrostatic transmission diagnosis or internal repair.
-
Repeated belt failures caused by pulley or spindle alignment issues.
-
Intermittent safety-interlock electrical tracing.
-
Valve-clearance adjustment at 200 hours.
-
Internal engine repair.
Skill level guide
-
Beginner: filters, battery care, deck cleaning, tire-pressure checks, spark plugs.
-
Intermediate: blade work, deck leveling, deck removal, deck belt replacement.
-
Advanced: electrical diagnosis, spindle or pulley repair, hydro-related diagnosis, valve or engine work.
Parts needed, OEM vs aftermarket, and what information you need
Before ordering parts for a John Deere e140, gather the full model name, tractor Product Identification Number, engine serial number, and confirmation of the deck size. Deere’s operator manual states that the tractor PIN is on the left side of the frame and also instructs owners to record the engine model and serial number for parts and service purposes.
Use OEM parts whenever fit, belt behavior, braking function, or safety systems matter. That usually means OEM is the safer choice for deck belts, fit-sensitive switches, guards, and other exact-fit components, while correctly cross-referenced aftermarket parts can be acceptable for some filters, blades, batteries, and tune-up items.
Where to find parts diagrams and service manuals
For most owners, the best mix is one official source and one or two Deere-focused aftermarket parts sites. The official operator’s manual explains controls, safety, routine service, and ID-number locations, while Deere’s manual portal helps confirm the right publication family and aftermarket parts sites help with diagrams and practical service-part lookups.
Useful sources:
-
Official operator’s manual: operator instructions, safety guidance, maintenance information, and location of identification numbers.
-
Deere Technical Information Store: Deere’s official manual portal for the E100 to E180 tractor family.
-
Green Farm Parts E140 maintenance guide: practical parts references and maintenance-part listings.
-
Jacks Small Engines E140 diagrams: exploded diagrams helpful when checking deck and chassis parts.
How to locate model, serial and engine numbers
These numbers matter because the wrong deck belt, filter, switch, or engine-service part can easily be ordered if the machine details are guessed. Deere specifically tells owners to record the tractor identification number and engine serial information for service support.
-
Park the tractor safely on level ground, shut it off, and remove the key.
-
Find the tractor Product Identification Number on the left side of the frame.
-
Record the full number exactly as shown on the tag.
-
Find the engine serial/model information on the engine, using the operator’s manual illustrations if needed.
-
Confirm the mower deck size before ordering belt, blade, or deck parts.
Buying parts online and in physical stores
The simplest strategy is to start with the OEM number, then confirm it against the tractor model, engine details, and deck size before buying. This reduces the risk of ordering a near-match that fits another 100 Series machine but not the exact John Deere e140 configuration you have.
-
Online: best for comparing OEM numbers, checking diagrams, and confirming deck-specific parts; start with Deere manuals, Green Farm Parts, and Jacks Small Engines.
-
Dealer counter: best for serial-sensitive items, superseded parts, and anything tied to safety systems or repeat failures.
-
Retail stores: acceptable for common consumables if the packaging clearly cross-references the E140 or the exact OEM part number.
Step-by-step fitting guide for common parts on the John Deere e140
These are among the highest-value DIY jobs on this model because they directly affect starting, running, cut quality, and annual reliability. They also match the service items most commonly listed in Deere-focused E140 maintenance guides.
John Deere e140 air filter replacement
A fresh air filter helps with hard starting, rich running, and power loss. E140 maintenance listings treat the air filter as a regular service item.
-
Park safely, remove the key, and let the engine cool.
-
Open the air-cleaner housing.
-
Remove the old element and clean loose debris from the housing.
-
Install the correct replacement filter or filter kit.
-
Refit the cover securely and check that it seals correctly.
Spark plug replacement on a John Deere e140
Fresh plugs can improve starting and help cure misfire or rough running under load. Spark plugs are listed among the recurring service parts for the E140.
-
Pull the plug wire off the first spark plug.
-
Remove the old plug with the correct socket.
-
Check the new plug gap against engine specification before installation.
-
Thread the new plug in by hand first, then tighten correctly.
-
Reconnect the plug wire and repeat on the other cylinder.
John Deere e140 blade service
Blade service is one of the quickest ways to restore cut quality and reduce vibration. Deere also warns owners to inspect blades after striking an object and not to continue using damaged cutting components.
-
Disable the tractor safely and access the deck.
-
Remove the blades and note their orientation.
-
Inspect for bends, cracks, or heavy wear.
-
Sharpen and balance the blades, or replace them as a set.
-
Reinstall securely and test the cut afterward.
Deck belt replacement on the John Deere e140
A worn deck belt can cause squeal, weak blade speed, and poor mowing performance. The E140’s 48-inch deck commonly uses belt GX21833, but owners should confirm by machine details before ordering.
-
Lower the deck and remove it if needed for access.
-
Note the old belt routing before removal.
-
Inspect idlers and pulleys while the belt is off.
-
Install the replacement belt on the correct pulley path.
-
Recheck belt seating before running the deck.
Maintenance to prevent problems reoccurring
Most repeat John Deere e140 problems are preventable with basic scheduled service. The main prevention themes in Deere-oriented service references are fuel and air service for reliable starting, blade and deck upkeep for good cut quality, regular lubrication, cooling-fin cleaning, and debris removal to reduce overheating and fire risk.
Focus areas:
-
Starting reliability: keep the battery charged, terminals clean, fuel fresh, and service the air filter, fuel filter, and spark plugs on schedule.
-
Cut quality: keep blades sharp, clean the deck underside, maintain correct deck level, and inspect the deck belt.
-
Fire and overheating prevention: remove debris from the muffler area, engine screens, cooling fins, deck top, and transmission area.
-
Drive performance: verify correct bypass position, release the brake fully, and inspect traction-related components when performance drops.
-
Electrical reliability: keep battery and visible wiring connections clean and secure.
John Deere e140 maintenance schedule and year-round checklist
The E140 service schedule commonly cited by Deere-focused parts guides includes an initial 8-hour service, lubrication checks every 25 hours, yearly or 50-hour service for several engine and mower items, and a 200-hour valve-clearance check handled by a dealer. Owners should still confirm against the exact manual for their machine because documentation can differ slightly by configuration and publication version.
Daily or before each use
-
Check engine oil level.
-
Inspect for loose parts, obvious damage, and leaks.
-
Check the area around hot and moving parts for debris buildup.
-
Make sure the machine is generally safe to operate.
After 8 hours
-
Lubricate mower spindles and pivot points.
-
Lubricate front axle pivot and axle spindles.
-
Lubricate front axle wheel bushings.
-
Check mower deck spindle brakes on manual PTO units.
Every 25 hours
-
Lubricate front axle pivot and axle spindles.
-
Lubricate front axle wheel bushings.
-
Lubricate mower spindles and pivot points.
Every 50 hours or yearly
-
Replace engine oil and oil filter, or service the Easy Change system if applicable.
-
Replace the air filter.
-
Replace the fuel filter.
-
Replace the spark plugs.
-
Clean engine cooling fins.
-
Sharpen or replace mower blades.
-
Check or replace mower drive belts.
-
Level and clean the mower deck.
-
Clean battery terminals.
Every 200 hours
-
Check and adjust valve clearance, typically as dealer service.
Seasonal checklist
-
Spring: oil service, air filter, spark plugs, fuel filter, blade service, belt inspection, battery-terminal cleaning.
-
Mid-season: deck cleaning, lubrication, blade inspection, belt inspection, cooling-fin cleaning, debris removal.
-
Fall or storage prep: thorough cleaning, leak check, worn-part review, and safe storage with debris removed from all hot areas.
Repair, upgrade, or replace?
For most owners, repairing a John Deere e140 makes sense when the machine has one or two normal wear-item faults and the tractor still has a sound frame, usable deck, and acceptable drive performance. Upgrading makes more sense when the machine still works but the owner’s lawn size, towing needs, or terrain have outgrown a residential 100 Series tractor, while replacement becomes the better call when engine, deck, and drive issues are all stacking up together.
Repair if…
-
The problem is limited to normal wear items like blades, belts, filters, battery, plugs, or deck setup.
-
The engine runs well and the transmission still pulls normally.
Upgrade if…
-
You need more durability, traction, or capability than a 100 Series lawn tractor is designed to provide.
-
Your mowing area or workload has grown enough that a heavier machine would save time and frustration.
Replace if…
-
The tractor has major engine wear, weak hydro performance, and costly deck repairs at the same time.
-
Repair cost is approaching the value of a better-condition replacement mower.
Expanded troubleshooting FAQ
1. Why will my John Deere e140 not start?
Most no-start complaints come down to interlock conditions, a weak battery, dirty battery terminals, or a simple fuse issue rather than catastrophic engine failure. Check the brake pedal position, PTO status, battery charge, terminal condition, and fuse before assuming a deeper fault.
2. Why does my John Deere e140 click but not crank?
A clicking sound usually points to low battery voltage, a bad connection, or starter-circuit resistance. Cleaning the terminals and fully charging the battery is the right first move before replacing electrical parts.
3. Why does the John Deere e140 crank but not start?
If the engine cranks normally but will not fire, suspect stale fuel, restricted fuel flow, dirty air filtration, or overdue spark plugs before assuming internal damage. A basic tune-up often solves this on tractors that have sat unused.
4. Why does my E140 start and then die?
That symptom often points to fuel-delivery trouble or stale fuel rather than a serious mechanical failure. Check the fuel condition, the fuel filter, and the air filter first.
5. Why does my John Deere e140 run rough?
Rough running often comes from dirty fuel, overdue tune-up parts, or restricted airflow. Start with the normal annual service items before chasing more complex carburetion or engine problems.
6. Why does my John Deere e140 lose power in thick grass?
A loss of power in heavy mowing often means the deck is overloaded, the blades are dull, the deck is dirty, or the belt is slipping. It can also happen when mowing wet or overgrown grass too quickly.
7. Why is my John Deere e140 cutting unevenly?
Uneven cutting usually comes from tire pressure differences, poor deck level, dull blades, or buildup under the deck shell. Tire pressure should be checked before deck adjustments because it directly affects deck height.
8. Why does the John Deere e140 leave strips of uncut grass?
Strips are usually caused by weak blade performance, bad deck airflow, or reduced blade speed from belt slip. Check blade condition and clean the underside of the deck before replacing parts.
9. Why does my John Deere e140 scalp the lawn?
Scalping happens when the deck rides too low for the terrain, the deck is out of level, or too much grass height is being removed in one pass. Uneven ground and aggressive mowing height choices make it worse.
10. Why are the grass tips ragged after mowing?
Ragged tips are a classic sign of dull blades. Sharpening or replacing the blades is usually the quickest fix.
11. Why does my John Deere e140 vibrate badly?
Severe vibration should be treated as a stop-now warning because Deere advises stopping the machine after impact or abnormal vibration. Bent blades, loose hardware, or pulley problems can escalate quickly if ignored.
12. Can a bent blade damage my John Deere e140 deck?
Yes, a bent or badly unbalanced blade can stress the spindle, pulley path, and deck hardware over time. What starts as a blade problem can become a spindle or belt problem if the machine keeps running that way.
13. Why does my John Deere e140 squeal when mowing?
Squeal usually indicates belt slip, worn idlers, pulley contamination, or deck overload in heavy grass. The deck belt and pulley condition are the first places to inspect.
14. Why do belts keep failing on my E140?
Repeated belt failure usually means another fault is being missed, such as wrong routing, pulley misalignment, worn spindle bearings, or the wrong replacement belt. Replacing the belt alone often does not fix the real cause.
15. What is the mower deck belt number for a John Deere e140?
A common OEM reference for the 48-inch deck belt on the E140 is GX21833. Always confirm with your tractor details before ordering because deck and configuration differences matter.
16. Why are my John Deere e140 blades not engaging properly?
Weak blade engagement usually points to belt, pulley, deck-brake, or PTO-control problems rather than the blades themselves. Start with the visible deck drive parts before assuming a deeper electrical issue.
17. Why does my John Deere e140 deck clog with grass?
Deck clogging is usually caused by wet grass, overgrown grass, dull blades, or heavy buildup under the deck. Better timing and deck cleanliness often solve the problem faster than replacing parts.
18. Why does my John Deere e140 overheat?
Restricted cooling airflow from dirty fins, blocked screens, and debris around the engine or muffler is a common cause. Deere’s fire-prevention guidance makes regular cleaning especially important.
19. Can debris really cause a fire on a John Deere e140?
Yes. Deere warns that grass, leaves, and other debris around hot and moving parts can create a fire hazard if not removed regularly.
20. Why does my John Deere e140 smell like gas?
A fuel smell usually means a leak, seepage, overfill issue, or hose/filter connection problem. Stop using the tractor until the source is identified because fuel leakage is both a running problem and a safety risk.
21. Why won’t my John Deere e140 move?
First check the obvious items, such as the parking brake, bypass position, and visible drive-area issues. If those are correct and the tractor still barely moves, hydrostatic or drive-related wear is more likely.
22. Why is my John Deere e140 weak on hills?
Weak hill performance can come from traction problems, drive wear, or simply asking a residential lawn tractor to do too much on slopes. Deere’s operator guidance also emphasizes safe slope limits, so this is both a performance and safety issue.
23. Why does the John Deere e140 roll when parked?
Check that the parking brake is set properly and that the tractor is parked where Deere recommends. If the brake will not hold reliably, do not trust it on any incline until the issue is fixed.
24. Why is the battery always dead on my John Deere e140?
Repeated dead batteries are often caused by corrosion, poor charging habits, weak battery condition, or long idle periods. Start with terminals and battery health before chasing the charging system.
25. Where is the PIN located on a John Deere e140?
Deere states that the Product Identification Number is located on the left side of the tractor frame. Record it before ordering parts or contacting a dealer.
26. Where do I find the engine serial number on my E140?
The operator’s manual includes illustrations showing where to find engine identification details. That engine information matters for exact tune-up and service parts.
27. How often should I change the oil on a John Deere e140?
Deere-focused E140 service references commonly list oil service yearly or every 50 hours, with some documentation noting yearly or 100-hour service depending on configuration. For many homeowners, annual service before the main mowing season is the practical baseline.
28. How often should I replace the air filter on a John Deere e140?
The air filter is a regular scheduled service item and may need more frequent attention in dusty conditions. Waiting too long can hurt both starting and mowing performance.
29. How often should I replace spark plugs on a John Deere e140?
Spark plugs are listed as recurring service parts in E140 maintenance references. Replacing them on schedule helps prevent hard starting and rough running complaints.
30. How often should I grease the John Deere e140?
The common E140 schedule includes lubrication at the initial 8-hour service and then every 25 hours for key mower and front-axle points. Regular greasing is especially important when the tractor works in dusty or wet conditions.
31. Should I buy OEM or aftermarket parts for a John Deere e140?
OEM is usually the better choice for belts, exact-fit deck components, and safety-related parts where fit and behavior matter. Aftermarket parts can work well for some consumables if the cross-reference is exact.
32. Is my John Deere e140 worth repairing?
Usually yes, if the fault is limited to normal maintenance and wear parts. It becomes much less attractive when deck, engine, and drive problems are all present at the same time.
33. When should I take my John Deere e140 to a dealer?
Dealer help is the sensible choice for hydrostatic transmission problems, repeated unexplained belt failures, intermittent electrical faults, valve-clearance work, and internal engine repair. Deere-focused E140 schedules specifically flag valve-clearance work at 200 hours as dealer service.
34. Can I do my own yearly John Deere e140 service?
Yes, many homeowners can handle the yearly service because the main tasks are routine items such as oil, filters, spark plugs, blade service, lubrication, and battery-terminal cleaning. Those are exactly the areas emphasized in E140 maintenance guides.
35. What is the smartest first step when troubleshooting a John Deere e140?
Start with the exact symptom and then check the simplest likely causes tied to that symptom. That symptom-first method is the fastest way to avoid replacing good parts and it matches the practical logic used in Deere operator and maintenance guidance.
How to winterize a John Deere E140 for off-season storage
For a John Deere E140, winterizing is mainly about fuel, battery, cleaning, basic service, and how/where you store it. The goal is to keep fuel from going bad, prevent rust and rodent damage, and have the tractor ready to go in spring.
1. End‑of‑season cleaning and inspection
A thorough clean and quick inspection is the best starting point. Moist grass and dirt left on the deck and chassis trap moisture and accelerate rust, especially over a long winter.
-
Wash or hose off the tractor, including the mower deck top and underside, to remove clippings and dirt.
-
Scrape off any stubborn buildup under the deck with a plastic scraper or stiff brush, wearing gloves around the blades.
-
Let the machine run or air‑dry long enough that belts and pulleys are dry, then park it in your storage spot.
-
Look for loose hardware, worn belts, damaged blades, and chipped paint; touch up bare metal and fix obvious issues now instead of discovering them next spring.
2. Fuel system: stabilize or run dry
You have two viable approaches: store the E140 with a full tank of stabilized fuel, or run the fuel system as empty as practical. Either is acceptable as long as you treat the fuel and avoid leaving old, untreated gas sitting for months.
Option A – full tank with stabilizer (common for modern riders):
-
Add a quality fuel stabilizer to fresh gasoline according to the product directions.
-
Fill the tractor’s tank with that treated fuel so there is minimal air space (reduces condensation and rust in the tank).
-
Start the E140 and run it for several minutes so stabilized fuel moves through the carburetor and fuel system.
Option B – store nearly dry (if you prefer this method):
-
Use a siphon or similar tool to remove most fuel from the tank.
-
Run the engine until it stalls and will no longer start, to empty remaining fuel from the carburetor.
If your E140 has a fuel shutoff, close it for storage after you finish the fuel steps.
3. Oil, filters and blades before storage
Doing your annual service now saves time in spring and prevents used oil and dirty components sitting through winter. Many dealers recommend a full service before storage rather than after.
-
Change engine oil and replace the oil filter so the engine overwinters with fresh oil.
-
Check and clean or replace the air filter if it is dirty.
-
Replace the fuel filter and spark plugs if they are at or beyond their normal service interval.
-
Remove, sharpen, and balance the mower blades, or replace them if heavily worn; it is easier now than at first mow.
-
Grease all specified grease fittings (spindles, front axle pivot and spindles, etc.) to purge moisture and protect through winter.
4. Battery care for winter
Proper battery handling is crucial, especially in cold climates in the USA and Canada. Leaving the battery discharged on the tractor in a freezing shed shortens its life.
-
Turn the mower off completely and remove the key.
-
Disconnect the negative (–) cable first, then the positive (+).
-
Remove the battery from the tractor, clean the case and terminals, and lightly protect the terminals if desired.
-
Store the battery in a cool, dry, non‑freezing place (garage or basement) away from heat sources and ignition sources.
-
Put the battery on a smart maintainer/trickle charger and top it up every 1–3 months so it stays charged.
5. Final storage setup: location, cover, and pests
Where and how you park the John Deere E140 for winter has a big impact on corrosion and rodent damage. Aim for dry, protected, and rodent‑unfriendly.
-
Store the tractor indoors if possible (garage, shed, barn), away from open flames, pilot lights, or wood stoves, especially if the tank is full of fuel.
-
If outdoor storage is unavoidable, choose a solid, well‑drained surface and use a good fitted weatherproof cover.
-
Drape a mower or tractor cover over the E140 to keep dust and moisture off while still allowing some ventilation.
-
Consider rodent deterrents (like mothballs or similar products placed near the engine and under the deck, not on painted surfaces) to discourage nesting and chewing on wiring.
-
Park it where you will not need to move it and avoid damp areas that promote rust.
6. Quick spring re‑start checklist
When mowing season returns, reversing the winterization is straightforward and avoids surprises.
-
Reinstall and reconnect the battery (positive cable first, then negative).
-
Open the fuel shutoff valve if equipped, and top off with fresh fuel if needed.
-
Check engine oil, tire pressure, and deck hardware before first start.
-
Give the tractor a brief test run in an open area, then recheck for leaks or loose parts.