
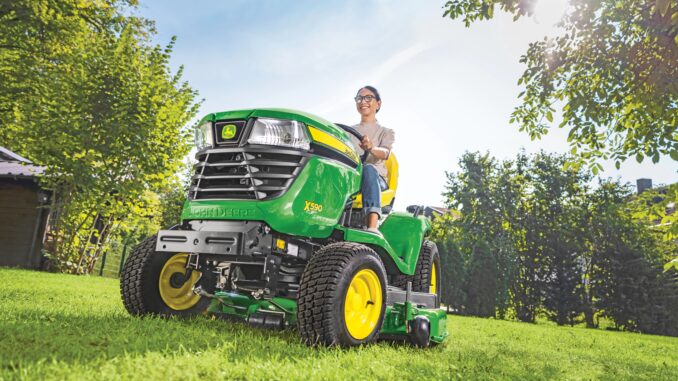
The John Deere D110 is a residential lawn tractor from Deere’s D100 family, built for homeowners who need dependable weekly mowing, light towing, and routine yard maintenance rather than commercial-duty service.
It uses a familiar homeowner-tractor layout with a gasoline engine, 42-inch mower deck, belt-driven traction system, battery-and-solenoid starting circuit, and multiple safety interlocks, which makes most faults fairly predictable once the symptoms are broken down properly.
This guide focuses specifically on the John Deere D110 and follows a symptom-first repair structure. It covers common starting issues, cut-quality complaints, vibration and noise, overheating and leaks, drive and electrical problems, parts identification, OEM versus aftermarket choices, maintenance intervals, and a large troubleshooting FAQ written for owners in the USA and Canada.
1. Overview of the John Deere D110
At a general level, the D110 is a homeowner lawn tractor intended for routine residential mowing and light seasonal yard work. Deere’s parts and maintenance information identifies the D110 as a 42-inch-deck tractor, while the D100 Series operator’s manual places it within the broader D105-D170 family of residential machines that share common service logic and operating procedures.
The D110 is commonly associated with a Briggs & Stratton single-cylinder engine in owner repair examples, a 42-inch mower deck, a belt-driven traction system, and a conventional battery/ignition/safety-switch setup. Deere-oriented D110 maintenance references list common parts such as mower belt GX20072, traction drive belt GX20006, ignition switch GY20074, key GY20680, gauge wheel GX10168, and battery TY25878, which gives a good picture of the areas owners most often service or repair.
John Deere D110 – General description of use
The D110 is best suited to homeowners maintaining small to medium lawns where simplicity and low running cost matter more than commercial speed or heavy-duty towing ability. It can handle regular mowing, bagging, or mulching with approved accessories, but it is not designed for brush cutting, steep embankments, or all-day heavy work.
John Deere D110 – General description of systems and components
-
Engine and fuel system: gasoline engine, air filter, fuel filter, spark plug, oil filter, fuel tank, cap, cooling fins, and carburetor/fuel-delivery components.
-
Mower system: 42-inch deck, blades, deck belt GX20072, spindles, anti-scalp/gauge wheels, lift linkage, and deck-level adjustment points.
-
Drive system: traction drive belt GX20006, rear transaxle, front axle, steering, brake linkage, and pedal controls.
-
Electrical system: battery, ignition switch GY20074, key GY20680, fuse, seat and brake safety logic, wiring harnesses, and starter/solenoid system.
Common John Deere D110 service parts
Deere’s parts and maintenance sheet for the D110 lists several routine service items for the 42-inch configuration, including blade kit GY20850, mower deck belt GX20072, oil filter GY20577, oil TY22029, fuel filter GY20709, air filter GY21435, and mulch cover GY00115. A Deere-oriented D110 maintenance page also lists commonly purchased repair parts such as traction drive belt GX20006, ignition switch GY20074, key GY20680, battery TY25878, fuel cap GX22166 or GX23465, and 42-inch 3-in-1 blade GX22151.
2. Troubleshooting Approach for the John Deere D110
The D110 is usually easiest to diagnose by starting with the visible symptom rather than guessing the failed part first. In practical use, most owner complaints fall into six main groups: starting faults, poor cut quality, abnormal vibration or noise, overheating and leaks, weak or erratic drive response, and electrical or safety-switch issues.
Before any inspection or repair, Deere instructs owners to stop on a level surface, disengage mower blades and attachments, lower attachments to the ground, lock the park brake, stop the engine, remove the key, and wait for all movement to stop. Deere also instructs owners to disconnect the negative battery cable or remove the spark plug wire before servicing and to pay close attention to machine cleanout because debris around the muffler, engine screens, top of deck, and transmission area increases fire risk and contributes to premature failures.
3. John Deere D110 – Emergency and Immediate Repair Needs
The most urgent D110 faults are the ones that stop safe operation or can quickly damage other parts. For this model, those most often include no-start conditions, severe blade or deck vibration, overheating, active fuel or oil leaks, weak traction, and electrical/interlock failures that create unpredictable starting or shutdown behavior.
3.1 John Deere D110 – Starting Issues
Starting problems are among the most common D110 complaints because these tractors often sit unused between mowing sessions or over winter. The first useful step is to decide whether the machine has a no-crank issue, a cranks-but-will-not-start issue, or a starts-then-stalls issue.
John Deere D110 – No crank
A no-crank condition usually points to battery charge, battery cable corrosion, fuse or switch problems, PTO/safety logic, or the starter/solenoid circuit. Deere’s operator guidance also stresses making sure all drives are neutral, the park brake is locked, and the machine is started only from the operator’s position, which matters because interlocks can make the tractor look electrically dead when the real problem is start-condition logic.
Checks:
-
Measure battery voltage and inspect terminals and grounds for corrosion or looseness.
-
Check the main fuse and visible wiring near the battery/relay area.
-
Confirm the park brake and PTO conditions are correct for starting.
-
Check the seat-switch connection and related harness condition.
-
Listen for starter solenoid click and inspect the key-switch circuit if needed.
An owner-repair example for a D110 that would not crank ultimately found broken compression-release parts on the camshaft, which shows that while most no-crank complaints are electrical, a mechanical engine issue can also overload or prevent cranking on this model.
John Deere D110 – Cranks but will not start
If the engine turns over but will not run, focus first on fuel, spark, and air. Deere’s maintenance sheet and Green Farm Parts’ D110 guide show the main service parts involved in these checks, especially fuel filter GY20709 or AM116304 depending on source, air filter GY21435 or MIU14395 depending on engine fitment, oil filter GY20577 or AM125424 depending on reference, and spark plugs such as M78543 or MIU11020 depending on configuration.
Checks:
-
Confirm fresh unleaded fuel and proper fuel level.
-
Inspect or replace the inline fuel filter.
-
Inspect spark plug condition, wire connection, and proper gap; a D110 tune-up example specifically references checking the plug gap around 0.030 inch.
-
Inspect and replace air filter elements if dirty or restricted.
-
Check for stale fuel, cap venting issues, or carburetor contamination if basics are good.
John Deere D110 – Starts then stalls
If the D110 starts but quickly dies, the problem is often related to fuel starvation, stale fuel, carburetor contamination, or an interlock issue. Start with the easiest items first: fuel condition, filter restriction, spark-plug connection, and whether the machine reacts to seat or brake movement during the stall event.
3.2 John Deere D110 – Cut Quality Problems
Poor cut quality on the D110 is usually a deck setup or blade issue rather than a major engine problem. Deere’s mowing setup guidance in the D100 Series manual provides exact deck-level measurements and explains that poor front-to-rear pitch can cause double cutting and brown grass tips.
Common causes:
-
Dull, bent, or mismatched blades.
-
Deck out of level side-to-side or front-to-rear.
-
Worn or slipping mower belt GX20072.
-
Incorrect gauge-wheel adjustment.
-
Grass buildup under or on top of the mower deck.
Deere states that side-to-side blade-tip variation should not exceed 1/8 inch (3 mm), and the front blade tip should be 1/8 to 1/4 inch (3–6 mm) lower than the rear. Those measurements are critical on the D110 because even a small deck-angle error can create visible striping, scalping, or ragged cutting.
3.3 John Deere D110 – Vibration and Noise
Strong vibration on a D110 should never be ignored because it usually points to a bent blade, loose hardware, spindle issue, pulley problem, or belt damage that can worsen quickly. Deere’s safety guidance also says that if abnormal vibration occurs after hitting an object, the machine should be stopped and inspected before further use.
Checks:
-
Inspect blades for bends, cracks, or impact damage.
-
Check blade bolts and spindle mounting hardware.
-
Inspect deck belt GX20072 for cracks, glazing, stretch, or misrouting.
-
Spin pulleys and spindles by hand with ignition safely disabled to feel for roughness.
A real-world D110 spark-and-noise complaint also mentioned the possibility of brake drag, spindle bearing issues, or even debris/wire wrapped around a pulley, which is typical of older residential tractors that work in overgrown areas.
3.4 John Deere D110 – Overheating and Leaks
Heat and debris management matter a great deal on the D110 because the machine has several horizontal surfaces and tight service areas that collect dry clippings. Deere’s D100 Series manual explicitly tells owners to inspect and clean the muffler and exhaust system, engine screens, top of mower deck and under shields, and on or near the transmission to reduce fire risk and maintain reliability.
Checks:
-
Clean muffler, exhaust, and hot engine-area surfaces only after cooldown.
-
Clean engine intake screens and cooling fins.
-
Clean top of deck under shields and around spindle/belt areas.
-
Check transmission/driveline area for packed debris.
-
Inspect for fuel leaks, oil seepage, or fuel-cap problems.
3.5 John Deere D110 – Transmission and Drive Problems
Weak motion, poor hill performance, or inconsistent pedal response on a D110 do not automatically mean the transaxle has failed. The traction drive belt, tire condition, brake drag, and driveline debris are more common first-level causes and should be checked before deeper transmission work.
Green Farm Parts lists traction drive belt GX20006 as a common D110 repair part, which makes it one of the first items to inspect on weak-drive complaints.
Checks:
-
Check tire pressures and rear tire traction condition.
-
Inspect traction drive belt GX20006 for glazing, stretching, contamination, or cracking.
-
Check for brake drag or stiff linkage.
-
Inspect driveline/transmission areas for debris buildup.
-
Compare flat-ground behavior versus uphill behavior before assuming the transmission is bad.
3.6 John Deere D110 – Electrical Problems
Electrical problems on the D110 typically show up as no-start issues, blown fuses, intermittent shutdowns, or key-switch behavior that seems random. Because the system depends on multiple safety switches and basic low-voltage connections, a loose connector or corroded terminal can look like a larger failure than it really is.
Common repair parts listed for the D110 include ignition switch GY20074, key GY20680, and battery TY25878, all of which are the kind of parts frequently involved in everyday electrical faults on residential tractors.
Checks:
-
Inspect battery voltage and terminal condition.
-
Check the fuse and relay area for continuity and corrosion.
-
Verify seat, brake, and PTO start-condition logic basics.
-
Inspect visible harnesses near seat, battery, and relay/solenoid area.
Summary:
Most common D110 problems
The recurring owner reports include transaxle complaints, deck corrosion and spindle/belt wear, plastic bonnet/hinge damage, electrical-connector faults, and engine failures such as head-gasket, camshaft, or compression-related issues. These are anecdotal reports rather than a complete failure-rate study, so they are best treated as inspection priorities rather than proof that every D110 is unreliable.greentractortalk+1
The important engine issue: hard cranking
Many D110s use a 19 hp Briggs & Stratton single-cylinder Intek engine. A distinctive complaint is that the starter struggles, stops at one point in the revolution, or needs the flywheel “bumped” by hand before it will start.
A broken automatic compression-release mechanism on the camshaft has been documented as a cause. The ACR temporarily reduces compression while cranking; when it fails, even a sound starter and battery may be unable to turn the engine through its compression stroke. One documented D110 repair found the compression-release mechanism broken from the camshaft.youtube
Before assuming internal engine failure, check:
-
Battery condition under load—not merely open-circuit voltage.
-
Clean, tight battery cables and engine/frame ground.
-
Starter motor condition.
-
Correct valve clearances.
-
Whether the crankshaft turns freely by hand with the spark plug removed.
If it cranks normally with the plug out but locks or stalls sharply with the plug installed, excessive compression/ACR trouble becomes much more plausible. A camshaft repair is substantially more involved than ordinary carburettor or electrical work.
Fuel and carburettor faults
For a D110 that starts, hunts at full throttle, only runs on choke, stalls after a few minutes, or refuses to restart after storage, start with the fuel system:
-
Drain old fuel and refill with fresh petrol.
-
Replace or inspect the fuel filter and fuel line.
-
Confirm fuel flows freely from the tank.
-
Check whether loosening the fuel cap temporarily restores running; that can point to a blocked tank vent.
-
Remove and properly clean the carburettor, particularly the main jet and emulsion passages.
-
Replace a dirty or oil-soaked air filter.
-
Fit a new spark plug if service history is unknown.
Dirty fuel, a plugged filter, poor carburettor adjustment/contamination, stale fuel, and blocked cooling are among the common fault categories listed for comparable John Deere 100 Series lawn tractors.greenfarmparts
Transmission and drive concerns
The D110 is a homeowner-grade mower, so it is best suited to regular grass cutting on relatively modest, dry, smooth ground—not repeated heavy towing, steep hills, or commercial-style hours.
If it slows down, slips, or quits pulling:
-
Ensure the transmission bypass/freewheel rod is fully returned to its operating position.
-
Inspect the traction-drive belt for glazing, cracking, burnt spots, loss of width, or oil contamination.
-
Check idler pulleys and belt guides.
-
Clear packed grass/debris around pulleys and belt paths.
-
Verify that the brake is releasing fully.
-
Test it only after it has warmed up; a machine that drives acceptably cold but loses motion hot can indicate internal transaxle wear.
Reported transmission problems exist, including claims of recall-related transmission issues, but diagnosing the external belt and linkage system first is important because those are far cheaper and more common fixes.greentractortalk
Used-buying inspection checklist
If you are researching a D110 to buy, I would not buy one without doing these checks:
-
Start it cold, not after the seller has warmed it up.
-
Listen for laboured cranking, clicking, starter kickback, knocks, or a compression “wall.”
-
Run it at full governed speed for 10–15 minutes.
-
Engage the deck and listen for bearing rumble, belt squeal, or serious vibration.
-
Drive it forward and reverse, including on a slight incline if possible.
-
Inspect the deck underside, spindle housings, deck-hanger points, belts, and pulleys for corrosion and play.
-
Check the oil level and condition; avoid one with metallic glitter, severe smoke, or unexplained low oil.
-
Look closely at the bonnet hinge area, wiring connectors, battery tray, engine cooling fins, and fuel lines.
-
Confirm the hour meter works, but judge condition independently—low hours alone do not guarantee good maintenance.
For a D110 that is already yours, the best preventative routine is fresh stabilised fuel, annual oil/filter/plug/air-filter service, frequent deck cleaning, regular blade balancing, and checking battery connections and engine oil before each mowing season.
Transmission issues
How do I bleed air from a hydrostatic transmission
To purge air from a hydrostatic transmission safely, raise the drive wheels off the ground, run the engine at low idle, cycle the bypass/tow control while repeatedly moving the travel control forward and reverse, then test it under load. This can help after the tractor has been towed/pushed with the bypass open, a transaxle has been serviced, or the hydrostat feels weak or jerky because air entered the hydraulic circuit.files-us-prod.cms.commerce.dynamics
For a John Deere D110, use this only as a controlled diagnostic/recovery procedure—not as a cure for a worn Tuff Torq T40 transaxle.
Before starting
-
Park on level, firm ground.
-
Set the parking brake, switch off the engine, remove the key, and remove the spark-plug lead if you will work near moving parts.
-
Put the mower deck in its raised position and ensure the PTO/blade switch is off.
-
Chock the front wheels.
-
Raise the rear of the tractor so both rear drive wheels are clear of the ground, using a suitable jack and properly rated axle stands placed on solid frame points. Do not rely on a hydraulic jack alone.
-
Check the transaxle exterior, drive belt, idler pulleys, cooling fan and bypass linkage before running it. A loose belt, seized idler, damaged fan, or stuck bypass control will not be fixed by bleeding air.
-
Make sure the freewheel/bypass control is located before you begin. It is normally at the rear of the machine and allows the mower to be pushed with the engine off.
Tuff Torq’s generic air-purging procedure calls for the drive axle to be on stands, low-idle operation, repeatedly opening/closing the bypass valve while alternating forward/reverse controls, then increasing engine speed once wheel motion starts.files-us-prod.cms.commerce.dynamics
Purging procedure
1. Start at low idle
-
Sit in the operator’s seat.
-
Confirm the PTO is disengaged.
-
Start the engine and leave it at low idle.
-
Keep clear of the rear wheels, pulleys, belt and any rotating parts.
2. Cycle the bypass and travel control
-
With the rear wheels still off the floor, place the bypass/tow control in the drive/engaged position.
-
Slowly press the forward pedal for about 5 seconds.
-
Release it to neutral and let the wheels stop.
-
Slowly press the reverse pedal for about 5 seconds.
-
Return to neutral.
Then repeat the forward/reverse cycle several times.
If there is initially no wheel movement, briefly put the bypass control into its release/tow position, then return it fully to the drive position. Repeat that open/close cycle while alternating forward and reverse, as specified in Tuff Torq’s general procedure. Do not leave it in the release position while expecting normal drive.files-us-prod.cms.commerce.dynamics
3. Increase speed gradually
Once both wheels begin responding consistently:
-
Raise engine speed from idle to a moderate operating speed.
-
Repeat forward/reverse cycles.
-
Use smooth pedal movements at first.
-
Then make several firmer accelerations followed by full releases to neutral/braking, allowing the wheels to stop between each direction change.
Tuff Torq describes repeating quick starts and firm stops until the transaxle responds fully.files-us-prod.cms.commerce.dynamics
Usually, 10–15 forward/reverse cycles is a sensible initial target. If the wheels remain erratic, repeat another short set rather than holding the pedal down continuously.
4. Lower and load-test it
-
Return the engine to low idle.
-
Shut it off and remove the key.
-
Wait for all rotating parts to stop.
-
Lower the tractor onto the ground.
-
Confirm the bypass control is fully in the normal drive position.
-
Start the engine, release the brake, and drive gently on level ground.
-
After a few minutes, test forward, reverse, and a mild incline.
If you have filled, drained, or otherwise opened a serviceable hydrostatic unit, recheck and top up fluid only according to the specific transaxle maker’s procedure. The generic Tuff Torq procedure includes a final oil-level check.files-us-prod.cms.commerce.dynamics
When bleeding will help
Air purging is worth trying when the issue began immediately after:
-
Pushing or towing the mower with the bypass/tow valve open.
-
Reinstalling a transmission, drive belt, or related linkage.
-
Changing fluid or carrying out transaxle work on a serviceable unit.
-
A long period of storage followed by a brief period of jerky or hesitant drive.
-
A machine that moves but responds slowly in both forward and reverse, without belt slip or a mechanical fault.
It is relatively low-cost and, done safely, is an appropriate early step before condemning the transaxle.
When it probably will not help
Bleeding air is unlikely to repair the problem if:
-
The tractor drives acceptably when cold but progressively loses motion as it heats up.
-
The engine is at normal speed but the tractor barely climbs a modest slope.
-
Forward and reverse are both consistently weak after proper belt, brake, pulley, linkage and bypass checks.
-
There is a burnt-oil smell, visible transaxle oil leak, damaged cooling fan, grinding noise, or metal contamination.
-
Repeated purging changes nothing.
Those symptoms point more toward belt/drive issues or internal hydrostatic wear. The D110’s T40 is a residential-grade unit; once its pump/motor clearances are worn and hot oil bypasses internally, purging trapped air cannot restore lost hydraulic efficiency. The D110 manual includes dedicated hydrostatic-operation and “moving machine by hand” procedures, so be certain the bypass function is returned properly before diagnosing an internal failure.
What causes air to get into the transmission
How to purge air from a hydrostatic transmission
To purge air from a hydrostatic transmission, safely lift the driven wheels off the ground, run the engine at low idle, cycle the bypass/tow valve and forward/reverse controls repeatedly, then lower the machine and test it under load. This is most useful after pushing the mower with its bypass open, servicing the hydrostat, or replacing the transaxle.pdf.lowes+1
Safety first
-
Work on flat, solid ground with the mower deck/PTO disengaged.
-
Stop the engine, remove the key, chock the non-driven wheels, and use correctly rated axle stands—never rely on a jack alone.
-
Raise both driven wheels clear of the ground.
-
Keep hands, clothing, tools, and bystanders away from tyres, belts, pulleys, and the underside while the engine runs.
-
Check the owner’s manual for your exact mower first: bypass-control location and fluid checks differ by model.
Purge procedure
-
Check basic condition first.
Ensure the bypass/freewheel control is not stuck, the drive belt is fitted and tensioned, the brake is released, and the transaxle cooling area is clear. If the unit has a serviceable reservoir, verify the correct oil level before purging. -
Raise the drive wheels.
With the engine off, lift the rear/driven axle so both wheels can rotate freely. Put the tractor on axle stands. -
Start at low idle.
Sit in the operator’s seat, keep the PTO off, start the engine, and leave it at low idle. -
Cycle forward and reverse.
Put the bypass control in its normal drive/engaged position. Slowly apply forward travel for about 5 seconds, return to neutral, then apply reverse for about 5 seconds. Let the wheels stop between direction changes. -
Cycle the bypass if required.
If the wheels do not respond, briefly move the bypass/tow control to its release position and then fully back to drive. Repeat several forward/reverse cycles. The general Tuff Torq procedure specifies cycling the bypass while alternating the direction control to clear trapped air and restore oil circulation.files-us-prod.cms.commerce.dynamics -
Repeat 10–15 times.
Continue slow forward/reverse cycles until wheel speed becomes smooth and consistent in both directions. Do not hold the pedal down continuously for long periods—short cycles are more effective and reduce heat buildup. -
Increase engine speed gradually.
Once the wheels move reliably, raise the engine to moderate operating speed. Repeat forward and reverse several more times, including a few firmer starts and complete returns to neutral. -
Lower and test.
Throttle down, switch off, remove the key, wait for all movement to stop, and lower the mower. Confirm the bypass control is fully returned to the normal drive position. Drive gently on level ground, then test forward, reverse, and a mild incline.
For a John Deere D110
For the D110, do not run or attempt to drive the mower with its bypass rod pulled out. Deere’s manual treats this control as a method for moving the machine by hand and warns against towing or operating the tractor with it disengaged, because doing so can damage the hydrostatic transmission.pdf.lowes
After purging:
-
If it regains smooth pulling power, the issue was likely temporary air/unpriming.
-
If it still has poor drive, inspect the traction belt, idlers, brake drag, pedal linkage, bypass linkage, and cooling fan/debris.
-
If it works cold but fades badly after 20–40 minutes, air is less likely; that pattern often indicates overheating or internal hydrostatic wear rather than something purging can correct.
How to fix an engine surging problem
On a John Deere D110, engine surging is usually a lean fuel-mixture problem: the governor repeatedly opens the throttle because the engine is not getting enough fuel, then closes it as revs recover. The most effective fix is normally to restore clean, unrestricted fuel flow and clean the carburettor’s tiny metering passages—not to adjust the governor first.smallenginespec+1
Diagnose it first
Run this quick test at full governed throttle:
-
While it is surging, move the choke very slightly toward choke—only enough to enrich the mixture.
-
If the engine immediately smooths out, it strongly suggests a lean condition: restricted carburettor jet/passage, restricted fuel supply, or an intake air leak.smallenginespec
-
If partial choke makes it worse or black smoke appears, look instead at an over-rich carburettor, a blocked air filter, choke not opening fully, or a float/needle issue.
Do not mow with the choke partly on as a permanent “fix.” It can foul the plug, increase fuel use, dilute oil over time, and mask the real fault.
Fix it in this order
1. Replace old fuel
-
Drain stale fuel from the tank and carburettor bowl where possible.
-
Refill with fresh petrol from a clean container.
-
If the mower will sit for more than a few weeks, use an appropriate petrol stabiliser or store it with the fuel system managed according to the engine manual.
-
Look for water or sediment in the old fuel; either can cause surging.
Briggs & Stratton’s carburetion checks begin with an adequate supply of fresh, clean fuel and confirm that fuel is flowing freely through the line and filter.scribd
2. Check the fuel supply path
With the engine off and cooled:
-
Inspect the fuel line for kinks, cracking, hardening, loose clamps, or soft sections that may collapse.
-
Replace the inline fuel filter if age/history is unknown or flow looks restricted.
-
Check that the tank outlet is not blocked.
-
Test the cap vent: when it begins surging, carefully loosen the fuel cap. If it smooths out shortly afterward, replace or repair the vented cap rather than drilling it.
-
Confirm fuel reaches the carburettor steadily.
A restricted fuel cap vent, blocked fuel line, or plugged fuel filter can starve the carburettor and cause a lean surge.scribd
3. Service the air filter
A dirty air filter more often causes rich running and loss of power, but it should still be inspected:
-
Replace a paper element that is heavily dusty, oil-soaked, wet, torn, or damaged.
-
Check that the air-cleaner housing seals correctly and that no debris can enter downstream.
-
Do not wash a paper filter in petrol or solvent.
Clean the carburettor
If fresh fuel and normal fuel flow do not stop the surge, the carburettor is the leading suspect.
The common restriction is not always obvious dirt in the bowl. It is often varnish or fine debris in the main jet, emulsion tube, idle/pilot passages, or tiny cross-holes. Those passages deliver the small amount of fuel needed at no load; restriction causes the governor to “hunt” for a stable engine speed.smallenginespec
Proper method
-
Turn off the fuel supply if fitted, or clamp the fuel line safely.
-
Remove the air cleaner and photograph the governor/choke linkages before removal.
-
Remove the carburettor carefully, avoiding damage to gaskets and the fuel-solenoid wire if fitted.
-
Remove the bowl and inspect for water, rust, gum, or debris.
-
Remove the main jet/emulsion tube if applicable.
-
Spray purpose-made carburettor cleaner through every accessible jet and passage until it exits another passage freely.
-
Use compressed air to clear passages.
-
If needed, use only a soft copper strand or nylon filament to clear a jet. Do not use a steel drill bit, welding-tip cleaner, or hard wire that can enlarge the calibrated orifice.
-
Reassemble with a new bowl gasket/O-ring and intake gasket if there is any doubt about sealing.
-
Refit, start, and allow it to warm fully before judging the result.
If the carburettor has severe corrosion, a warped body, damaged plastic components, or repeated contamination, replacing it with a correct-quality unit can be more reliable than repeatedly cleaning it.
Check for intake leaks
If partial choke improves the surge but a cleaned carburettor does not, look for air entering after the carburettor:
-
Carburettor-to-intake gasket.
-
Intake manifold/insulator block.
-
Cracked intake tube or spacer.
-
Loose mounting bolts.
-
Damaged O-ring or warped plastic intake component.
A controlled test can help: with the engine running, apply a very small amount of carburettor cleaner around the intake gasket and spacer—not near the exhaust or other ignition sources. A sudden rpm change suggests a leak. Because aerosol cleaner is flammable, this is best done outdoors with an extinguisher nearby; replacing the suspect gasket/insulator is safer than relying on sealant. Intake air leaks are a recognised cause of a lean surge.smallenginespec
Inspect governor only after fuel checks
A governor normally reacts to the fuel/air problem; it is often not the root cause.
With the engine off:
-
Check that the governor arm and throttle linkage move freely.
-
Check for a missing, stretched, incorrectly fitted, or damaged governor spring.
-
Remove grass/dirt that may make the linkage stick.
-
Compare linkage-hole positions with a photograph taken before disassembly or the correct Briggs engine diagram.
Do not turn the governor adjustment casually. Incorrect adjustment can cause overspeeding and engine damage. If the carburettor has been removed or the governor arm/clamp has been disturbed, use the proper Briggs single-cylinder OHV static-governor adjustment procedure for the engine’s exact model/type number.lawnmowerforum+1
Other causes if it persists
Sensible repair sequence
For an older D110 with an unknown history, the practical route is:
-
Fresh fuel.
-
New fuel filter and spark plug.
-
Inspect/replace air filter.
-
Check fuel-cap vent and fuel flow.
-
Clean the carburettor thoroughly—or fit a quality correct replacement.
-
Replace intake gaskets/insulator if choke test still indicates lean running.
-
Only then inspect governor setting, valves, ignition, and compression.
That sequence avoids the common mistake of adjusting the governor to compensate for a clogged carburettor.
How do I clean the carburetor jets
For a surging John Deere D110, clean the carburettor jets by removing the carburettor bowl, taking out the main jet and emulsion tube if your version allows it, then flushing every calibrated hole and passage with carburettor cleaner and compressed air. The key is to dissolve and blow out deposits without enlarging the jet holes. Briggs & Stratton specifically advises carb cleaner and compressed air for the main fuel jet, and warns against using wire or tools that can damage or obstruct the openings.briggsandstratton+1
What you need
-
Carburettor-cleaner aerosol with straw nozzle
-
Safety glasses and nitrile gloves
-
Clean rags and a shallow tray
-
Correct sockets/screwdrivers
-
Compressed air, ideally regulated to a sensible low pressure
-
New bowl gasket/O-ring and possibly an intake gasket
-
Fresh petrol and, ideally, a new inline fuel filter
Avoid using a drill bit, welding-tip cleaner, stiff steel wire, or a needle to “ream” a jet. Even a tiny enlargement changes fuel metering and can create a permanent rich-running fault. Briggs & Stratton says not to use wire or tools in the passages because they can damage or further obstruct them.briggsandstratton
Safety and preparation
-
Work outdoors or in a well-ventilated area, well away from flames, heaters, pilot lights, cigarettes, sparks, and hot exhaust parts. Carb cleaner and petrol vapour are highly flammable.
-
Let the engine cool fully.
-
Turn off the fuel valve if your D110 has one. If not, clamp the fuel hose gently with a proper fuel-line clamp or drain the tank to below the carburettor level.
-
Remove the ignition key and pull off the spark-plug lead.
-
Photograph the throttle spring, governor linkage, choke linkage, fuel-solenoid wire, and hose routing before dismantling. This prevents incorrect reassembly.
Remove the bowl
On the common Briggs single-cylinder carburettor layout, the main jet is often incorporated into, or accessible through, the bowl-retaining bolt/nut.
-
Remove the air-filter cover and air-filter element.
-
Remove the air-cleaner housing enough to access the carburettor.
-
Place a tray and rags beneath the carburettor.
-
Remove the bowl-retaining bolt/nut from the bottom of the carburettor.
-
Catch the petrol and remove the float bowl carefully.
-
Inspect the bowl: water droplets, rust flakes, white residue, gum, or dark varnish confirm contaminated fuel.
-
Keep the bowl gasket/O-ring safe. Replace it if flattened, cracked, swollen, torn, or stiff.
If the bowl bolt has a wire connector, it may be a fuel-shutoff solenoid rather than a simple bolt. Disconnect its plug before removal and do not damage the needle/plunger.
Clean the main jet
The exact carburettor differs by engine serial/type, but this method applies to the common styles.
If the bowl nut is the main jet
-
Look through the centre hole and the small cross-drilled side holes in the bowl nut.
-
Spray carb cleaner through every hole until cleaner exits freely from another opening.
-
Blow through each passage with compressed air.
-
Hold it toward a bright light: every metering hole should appear clear and round.
If there is a removable brass jet
-
Use a screwdriver that fits the slot exactly.
-
Remove the main jet carefully.
-
Spray through the centre bore and all side holes.
-
Blow dry with air.
-
Inspect the slot and threads; do not force it if it is seized.
Briggs & Stratton describes removing the main jet and, where fitted, the emulsion tube, using a proper carburettor screwdriver to avoid damaging the jet, tube, and threads.briggsandstratton
Clean the emulsion tube
The emulsion tube is the long tube above or below the main jet, with a central bore and several tiny side ports. It is a frequent reason a mower surges at no load.
-
Remove it only if the carburettor design permits and it will come out without forcing.
-
Spray cleaner through the central passage.
-
Spray each tiny cross-hole individually.
-
Follow with compressed air.
-
Confirm that air/cleaner exits through every side port.
-
Refit it in the same orientation, seated fully but without overtightening.
A partly blocked emulsion tube can supply enough fuel for the engine to start but not enough for stable governed running. The governor then repeatedly opens and closes the throttle, producing the familiar rise-and-fall surge.
Clean the rest of the fuel circuit
A jet can be clean while another passage remains blocked. Flush:
-
The fuel inlet passage.
-
Float needle and seat area.
-
Main-well passage.
-
Idle/transition passages, if accessible.
-
Bowl vent and carburettor throat passages.
-
Any fuel-solenoid passage in the bowl nut.
Do not soak rubber seals, O-rings, plastic components, or non-metal parts in harsh cleaner unless the product specifically says it is safe for them. Briggs advises removing non-metal parts before soaking and limiting the soak period for removable components.briggsandstratton
Reassemble correctly
-
Refit the emulsion tube and main jet or cleaned bowl nut.
-
Confirm the float moves freely and the needle is properly seated.
-
Fit a good bowl gasket/O-ring.
-
Reinstall the bowl in its original orientation.
-
Tighten the bowl fastener securely but do not overtighten and distort the gasket or strip soft threads.
-
Refit the carburettor, intake gasket, linkages, fuel line, air-cleaner housing, and filter.
-
Reconnect the spark plug lead.
-
Turn fuel on and check carefully for leaks before starting.
Always run the engine with its air filter installed after the cleaning check. Running without it risks drawing debris into the engine and can change the mixture enough to confuse diagnosis.
Test the repair
-
Start the engine and let it warm for several minutes.
-
Run it at normal mowing speed with the choke fully off.
-
Listen for smooth, steady governed rpm.
-
Engage the mower deck and test under actual mowing load.
If it still surges but runs smoother when you apply a little choke, the likely next steps are:
-
Recheck the emulsion-tube ports and main jet.
-
Replace the fuel filter and verify unrestricted flow from tank to carburettor.
-
Test the fuel-cap vent by loosening the cap briefly when the issue occurs.
-
Inspect/replace the carburettor-to-intake gasket and intake insulator for an air leak.
-
Inspect governor-linkage springs and movement, without altering the governor adjustment.
What causes the compression release failure
On the Briggs & Stratton single-cylinder Intek engine commonly fitted to a John Deere D110, the automatic compression release (ACR) usually fails because its small mechanical release mechanism on the camshaft wears, sticks, breaks, or no longer lifts a valve slightly during cranking. It is a mechanical component inside the engine—not an electrical starter component—and a confirmed failure normally means replacing the camshaft.sesdirect+1
What the compression release does
A small mechanism on the camshaft holds a valve open by a tiny amount at cranking speed. That reduces cylinder pressure enough for the battery and starter motor to spin the engine. Once the engine starts and reaches running speed, centrifugal action disengages the mechanism so the valve closes fully and the engine develops normal compression.
When it fails, the engine may behave as though the battery is flat:
-
The starter engages, but stops abruptly at the compression stroke.
-
It may crank a little, then click or strain.
-
It may start if the flywheel is moved slightly by hand first.
-
It often cranks better with the spark plug removed, because there is then no compression resistance.youtube+1
What causes failure
The repair-manual guidance for mechanical compression-release systems includes inspecting the camshaft and verifying that the release yoke moves to the open position and returns to closed position when released.manualslib
Valve clearance matters
Before splitting the engine to replace a camshaft, check valve lash correctly on a cold engine. Incorrect clearance is a much cheaper and more common look-alike fault.
For the likely 19 hp Intek single-cylinder engine family, commonly quoted guidance is approximately:
-
Intake: 0.003–0.005 in. (0.08–0.13 mm)
-
Exhaust: 0.005–0.007 in. (0.13–0.18 mm)
However, use the engine’s exact Briggs model/type/code number—not just “D110”—to confirm the specification. The engine identifier is usually stamped on the blower housing or valve-cover area. The piston must be positioned about 1/4 in. (6 mm) past top dead centre on the compression stroke when measuring, so the ACR bump is not affecting the clearance reading.smallenginespec+1
Too much clearance can mean the ACR bump fails to move the valve sufficiently, causing hard cranking even when the ACR itself is intact. Too little clearance can stop a valve sealing properly and create different starting, compression, backfire, or valve-damage problems.smallenginespec
How to tell ACR failure apart
-
Eliminate the battery/starter system first.
Load-test the battery; clean both battery terminals, chassis ground, and engine ground; inspect starter cable connections; and verify that the starter is healthy. -
Remove the spark plug.
If the engine suddenly cranks rapidly with the plug out but labours/stalls with it installed, compression resistance is implicated. This is not conclusive by itself, but it narrows the problem. -
Set and check valve clearance.
Correct it if out of specification, then retest. This can resolve the issue without internal engine work. -
Observe valve movement.
With the valve cover off and the spark plug removed, turn the engine slowly by hand. Near the compression event, the ACR should create a slight, brief valve movement/lift. No detectable release action after correct valve adjustment makes a failed camshaft mechanism more likely.sesdirect -
Inspect oil for metal.
Metallic fragments or unusual ferrous debris can support a camshaft/ACR failure, though clean oil does not rule it out.sesdirect
Repair implications
If the ACR mechanism is actually broken, the practical repair is generally:
-
Remove the engine or access its sump.
-
Remove the sump/oil pan.
-
Replace the camshaft, and inspect tappets, pushrods, timing gear, and governor components.
-
Fit the correct new sump gasket and oil seal as required.
-
Reassemble with correct timing marks, refill with fresh oil, set valve clearance, and confirm normal cranking.
This is a moderate-to-major small-engine job, not an external adjustment. It becomes economical mainly when the engine is otherwise sound—good compression once running, no serious bore wear, no heavy smoke, and no major crankcase damage. If the D110 also has a worn deck, bad transaxle, and deteriorated engine, replacement or a donor machine can be the more rational route.
How to check valve clearance on a Briggs Intek
To check valve clearance on a Briggs Intek single-cylinder OHV engine, remove the valve cover, position the piston ¼ in. (6 mm) past top dead centre on the compression stroke, then measure the gap between each rocker arm and valve stem with feeler gauges. Correct piston position matters because measuring at true TDC can put the automatic compression-release bump into the reading and give a false result.briggsandstratton+1
For the 19 hp single-cylinder Intek commonly used in a John Deere D110, the usual cold settings are:
Use these as a working guide only. Confirm the exact specification from the Briggs & Stratton model/type/code stamped on your engine, because variants can differ. Briggs provides a manual lookup using that identification number.briggsandstratton+1
Tools and preparation
You will need:
-
Feeler-gauge set covering 0.003–0.007 in. / 0.08–0.18 mm
-
Socket/spanner for the rocker lock nuts
-
Small screwdriver or Allen key for the adjuster, depending on engine version
-
Socket/ratchet to turn the crankshaft, or a safe way to rotate the engine by hand
-
Valve-cover gasket if the existing one is hard, torn, flattened, or leaking
-
Clean rag
Work with the engine cold. Park on level ground, apply the brake, turn the key off, remove it, disconnect the spark-plug lead, and disengage the PTO.
Identify the valves
On most single-cylinder OHV Briggs engines:
-
The intake valve is on the carburettor/intake side of the engine.
-
The exhaust valve is on the muffler/exhaust side.
If you are uncertain, trace the intake manifold from the carburettor and the exhaust port toward the silencer rather than guessing.
Step-by-step procedure
1. Remove the spark plug
Remove the plug lead, then remove the spark plug. This eliminates compression, so the engine turns easily and safely by hand.
2. Remove the valve cover
Remove the valve-cover screws and lift off the cover. Keep dirt away from the rocker arms, valve springs, and gasket surface.
You should now see two rocker arms acting on the two valve stems.
3. Find compression TDC
Turn the engine slowly in its normal direction of rotation. Watch both rockers:
-
The intake valve opens, then closes.
-
After the intake valve has fully closed, continue rotating until the piston reaches top dead centre—this is top dead centre on the compression stroke.
-
At that point, both valves should be closed and both rocker arms should have clearance.
An easy confirmation is to place a finger lightly over the empty spark-plug hole while turning the engine. You should feel air pressure building as it approaches compression TDC. Do not put a tool or finger into the plug hole.
4. Move the piston ¼ in. past TDC
From compression TDC, turn the crankshaft a little farther in the normal direction, until the piston is approximately ¼ in. / 6 mm down the bore.
Briggs & Stratton specifically calls for turning the engine to TDC with both valves closed, then moving the piston ¼ in. down before checking valve clearance. This positions the valvetrain off the automatic compression-release feature and gives the correct lash reading.briggsandstratton+1
A practical way to judge ¼ in. down:
-
Insert a clean plastic drinking straw, cable tie, or wooden dowel gently into the spark-plug hole.
-
Mark or hold it at TDC.
-
Rotate the engine past TDC until it drops about 6 mm.
-
Remove the straw/dowel before doing any other work or starting the engine.
Do not use metal wire, a screwdriver, or anything that can scratch the piston or break inside the cylinder.
5. Measure the intake clearance
Slide the appropriate feeler gauge between the rocker-arm tip and the top of the valve stem.
For a likely D110 19 hp Intek intake valve:
-
0.003 in. should fit.
-
0.005 in. should fit with a light, even drag.
-
A gauge larger than the maximum should not fit easily.
The correct feel is a slight “drag”—not loose enough to fall through and not so tight that the gauge bends or must be forced.
6. Measure the exhaust clearance
Repeat for the exhaust valve:
-
0.005 in. should fit.
-
0.007 in. should fit with light drag.
-
Anything appreciably above the maximum should not slide through normally.
Record what you find before changing anything. That information can help diagnose hard cranking, a failed compression release, burnt valves, or an incorrect previous adjustment.
If adjustment is needed
On the usual adjustable-rocker arrangement:
-
Keep the feeler gauge of the target thickness between rocker and valve stem.
-
Loosen the rocker-arm lock nut.
-
Turn the adjuster screw until the gauge has a light, consistent drag.
-
Hold the adjuster still and tighten the lock nut.
-
Recheck after tightening—lock-nut tightening often changes the setting slightly.
-
Turn the engine through at least two complete revolutions by hand.
-
Return to compression TDC, then ¼ in. past it, and recheck both valves.
Briggs describes checking clearance at the rocker arm and adjusting it with the rocker screw, then tightening the rocker nut.briggsandstratton
Do not set valve clearance at true top dead centre, and do not tighten it to zero lash. Both can cause hard starting, poor running, burnt valves, and misleading compression-release symptoms.
Reassemble and test
-
Clean the valve-cover sealing surface.
-
Refit the gasket; replace it if damaged.
-
Install the valve cover evenly without overtightening the screws.
-
Reinstall the spark plug and plug lead.
-
Start the engine and listen for normal cranking and stable operation.
-
Check for oil seepage around the valve cover after it runs.
What your measurement means
John Deere D110 – DIY or Dealer? Repair Decision Guide
Many D110 repairs are realistic for a careful DIY owner because this model is mechanically simple and parts are widely available. The dividing line is usually whether the problem remains in maintenance and wear parts, or whether it extends into internal engine, transmission, or layered electrical diagnosis.
Good DIY jobs
-
Battery replacement and cable cleaning.
-
Fuel filter, air filter, oil/filter, and spark plug service.
-
Blade replacement and sharpening.
-
Deck cleanout and deck-level adjustment.
-
Mower belt replacement GX20072.
-
Basic switch, fuse, and visible wiring checks.
John Deere D110 – Advanced DIY or dealer jobs
-
Persistent no-start after battery, fuel, spark, and interlock basics are confirmed.
-
Internal engine repair, including compression-release or camshaft-related problems.
-
Major transmission or transaxle repair.
-
Repeated electrical faults involving multiple switches or hidden wiring damage.
John Deere D110 – Skill level guide
-
Beginner: filters, battery, blades, cleanout, tire pressure, simple inspections.
-
Intermediate: deck leveling, belt replacement, switch replacement, tune-up work.
-
Advanced: carburetor diagnosis, driveline diagnosis, major electrical tracing, internal engine work.
5. John Deere D110 – Parts Needed, OEM vs Aftermarket, and What Information You Need
The most important step before ordering D110 parts is to identify the tractor correctly. Deere’s D100 Series operator manual says the dealer needs the machine Product Identification Number and engine serial number, and the D110 maintenance sheet also notes that some part applications vary by PIN range.
Information to gather before ordering
-
Full model: John Deere D110.
-
Product Identification Number from the left side of the frame.
-
Engine serial number.
-
Deck size: 42-inch deck.
-
Existing part number if visible on the removed part.
Common John Deere D110 service and repair parts
John Deere D110 – OEM vs aftermarket
OEM parts are usually the safest choice for belts, switches, ignition parts, and any components where fit or safety logic matters. Aftermarket parts can work well for blades, batteries, filters, and some tune-up items, but only when they cross-reference exactly to the D110 OEM number and match your tractor’s PIN and engine configuration.
6. John Deere D110 – Where to Find Parts Diagrams and Service Manuals
The best place to start is Deere’s own operator and parts references. Deere says digital operator manuals can be viewed through the Technical Publications site using the model number, and the D100 Series operator manual itself provides the identification and servicing framework owners need before ordering parts or beginning repairs.
Useful sources:
-
D100 Series operator manual: http://pdf.lowes.com/operatingguides/759936768866_oper.pdf
-
D110 parts and maintenance sheet: http://pdf.lowes.com/useandcareguides/889818000620_use.pdf
-
Deere Technical Publications: https://techpubs.deere.com/
-
Deere parts ordering/info: http://JDParts.deere.com
-
Green Farm Parts D110 maintenance page: https://greenfarmparts.com/john-deere-d110-lawn-tractor-maintenance-guide/
7. John Deere D110 – How to Locate the Model Number, Serial Number, and Engine Number
Deere’s D100 Series operator manual states that the machine Product Identification Number is located on the left side of the frame and that the engine serial number is located on the engine itself. Recording both numbers is important because some maintenance and repair parts vary by engine configuration or PIN range.
Step-by-step guide
-
Park safely on level ground and remove the key.
-
Stand at the left side of the tractor and locate the PIN label on the frame.
-
Record the full machine number exactly as shown.
-
Locate the engine serial number on the engine and record it separately.
-
Use both numbers whenever ordering engine, fuel, electrical, or drive-system parts.
8. John Deere D110 – Buying Parts Online and In Physical Stores
For the D110, the smartest buying strategy is to confirm the OEM part number first and then compare price and stock. Because D110 references show some differences by PIN range and engine fitment, serial-number confirmation is especially useful before buying filters or tune-up parts.
Useful online and store-related URLs
-
JDParts: http://JDParts.deere.com
-
Deere Technical Publications: https://techpubs.deere.com/
-
Green Farm Parts D110 page: https://greenfarmparts.com/john-deere-d110-lawn-tractor-maintenance-guide/
Buying advice
-
Online: match the exact OEM number and verify your PIN range.
-
Dealer counter: best for serial-number-sensitive parts and hard-to-diagnose electrical items.
-
Physical retail: useful for common parts such as oil, filters, blades, and belts when packaging clearly confirms D110 fitment.
9. John Deere D110 – Step-by-Step Fitting Guide for Common Parts
For most D110 owners, the most useful repairs to learn first are filters, spark plug service, blades, and belts. These jobs solve many real-world complaints and align closely with Deere’s published maintenance schedule.
John Deere D110 – Fuel filter and air filter service
-
Park safely and allow machine to cool.
-
Replace fuel filter GY20709 or verified equivalent such as AM116304 if confirmed for your engine/PIN.
-
Replace air filter and precleaner using the correct engine-specific elements.
-
Inspect fuel lines and air-box sealing before restarting.
John Deere D110 – Spark plug replacement
-
Remove spark plug wire and allow engine to cool.
-
Remove old spark plug and inspect color and deposits.
-
Gap the new plug correctly; one D110 tune-up example references about 0.030 inch.
-
Install and reconnect wire securely.
John Deere D110- Blade replacement
-
Park safely, remove key, and disconnect the negative battery cable or spark plug wire.
-
Block blade rotation and remove blade hardware.
-
Install new blade(s) in correct orientation and replace damaged hardware as needed.
-
Tighten correctly and test for smooth operation.
John Deere D110 – Deck belt replacement
-
Lower or remove deck as needed.
-
Photograph belt routing before removal.
-
Remove belt guards and release idler tension.
-
Remove old GX20072 belt and inspect pulleys.
-
Install new belt with correct routing and test tracking before mowing.
10. John Deere D110 – Maintenance to Prevent Problems Reoccurring
Preventive maintenance makes a major difference on a D110 because the tractor is simple enough that small neglected issues often become repeated failures. Deere’s maintenance and cleanout guidance show that many common D110 breakdowns are tied to ignored filters, belts, lubrication points, and debris accumulation rather than rare component defects.
Focus areas
-
Starting reliability: keep battery charged, use fresh fuel, replace filters and spark plug on schedule.
-
Cut quality: sharpen blades, level the deck correctly, and inspect the deck belt often.
-
Fire prevention: clean muffler, engine screens, top of deck, and transmission area frequently.
-
Drive performance: monitor tire pressure, traction belt condition, and brake drag.
-
Electrical reliability: inspect battery terminals, fuse/relay zone, and switch connections regularly.
11. John Deere D110 – Maintenance Schedule and Year-Round Checklist
The Deere D110 parts and maintenance sheet gives a clear owner-service schedule. After 8 hours, Deere lists lubricating mower spindles and pivot points, checking mower deck spindle brakes on manual PTO machines, lubricating front axle pivot and spindles, and lubricating front axle wheel bushings.
Every 25 hours, Deere repeats the mower spindle/pivot and front axle lubrication points. Yearly or every 50 hours, Deere lists engine oil and filter change, air-filter service, fuel-filter replacement, blade sharpening or replacement, and mower-drive-belt check or replacement. At 200 hours, Deere specifies valve-clearance check/adjustment by a dealer.
Daily or before each use
-
Check safety devices and brakes.
-
Check fuel level and engine oil level.
-
Check tire pressure and visible hardware.
-
Remove debris from engine compartment, muffler area, top of mower deck, and around transmission.
-
Inspect for leaks and abnormal wear.
After 8 hours
-
Lubricate mower spindles and pivot points.
-
Check mower deck spindle brakes on manual PTO setups.
-
Lubricate front axle pivot and axle spindles.
-
Lubricate front axle wheel bushings.
Every 25 hours
-
Lubricate mower spindles and pivot points.
-
Lubricate front axle pivot and axle spindles.
-
Lubricate front axle wheel bushings.
Every 50 hours or yearly
-
Change engine oil and replace oil filter.
-
Clean or replace air filter and precleaner.
-
Replace fuel filter.
-
Sharpen or replace blades.
-
Check or replace mower drive belt.
Every 200 hours
-
Have valve clearance checked/adjusted by a John Deere dealer.
John Deere D110 – Seasonal checklist
Spring
-
Charge battery, use fresh fuel, change oil and filter, inspect air and fuel filters, inspect blades, and check deck level.
Mid-season
-
Recheck blades, belts, tire pressures, driveline cleanout, and hot/debris-prone areas.
Fall / storage
-
Clean the entire tractor, manage fuel for storage, maintain battery charge, and store only after machine cooldown.
12. Repair, Upgrade, or Replace the D110?
In most cases, a D110 is worth repairing when the frame, deck shell, engine, and transmission are still fundamentally sound. Belts, blades, filters, tune-up parts, switches, and battery service are normal costs on an older homeowner tractor and are not by themselves signs that the machine should be replaced.
Repair if
-
Problems are limited to routine service parts, belt replacement, deck setup, battery service, or minor electrical faults.
-
The frame and deck shell are still structurally good.
-
The engine and transmission perform acceptably after routine service.
Upgrade if
-
The machine works well but would benefit from fresh blades, mulch equipment, bagging setup, or refreshed tires/seat for continued use.
Replace if
-
Major engine, transmission, and deck/frame problems overlap.
-
Internal engine damage such as the cam/compression-release failure seen in one D110 repair example combines with poor overall machine condition.
-
Reliability has fallen enough that downtime outweighs repair cost.
13. John Deere D110 – Troubleshooting FAQ
1. Why will my John Deere D110 not start at all?
Start by deciding whether it will not crank or whether it cranks but will not fire. Most D110 no-start problems begin with the battery, fuse, park-brake/PTO start conditions, and safety-switch or wiring basics rather than major engine damage.
2. Why does my D110 just click when I turn the key?
A click usually means the solenoid is trying to engage but the battery is weak under load or the cables are corroded. Clean both battery terminals, inspect the ground cable, and test battery condition before replacing more expensive parts.
3. Could a bad key switch stop the D110 from starting?
Yes. If the fuse is good and power is not reaching the solenoid correctly through the key circuit, the ignition switch becomes a suspect. Green Farm Parts lists GY20074 as the D110 ignition switch, which is a common electrical service item on these tractors.
4. Could the seat switch keep it from starting?
Yes. A Reddit troubleshooting discussion on a D110 specifically mentions that safety switches can prevent power from reaching the solenoid through the key switch. A loose seat-switch plug or failing switch can cause no-crank or intermittent starting behavior.
5. Why does my D110 crank but not start?
That usually means the issue is in fuel, spark, or air rather than the starter system. Start with fresh fuel, fuel filter condition, spark plug connection and gap, and air filter condition before moving deeper into carburetor diagnosis.
6. What fuel filter should I use on a D110?
Deere’s maintenance sheet lists GY20709, while Green Farm Parts lists AM116304 for the D110. Because filters can vary by PIN range or engine fitment, confirm using your serial number and engine details before ordering.
7. What spark plug fits the D110?
Green Farm Parts lists M78543 and MIU11020, while owner maintenance examples also cite common Briggs plug equivalents depending on engine configuration. The correct plug should always be confirmed by the engine model and serial number, not just by tractor model alone.
8. What spark plug gap should I check for?
A D110 tune-up video specifically references setting the plug gap at about 0.030 inch. Even new plugs should be checked before installation because shipping and handling can change the gap slightly.
9. Why does my D110 start and then stall?
This usually points to fuel starvation, stale fuel, a partially clogged carburetor, or an interlock issue rather than a dead starter system. Begin with fuel freshness, fuel filter condition, cap venting, and whether the machine reacts to seat or brake movement.
10. Could stale fuel cause rough running or hard starting?
Yes. Deere warns repeatedly about fuel quality and safe fuel handling because stale or contaminated fuel can cause poor starting and running issues. On seasonal lawn tractors, bad fuel is one of the most common causes of repeated spring no-start complaints.
11. Why does my D110 leave strips of uncut grass?
That usually means dull blades, poor deck level, a slipping deck belt, or mowing too fast for the grass conditions. Start with blade sharpness and deck-level measurements before blaming the engine.
12. Why are the grass tips turning brown after mowing?
Deere explains that incorrect front-to-rear deck pitch can cause double cutting and brown grass tips. Set the front of the deck 1/8 to 1/4 inch lower than the rear and make sure the blades are sharp.
13. What is the correct side-to-side deck level on a D110?
Deere says the outside blade-tip difference should not exceed 1/8 inch, or 3 mm. If the mower is cutting lower on one side, check tire pressure first and then measure the deck.
14. What is the correct front-to-rear deck pitch?
The front blade tip should be 1/8 to 1/4 inch, or 3 to 6 mm, lower than the rear according to Deere’s mower-leveling procedure. This improves cut quality and reduces brown-tipped grass.
15. Why does my D110 scalp the lawn?
Scalping usually comes from mowing too low, uneven ground, or gauge wheels adjusted incorrectly. Deere says the anti-scalp wheels should generally be about 1/8 to 1/2 inch off the ground and lower when mowing at 3 inches or higher.
16. Why does the deck belt keep coming off?
A stretched or worn belt, bent guide, seized idler, or incorrect routing are the usual causes. If your machine uses the common GX20072 belt, make sure the replacement is the exact correct size rather than just an approximate aftermarket fit.
17. How often should I check or replace the deck belt?
Deere’s D110 maintenance sheet says to check or replace the mower drive belt yearly or every 50 hours. Dust, heavy mowing, and debris around the top of the deck can shorten belt life.
18. Why does the tractor vibrate badly when mowing?
Severe vibration usually means a bent blade, loose blade hardware, spindle wear, or a pulley/belt problem. Stop mowing and inspect it immediately, because continued use can damage the deck further.
19. Can I straighten a bent blade?
No. Deere’s safety and maintenance guidance says damaged blades should be replaced, not straightened or welded. A blade that looks nearly straight can still be weakened or out of balance.
20. What areas should I clean most often to prevent overheating or fire?
Deere specifically points to the muffler and exhaust system, engine and engine screens, top of mower deck and under shields, and on or near the transmission. Those are the highest-value cleanout zones on a D110.
21. Why is there debris on top of the deck when the underside is already clean?
Because dry clippings collect under the deck shields and around spindle and belt areas, not just underneath. Deere specifically identifies the top of the mower deck and under-shield area as a fire-prevention cleanout zone.
22. Why does my D110 feel weak going uphill?
Weak uphill performance often comes from tire pressure, traction loss, or a slipping traction belt rather than a failed transmission. Since Green Farm Parts lists GX20006 as the traction drive belt, that is one of the first parts to inspect.
23. Could the transmission be bad if the tractor barely moves?
Possibly, but check simpler causes first: traction belt condition, brake drag, tire pressure, and driveline debris. Residential tractors often feel like they have a bad transmission when the real problem is a slipping belt or dragging brake.
24. Can low tire pressure affect cut quality and traction?
Yes. Deere’s daily checks include tire pressure because tire height affects both deck level and how well the tractor drives, especially on slopes or uneven ground.
25. Why does my battery keep dying?
The usual causes are battery age, poor charging, corroded terminals, or long periods of storage without maintenance charging. Start with a fully charged battery and clean cable ends, then see whether the problem returns.
26. Which parts should I keep on hand for a D110?
A practical spare-parts set includes a fuel filter, air filter, spark plug, deck belt, and spare blade set. Deere and Green Farm Parts both identify those items as routine service or commonly replaced parts for the D110.
27. How often should I change the oil and filter?
Deere’s maintenance sheet says yearly or every 50 hours, whichever comes first. In dusty conditions, the oil and filter may need more frequent service.
28. How often should I replace the air filter?
The Deere sheet says to clean or replace the air-filter precleaner and element yearly or every 50 hours. Dusty mowing conditions can require much more frequent attention.
29. How often should I replace the fuel filter?
Deere says yearly or every 50 hours on the D110 maintenance sheet. If fuel quality is questionable or the tractor sat for a long time, earlier replacement is often wise.
30. How often should I sharpen or replace blades?
Deere lists sharpening or replacing blades yearly or every 50 hours. If you hit rocks, roots, or hidden debris, inspect them immediately rather than waiting for the interval.
31. Is the D110 worth repairing?
Usually yes, if the machine mainly needs filters, belts, blades, switches, or tune-up parts. These are normal ownership items and the D110 still has strong parts support.
32. When would I replace the tractor instead of repairing it?
Replacement starts to make more sense when major engine, transmission, and deck/frame issues overlap. A single internal engine fault like the broken cam/compression-release case may still be repairable, but only if the rest of the tractor is in decent shape.
33. Where do I find the model and serial number on a D110?
Deere says the machine Product Identification Number is on the left side of the frame and the engine serial number is on the engine. Record both before ordering parts.
34. Can I do a full D110 tune-up myself?
Yes, in many cases. A typical D110 tune-up includes oil and filter, fuel filter, air filter, spark plug, lubrication, and inspection, and owner examples show these are realistic DIY tasks with basic tools.
35. When should I stop troubleshooting and take it to a dealer?
If you have already checked battery, fuse, fuel, spark, deck, and visible safety-switch basics but the tractor still has overlapping electrical, driveline, or internal engine issues, dealer diagnosis may save time and money. That is especially true if you suspect valve, cam, or compression-release problems.