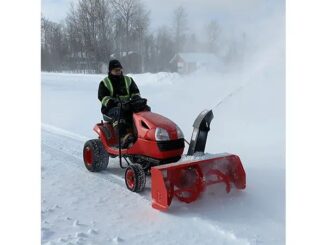
John Deere X300 Snow Blower Guide
The John Deere X300 can operate a compatible 44-inch front-mounted, two-stage snow blower, making it useful for clearing driveways and other residential areas. The important buying decision is not simply choosing a John Deere attachment: the blower, mounting hardware, belt drive, lift components, and tractor must match.deere
The original X300 lawn tractor and the wider X300 Select Series are not interchangeable model descriptions. Later-series attachment listings may describe equipment intended for different tractors, so identify both machines before buying a new or used snow blower.
This guide explains compatibility, installation checks, traction, ballast, clearing technique, maintenance, and troubleshooting, with particular attention to the original X300.
John Deere X300 Snow Blower Compatibility
The 44-inch snow blower is a documented attachment option for the original X300. Its approximately 112-centimeter clearing width makes it suitable for residential snow removal where a tractor can maneuver safely. Do not assume that a 47-inch blower fits merely because it appears in the same attachment manual or looks similar.
Original X300 versus X300 Select Series
“X300” can mean a specific tractor model or serve as shorthand for a broader equipment family. That distinction matters when comparing attachment advertisements.
| Identification detail | What to verify |
|---|---|
| Tractor model | Confirm that the identification plate says X300 rather than another X300-series designation |
| Tractor product identification number | Use it to establish the applicable mounting and lift configuration |
| Snow-blower identification | Record its model and identification information rather than relying on housing color or width |
| Attachment generation | Confirm that its mounting and drive arrangement suit the tractor |
| Included hardware | Check the hitch, lift linkage, drive components, controls, guards, and fasteners |
| Installation instructions | Obtain instructions covering the actual tractor-and-blower combination |
John Deere has offered compatibility hardware for moving certain older attachments onto later X300/X500 tractors. That does not establish reverse compatibility or mean every attachment fits every tractor.
What to check before buying a used blower
A used snow blower advertised as “fits X300” may be missing expensive tractor-side components.
Ask for photographs of the identification plate, mounting frame, belt routing, pulleys, lift linkage, and chute controls. Compare the package with the installation instructions before agreeing on a price.
Inspect for:
-
Bent auger flights or a distorted housing.
-
Cracks around mounting points.
-
Excessive movement in bearings and shafts.
-
Damaged gearbox housings or leaking seals.
-
Worn skid shoes and scraper edge.
-
Seized chute controls.
-
Missing shields, retaining pins, or belt guides.
-
Incorrect bolts substituted for shear bolts.
A low purchase price can become poor value if the attachment needs a different hitch, multiple drive components, and structural repairs.
How the Front-Mounted Blower Works
The relevant 44-inch attachment uses a two-stage design. An auger gathers snow and moves it toward an impeller, which accelerates it through the discharge chute.
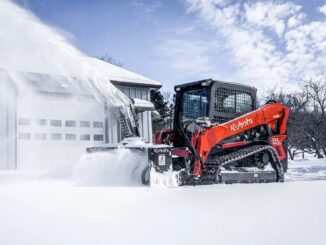
Unlike a walk-behind snow blower, it depends on the tractor for propulsion and power. Unlike a rear-mounted compact-tractor blower, it does not use a rear three-point hitch and rear PTO driveline.
Drive and lift arrangements
The X300 attachment uses a belt-driven arrangement associated with the tractor’s PTO engagement system. Correct belt specification, routing, pulley alignment, and guarding are essential; a similar-looking belt is not necessarily suitable.
The original X300 uses a foot-operated implement lift. Depending on the tractor’s configuration, additional lift-assist hardware may be needed. Some later X300-series tractors have different lift arrangements, but those features should not be attributed to the original X300.
Check the attachment instructions for the required lift spring, linkage, and adjustments. Do not fabricate mounting brackets or substitute improvised lift components.
Chute and deflector controls
Chute rotation changes discharge direction; the deflector changes the discharge angle. Check that the installed controls move freely and remain secure through the permitted range.
Do not assume a used blower includes electric chute rotation, remote deflector adjustment, or every control needed for your tractor.
Blower, blade, or walk-behind machine?
A tractor-mounted blower is useful when snow must be thrown beyond the clearing area rather than pushed into nearby piles. It also allows seated operation over larger residential areas.
An approved front blade may be simpler for lighter accumulations where there is enough space to push snow. A separate walk-behind blower may be more practical for narrow paths, confined spaces, or properties where converting the tractor and storing the attachment is inconvenient.
Neither attachment makes the X300 suitable for forcing through frozen banks or working where traction and slope conditions prevent safe control.
Preparing the John Deere X300 for Installation
The original X300 is a gasoline-powered lawn tractor with an air-cooled engine and hydrostatic transmission. Its winter preparation should focus on those systems, not diesel treatments, radiator coolant, or compact-tractor hydraulic connections.
Check the tractor first
Inspect:
-
Battery terminals, cables, and hold-down hardware.
-
Engine oil level and condition.
-
Fuel freshness and fuel-system leaks.
-
Cooling screens and engine air-intake areas.
-
Tires, steering, brakes, and wheel fasteners.
-
PTO operation and safety interlocks.
-
Lift-pedal operation and linkage condition.
Use the engine-oil recommendation for the installed engine and expected temperatures. Do not change transmission fluid or add a low-temperature product without an approved procedure.
Install in the correct sequence
-
Park on firm, level ground, disengage the PTO, apply the parking brake, stop the engine, and remove the key.
-
Remove the mower deck and other components specified in the installation instructions.
-
Install the correct tractor-side mounting and lift hardware.
-
Attach the blower and secure every prescribed pin and retainer.
-
Route the specified belt through the correct pulleys and guides.
-
Install controls, guards, and shields.
-
Fit the prescribed ballast and approved traction equipment.
-
Check lift travel, clearances, and control movement with the engine stopped.
-
Perform the instructed operating checks in a clear area.
Use stable blocking or approved supports where necessary. Never work beneath an attachment held up only by the lift mechanism.
Set the skid shoes and scraper
Skid shoes support the housing and establish scraper clearance. Set both sides consistently using the attachment manual’s procedure.
For gravel, provide clearance that reduces the chance of collecting loose stones. For asphalt or concrete, account for uneven joints, frost heave, and surface condition rather than automatically setting the scraper as low as possible.
Do not invent an intake-height specification from the clearing width. Check the particular attachment’s dimensions and instructions when assessing drift clearance or storage space.
John Deere X300 Traction and Ballast
Traction and ballast solve related but different problems. Chains improve tire grip; specified ballast helps maintain the machine’s intended balance and rear-wheel loading with the front attachment installed.
The original X300 is not a four-wheel-drive compact tractor. Rear-wheel grip and available front steering traction both matter.
Choosing tire chains
Use chains approved for the installed tire size and tractor configuration. Check clearance around the fenders, chassis, and any nearby components throughout wheel rotation.
Chains can mark asphalt, concrete, pavers, and decorative surfaces. Alternative traction products should only be used when their fit, clearance, and suitability are established.
After installation, inspect chain security following the manufacturer’s instructions. Stop immediately if a chain strikes the tractor.
Choosing ballast
Follow the snow-blower manual’s ballast arrangement for the specific tractor. Do not substitute a universal weight quantity or assume a weight bracket can carry any load that physically fits.
Use approved mounting hardware and secure all weights correctly. Improvised rear loads can interfere with operation, overload components, or detach.
More weight is not automatically better. Include the tractor, attachment, ballast, and accessories when checking trailer or ramp capacity.
Operating the John Deere X300 Snow Blower
Good performance depends on matching forward speed and cutting width to the snow load. Forcing the tractor into more snow than the blower can process increases clogging, belt stress, and loss of control.
Before starting
-
Remove debris and loose objects from the clearing area.
-
Mark curbs, drainage edges, landscaping, and hidden drop-offs.
-
Clear snow from tractor cooling and intake areas.
-
Check belt guards, retaining pins, chute controls, chains, and ballast.
-
Confirm that the discharge area is clear of people, animals, vehicles, and windows.
-
Start outdoors or move outside promptly; never operate the tractor in an enclosed building.
Wear eye and hearing protection, insulated footwear with grip, and close-fitting clothing. Gloves should allow reliable control operation.
Warm up and engage correctly
Follow the tractor’s cold-start instructions, including choke use where applicable. Allow the machine to respond normally before applying a heavy load; there is no universal warm-up time.
Engage the attachment as instructed and use the specified operating engine speed. Regulate the snow load primarily with travel speed and pass width rather than trying to clear heavy snow at low engine speed.
The hydrostatic pedals allow small speed changes. Use them progressively instead of making abrupt forward-to-reverse changes.
Adjust technique to the snow
For deep or wet snow, reduce travel speed and take narrower passes. If the engine labors or discharge weakens, reduce the load rather than continuing to push forward.
Avoid driving the housing into frozen piles or ice chunks. Shear bolts protect components from some overloads, but they do not make impact loading harmless.
Plan discharge with the wind where practical. Avoid repeatedly throwing snow into areas that must be cleared again.
Work safely on gravel and slopes
Loose gravel can become a projectile even when skid shoes are adjusted. Keep discharge away from people and property, and stop if the blower begins collecting stones.
Stay within the tractor manual’s slope restrictions. Chains and ballast do not make icy slopes safe, and improved rear traction does not guarantee steering control.
Travel slowly with the attachment in the prescribed transport position. Avoid abrupt braking, steering, or direction changes.
Blockages and Routine Maintenance
A stopped auger or impeller may retain stored force. Never reach into the housing or chute, even after the engine has stopped.
Clearing a blockage
-
Stop travel and disengage the PTO.
-
Park safely, apply the parking brake, and lower the attachment.
-
Stop the engine and remove the key.
-
Wait for all movement to stop.
-
Follow the attachment manual’s isolation procedure.
-
Use the specified clean-out tool, never hands or feet.
-
Restore guards and check the area before restarting.
If a blockage cannot be removed safely, obtain service.
Inspect after use
Remove packed snow and ice with the machine shut down. Clean salt-contaminated areas using a method that avoids forcing water into bearings, electrical connectors, or drive components.
Allow the equipment to dry before enclosed storage. Check for new vibration damage, loose fasteners, belt wear, and leaking gearboxes.
Lubricate only the points specified in the attachment manual. Keep lubricant away from belts and friction surfaces.
Replace shear bolts correctly
Use the specified shear bolts and matching hardware. Ordinary bolts, harder substitutes, or improvised pins can defeat the intended protection and transfer impact loads into more expensive components.
Investigate repeated failures rather than simply fitting another bolt.
John Deere X300 Snow Blower Troubleshooting
Perform checks only after stopping the tractor, removing the key, and waiting for moving parts to stop.
| Symptom | Likely causes | Safe first checks | When professional service is needed |
|---|---|---|---|
| Slow cranking | Discharged battery, poor connections, unsuitable oil | Inspect terminals and cables; check oil recommendation and battery condition | Repeated discharge, damaged battery, starter or wiring faults |
| Repeated clogging | Wet snow, excessive feed rate, obstructed chute | Clear safely; reduce speed and pass width | Clogging persists with correct operation or damaged components |
| Poor discharge | Overfeeding, belt slip, obstruction, damaged impeller | Inspect belt condition, routing, and visible damage | Gearbox, shaft, bearing, or impeller repair |
| Auger stops but other parts turn | Failed shear bolt or auger-drive fault | Check specified shear bolts and remove the obstruction | Repeated failures, bent shaft, or gearbox damage |
| Entire blower stops | Belt, PTO engagement, drive, or interlock fault | Inspect accessible belt and controls without bypassing interlocks | Electrical clutch, internal drive, or complex electrical faults |
| Excessive vibration | Ice buildup, foreign object, loose or bent component | Remove buildup safely and inspect visible damage | Cracks, bent rotating parts, or bearing faults |
| Rear wheels spin | Poor grip, unsuitable chains, incorrect ballast, excessive load | Check approved setup and reduce the cut | Persistent control problems or transmission symptoms |
| Blower digs into gravel | Incorrect skid setting, worn shoes, uneven surface | Inspect shoes and scraper; adjust as instructed | Bent housing or damaged mounting system |
| Lift pedal is unusually difficult | Incorrect spring setup, binding linkage, ice | Inspect the linkage and verify required lift-assist hardware | Damaged mechanism or spring work beyond owner instructions |
Stop using the attachment if the housing is cracked, the mounting system moves unexpectedly, or a rotating component is bent. Internal hydrostatic repairs, complex electrical faults, and structural attachment repairs belong with a qualified technician.
Off-Season Storage and Winter Readiness
Store the blower clean, dry, and securely supported on approved stands or stable blocking. Do not leave it suspended by the tractor’s lift mechanism.
Protect exposed metal with an appropriate corrosion inhibitor while keeping belts and drive surfaces clean. Record worn parts and repair needs before putting the attachment away.
For the tractor, follow the gasoline-storage method specified for its fuel system: fresh stabilized fuel or proper draining, as instructed. Do not automatically leave every tank full or empty.
Keep the installed battery charged using a compatible maintainer. Never charge a visibly frozen, cracked, swollen, or leaking battery.
Before the next snow season, inspect for rodents, damaged wiring, seized controls, deteriorated belts, and loose hardware. Reinstall guards and test steering, brakes, lift, PTO operation, and safety interlocks in a clear area.
John Deere X300 Snow Blower FAQs
What snow blower fits the original John Deere X300?
The 44-inch front-mounted snow blower is a documented option. Confirm the blower generation and all required mounting, drive, and lift components against the tractor’s identification information.
Will any John Deere 44-inch snow blower fit?
No. Width and brand do not establish compatibility. Different attachment generations can require different mounting hardware, belts, controls, and lift arrangements.
Can the X300 use a rear three-point snow blower?
The original X300 does not provide the standard rear three-point hitch and rear PTO arrangement required by conventional compact-tractor snow blowers. Its relevant snow-removal arrangement is a compatible front-mounted attachment.
Does the tractor need chains and rear weights?
Use the traction equipment and ballast arrangement specified for the tractor-and-blower combination. Chains improve grip but do not replace required counterweight.
Can it clear a gravel driveway?
It can be used where conditions and the attachment instructions permit, with skid shoes adjusted to reduce stone pickup. Loose gravel remains a projectile hazard, so discharge direction and bystander clearance are critical.
Why does the blower clog in wet snow?
Wet snow can overload the attachment when travel speed or pass width is too great. Clear the blockage safely, then reduce the feed rate while maintaining the prescribed operating engine speed.
Can a regular bolt replace a broken shear bolt?
No. Use the specified shear bolt and hardware so the intended overload protection remains effective.
How should the blower be stored?
Clean and dry it, lubricate specified points, protect exposed metal, and support it securely. Keep it off damp ground with stable blocking or approved stands, not a raised lift position.
Resolve Fit and Condition Before Snow Arrives
Confirm the complete attachment package before spending money on a blower or installing it. Correct mounting, belt routing, lift assistance, ballast, and traction matter as much as clearing width.
Follow both the tractor and attachment manuals, and resolve vibration, drive faults, damaged guards, or steering problems before the next use.