
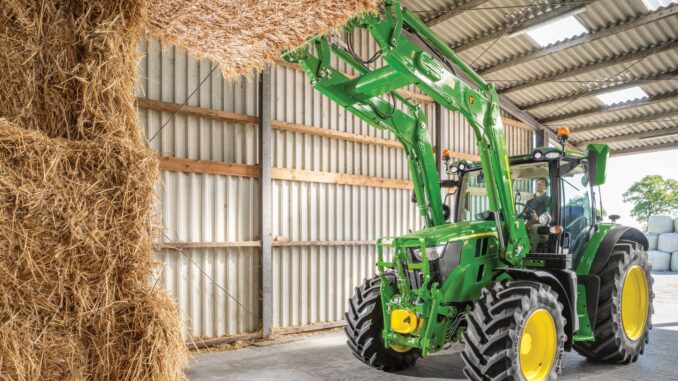
The John Deere 770 is a compact utility tractor aimed at property owners, acreage users, and DIY operators who need more capability than a lawn tractor but still want a relatively simple machine to maintain at home. This guide is written in a symptom-first format and covers repair decisions, troubleshooting, maintenance planning, parts sourcing, and a long-form FAQ for owners in the USA and Canada.
John Deere 770 model overview
The John Deere 770 sits in Deere’s compact utility tractor category rather than the residential mower lineup, so owners typically use it for mowing with an attached deck, loader work, light grading, material handling, and general small-acreage tasks. Compared with a lawn tractor, the John Deere 770 has heavier-duty drivetrain, hydraulic, and chassis systems, which makes it more capable but also means diagnosis should include tractor, engine, hydraulic, PTO, and attachment-related issues rather than just “engine won’t start.”
In practical terms, this is a machine where owner maintenance is very realistic if the job is basic and access is good, but some repairs quickly move into dealer territory because compact tractors combine diesel engine, clutch or transmission, PTO, hydraulics, and electrical safety systems in one package.
General overview of the John Deere 770
The key systems most owners deal with on the John Deere 770 are the engine and fuel system, air intake and filtration, electrical starting and charging, cooling system, clutch/transmission or driveline components, PTO, hydraulics, and any attached mower or implement system. That matters because the same symptom, such as poor mowing performance or weak power, can come from the tractor itself or from the attachment setup, belt condition, PTO engagement, or simple maintenance neglect.
Common service parts owners regularly buy for this model include an engine oil filter, air filter elements, a fuel filter, and a battery, while additional wear items depend on whether the tractor is fitted with a mower deck or front/rear implements. One currently listed maintenance kit for the John Deere 770 cross-references OEM numbers M802606, CH12881, M806419, CH15553, and RE27284, which supports the fact that filters are among the most common routine-purchase items for this tractor.
John Deere 770 troubleshooting approach
The best way to troubleshoot a John Deere 770 is to begin with the exact symptom the owner sees: slow cranking, no start, hard starting when cold, engine runs rough, PTO won’t deliver power, hydraulics feel weak, steering is heavy, transmission performance changes, or an attachment is not working as expected. Starting from the symptom keeps owners from replacing parts too early and reduces the risk of missing a simple cause like a restricted filter, weak battery, low fluid level, or control linkage issue.
Main symptom categories for this tractor usually fall into:
-
Starting issues, such as no crank or hard starting.
-
Running issues, such as smoke, rough idle, low power, or stalling.
-
PTO or mower performance problems, such as poor cutting or weak implement drive.
-
Vibration and noise, including driveline, deck, and engine-related causes.
-
Overheating or leaks, including engine coolant, fuel, oil, or hydraulic leaks.
-
Drive, clutch, or hydraulic performance problems, especially on older compact tractors under load.
Emergency repair needs on the John Deere 770
Some problems on a John Deere 770 should be dealt with immediately because they affect safety or can damage expensive components fast. The biggest red flags are fuel leaks, hydraulic leaks under pressure, overheating, major vibration, PTO or implement driveline damage, and any loss of braking, steering control, or secure attachment mounting.
4.1 Starting issues
If the tractor will not crank, cranks very slowly, or repeatedly kills the battery, the problem matters right away because repeated starting attempts can overheat cables, damage the starter circuit, and leave the tractor stranded in an unsafe spot. On an older compact utility tractor, poor electrical connections and weak batteries are just as likely as a failed component, so simple tests come first.
Common causes:
-
Weak or failing battery.
-
Corroded battery terminals or bad ground connection.
-
Faulty starter circuit or solenoid.
-
Safety interlock or neutral-start issue.
-
Fuel delivery or glow/cold-start related issue on a diesel engine.
Basic checks:
-
Inspect battery posts and cable ends for corrosion or looseness.
-
Confirm the tractor is in the correct starting position and all safety/start conditions are met.
-
Check whether the engine cranks normally, slowly, or not at all, because that changes the likely fault path.
-
If it cranks but will not fire, move next to fuel supply, filter condition, and air-in-fuel checks.
4.2 John Deere 770 running and power issues
A John Deere 770 that starts but runs rough, smokes, stalls under load, or feels weak often has a maintenance-related cause before it has a major internal-engine problem. Restricted air or fuel flow, contaminated fuel, and neglected service items are common starting points for diagnosis.
Common causes:
-
Dirty air filter.
-
Restricted fuel filter.
-
Old or contaminated diesel fuel.
-
Injector or fuel-system issues.
-
Compression or internal-engine wear on high-hour machines.
Basic checks:
-
Inspect and replace service filters if due.
-
Check fuel quality and whether the tractor has been sitting for a long period.
-
Look for smoke color changes during start-up and under load.
-
Compare performance with and without PTO or implement load.
4.3 Vibration and noise
Sudden vibration on a compact tractor should never be ignored because it can come from the engine, driveline, PTO shaft, mower deck, tire/wheel hardware, or an attachment with damaged rotating parts. Continued use can turn a simple wear problem into damage to bearings, shafts, mounting points, or the implement gearbox.
Common causes:
-
Loose wheel or implement hardware.
-
Bent or damaged mower blade if equipped with a mid-mount deck.
-
PTO shaft misalignment or driveline wear.
-
Worn bearings or engine/accessory vibration.
Basic checks:
-
Stop the tractor and inspect visible rotating parts before restarting.
-
Check attachment mounting points and PTO driveline guards.
-
Inspect blades or rotating implement parts for imbalance or impact damage.
-
Do not continue mowing or PTO work until the source is identified.
4.4 John Deere 770 overheating and leaks
Overheating and fluid leaks need fast attention because diesel engines and hydraulic systems become expensive very quickly once lubrication or cooling is compromised. A small coolant seep, clogged screen, dirty radiator area, or low fluid level can become a head-gasket, pump, or hydraulic failure if ignored.
Common causes:
-
Low coolant level.
-
Plugged cooling fins or debris around radiator area.
-
Engine oil leak or hydraulic leak.
-
Loose hose, fitting, or aging seal.
Basic checks:
-
Let the tractor cool fully before opening any cooling-system component.
-
Check engine oil, coolant, and visible hydraulic fluid conditions/levels.
-
Clean external debris from the cooling area if accessible.
-
Trace any leak to its highest visible point rather than the lowest drip point.
4.5 Transmission, clutch, and drive problems
Drive complaints on an older compact tractor often show up as weak pulling power, difficult shifting, clutch slip, poor response under load, or unusual noises when moving. These issues matter because continued use can damage the clutch, gears, bearings, or associated driveline components.
Common causes:
-
Clutch wear or poor adjustment.
-
Low or contaminated transmission/hydraulic fluid, where applicable to the configuration.
-
Linkage problems.
-
Driveline wear under high hours.
Basic checks:
-
Confirm the exact symptom: slipping, grinding, hard shift, or no movement.
-
Check fluid condition and service history first.
-
Inspect visible linkage and pedal free play for obvious problems.
-
Stop using the tractor for heavy pull work until the issue is understood.
4.6 John Deere 770 electrical problems
Electrical faults often appear as intermittent starting, weak charging, blown fuses, dead lights, or gauges that stop working. On a machine of this age, bad grounds, corroded connectors, and worn switches are often more likely than a dramatic harness failure.
Common causes:
-
Battery or charging weakness.
-
Corroded terminals or grounds.
-
Faulty switch or relay.
-
Wiring damage from age, vibration, or abrasion.
Basic checks:
-
Clean and tighten battery connections.
-
Inspect visible harness sections around the battery, starter, and dash area.
-
Check for blown fuses if equipped.
-
Separate charging problems from cranking problems before ordering parts.
DIY or dealer repair guide
For the John Deere 770, the normal DIY line is routine service, visible bolt-on parts, filters, battery work, and straightforward attachment maintenance, while internal engine work, clutch splitting, hydraulic pump issues, injector faults, or transmission teardown are usually advanced jobs better suited to a dealer or a very experienced tractor owner. The machine is owner-serviceable in many areas, but diagnosis becomes less forgiving once the repair involves pressurized hydraulics, driveline disassembly, or engine internals.
Good DIY jobs:
-
Engine oil and filter service.
-
Air and fuel filter replacement.
-
Battery replacement and terminal cleaning.
-
Basic blade, belt, or deck service on a fitted mower deck.
-
Cooling-system cleaning and visual leak inspection.
Advanced DIY or dealer jobs:
-
Injector or fuel-system repair beyond filter service.
-
Clutch replacement or tractor splitting.
-
Hydraulic pump, valve, or internal leak diagnosis.
-
PTO internal repairs.
-
Major electrical tracing through multiple circuits.
Skill level guide:
-
Beginner: filters, battery, fluid checks, simple deck parts.
-
Intermediate: belts, blades, cooling cleanout, basic electrical testing, visible hose replacement.
-
Advanced: clutch, hydraulic, injector, transmission, and internal PTO repairs.
John Deere 770 parts, OEM numbers, and ordering information
Before ordering parts for a John Deere 770, gather the full tractor model, the Product Identification Number, the engine model and serial details, and the exact attachment or mower-deck version if the repair involves PTO-driven equipment. That step matters because compact tractors often have serial-break changes and attachment-specific parts that look similar but do not fit the same way.
OEM parts are usually the safer choice for belts, seals, safety switches, and fit-sensitive driveline or hydraulic items because compact tractor tolerances and routing matter. Aftermarket can be reasonable for filters, blades, and batteries when the cross-reference is exact and the supplier clearly lists John Deere 770 compatibility by model or part number.
Manuals, diagrams, and parts lookups
For manuals and diagrams, the most useful starting points are Deere’s owner support page, Deere parts catalog resources, Deere operator/technical manual channels, and a Deere-focused parts retailer that lists model-specific maintenance items. Use the official sources first for identification and diagrams, then use a reputable aftermarket seller only after confirming the OEM number.
Useful sources:
-
John Deere Owner Support for 770 for parts categories, owner support, and current Deere support routing.
-
John Deere Operators Manuals Online for operator, technical manual, and parts-catalog access points.
-
Quality Farm Supply John Deere 770 maintenance kit page for a practical cross-reference of common maintenance filters.
-
Farmpartsstore John Deere 770 replacement parts for a model-specific aftermarket parts browsing page.
How to locate John Deere 770 serial and engine numbers
These numbers matter because Deere parts can change by production break, and engine-related items may require engine-specific identification rather than tractor model alone. Owners save time and avoid wrong orders when they collect all identification details before searching online or calling a dealer.
Steps:
-
Locate the tractor Product Identification Number plate on the tractor frame area specified in the operator or technical literature for the machine.
-
Record the full model designation exactly as shown, including any transmission or regional coding if present.
-
Find the engine model and serial information on the engine tag or plate.
-
If ordering deck or implement parts, record the deck width or implement model from its own identification tag.
-
Take clear photos of all tags before ordering, because older plates can be hard to read later.
Buying John Deere 770 parts online and in stores
The most reliable strategy is to identify the OEM number first, then shop by that number rather than by a generic “fits 770” label. That approach matters most on the John Deere 770 because mower-deck, implement, and serial-specific changes can make broad compatibility claims misleading.
-
Online: good for filters, maintenance kits, belts, and common wear items once the OEM number is verified.
-
Dealer counter: best for serial-sensitive parts, hydraulic parts, switchgear, driveline pieces, and parts diagrams help.
-
Retail stores: acceptable for batteries, fluids, and some filters only when packaging clearly cross-references the exact tractor or OEM number.
Useful links:
John Deere 770 fitting guide for common DIY parts
These are the most practical owner-level jobs because they solve many common running and reliability complaints without entering major teardown territory.
Engine oil and filter
This job helps protect the engine and is one of the most basic John Deere 770 maintenance tasks.
-
Warm the engine briefly so the oil flows more easily, then shut the tractor off on level ground.
-
Drain the old oil safely into a suitable container.
-
Remove the old oil filter and confirm the old gasket came off with it.
-
Lightly oil the gasket on the new filter, install it correctly, and refill with the proper oil type from the operator literature.
-
Start the engine, check for leaks, then recheck oil level after shutdown.
Air filter service on the John Deere 770
A restricted air filter can cause poor performance, smoke, and hard starting under some conditions, so this is a high-value first check.
-
Open the air-cleaner housing carefully so dirt does not fall into the clean side.
-
Remove the filter element and inspect for heavy dust loading, damage, or moisture contamination.
-
Clean the housing gently and inspect seals before fitting the new element.
-
Install the replacement element in the correct orientation and reseal the housing.
-
If the tractor still lacks power, continue diagnosis instead of assuming the filter was the only issue.
Fuel filter replacement
Fuel restriction is a common cause of weak running and stalling, especially on tractors that sit for long periods.
-
Shut the tractor down safely and control any fuel spill before opening the system.
-
Remove the old fuel filter and compare it to the replacement before installation.
-
Refit the new filter with clean hands and clean fuel-system practices.
-
Bleed or prime the system as required by the tractor’s procedure before cranking.
-
Start the engine and watch for leaks or air-related stumble after the repair.
Mower blade or deck wear-part replacement
If the tractor is fitted with a mower deck, blade condition directly affects cut quality, vibration, and power demand.
-
Confirm the exact deck model first, because Deere offered multiple deck widths with related but different parts.
-
Secure the tractor and deck safely before working underneath or around rotating parts.
-
Remove worn or bent blades and inspect related hardware for damage.
-
Fit the correct replacement parts for that deck model and torque hardware correctly according to the manual.
-
Test for smooth operation and even cut after reassembly.
Maintenance to prevent repeat problems
Regular maintenance on the John Deere 770 prevents many of the issues owners describe as sudden breakdowns, because starting problems, weak power, smoke, overheating, and attachment complaints often build gradually as filters clog, fluids age, and connections corrode. On a compact utility tractor, preventive maintenance also protects expensive systems like hydraulics, PTO, and driveline components that cost far more than routine filters and fluids.
Focus areas:
-
Starting reliability: keep the battery, terminals, and fuel system in good condition.
-
Engine performance: replace air and fuel filters on schedule.
-
Cooling and fire prevention: keep debris away from hot engine and cooling areas.
-
Drive performance: check fluids, linkage feel, and unusual noises early.
-
Attachment performance: inspect deck, PTO, and implement wear items before they fail in use.
John Deere 770 maintenance schedule and seasonal checklist
The exact maintenance chart should always be confirmed against the operator’s manual for the tractor and any fitted attachment, but routine compact-tractor service consistently centers on fluid checks, filter service, cooling-system cleanliness, battery care, and lubrication at scheduled intervals. Because Deere directs owners to the operator’s manual for critical everyday maintenance procedures and fluid details, owners should use the manual as the final authority for capacities and intervals on their specific configuration.
Daily / before each use
-
Check engine oil level.
-
Check coolant level and look for leaks.
-
Inspect tires, visible hardware, and the area under the tractor for fresh drips.
-
Check attachment mounting and PTO/driveline condition before work.
Every 25 hours
-
Inspect air intake components and clean debris from cooling areas.
-
Check battery condition and cable tightness.
-
Inspect visible belts, hoses, and fuel lines.
Every 50 hours or yearly
-
Change engine oil and oil filter as directed for the machine’s service schedule.
-
Inspect or replace fuel and air filters as needed or per schedule.
-
Lubricate service points listed in the operator literature.
Every 200 hours or similar interval
-
Perform more complete annual service using the official operator guidance for your exact tractor and attachment setup.
-
Replace maintenance items that are age- or hour-sensitive rather than waiting for symptoms.
-
Review hydraulic, driveline, and cooling-system condition before peak season.
Seasonal checklist
-
Spring: service filters, battery, engine oil, and mower or implement setup before heavy use.
-
Mid-season: recheck cooling cleanliness, blade condition, and any emerging leaks or vibration.
-
Fall or storage prep: clean the tractor thoroughly, inspect fuel condition, charge the battery, and address repairs before storage.
Repair, upgrade, or replace?
For a John Deere 770, repair usually makes sense when the machine is structurally sound, starts and drives well apart from one or two isolated issues, and the problem is in normal wear items or a contained subsystem. Upgrade makes more sense when the tractor still works but no longer matches attachment needs, hydraulic expectations, or workload, while replacement becomes easier to justify when multiple major systems need work at the same time.
Repair if:
-
The issue is limited to filters, battery, wiring, hoses, belts, blades, or one attachment-related fault.
-
The tractor otherwise has good engine, driveline, and hydraulic performance.
Upgrade if:
-
The tractor is reliable but lacks the PTO, hydraulic, loader, or attachment capability needed now.
-
You are repeatedly adapting around limitations rather than fixing faults.
Replace if:
-
The machine has major engine, clutch/transmission, hydraulic, and electrical problems together.
-
Repair cost is approaching the value of a better-condition compact tractor.
John Deere 770 troubleshooting FAQ
1. Why will my John Deere 770 not start?
Start by separating “no crank” from “cranks but won’t fire,” because they point to different systems. No-crank problems are often battery, cable, ground, or start-circuit related, while crank-no-start issues usually push you toward fuel supply, filter condition, air in fuel, or engine-side diagnosis.
2. Why does my John Deere 770 crank slowly?
Slow cranking usually means low battery output, high resistance at terminals or grounds, or starter-circuit problems. On an older tractor, corroded connections are common, so clean and tighten the battery and ground points before assuming the starter itself has failed.
3. Why does the John Deere 770 start and then stall?
If the John Deere 770 starts and dies, suspect fuel restriction, contaminated fuel, or air entering the fuel system. A partially restricted fuel filter can allow brief start-up but fail once fuel demand stabilizes.
4. Why is my John Deere 770 hard to start when cold?
Cold-start complaints usually point to fuel condition, battery strength, compression wear, or cold-start system issues rather than one single “bad part.” Make sure the battery is strong and the fuel system is up to date on service before chasing deeper engine faults.
5. Why is my John Deere 770 losing power under load?
Low power under load is often caused by restricted air or fuel flow, overdue maintenance, or an implement/load issue rather than immediate engine failure. Check service filters first, then compare performance with and without PTO or heavy drawbar load.
6. Why is the John Deere 770 smoking?
Smoke color matters, because black smoke often suggests overfueling or restricted air, while other smoke conditions can indicate oil-burning or incomplete combustion. Start with filter service and basic engine-condition checks before assuming internal damage.
7. Why is my John Deere 770 overheating?
Overheating can result from low coolant, blocked cooling airflow, debris around the radiator area, or a deeper cooling-system fault. Stop operation early, because continued use under heat stress can quickly turn a manageable issue into major engine damage.
8. Why is there oil under my John Deere 770?
The key is to identify whether the leak is engine oil, fuel, coolant, or hydraulic fluid before ordering parts. Always trace the leak to the highest visible wet point, because drips travel and can make the wrong area look guilty.
9. Why is hydraulic performance weak on my John Deere 770?
Weak hydraulics can come from low fluid, internal wear, air entry, pump issues, or control-valve problems. Basic fluid and leak checks are owner-friendly, but pressure testing and internal hydraulic diagnosis are usually advanced work.
10. Why is steering heavy on the John Deere 770?
Heavy steering can be hydraulic-related or mechanical, depending on configuration and the exact complaint. Check fluid condition, visible leaks, and whether the problem changes with engine speed before moving to deeper diagnosis.
11. Why is my John Deere 770 slipping or not pulling well?
Poor pulling power can be caused by clutch wear, driveline issues, or problems that only show up under load. Continued use while slipping can worsen damage, so reduce workload until the cause is confirmed.
12. Why is the John Deere 770 hard to shift?
Hard shifting often relates to clutch adjustment, wear, or driveline condition rather than just old gear oil. If the tractor grinds during shifts, avoid forcing it, because that can increase internal wear.
13. Why does my John Deere 770 make a grinding noise when moving?
A grinding or rumbling noise while moving can come from driveline, transmission, wheel, or attachment-related components. Narrow the symptom by checking whether it changes with ground speed, engine speed, PTO engagement, or steering input.
14. Why is the PTO on my John Deere 770 not working properly?
PTO complaints can stem from engagement issues, linkage faults, driveline wear, or the implement itself. Verify whether the PTO shaft actually turns correctly before assuming the attachment is at fault.
15. Why does my mower deck cut unevenly behind the John Deere 770?
Uneven cutting usually points to deck setup, blade condition, tire pressure, or wear in deck hardware rather than tractor engine power. Always confirm the exact deck model first because setup details depend on deck width and configuration.
16. Why is the John Deere 770 mower vibrating?
Deck vibration is often caused by bent blades, damaged spindle areas, or debris and impact damage in rotating parts. Stop mowing immediately, because a balance issue can quickly damage bearings and mounts.
17. Why does my John Deere 770 leave strips of uncut grass?
This usually comes from blade wear, poor overlap, deck-level issues, or ground-speed mismatch for conditions. It is usually an attachment setup problem before it is a tractor engine problem.
18. Why are blades on my John Deere 770 setup wearing quickly?
Fast blade wear often reflects sandy soil, hidden impact damage, incorrect blade selection, or mowing conditions rather than poor tractor operation. Use the exact blade type for the deck model and inspect the mowing area for obstacles.
19. Why does the John Deere 770 bog down when mowing?
Bogging can be caused by dull blades, a heavy grass load, belt or deck drag, or an engine that is not making full power due to maintenance issues. Rule out deck drag and overdue filter service first.
20. Why does my John Deere 770 battery keep going flat?
Repeated battery discharge can be caused by charging weakness, bad connections, battery age, or intermittent drains. Distinguish between a battery that will not hold charge and a tractor that is not charging it properly.
21. Why are the lights or gauges on my John Deere 770 not working?
This usually points to a fuse, switch, connector, ground, or harness problem rather than a major electrical failure. Check the simplest power and connection issues first, especially around the battery and dash area.
22. Why does my John Deere 770 click but not crank?
A click with no crank often suggests insufficient battery power, a poor high-current connection, or a starter/solenoid issue. Test and clean the battery path before replacing expensive electrical parts.
23. Why is my John Deere 770 using more fuel than usual?
Higher fuel use can come from restricted air flow, engine tune condition, increased load, or attachment drag. Compare fuel use to the kind of work being done before assuming there is a fuel-system fault.
24. Why does my John Deere 770 run rough at idle?
Rough idle often reflects fuel delivery issues, air restriction, injector imbalance, or age-related engine wear. Begin with maintenance items because they are the cheapest and most common causes.
25. Why is fuel leaking on my John Deere 770?
Fuel leaks usually come from hoses, fittings, filter seals, or disturbed service components. Treat any diesel leak as urgent because of fire risk, contamination, and the chance of drawing air into the system.
26. Why does my John Deere 770 smell hot after use?
A hot smell can come from debris around the engine, slipping belts on an attachment, overheating, or fluid contacting hot surfaces. Clean the machine and inspect for leaks before the next use.
27. Why is there a squealing noise from my John Deere 770 setup?
Squealing often indicates a belt, bearing, pulley, or rotating attachment component under distress. The source can be engine-side or deck/implement-side, so isolate whether the noise appears only with PTO engagement.
28. Which repairs on a John Deere 770 are realistic for DIY owners?
Most owners can handle filters, fluids, battery work, visible hoses, and many deck wear parts safely with the right manual and tools. Once the work involves hydraulic pressure testing, clutch replacement, internal PTO work, or injection-system repair, the job usually moves into advanced territory.
29. Should I buy OEM or aftermarket parts for the John Deere 770?
OEM is usually best for belts, seals, switches, and fit-sensitive parts where exact routing and tolerances matter. Aftermarket can be perfectly acceptable for routine filters, blades, and batteries if the cross-reference is exact and the seller is reputable.
30. How often should I service my John Deere 770?
Service timing depends on the official chart for the tractor and any attachment, but owners should routinely check fluids before use and stay current on oil, air, and fuel filter service. The operator manual remains the best source for exact intervals, capacities, and procedures for your serial-specific machine.
31. Where can I find a John Deere 770 operator’s manual or parts diagram?
The best starting points are Deere owner support, Deere manual access pages, and official parts-catalog channels. Those sources are better than generic listings because they help confirm identification and avoid ordering errors.
32. What information do I need before ordering John Deere 770 parts?
At minimum, collect the tractor model, PIN, engine identification, and the model of any attached mower deck or implement. That combination prevents many of the wrong-part mistakes owners make when they search by model name alone.
33. When should I stop using my John Deere 770 immediately?
Stop using it immediately if you have major vibration, overheating, fuel leaks, hydraulic leaks under pressure, severe noise, steering/braking issues, or PTO/driveline damage. Those faults can create safety risks and often get much more expensive if the tractor keeps working.
34. Is an old John Deere 770 still worth repairing?
It usually is if the engine, hydraulics, and driveline are fundamentally healthy and the current issues are in normal wear items or one contained subsystem. It becomes harder to justify when several major systems need work at once.
35. What is the smartest first troubleshooting step on a John Deere 770?
Start with the exact symptom and check the simplest maintenance-related causes first: battery condition, cable connections, fluid levels, filter condition, visible leaks, and attachment setup. That method avoids wasted parts spending and matches the way compact tractor diagnosis should be approached.
John Deere 770 hydraulic system pressure troubleshooting steps
The John Deere 770 hydraulic system powers loader, hitch, and implement functions, so weak or missing hydraulic pressure directly affects work capability and can indicate serious internal wear or system faults. Pressure troubleshooting should follow a step-by-step approach starting with simple fluid and filter checks, then moving to testing, leak diagnosis, and pump/valve evaluation if basic fixes do not restore performance.
Hydraulic pressure troubleshooting steps for the John Deere 770
Step 1: Check hydraulic fluid level
Low fluid is one of the most common causes of weak hydraulic performance on compact tractors, and repeated low levels indicate a leak or consumption issue that needs attention. Use the dipstick or sight glass to verify fluid level against the cold or hot marks, depending on tractor temperature, and add the correct John Deere Hy-Gard or equivalent fluid if low.
Step 2: Inspect hydraulic fluid quality
Contaminated, foamy, milky, or burnt-smelling hydraulic fluid reduces system performance and can signal water entry, overheating, or internal wear. Remove a small sample and look for cloudiness (water contamination), debris or metal particles (internal wear), or a burnt smell (overheating or degradation). If contaminated, the fluid and filter should be changed together.
Step 3: Replace or clean hydraulic filter and suction screen
A clogged transmission/hydraulic filter or charge-pump suction screen restricts flow and causes the entire hydraulic system to fail or overheat. On the John Deere 770, the suction screen is located on the right side of the transmission housing near the bottom under a cap held by three bolts with a pipe plug in the center (part number M803024). The screen can usually be cleaned rather than replaced, but the hydraulic fluid must be drained to access it.
Step 4: Check for visible external leaks
Inspect all hoses, connections, cylinders, quick-couplers, the reservoir, and filter housings for wet spots, oil trails, or active drips. Small leaks can seem insignificant but indicate failing components and allow air entry into the system, which disrupts performance. Clean suspect areas first so fresh leaks become visible, and ensure loader quick-couplers are fully engaged if the tractor uses them.
Step 5: Bleed air from the hydraulic system
Air in the hydraulic system causes spongy, jerky, or erratic operation and can enter through leaks, low fluid, or recent service work. To bleed, operate the hydraulic controls (loader, hitch, etc.) through their full range of motion several times, then check for air bubbles in the reservoir and repeat until operation smooths out. Consult the operator’s manual for any model-specific bleeding procedure.
Step 6: Measure hydraulic system pressure
Use a hydraulic pressure gauge (5000 PSI capacity) with appropriate adapters connected to a test port or in-line with a hydraulic function. Start the engine, bring the hydraulics to normal operating temperature, then operate the function to its relief-valve setting and compare the gauge reading to the specification in the service manual. Low pressure suggests a worn pump or internal leak; high pressure may indicate a restriction or stuck relief valve.
Step 7: Test hydraulic pump performance and flow
A failing pump may not generate sufficient pressure or flow (GPM), which shows up as slow or weak hydraulic functions and unusual pump noise such as whining or grinding. Flow testing requires a flow meter installed in the pressure line to measure gallons per minute at set pressure, then comparing measured flow to the pump’s rated output. Significant drops indicate pump wear and usually require professional diagnosis or replacement.
Step 8: Inspect control valves and relief valves
Faulty control valves, priority valves, or stuck relief valves can disrupt pressure regulation, starve certain circuits, or allow internal leakage. Testing involves checking pressure at different valve outlets and comparing to specifications. Malfunctions typically require disassembly, cleaning, or replacement, which is dealer-level work on most compact tractors.
Step 9: Check for internal restrictions and overheating causes
If the hydraulic system overheats, possible causes include low oil supply, clogged filter, restricted or internally blocked oil cooler, stuck-open cooler bypass relief valve, excessive internal leakage, or restrictions/kinks in hydraulic lines. Feel components for excessive heat, clean the oil cooler and condenser if air passages are blocked, and inspect lines for kinks or dents that restrict flow.
When to involve a dealer
High-pressure internal leaks, worn hydraulic pumps, faulty relief or priority valves, internal cooler restrictions, and component rebuilds generally require dealer-level diagnosis and repair. Owner-level troubleshooting is most effective for fluid and filter service, leak detection, air bleeding, and basic pressure testing if the owner is comfortable with gauge installation.
how to test relief valve pressure on a compact tractor
Testing relief valve pressure on a compact tractor involves using a hydraulic pressure gauge to measure actual system pressure against the manufacturer’s specification, then adjusting the relief valve if the reading is out of range. Relief valve testing typically requires warming the hydraulic system to operating temperature, connecting a gauge to a test port or hydraulic circuit, stalling the system against the relief valve, and reading peak pressure at specified engine RPM.
Required tools and safety
You need a hydraulic pressure gauge rated for at least 3000-5000 PSI, appropriate hoses or quick-connect couplers to connect the gauge to your tractor’s hydraulic system, and safety glasses or eye protection. Because hydraulic systems operate under very high pressure, injection injuries are a serious risk, so many technicians also wear gloves when handling connections.
Testing procedure
Step 1: Warm the hydraulic system to operating temperature
Drive the tractor around and operate the loader, three-point hitch, or other hydraulic functions for several minutes until the hydraulic fluid reaches normal operating temperature, typically around 50-84°C (122-183°F) depending on the tractor model. Accurate pressure readings require warm oil because viscosity and system performance change with temperature.
Step 2: Locate the test port or connection point
Most compact tractors have either a dedicated pressure test port on the hydraulic valve block or loader valve, or you can connect the gauge in-line with a loader quick-coupler port. If using loader quick-disconnects, turn off the tractor, lower the loader to the ground, and relieve hydraulic pressure by moving the joystick in all directions before disconnecting any hydraulic line.
Step 3: Connect the pressure gauge
With the engine off, disconnect the chosen hydraulic connector or remove the plug from the test port, wipe the connection clean to prevent contamination, and attach the pressure gauge with its hose and fittings. Ensure the connection is fully seated and secure, then position the gauge where you can read it from the operator’s seat.
Step 4: Start the engine and set the correct RPM
Start the tractor and throttle up to the specified test speed, which is often PTO speed (around 2000-2500 RPM) or full throttle depending on your tractor’s service manual. The test RPM matters because relief valve pressure specifications are tied to a specific engine speed.
Step 5: Stall the hydraulic function to trigger the relief valve
Move the hydraulic control lever (loader joystick, remote valve, or stabilizer lever) in the direction that corresponds to the test port or circuit until the system stalls—meaning the hydraulic function reaches its physical limit and pressure builds to the relief valve setting. For loader testing, this typically means moving the lever to dump, tilt, or lift while the loader is already at full extension. Hold the lever in the stalled position only for 5-10 seconds maximum, because stalling the system generates heat very quickly and can damage components if held longer.
Step 6: Read the pressure gauge at peak stall
While holding the hydraulic function in the stalled position, read the peak pressure on the gauge. This reading represents the relief valve setting for that circuit. Compare the reading to the specification in your tractor’s service manual—common compact tractor relief pressures range from 2000-2700 PSI depending on model and circuit.
Step 7: Adjust the relief valve if necessary
If the measured pressure is outside the specified range, the relief valve needs adjustment. Most relief valves have a locknut and adjustment screw accessible by removing a cover or cap from the hydraulic valve body. Loosen the locknut while holding the adjustment screw in position, then turn the adjustment screw clockwise to increase pressure or counterclockwise to decrease pressure. As a general rule, one full turn changes pressure by approximately 34-50 PSI depending on valve design. After adjustment, tighten the locknut to the specified torque (typically 13-18 lb-ft), then repeat the test procedure to verify the new setting.
Step 8: Shut down and disconnect
After testing is complete, throttle back to idle, turn off the tractor, and relieve system pressure by moving the hydraulic control lever in all directions. Disconnect the pressure gauge with a rag ready to catch residual fluid, then reconnect the loader coupler or reinstall the test port plug.
Important cautions
Never hold a hydraulic function in the stalled (relief) position for more than 10-30 seconds, as this forces fluid through a very small orifice in the relief valve and generates extreme heat that can damage seals, fluid, and valve components. Always wear eye protection when working with high-pressure hydraulics because accidental hose failure or coupler release can cause injection injuries or spray hazards. Consult your tractor’s service manual for exact relief valve specifications, test procedures, and adjustment torque values, as these vary significantly by make, model, and hydraulic circuit.