
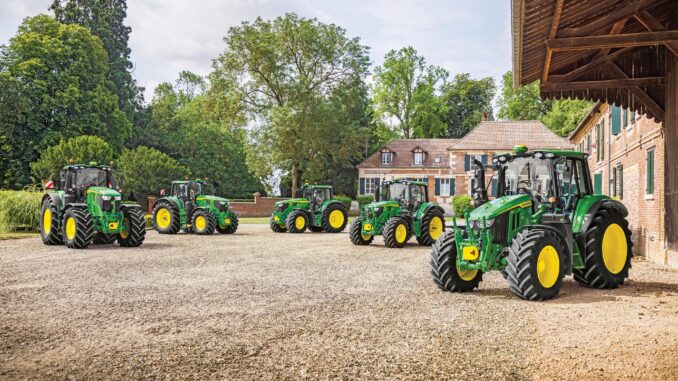
The John Deere 4044M is a compact utility tractor aimed at property owners, acreage users, and light agricultural operators who need more capability than a lawn tractor but still want a machine that is manageable for regular owner maintenance. In North America, this model sits in Deere’s 4M compact utility tractor range and is commonly used for mowing larger areas, loader work, material handling, grading, light ground-engaging work, and general property maintenance.
This guide is written for USA and Canada owners who are comfortable with routine service and some intermediate repairs, but who also need clear limits on when a problem has moved beyond sensible DIY work. It covers model overview, common failures, John Deere 4044M troubleshooting steps, maintenance intervals, repair decisions, parts sourcing, and an expanded FAQ built around what owners actually notice first: hard starting, poor running, hydraulic or transmission complaints, electrical faults, overheating, leaks, and abnormal noise.
General overview of the John Deere 4044M
The John Deere 4044M is part of Deere’s 4M compact utility tractor family, sharing operator’s manual coverage with related 4044R, 4052M, 4052R, 4066M, and 4066R models in the North American manual set. That matters because many operating, maintenance, and troubleshooting procedures are organized around shared systems even when trim level, transmission, or equipment differs.
From an owner-repair point of view, the key systems on the 4044M are the diesel engine and air/fuel/cooling system, the transmission and hydraulic system, the MFWD front axle, the PTO and hitch systems, and the electrical and safety interlock system. Deere’s official manual also includes dedicated sections for engine maintenance, air/fuel/coolant and exhaust maintenance, electrical service, transmission maintenance, MFWD/front axle maintenance, and troubleshooting, which is exactly where most owner complaints tend to fall.
Common service parts owners regularly buy for this tractor include the engine oil filter M806419, primary fuel filter MIU802421, final fuel filter MIU803127, primary air filter RE68048, secondary air filter RE68049, hydraulic oil filter LVA10419, and transmission oil filter RE45864 for FT4 series applications listed by Deere-focused parts sources. Filter kit listings for the 4044M family also confirm packaged maintenance kits are widely sold for recurring service work.
John Deere 4044M troubleshooting approach
The best way to troubleshoot a John Deere 4044M is to start with the exact symptom the owner sees, not with a random part swap. Deere’s manual separates troubleshooting into engine, electrical system, machine, brakes, steering, and onboard diagnostics, which is a good reminder that the same complaint can have multiple causes across different systems.
For this model, the main symptom groups are:
-
Starting issues, such as slow crank, no crank, hard cold starting, or crank-no-start.
-
Running issues, such as rough idle, low power, excessive smoke, regeneration-related complaints, or stalling under load.
-
Hydraulic and drive complaints, such as weak loader response, poor travel performance, or transmission/hydraulic noise.
-
Overheating and leak problems, including clogged screens, coolant issues, hydraulic leaks, or fuel seepage.
-
Electrical and safety-switch faults, including battery, fuse, PTO switch, seat switch, or display/diagnostic issues.
Emergency and immediate repair needs on a John Deere 4044M
Some faults on the John Deere 4044M should be dealt with immediately because they create a safety risk or can damage expensive components quickly. Deere’s manual specifically highlights fire prevention, safe fuel handling, avoiding high-pressure fluids, safe battery service, hot exhaust precautions, and exhaust filter cleaning safety, so owners should treat related symptoms as urgent rather than optional.
1. John Deere 4044M starting issues
If the tractor will not crank, only clicks, or starts intermittently, stop and sort it before forcing repeated starts. Repeated low-voltage cranking can damage the battery, starter circuit, or leave you diagnosing a second fault created by the first one.
Common causes:
-
Weak or discharged battery.
-
Dirty or loose battery terminals.
-
Faulty seat switch, PTO switch, or neutral/start interlock issue.
-
Blown fuse or relay problem.
-
Fuel restriction or air in the fuel system causing crank-no-start.
Basic owner checklist:
-
Confirm battery connections are clean and tight.
-
Verify PTO is off and the machine is in the correct start condition for its transmission.
-
Check for obvious fuse issues and look for warning indications on the display.
-
Inspect the sediment bowl and fuel filter area for contamination or air leaks.
-
If the engine cranks but will not fire, move toward fuel delivery and dealer-level diagnostics instead of extended cranking.
2. John Deere 4044M running and power-loss problems
A 4044M that starts but runs rough, feels weak under load, smokes more than normal, or struggles during PTO or loader work needs attention promptly. Poor combustion, restricted airflow, fuel filter restriction, cooling issues, or exhaust aftertreatment complaints can all worsen quickly when the tractor is kept working.
Common causes:
-
Restricted air filter elements.
-
Fuel filters overdue for service.
-
Dirty grille screens or cooling fins.
-
Poor-quality or contaminated diesel fuel.
-
Exhaust filter/regeneration-related issue.
Basic owner checklist:
-
Check the primary and secondary air filter service condition.
-
Inspect front and side grille screens and radiator/cooler areas for debris.
-
Confirm fuel is fresh and appropriate for seasonal conditions.
-
Review whether fuel filters are beyond the 400-hour/annual service point.
-
If warning indicators or regeneration issues persist, stop short of guessing and follow dealer diagnostics.
3. Vibration and abnormal noise
Vibration, rattling, driveline noise, front axle noise, or a new hydraulic whine should never be ignored on a compact utility tractor. What feels minor at first can turn into driveline, wheel, PTO, or hydraulic damage if the tractor stays in service.
Common causes:
-
Loose wheel hardware.
-
Implement driveline or PTO shaft issues.
-
Front axle oil level or wear issue.
-
Loader or hitch hardware looseness.
-
Belt or fan-related noise around the engine bay.
Basic owner checklist:
-
Park safely and inspect wheels, hitch hardware, and loader mounting points.
-
Check whether the noise changes with engine speed, travel speed, or PTO engagement.
-
Check front axle oil level and visible leaks.
-
Inspect grille, shields, and side panels for loose hardware causing false “mechanical” noises.
-
Stop using PTO-driven attachments until driveline vibration is understood.
4. Overheating and leaks on the John Deere 4044M
Overheating or fluid leaks deserve same-day attention because they can lead to engine damage, hydraulic failure, or fire risk. Deere specifically calls out cooling-system safety, hose inspection, front screen cleaning, and fire prevention around debris buildup.
Common causes:
-
Plugged front grille or cooling fins.
-
Low coolant or a hose/clamp problem.
-
Engine compartment packed with dry debris.
-
Hydraulic hose seepage or high-pressure leak.
-
Fuel filter bowl or line leak.
Basic owner checklist:
-
Shut down and let the machine cool before opening anything hot or pressurized.
-
Clean front and side screens and inspect cooling fins.
-
Check coolant level and inspect hoses/clamps for wet spots or swelling.
-
Look for oil, diesel, or hydraulic fluid under the tractor and trace upward carefully.
-
Treat any high-pressure hydraulic leak as dealer-level urgent repair.
5. John Deere 4044M transmission and drive problems
Poor travel response, weak pulling power, jerky operation, or hydrostatic/PowrReverser complaints can come from low fluid, incorrect operating setup, filter restriction, or internal wear. Transmission and hydraulic systems are expensive enough that owners should diagnose carefully and avoid “running it and seeing if it clears up.”
Common causes:
-
Low transmission/hydraulic oil level.
-
Restricted suction or transmission oil filter.
-
Incorrect linkage or operating range selection.
-
Front axle engagement or traction-related confusion rather than actual transmission failure.
-
Internal hydraulic or transmission problem requiring pressure testing.
Basic owner checklist:
-
Check transmission/hydraulic oil level exactly as the manual describes.
-
Review whether fluid and filters are overdue at the 400-hour service point.
-
Confirm MFWD and differential-lock use is appropriate for the conditions.
-
Compare performance with and without a heavy hydraulic load attached.
-
If travel remains weak or erratic, move to dealer diagnosis before contamination or wear spreads.
6. Electrical and safety system faults
Electrical faults often look like starting trouble, PTO trouble, or “tractor has a mind of its own” behavior. On the 4044M, battery condition, fuses, relays, switches, and safety interlocks are all realistic first-level checks before deeper diagnostic work.
Common causes:
-
Weak battery or corrosion at terminals.
-
Bad fuse or relay.
-
Seat switch or rear PTO switch problem.
-
Damaged wiring near battery, chassis, or implement areas.
-
Stored fault code needing onboard diagnostic review.
Basic owner checklist:
-
Clean and tighten battery terminals first.
-
Check fuse and relay condition.
-
Test symptoms with PTO disengaged and operator seated correctly.
-
Inspect visible wiring for rub-through or loose connectors.
-
Use onboard diagnostics or dealer scan tools if the fault is intermittent or code-related.
DIY or dealer? John Deere 4044M repair decision guide
The practical line on a John Deere 4044M is this: routine service, inspections, filter changes, battery work, and straightforward access repairs are realistic DIY jobs for a careful owner, but high-pressure fuel, hydraulic diagnosis, transmission internal work, exhaust aftertreatment service, and most electronic diagnostics are better left to a dealer or experienced tractor technician.
Good DIY jobs
-
Engine oil and oil filter changes.
-
Air filter service and replacement.
-
Fuel filter replacement if you are comfortable following priming/bleeding procedure carefully.
-
Battery cleaning, replacement, and terminal service.
-
Grille screen, cooling-fin, and engine compartment cleaning.
-
Front axle oil checks and basic fluid-level checks.
Advanced DIY or dealer jobs
-
Hydraulic leak diagnosis beyond obvious hose replacement.
-
Transmission/hydraulic filter and fluid service if contamination or symptoms already exist.
-
Electrical troubleshooting involving interlocks, relays, harness damage, or fault codes.
-
Exhaust filter system faults or forced cleaning/service events.
-
Fuel injection, pump, or nozzle work.
Skill level guide
-
Beginner: air filters, engine oil, battery cleaning, screen cleaning, visual inspections.
-
Intermediate: fuel filters, front axle oil service, hydraulic/transmission service done exactly by manual procedure.
-
Advanced: electrical diagnosis, hydraulic pressure diagnosis, driveline repairs, regeneration-related faults, or any repair requiring special tools and testing.
Parts needed for John Deere 4044M repairs, OEM vs aftermarket, and what information you need
Before ordering anything for a John Deere 4044M, gather the full model name, product identification number (PIN), transmission/equipment details, and engine identification data. Deere’s manual includes a full identification section because serial-sensitive differences matter, especially for filters, electrical parts, and tractor configurations.
For this model, you should confirm:
-
Full model name: John Deere 4044M.
-
Product Identification Number / PIN from the tractor identification area.
-
Engine model and serial number.
-
Transmission/equipment setup and any installed options that may affect filters, belts, electrical parts, or loader/hydraulic components.
OEM parts are the safer choice for belts, seals, safety switches, filters with fit-sensitive sealing surfaces, and anything tied to emissions or operator safety. Aftermarket can be reasonable for some batteries, fluids, and selected filters if the cross-reference is exact and the seller clearly matches the part to your 4044M PIN and configuration.
Where to find John Deere 4044M parts diagrams and service manuals
The official Deere operator’s manual for the 4044M North America family is the best starting point for operating procedures, maintenance intervals, safety system tests, fluid guidance, and basic service tasks. A good second source is a Deere-focused maintenance page that groups common service parts and intervals in one place for quick ordering.
Useful sources:
-
John Deere Technical Information Store / operator’s manual for official procedures, maintenance intervals, and troubleshooting topics.
-
4044M maintenance guide at Green Farm Parts for service part references and interval summaries.
-
Deere parts and maintenance PDF reference for quick filter and interval confirmation.
-
RDO Equipment filter pak listing for packaged service-kit cross-checking.
How to locate model, serial, and engine numbers on the John Deere 4044M
These numbers matter because Deere grouped several related tractors into shared manuals, and specific parts can change by serial range, emissions version, or equipment package. Ordering by appearance alone is risky on compact utility tractors.
Use this process:
-
Locate the tractor Product Identification Number using the identification information section referenced in the official manual.
-
Record the full model exactly as shown, including 4044M designation.
-
Find the engine identification label and copy the engine model and serial exactly.
-
Note transmission type and major installed equipment if relevant to the repair.
-
Keep a photo of each tag before ordering parts online or visiting the dealer.
Buying John Deere 4044M parts online and in physical stores
The best buying strategy is to identify the OEM number first, then compare seller listings against your exact model and PIN instead of relying on generic “fits many tractors” wording. That is especially important for hydraulic, transmission, electrical, and emissions-related parts.
-
Online: use OEM numbers, verify PIN-sensitive fitment, and cross-check at sources like John Deere manuals, Green Farm Parts, and RDO Equipment.
-
Dealer counter: best for serial-specific filters, hydraulic parts, switches, hoses, and anything emissions-related.
-
Retail stores: acceptable for common fluids, batteries, and some filters only when the packaging clearly cross-references the 4044M correctly.
Step-by-step fitting guide for common John Deere 4044M parts
These are the highest-value DIY jobs for preventing common owner complaints on the John Deere 4044M. Always park safely, lower implements, remove the key, and let hot components cool first.
Changing the engine oil and oil filter on a John Deere 4044M
This service helps prevent hard starting, excess wear, and long-term engine damage.
-
Warm the engine briefly so the oil flows, then shut down and park safely.
-
Check the manual for the correct drain and refill procedure and place a drain pan under the engine.
-
Remove the old oil filter, clean the mounting surface, and install the new M806419 filter with a lightly oiled gasket.
-
Refill with the correct oil, start briefly, check for leaks, then recheck the level.
Replacing the John Deere 4044M air filters
Air filter service helps correct power loss, black smoke, and dust-related engine wear.
-
Open the air cleaner housing and remove the primary RE68048 element carefully.
-
Inspect the secondary RE68049 inner element and replace if dirty or due by service interval.
-
Clean dust from the housing gently and inspect intake hoses for cracks or loose clamps.
-
Reinstall elements correctly, making sure seals seat fully before closing the housing.
Replacing fuel filters on the John Deere 4044M
Fuel filter service is a common fix for hard starting, low power, and rough running when intervals are overdue.
-
Shut off and clean the area around the filter housings and sediment bowl before opening the system.
-
Replace the primary MIU802421 and final MIU803127 filters using the correct sealing surfaces and orientation.
-
Check the sediment bowl for water or contamination while you are there.
-
Prime or bleed the fuel system exactly as required, then start and inspect carefully for leaks.
Cleaning screens and cooling areas on the John Deere 4044M
This simple job prevents many overheating and fire-risk complaints on compact tractors.
-
Open access panels after the machine cools fully.
-
Remove debris from front and side grille screens and the radiator/cooler area.
-
Clean the engine compartment, especially if the tractor has been used in dry grass, chaff, or dusty conditions.
-
Inspect hoses, clamps, and visible wiring while access is open.
Maintenance to prevent John Deere 4044M problems from returning
Regular maintenance on the 4044M prevents a lot of repeat failures that owners misread as “bad luck.” In practice, starting complaints often trace back to battery condition or overdue fuel service, overheating complaints come from clogged screens and debris, and hydraulic or drive complaints often get worse when fluid and filter intervals are ignored.
Focus areas:
-
Starting reliability: keep battery terminals clean, maintain battery charge, and replace fuel filters on time.
-
Running quality: service air filters and use clean seasonal diesel.
-
Fire and overheating prevention: clean grille screens, cooling fins, and the engine compartment regularly.
-
Drive performance: check transmission/hydraulic fluid level and follow filter intervals.
-
Electrical reliability: inspect terminals, fuses, switches, and visible harness routing before faults become intermittent.
John Deere 4044M maintenance schedule and year-round checklist
The official North America manual provides service intervals ranging from daily checks through 50, 200, 400, 600, 1000, 2000, and 6000 hours, with some items specified annually or every two to six years. The points below keep to the official chart structure and the 4044M service items confirmed in Deere-based sources.
Daily / before each use
-
Check engine oil level.
-
Inspect for coolant, fuel, engine oil, and hydraulic leaks.
-
Clean grille screens and remove debris from cooling areas as needed.
-
Check tire condition and visible hardware.
-
Confirm safety systems and controls are operating normally.
After first 10 hours / early ownership checks
-
Review wheel and hardware security if the tractor is new to you or newly serviced.
-
Reinspect for leaks and loose clamps after initial use.
Every 50 hours
-
Perform scheduled lubrication and inspection items in the operator’s chart.
-
Clean machine areas that collect debris and dust.
Every 200 hours or annually
-
Change engine oil and engine oil filter M806419.
-
Complete related annual engine service items in the Deere chart.
Every 400 hours
-
Replace primary fuel filter MIU802421 and final fuel filter MIU803127.
-
Change hydraulic/transmission service filters as required by configuration, including LVA10419 and RE45864 where applicable.
-
Perform chart-listed transmission and hydraulic service items.
Every 600 hours
-
Replace primary and secondary air filters RE68048 and RE68049 if due under the maintenance guide.
-
Review intake hoses and air cleaner sealing surfaces.
Seasonal checklist
-
Spring or heavy-use season start: inspect battery, replace overdue filters, check fluids, and clean cooling areas.
-
Mid-season: recheck air intake cleanliness, front screens, and hydraulic leaks after repeated loader or mowing work.
-
Fall or storage prep: clean the tractor thoroughly, prepare fuel and engine for storage, and remove the machine from service using the manual’s storage guidance.
Repair, upgrade, or replace?
For a John Deere 4044M, repair usually makes sense when the problem is isolated, the tractor is structurally sound, and the fix is limited to service parts, hoses, switches, tires, filters, or external components. Upgrade makes sense when your work has outgrown the tractor’s setup rather than the tractor itself, while replacement becomes more realistic when repair cost stacks across engine, hydraulic, transmission, and electrical systems at the same time.
Repair if…
-
The issue is a known service item, leak, switch, filter, hose, or battery problem.
-
The tractor otherwise starts, drives, and hydraulically functions well.
Upgrade if…
-
You need more loader capacity, hydraulic capability, cab features, or transmission convenience than your current setup provides.
-
You are adding tasks that the 4044M can do only at the edge of its comfort zone.
Replace if…
-
There is combined engine, hydraulic, electrical, and transmission wear.
-
You are facing repeated major downtime and dealer-level repair bills that approach a substantial share of the machine’s value.
Expanded John Deere 4044M troubleshooting FAQ
1. Why will my John Deere 4044M not start?
Start with the basics: battery charge, terminal condition, PTO off, and correct start position for the transmission setup. If it cranks but will not fire, move next to fuel restriction, air in the fuel system, or an overdue fuel filter service rather than assuming a major engine failure.
2. Why does my John Deere 4044M click but not crank?
A clicking sound usually points to low battery voltage, poor cable connection, or starter circuit resistance. Clean and tighten the terminals first, then test battery condition before replacing other parts.
3. Why is my John Deere 4044M hard to start in cold weather?
Cold-weather diesel starting problems are often linked to fuel condition, reduced battery performance, and heavier oil drag. Deere’s fuel section specifically addresses minimizing cold-weather effects on diesel engines, so fuel quality and seasonal preparation matter here.
4. Why does the John Deere 4044M crank but not fire?
That symptom often points to fuel delivery rather than a dead starter or battery. Check for restricted fuel filters, contamination in the sediment bowl, air leaks in the fuel side, or priming issues after recent service.
5. Why does my John Deere 4044M lose power under load?
Restricted air filters, overdue fuel filters, dirty cooling areas, or exhaust aftertreatment issues are common causes of power loss on modern diesel compact tractors. Check service intervals before assuming injector or pump failure.
6. Why is my John Deere 4044M blowing black smoke?
Black smoke usually means incomplete combustion from excess fuel relative to air, often caused by restricted intake airflow or heavy loading. Inspect the air filters and intake path first, then consider operating conditions and service history.
7. Why is my John Deere 4044M running rough?
Rough running can come from fuel restriction, contaminated diesel, air intake issues, or a deeper injection problem. If simple service items are current and the symptom persists, this is where dealer diagnosis becomes more sensible.
8. Why does my John Deere 4044M stall after starting?
Stalling shortly after startup often points to fuel starvation, contamination, or air entering the fuel system. Check recent filter work, bowl condition, and whether the tractor sat long enough for fuel quality to become a factor.
9. Why is the John Deere 4044M overheating?
The most common owner-level causes are plugged screens, dirty cooling fins, low coolant, or debris packed into the engine bay. Deere includes multiple cooling-system and cleaning procedures because this is a predictable maintenance issue, not a rare one.
10. Why does my John Deere 4044M run hot when mowing or doing loader work?
Heavy work exposes marginal cooling-system maintenance quickly. Clean the screens and cooler area first, then inspect coolant level and airflow before suspecting internal engine problems.
11. Why do I smell hot debris or burning material on my John Deere 4044M?
Dry grass, chaff, and oily buildup around the engine and exhaust areas can create strong hot smells and real fire risk. Deere’s safety section specifically warns about fire prevention and hot exhaust areas, so stop and clean the machine before continuing.
12. Why is my John Deere 4044M battery going dead?
Repeated battery discharge usually comes from age, poor terminal contact, parasitic drain, or insufficient charging. Start with terminal cleaning and battery testing before chasing more complex electrical theories.
13. Why won’t the PTO engage on my John Deere 4044M?
PTO issues can be caused by switch problems, interlock faults, operator presence faults, or electrical control issues. Deere’s maintenance section includes rear PTO switch testing, which makes that a sensible early checkpoint.
14. Why does the seat switch on my John Deere 4044M cause intermittent problems?
Intermittent seat-switch symptoms can mimic broader electrical problems because they interrupt normal safety logic. If symptoms change when you shift position in the seat, inspect the switch area and mounting before replacing unrelated parts.
15. Why does my John Deere 4044M move weakly or hesitate?
Weak movement can come from low transmission/hydraulic oil, restricted filters, setup issues, or internal wear. Check service status and fluid level first because those are cheaper and more common than internal transmission failure.
16. Why is my John Deere 4044M jerky when changing direction?
Jerky operation can be normal to a point depending on setup and operator input, but it can also indicate fluid, linkage, or transmission control issues. If the symptom is getting worse rather than staying consistent, inspect fluid condition and service history before continuing hard use.
17. Why is the hydraulic response slow on my John Deere 4044M?
Slow loader or hydraulic response often points to low oil level, restricted filtration, cold oil, or pump-related wear. Start with fluid level and service intervals before moving to pressure testing.
18. Why is my John Deere 4044M loader weak?
A weak loader can reflect hydraulic oil condition, low hydraulic level, relief-valve behavior, or cylinder leakage. Owners can check basics, but hydraulic pressure diagnosis usually crosses into advanced DIY or dealer territory.
19. Why does my John Deere 4044M make a whining hydraulic noise?
Hydraulic whine often means aeration, restriction, cold oil, or pump strain. If it appears together with weak hydraulic function, stop using the tractor until fluid level and filter condition are checked.
20. Why is there hydraulic fluid leaking from my John Deere 4044M?
Leak sources include hoses, couplers, fittings, cylinders, and filter sealing areas. Any misting, injection-like spray, or suspected high-pressure leak should be treated as urgent and not touched with bare hands.
21. Why is the front axle leaking on my John Deere 4044M?
Front axle leaks can come from seals, drain/fill points, or housing-area seepage. Catching them early matters because running low on axle oil can create much more expensive wear.
22. Why does my John Deere 4044M vibrate while driving?
Driving vibration can come from tires, wheel hardware, axle issues, or driveline/implement imbalance. Check wheel bolt security and isolate whether the vibration changes with speed, PTO use, or surface condition.
23. Why does my John Deere 4044M shake when the PTO is on?
A PTO-related shake points more toward the implement driveline, PTO shaft condition, or attachment balance than the engine itself. Stop PTO operation until the driveline is inspected because vibration can damage both tractor and implement components.
24. Why are my grille screens clogging so quickly on the John Deere 4044M?
Dry mowing, dusty work, and loader jobs in loose material can load the screens fast. That is normal in some conditions, which is why frequent screen cleaning is part of practical preventive maintenance even between scheduled intervals.
25. Why does my John Deere 4044M show a warning light related to the exhaust filter?
The 4044M manual includes an exhaust filter system overview and maintenance procedures because the emissions system has its own service logic. Follow the manual’s cleaning/regeneration guidance and avoid guessing, especially if the tractor asks for parked cleaning or service cleaning.
26. Can I clean the air filter instead of replacing it on my John Deere 4044M?
Light cleaning around the housing is fine, but filter elements have a service life and should be replaced when restricted, damaged, or due by interval. Blowing out elements aggressively can damage them and create sealing problems.
27. How often should I change the oil on a John Deere 4044M?
Deere-based sources list engine oil and filter service at every 200 hours or annually, whichever comes first. Heavy-duty or dusty use can justify closer monitoring between intervals.
28. How often should I replace fuel filters on a John Deere 4044M?
Deere parts references list the 4044M fuel filters at every 400 hours or annually depending on usage and service timing. If you have contaminated fuel or recurring power issues, earlier replacement may be warranted.
29. How often should I replace the air filters on a John Deere 4044M?
The Deere-focused maintenance guide lists the primary and secondary air filters at 600-hour intervals for the 4044M. In dusty conditions, inspection and replacement may need to happen sooner.
30. Is the John Deere 4044M a good DIY maintenance tractor?
Yes, for owner-level maintenance it is generally reasonable if you stick to filters, fluids, battery service, cleaning, inspections, and straightforward access work. It becomes less DIY-friendly when diagnostics move into hydraulics, emissions, high-pressure fuel, or complex electrical controls.
31. Should I use OEM filters on my John Deere 4044M?
OEM is the safer default for fit, seal quality, and serial-specific confidence, especially on diesel fuel, hydraulic, and emissions-related service items. Good aftermarket parts can work, but only when the cross-reference is exact and the supplier is credible.
32. Where can I get a John Deere 4044M operator’s manual?
The North America operator’s manual is available through Deere’s technical information site and covers operating procedures, service intervals, troubleshooting topics, and identification information. It should be the first reference before ordering parts or starting any non-routine repair.
33. Where can I find John Deere 4044M part numbers quickly?
A Deere-focused maintenance page is often the fastest shortcut for recurring service part numbers, while the official manual helps confirm interval and procedure. For serial-specific items, dealer lookup remains the safer option.
34. Should I repair or replace my John Deere 4044M if it has multiple issues?
If the problems are mostly service items, external leaks, or electrical basics, repair usually still makes sense. If the tractor has stacked engine, transmission, hydraulic, and emissions faults, replacement or trade-up becomes easier to justify financially.
35. What is the best way to keep a John Deere 4044M reliable?
Stay ahead of filters, fluids, cooling-system cleanliness, battery condition, and leak inspection instead of waiting for symptoms to pile up. Most expensive compact-tractor failures start as neglected routine service or ignored early warning signs.
John Deere 4044M hydraulic system common issues
For the John Deere 4044M, the most common hydraulic system issues owners report are overheating, weak or low-pressure hydraulics, jerky or hesitant loader/3‑point operation, and problems with the hitch not lowering or lifting smoothly.
Typical John Deere 4044M hydraulic symptoms
Owners frequently see:
-
“System runs hot” or hydraulic oil overheating.
-
Weak loader or 3‑point lift, or overall low hydraulic pressure.
-
Jerky hitch that drops or lifts in steps instead of smoothly.
-
Hitch that will not lower or is slow to drop.
-
Hydraulic operation that becomes hesitant and then quits entirely in severe cases.
These symptoms often originate in a few recurring causes: incorrect or contaminated oil, low oil level, air in the system, blocked filters, incorrect valve settings, or wear/failure in the pump, cylinder, or control valve block.
Common John Deere 4044M hydraulic causes and fixes
1. Hydraulic overheating
Hydraulic overheating on the 4044M is often linked to:
-
Wrong hydraulic oil type or viscosity for the tractor.
-
Contaminated or degraded hydraulic fluid.
-
Restricted cooler or radiator area causing poor heat rejection (the 4044M’s cooler is in front of the radiator, which can clog with fine material and drive temperatures up).
Owner-level steps:
-
Verify the hydraulic/transmission oil type matches the operator’s manual recommendation and correct viscosity for your climate.
-
Inspect and clean the hydraulic cooler and radiator stack; fine debris past the front screen can clog the radiator and cooler and make the system run hot.
-
If fluid is dirty or suspected contaminated, change the hydraulic/transmission fluid and filter to restore proper cooling and lubrication.
2. Low hydraulic pressure or weak lift
Low pressure shows up as weak loader lift, slow 3‑point raising, or poor hydraulic response. Common root causes on these tractors are:
-
Low hydraulic/transmission fluid level.
-
Blocked or dirty hydraulic oil filter restricting flow.
-
Air ingress into the hydraulic circuit, reducing effective pressure until bled.
-
Leaks in hoses, fittings, or internal components.
-
Mis-set hydraulic control valve block or relief settings.
-
In more serious cases, pump or cylinder wear/failure.
Owner-level steps:
-
Check and correct fluid level first, following the level procedure in the operator’s manual.
-
Inspect for visible leaks and damaged hoses; repair any holes or seepage points.
-
Replace or clean the hydraulic filter if it is due or suspected blocked.
-
Bleed the system properly to remove trapped air after any fluid/filter work.
-
If pressure is still low after these steps, have a dealer check system pressure and relief-valve settings and test the pump/cylinders.
3. Jerky hitch or 3‑point that will not lower
On the 4044M, owners commonly report a three‑point hitch that drops in jerks, lifts unevenly, or refuses to lower. This can come from:
-
Dirty or contaminated hydraulic fluid causing sticky valve operation.
-
Air trapped in the hydraulic system.
-
Incorrect spool/flow or drop-rate settings on the control valve.
-
Wear or internal damage in the hydraulic cylinder or hitch shaft.
Owner-level steps:
-
Confirm the hitch/drop-rate control and spool valve are set correctly as per the manual.
-
Change dirty fluid and bleed the system if contamination or air is suspected.
-
Inspect linkage and shaft for obvious wear or binding.
-
If the hitch still drops erratically or will not move correctly, a dealer should inspect the internal cylinder and hydraulic valve block for damage.
4. Hydraulic system suddenly jerky then dead
Some owners describe the hydraulics becoming jerky and hesitant before stopping altogether, even when fluid level appears normal. That pattern often points to:
-
Severe restriction at the filter or suction side.
-
Air being drawn into the pump.
-
Internal pump or control valve failure.
Once basic level and filter checks are done, a sudden total loss of function is usually a dealer-level repair, because you need pressure gauges and system knowledge to avoid causing further damage while guessing.
DIY vs dealer for 4044M hydraulic issues
Good DIY scope on a 4044M hydraulic system includes checking fluid level, cleaning the cooler and radiator stack, replacing the hydraulic/transmission filter at the correct intervals, inspecting hoses and fittings for leaks, and correctly bleeding the system after fluid/filter service. Setting relief pressure, diagnosing internal pump or control-valve faults, or dealing with a system that goes from jerky to completely dead is better handed to a dealer, because those repairs need test equipment and can get expensive if misdiagnosed.
How to check and clean 4044M hydraulic filter and screen
On a John Deere 4044M you do not “service” the hydraulic filter itself – you replace the filters and clean the small suction screen/plug area that can collect debris and gunk in the housing. The exact drain and refill steps are in the operator’s manual, but you can safely follow a simplified, owner‑level process like the one below.
Safety and prep
-
Park on level ground, lower all implements, set the brake, and shut off the engine.
-
Allow the tractor and hydraulic oil to cool so you are not working around hot fluid.
-
Have a drain pan ready; owners report losing roughly half a gallon when changing filters only, and more if you also drain down for a full fluid change.
-
Clean the area around the hydraulic/transmission filters and the screen plug before opening anything so dirt does not fall into the system.
Where the John Deere 4044M hydraulic filters and screen are
-
The transmission and hydraulic filters are mounted low on the left side of the tractor, toward the rear axle, accessible from the left-hand side once you are underneath or have removed the left rear wheel for more room.
-
A small plug/screen behind a plug in the same region can trap sludge; one owner solving jerky/no‑hydraulics symptoms found “a bunch of gunk on the screen behind the plug,” cleaned it, and refilled the system.
Always confirm the exact locations in your operator’s manual diagrams before you start.
Step-by-step: changing 4044M hydraulic filters
This is the basic owner-level process demonstrated by 4044M owners changing both the transmission and suction filters.
-
Prepare access and support
-
If needed, remove the left rear wheel and some 3‑point hardware (top link, sway chains, etc.) to open the area up; owners report this makes the job much easier.
-
Set a suitable jack and stands only under approved chassis points if you raise the tractor.
-
-
Clean the filter area
-
Use a brush and rags to wipe down the filter housings, hoses, and surrounding casting so dirt will not fall in when you remove filters.
-
-
Place a drain pan
-
Position the pan under the filter area to catch the fluid that will spill when you loosen the filters.
-
-
Remove the old hydraulic/transmission filters
-
Use a strap/band wrench or filter tool to loosen each filter can; one 4044M owner had to resort to a band wrench and even a hammer/chisel because the factory filter was so tight.
-
Spin each filter off slowly, allowing oil to drain into the pan.
-
-
Inspect and clean filter mounting surfaces
-
Wipe the base plates where the filters seal, making sure the old rubber gasket is fully removed and the sealing surface is clean.
-
-
Install new filters
-
Lightly oil the new filter gaskets.
-
Spin each new filter on by hand until the gasket seats, then tighten to the specification (usually additional ¾–1 turn by hand; follow the filter/manual instructions).
-
-
Refill hydraulic/transmission fluid to make up for what was lost
-
On the 4044M the fill point is on the rear of the tractor; a long funnel through the top link area makes this much easier.
-
Add fluid gradually, then check the dipstick at the rear until the level is in the correct range.
-
-
Start, cycle, and recheck
-
Start the tractor, run at low idle, and cycle the hydraulics gently (loader, 3‑point) to move air out.
-
Shut it down and recheck the fluid level and filter areas for leaks, topping off as needed.
-
Step-by-step: checking and cleaning the John Deere 4044M hydraulic screen/plug area
The 4044M has a small screen or collection area behind a plug that can accumulate sludge and debris, especially if fluid has degraded; cleaning this has solved jerky→no‑hydraulics complaints for at least one owner. The exact plug location and torque spec are in the Deere manual, but the general pattern is:
-
Locate the screen plug
-
With the tractor safely supported and drained down as needed, locate the plug called out in your manual as the suction screen or magnetic/screen plug on the transmission/hydraulic case.
-
-
Clean around the plug
-
Thoroughly clean the area around the plug so no dirt falls in when you remove it.
-
-
Remove the plug carefully
-
Place a pan under the plug (you may lose more fluid here).
-
Loosen and remove the plug using the correct socket/hex, being ready for fluid and the screen or magnet assembly to come with it.
-
-
Inspect and clean the screen/magnet
-
Pull out the screen or screen-plus-magnet and inspect it; owners have reported “a bunch of gunk” on this screen that was enough to restrict flow.
-
Wipe off sludge and debris, and clean the screen with an appropriate solvent and compressed air from the inside-out if needed, taking care not to damage the mesh.
-
-
Inspect seals/washers
-
Check O‑rings or sealing washers (copper or similar) on the plug and replace if damaged or crushed per common hydraulic-screen service practice.
-
-
Reinstall the screen and plug
-
Reinsert the clean screen into its bore, refit the plug with the correct seal, and tighten to the torque specified in the manual so it seals without stripping threads.
-
-
Refill and bleed
-
Refill the hydraulic/transmission fluid to the correct level (you may be adding several gallons after a partial drain or full change).
-
Start the tractor, let it run at low idle, and operate hydraulic functions to purge air; shut down and recheck level and leaks again.
-
When to stop and call a dealer
-
If the screen comes out packed with metal flakes rather than just sludge and seal fragments, that can indicate internal wear in the pump or other components and deserves dealer-level diagnosis.
-
If hydraulics are still jerky, weak, or dead after filter replacement, screen cleaning, correct refill, and proper bleeding, the next step is pressure testing and checking the control/relief valves rather than more home experimentation.