
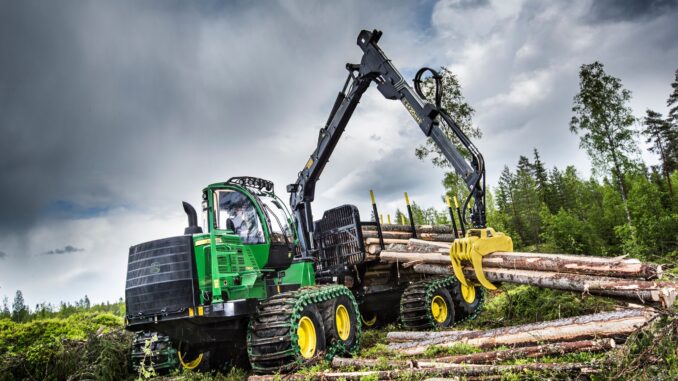
Introduction – John Deere 135G overview
The John Deere 135G is a mid‑size, reduced‑tail‑swing hydraulic excavator designed for construction, utility and landscaping work rather than home lawns. It runs a turbocharged diesel engine with a hydrostatic drive feeding hydraulic pumps and a full hydraulic implement system for boom, arm and bucket.
Owners typically use the John Deere 135G for trenching, site preparation, grading, small demolition jobs and loading trucks, often on residential or light commercial sites in the USA & Canada. This guide covers symptom‑first troubleshooting, practical repair decisions, key John Deere 135G parts, links to diagrams and manuals, and a large FAQ section aimed at competent DIY owners who work on their own machines between dealer visits.
General overview of the John Deere 135G
The John Deere 135G sits in Deere’s G‑Series excavator line up as a reduced‑radius machine in the roughly 13–14 ton class, positioned between smaller compact excavators and larger production machines. It combines a Deere diesel engine, electronically‑managed hydraulic system and load‑sensing pumps with pilot controls and a swing boom for tight‑area work.
Key systems on the John Deere 135G relevant to owners include:
-
Engine and fuel system (diesel engine, fuel filters, water separator, fuel lift and injection).
-
Hydraulic system (main pumps, control valves, boom/arm/bucket cylinders, pilot controls, travel motors).
-
Cooling system (radiator, charge‑air cooler, hydraulic oil cooler, thermostats, fan and shrouds).
-
Electrical system (batteries, alternator, starter, fuses, relays, controllers, safety and interlock switches).
-
Drive system (track undercarriage, idlers, rollers, sprockets, track adjusters and travel motors).
-
Work equipment (bucket, coupler, pins and bushings, auxiliary hydraulics for attachments).
Common John Deere 135G service parts that owners regularly buy include fuel and oil filters, hydraulic filters, air filters, drive belts, coolant, batteries, bucket teeth and wear parts. Technical manuals and parts catalogs list exact numbers; typical examples for the 135G platform include:
-
Engine oil filter – Deere diesel spin‑on filter (matched to engine and PIN).
-
Fuel filter and water separator elements – PIN‑specific elements.
-
Hydraulic oil filters – return or case drain filters specified in the parts catalog.
-
Primary and secondary air filters – inner and outer elements in the air cleaner.
-
Batteries – heavy‑duty 12V units sized for starting current and tray dimensions.
-
Bucket teeth and adapters – ground‑engaging tools sized to the bucket and coupler.
Troubleshooting approach for John Deere 135G
Diagnosis on a John Deere 135G should start from the symptom the operator sees, not from guessing a specific failed component. Think in terms of “what it’s doing wrong” — for example, slow hydraulics, no‑start, overheating, weak travel power or electrical warnings — and then work through basic checks using safe procedures.
For a John Deere 135G excavator, the main symptom categories are:
-
Starting issues (no‑crank, slow crank, no start, hard starting).
-
Running issues (stalling, smoke, lack of power, surging).
-
Hydraulic performance (slow boom/arm, weak bucket curl, uneven functions).
-
Vibration and noise (unusual engine, pump, travel or swing noises).
-
Overheating and leaks (engine coolant, hydraulic oil, fuel, gear oil).
-
Travel/drive problems (machine not tracking straight, weak travel, track issues).
-
Electrical and safety‑control problems (warning lights, codes, dead controls).
Start with the operator’s manual for basic checks and safety, then escalate into the repair/technical manual for detailed testing procedures when simple checks don’t resolve the issue.
Emergency and immediate repair needs on John Deere 135G
Some John Deere 135G problems need immediate attention because they either stop safe operation or quickly damage expensive components like pumps, engines or travel motors.
John Deere 135G starting issues
Starting issues look like slow cranking, clicking with no crank, or the engine cranking but failing to fire. These matter because repeated cranking can damage the starter and a no‑start may strand the machine on site or indicate a deeper fuel or electrical fault.
Common causes:
-
Weak or flat batteries.
-
Loose or corroded battery cables and grounds.
-
Faulty starter relay, key switch or starter motor.
-
Fuel system air entry or clogged fuel filters.
-
Safety interlock not recognizing controls in safe position.
Basic owner checklist:
-
Verify the park brake is engaged and all controls are in neutral according to the operator’s manual.
-
Check battery voltage and age; recharge or replace if low.
-
Inspect and clean battery terminals and ground cable connections.
-
Confirm that any fuel shutoff and electronic lockouts are functioning, watching for indicator lights.
-
If it still will not crank, stop and avoid repeated cranking; consult the technical manual or dealer.
John Deere 135G hydraulic performance problems
Hydraulic problems present as slow boom and arm movement, weak bucket curl, jerky operation or functions that don’t respond. They matter because running with low hydraulic oil or cavitating pumps can rapidly damage expensive hydraulic components.
Common causes:
-
Low hydraulic oil level or wrong oil type.
-
Clogged hydraulic filters.
-
Air in the hydraulic system or internal leakage.
-
Faulty pilot controls or solenoid valves.
-
Pump or valve body wear.
Basic owner checklist:
-
Park safely, lower all attachments, and relieve hydraulic pressure.
-
Check hydraulic oil level and condition; top up with the correct specification fluid if low.
-
Inspect hydraulic filters for service interval and replace if overdue.
-
Look for obvious external leaks at hoses, cylinders and connections.
-
If the machine still runs weak or squeals, stop use and have pressures and flows tested.
John Deere 135G vibration and noise issues
Abnormal vibration or noise may feel like shaking through the cab, grinding from the undercarriage or whine from pumps and motors. These are important because they can indicate bearing failures, cavitation or track issues that become unsafe quickly.
Common causes:
-
Loose track pads or damaged rollers/idlers.
-
Worn bucket pins/bushings and linkage play.
-
Cavitating hydraulic pumps or aerated oil.
-
Engine mount or fan/drive belt problems.
Basic owner checklist:
-
Walk around and visually inspect undercarriage, track tension and rollers.
-
Check bucket, coupler and linkage hardware for looseness or missing hardware.
-
Verify hydraulic oil level and look for foaming.
-
Listen with the machine at idle and low throttle to localize the noise.
-
If vibration is severe or noise is metallic, shut down and have a technician inspect.
John Deere 135G overheating and leak problems
Overheating appears as engine temperature warnings, hydraulic oil temperature alarms or derated power. Leaks show up as puddles of coolant, fuel or hydraulic oil under the machine, which are both a fire risk and a sign of failing hoses or components.
Common causes:
-
Plugged radiator, coolers or screens.
-
Low coolant level or failed thermostat.
-
Low hydraulic oil and blocked coolers.
-
Hose failures or loose clamps.
Basic owner checklist:
-
Stop work immediately if a temperature warning appears; idle briefly, then shut down.
-
Inspect radiator, coolers and screens; clean according to the manual.
-
Check coolant and hydraulic oil levels once the machine cools.
-
Look for wet, stained areas around hoses and cooler connections.
-
Avoid operating while overheating; schedule diagnosis if basic cleaning and fluid checks don’t fix it.
John Deere 135G travel and drive problems
Travel problems show as weak tracking up slopes, machine not steering straight or tracks that won’t move. These matter because travel motor or final‑drive issues are expensive and unsafe if they fail on slopes or near edges.
Common causes:
-
Incorrect track tension.
-
Worn sprockets, rollers or idlers.
-
Low gear oil in final drives.
-
Hydraulic supply issues to travel motors.
Basic owner checklist:
-
Inspect track tension and adjust per the operator’s manual if slack or overly tight.
-
Check undercarriage components visually for broken or excessively worn parts.
-
Verify final drive oil level if accessible in the maintenance chart.
-
If one track is weak, avoid side‑slope work and get the travel circuit tested.
-
Do not continue operating with severe travel problems to avoid further damage.
John Deere 135G electrical and control problems
Electrical problems show up as dead display, warning lights, no response from joysticks or error codes. Safety‑critical issues like dead emergency stop or inoperative lockout systems must be addressed before further use.
Common causes:
-
Blown fuses or relays.
-
Loose ground connections or corroded harness plugs.
-
Battery and alternator faults.
-
Control module or sensor failures.
Basic owner checklist:
-
Verify main battery connections and grounds are solid and clean.
-
Check fuses and relays according to the operator’s manual.
-
Note any error codes or indicator lamps for later diagnosis.
-
Try a safe restart after checking basics; if controls remain dead, stop use.
-
Use a technical manual or dealer support to interpret codes and test circuits.
DIY or dealer? Repair decision guide on John Deere 135G
For a John Deere 135G excavator, the line between DIY and dealer work is stricter than on a lawn tractor due to machine complexity, weight and safety. Owners can realistically handle consumable parts and basic maintenance, while hydraulic and electronic systems usually require test ports, gauges and diagnostic tools.
Good DIY jobs – John Deere 135G:
-
Routine services: engine oil and filter, fuel filters, primary/secondary air filters.
-
Greasing pins and bushings per the lubrication chart.
-
Cleaning coolers, replacing cab filters, maintaining batteries.
-
Simple bucket tooth and wear‑part replacement.
Advanced DIY or dealer jobs:
-
Hydraulic pump, valve block, cylinder seal or travel‑motor repairs.
-
Electronic control issues, code diagnosis and sensor replacement.
-
Undercarriage replacement (sprockets, idlers, rollers, tracks).
-
Structural welding or boom/arm repairs.
Skill level guide:
-
Beginner: fluid checks, greasing, air filter changes, battery maintenance, basic cleaning.
-
Intermediate: engine oil and filter changes, fuel filter and separator service, bucket teeth and cab filter replacement.
-
Advanced: hydraulic diagnosis, travel‑drive repairs, electrical troubleshooting using test procedures — usually best handled by a dealer or experienced technician.
John Deere 135G parts, OEM vs aftermarket, and information you need
Before ordering John Deere 135G parts you should gather key identification information so you can match the correct components and diagrams. The same model designation can have multiple PIN ranges or configuration options, so accurate data prevents wrong parts and returns.
You need:
-
Full model name: “John Deere 135G Excavator”.
-
Product Identification Number (PIN), which determines exact configuration and applicable technical manuals.
-
Engine model and serial number from the engine plate.
-
Attachment or option information (quick coupler type, auxiliary hydraulics, specific buckets or thumbs).
Key John Deere 135G service parts (example table)
Use a PIN‑specific parts catalog to confirm exact numbers, but typical owner‑level parts for a John Deere 135G include:
For this machine, use OEM parts for hydraulic filters, critical seals, safety‑related components and anything tied to the electronic control system. Aftermarket options can be acceptable for certain engine filters, batteries and bucket teeth if they cross‑reference correctly to the Deere number and meet equivalent specification.
Where to find John Deere 135G parts diagrams and service manuals
Owners should rely on official technical publications and reputable manual vendors for accurate diagrams and repair information.
Key sources for John Deere 135G include:
-
Repair technical manual for 135G – detailed repair instructions, testing, and hydraulic/electrical diagnostics.
-
Operation & test technical manual – focuses on operation and testing procedures including hydraulic and electrical tests.
-
135G parts catalog manual – exploded diagrams and part numbers for assemblies.
-
Reputable online manual distributors with 135G‑specific listings.
When buying or downloading manuals, always match the PIN range in the description to your machine (for example, a serial‑number range starting at a specific PIN). Using the wrong PIN range can lead you to incorrect procedures or parts diagrams.
How to locate model, serial and engine numbers on John Deere 135G
Model and serial numbers matter because Deere uses the PIN to determine parts, updates and applicable technical documents. Many systems on the John Deere 135G — especially hydraulics and electronics — can change across PIN ranges or production updates.
To find them:
-
Locate the product identification plate on the machine’s upperstructure or frame; it will list “John Deere 135G” and the PIN.
-
Record the full PIN exactly as stamped, including any prefix or suffix.
-
Find the engine serial plate on the side of the engine block or valve cover area, which lists engine model and serial.
-
Note down attachment information (bucket sizes, coupler type, auxiliary circuits) for parts ordering.
-
Keep these numbers in your maintenance log and use them whenever searching parts catalogs or manuals.
Buying John Deere 135G parts online and in physical stores
A simple parts‑buying strategy for John Deere 135G is to use a parts catalog to get OEM numbers, then decide whether to purchase online or through a dealer based on part complexity. PIN‑specific components and hydraulic or electronic parts are best handled through official channels.
-
Online: Use sites that list the John Deere 135G model and allow search by OEM part number. Always confirm the OEM number, PIN applicability, and any notes about superseded part numbers before checkout.
-
Dealer counter: Ideal for complex, serial‑specific items like hydraulic pumps, control modules, wiring harnesses, and any component with superseded numbers. Dealers can check your PIN in the Deere system and supply updated parts.
-
Retail stores: Suitable for generic consumables like engine oil, diesel exhaust fluid (if applicable), and shop supplies such as grease, provided packaging clearly lists compatibility or meets required specifications (oil viscosity, diesel ratings, etc.).
Include 2–3 concrete links in your live post to:
-
An official John Deere technical publications page.
-
A 135G parts catalog or manual listing.
-
A reputable aftermarket parts site that has a John Deere 135G section.
Step‑by‑step fitting guide – common John Deere 135G DIY jobs
These jobs focus on owner‑level maintenance that improves reliability without entering deep hydraulic or electronic repair territory.
Engine oil and filter change – John Deere 135G
Changing engine oil and filter protects the diesel engine against wear and contamination.
-
Park the machine on level ground, lower attachments and shut down; let the engine cool.
-
Remove engine access covers to reach the drain plug and filter.
-
Place a suitable drain pan, remove the drain plug and allow oil to fully drain.
-
Remove the old oil filter, clean the mounting surface and install the new OEM filter, lightly oiling the gasket.
-
Reinstall the drain plug with correct torque, fill with the specified oil grade to capacity, then start and check for leaks.
-
Stop the engine, recheck level and top up if necessary; record the service in your log.
Fuel filter and water separator service – John Deere 135G
Servicing the fuel filters and water separator helps prevent starting and running issues due to clogged filters or water in fuel.
-
Park safely, shut down the engine and relieve fuel system pressure as described in the operator’s manual.
-
Identify the primary fuel filter and water separator assembly.
-
Place a catch container under the separator, remove the bowl and filter element.
-
Clean the bowl, check for water and debris; install the new OEM filter and reassemble with correct seals.
-
Prime the fuel system using the manual priming pump or key‑on procedure.
-
Start the engine and check for leaks and smooth running; note the service interval.
Air filter replacement – John Deere 135G
Replacing air filters maintains proper airflow and reduces engine wear from dust and debris.
-
Open the air cleaner housing access per the operator’s manual.
-
Remove the outer and inner filter elements carefully without dumping dust into the intake.
-
Clean the housing and inspect for damage; do not reuse a contaminated inner element.
-
Install new OEM inner and outer elements in the correct orientation.
-
Close and secure the housing, ensuring latches seal properly.
-
Record the replacement and check more frequently in dusty conditions.
Bucket tooth replacement – John Deere 135G
Replacing bucket teeth restores digging performance and reduces stress on the machine.
-
Park the machine, lower the bucket to the ground and shut off the engine.
-
Inspect bucket teeth and adapters; identify worn or broken teeth.
-
Remove retaining pins or bolts according to the tooth system design.
-
Fit new OEM or correctly cross‑referenced teeth onto adapters and secure with new pins/locks.
-
Check that all teeth are seated fully and evenly aligned.
-
Grease bucket pins while you’re at the bucket to maintain linkage life.
John Deere 135G maintenance to prevent recurring problems
Regular maintenance on a John Deere 135G prevents many of the high‑cost failures seen in hydraulic and diesel systems. Following the maintenance chart in the official operator’s manual and technical publications is critical.
Focus areas:
-
Starting reliability: keep batteries in good condition, clean terminals, and maintain fuel filters to avoid hard‑starting.
-
Hydraulic performance: change hydraulic filters on schedule, maintain correct oil, and inspect hoses and fittings for leaks.
-
Overheating prevention: clean coolers and screens regularly and maintain coolant and hydraulic oil levels.
-
Drive performance: monitor undercarriage wear, track tension and final drive oil levels.
-
Electrical reliability: inspect harness routing, protect connectors from moisture, and address codes quickly.
John Deere 135G maintenance schedule and year‑round checklist
Base your schedule on the official John Deere 135G operator’s manual and maintenance charts. The tasks below reflect typical excavator practice; always confirm intervals for your specific PIN.
Daily / before each use
-
Walk‑around inspection for leaks, loose hardware and damage.
-
Check engine oil level and coolant level.
-
Check hydraulic oil level; top up if needed with the correct fluid.
-
Inspect undercarriage and track tension visually.
-
Clean radiator and cooler screens if operating in dusty conditions.
After roughly 8 hours
-
Grease all specified pins and bushings per the lubrication chart.
-
Inspect bucket teeth and cutting edges; replace worn teeth.
-
Check cab air filter and clean or replace if necessary.
Every 25 hours
-
Recheck all fluid levels and adjust as needed.
-
Inspect battery terminals, cables and mounting.
-
Look over hydraulic hoses and connections for rubbing or minor leaks.
Every 50 hours or yearly
-
Change engine oil and filter following the operator’s manual.
-
Inspect fuel filters and water separator; service if indicated.
-
Check and adjust track tension.
-
Examine undercarriage wear components to plan future replacements.
Every 200 hours or as specified
-
Replace fuel filters and water separator elements.
-
Replace outer and inner air filter elements if intervals or conditions require.
-
Replace hydraulic filters per the hydraulic maintenance chart.
-
Check final drive oil levels and change if scheduled.
Seasonal checklist (pre‑season, mid‑season, end‑of‑season)
Pre‑season:
-
Perform full fluid and filter service if near due dates.
-
Inspect and repair undercarriage components; replace worn teeth and cutting edges.
-
Confirm all safety equipment and decals are legible and present.
Mid‑season:
-
Deep‑clean coolers and screens; inspect fan drive belts.
-
Review hours since last service and schedule upcoming maintenance.
End‑of‑season:
-
Complete overdue services, protect fuel and coolant for storage.
-
Clean the machine thoroughly, touch up exposed metal and store with attachments lowered.
-
Disconnect batteries or use a maintainer for long‑term storage.
John Deere 135G – repair, upgrade, or replace?
For a John Deere 135G, deciding whether to repair, upgrade or replace depends on machine age, total hours, undercarriage condition and the scale of needed hydraulic or structural work. Because it is a commercial machine, major repairs can still be justified if the base structure and undercarriage remain sound.
Repair if:
-
Issues involve filters, hoses, seals or minor hydraulic leaks that are localized.
-
The engine runs well but needs routine maintenance or minor component replacement.
-
Underlying structure and undercarriage are still good, with normal wear.
Upgrade if:
-
You need additional auxiliary hydraulics or better attachments for productivity.
-
You can add features like improved work lights, bucket options or couplers that fit the existing machine.
-
Electronics or control updates are available that enhance functionality without replacing the unit.
Replace if:
-
Major components like pumps, engines and travel motors all require overhaul and the cost approaches machine value.
-
Structural damage to boom, arm or frame compromises safety.
-
Wear and failure history indicate the machine is near end‑of‑life.
Expanded troubleshooting FAQ – John Deere 135G
1. Why will my John Deere 135G not start?
A John Deere 135G that will not start usually has issues with battery power, fuel delivery or safety interlocks. Check that batteries are charged, terminals are clean and the machine is in neutral with park brake engaged. Then inspect fuel filters and the water separator for clogs or water and follow the priming instructions in the manual. If it cranks but will not fire, error codes or warning lights may point to electronic or sensor problems best handled by a dealer.
2. Why does my John Deere 135G crank slowly?
Slow cranking usually results from weak batteries, corroded connections or cold conditions. Measure battery voltage and consider load testing, replacing old batteries with correct capacity units. Clean and tighten all battery and ground connections and check starter wiring for heat damage or looseness. In very cold weather, proper oil viscosity and any recommended preheating methods help the engine crank more easily.
3. Why does my John Deere 135G click but not crank?
A clicking sound with no crank indicates the starter solenoid is trying to engage but battery or starter amperage is insufficient. Inspect batteries and cables, looking for corrosion or loose grounds. Check related fuses and relays in the electrical panel. If voltage is good and cables are sound, a failing starter motor or solenoid may need testing or replacement.
4. Why does my John Deere 135G start then stall?
Starting and then stalling often points to fuel delivery issues like clogged filters or air in the system. Service the fuel filters and water separator, then properly prime the system as described in the operator’s or technical manual. Check for visible fuel leaks or loose fittings that can draw air. If stalling persists, fuel injection components or electronic controls may need professional diagnostics.
5. Why is my John Deere 135G smoking heavily?
Excessive exhaust smoke can indicate overfueling, poor combustion, restricted air intake or mechanical engine issues. Make sure air filters are clean and correctly installed; a plugged filter can cause black smoke and power loss. Blue smoke may suggest oil consumption due to internal wear, while white smoke can signal unburned fuel or coolant entry. Persistent heavy smoke deserves a professional inspection to prevent serious engine damage.
6. Why are the hydraulics on my John Deere 135G slow?
Slow hydraulics are usually tied to low hydraulic oil, dirty filters or system issues. Verify hydraulic oil level and condition and top with approved fluid if low. Check service history of hydraulic filters and replace them if overdue. If functions remain slow or noisy, pump, valve or control problems require pressure and flow testing by a technician.
7. Why is my John Deere 135G boom jerky?
Jerky boom movement often stems from air in the hydraulic system, sticking valves or worn bushings and pins. First confirm hydraulic oil is at the correct level and free of foam, and that filters are up to date. Inspect boom and arm pins and bushings for excessive play, which can feel like jerky motion. If the machine shows consistent jerks under load, valve or cylinder problems should be diagnosed using proper test procedures.
8. Why does my John Deere 135G bucket feel weak?
A weak bucket curl suggests hydraulic pressure loss or internal leakage. Ensure the hydraulic oil level is correct and filters are not plugged. Inspect bucket linkage and cylinder for external leaks and mechanical damage. If other functions feel strong but bucket remains weak, pressure tests and cylinder bypass checks may be necessary.
9. Why is my John Deere 135G vibrating more than usual?
Extra vibration can come from undercarriage wear, loose components, or hydraulic cavitation. Check track tension, rollers and idlers for damage or uneven wear. Look for loose bolts on track frames, superstructure and attachments. If vibration coincides with hydraulic noise, stop and have hydraulic systems inspected for low oil, air or pump issues.
10. Why does my John Deere 135G make a whining noise?
Whining sounds from the hydraulics often indicate cavitation, high back pressure or pump issues. Confirm hydraulic oil level, check for leaks and examine filters for clogging. Listen for whether the noise changes with hydraulic load or engine speed; this helps pinpoint certain circuits. Operating with persistent hydraulic whine can damage pumps and should be limited until diagnosed.
11. Why is my John Deere 135G overheating?
Overheating typically results from restricted cooling airflow, low coolant, or high hydraulic oil temperatures. Clean radiator and cooler screens regularly and remove debris blocking fins. Check coolant level and condition and confirm the cooling fan and drive belt are operating properly. If hydraulic temperature warnings arise, coolers and oil levels must be inspected and deeper issues diagnosed.
12. Why is hydraulic oil leaking on my John Deere 135G?
Hydraulic leaks come from worn hoses, damaged fittings or seal failures on cylinders and components. Perform a careful visual inspection with the machine shut down, focusing on hose routing and connection points. Replace damaged hoses promptly and avoid temporary fixes on high‑pressure lines. Major leaks or repeated failures can indicate misrouted hoses or structural issues needing professional attention.
13. Why won’t my John Deere 135G travel straight?
A machine that won’t travel straight usually has uneven track tension, undercarriage wear or issues in one travel motor. Check track tension on both sides and adjust to the specifications in the operator’s manual. Inspect sprockets and rollers for significant wear that can cause directional drift. If track tension and undercarriage are correct, hydraulic or motor problems should be evaluated by a technician.
14. Why is one track on my John Deere 135G weak?
A single weak track points toward hydraulic supply or travel motor problems on that side. Confirm track tension and look for obvious damage to sprocket or final drive. Check for hydraulic leaks or unusual noises from the affected side. Because travel circuits involve high pressures and safety concerns, pressure and flow tests should be performed using appropriate gauges and procedures.
15. Why is there fuel leaking on my John Deere 135G?
Fuel leaks can occur at filter housings, lines, injector return lines or the tank. Examine the fuel filter and water separator assemblies for proper installation and seal condition. Inspect lines and connections for damp areas or staining. Fuel leaks are both fire and environmental hazards, so repair them immediately and avoid operating until fixed.
16. Why are my John Deere 135G controls dead?
Dead controls may be caused by low battery voltage, faulty key switch, blown fuses, relay issues or safety lockouts. Check that batteries and main power connections are in good condition. Verify control lockouts and safety switches are set correctly according to the manual. Then inspect fuses and relays; persistent control failure may indicate electronic module or wiring faults that require diagnosis.
17. Why does my John Deere 135G show error codes?
Error codes arise when sensors or control systems detect abnormal readings or faults. Refer to your operation or test manual for code definitions and recommended actions. Sometimes codes result from simple issues like low fluid levels or loose connectors. Persistent or serious codes, especially those involving engine or hydraulic control systems, need professional interpretation and repair.
18. How often should I change engine oil on my John Deere 135G?
Engine oil change intervals for the John Deere 135G are specified in the operator’s manual and typically depend on hours of operation and conditions. Many excavator engines use intervals on the order of a few hundred hours under normal use, but heavy duty or dusty conditions may require shorter intervals. Always follow the charts for your specific engine and PIN and record each service.
19. How often should I replace fuel filters on my John Deere 135G?
Fuel filter replacement intervals are based on hours and environment, as shown in the maintenance chart. Typical practice is to replace fuel filter elements every few hundred hours or sooner if poor fuel quality is suspected. Water separator elements should be checked frequently and drained when water collects. Following your manual’s schedule closely helps prevent hard‑starting and pump or injector wear.
20. How often should I service hydraulic filters on my John Deere 135G?
Hydraulic filters on the John Deere 135G must be serviced according to the hydraulic maintenance chart. Many excavator hydraulic systems specify filter changes at defined hour intervals or when differential‑pressure indicators show clogging. Use OEM filters, and never bypass a clogged filter by removing elements; doing so risks major component damage.
21. What type of hydraulic oil does my John Deere 135G need?
Hydraulic oil type and viscosity are specified in the operator’s manual and technical publications for the John Deere 135G. Deere usually requires branded or equivalent oils that meet its hydraulic system specifications, including viscosity and additive packages. Always match oil to ambient temperatures and usage to maintain proper lubrication and system performance.
22. How do I adjust track tension on my John Deere 135G?
Track tension adjustment procedures for the John Deere 135G are detailed in the operator’s manual. Generally, you support the machine safely, loosen track‑frame covers, and use the grease‑type adjuster to increase or decrease tension. The correct sag measurement and adjustment steps are shown in diagrams for your specific undercarriage. Over‑tight or too‑loose tracks cause accelerated wear and travel problems.
23. How should I store my John Deere 135G over winter?
For off‑season storage, perform scheduled maintenance, clean the machine and protect fluids and fuel according to the operator’s manual. Lower attachments, park on firm ground and consider using blocks, especially under the bucket if needed. Check coolant freeze protection and fuel system, and disconnect batteries or use a maintainer if storing long term. Proper storage reduces corrosion and starting issues when you return to work.
24. Can I use aftermarket filters on my John Deere 135G?
Aftermarket filters may be acceptable for some engine oil and air filter applications if they cross‑reference exactly and meet or exceed Deere specifications. However, hydraulic filters and critical safety‑related components should remain OEM because system performance and bypass settings are designed around them. If in doubt, default to OEM parts or consult a dealer parts department.
25. Where can I get a John Deere 135G repair manual?
You can obtain John Deere 135G repair manuals through an official technical publications portal or authorized distributors. Many online vendors offer downloadable repair technical manuals for the 135G, often specifying serial‑number ranges. Make sure the manual you purchase matches your machine’s PIN to ensure procedures and diagrams are correct.
26. Where can I find parts diagrams for my John Deere 135G?
Parts diagrams are available in the 135G parts catalog manual and through online parts‑catalog PDFs. Deere’s own parts portal and technical publications provide exploded views and part numbers tied to your PIN. These diagrams help you identify assemblies, components and exact part numbers before ordering.
27. Why does my John Deere 135G fan run loudly?
A loud cooling fan can be normal under high load or high temperature, especially if the system uses viscous couplings or variable‑speed controls. However, unusual fan noise may indicate damaged blades, loose shrouds or belt issues. Inspect the fan and related hardware visually and listen for rubbing or imbalance. Persistent abnormal noise should be checked to avoid cooling or safety problems.
28. Why is my John Deere 135G cab dusty?
Dust entering the cab can result from a clogged or damaged cab air filter or poor sealing of doors and windows. Replace cab filters at recommended intervals and inspect seals for gaps or damage. Clean the interior and verify HVAC operation to maintain positive pressure in the cab. In very dusty environments, more frequent cab filter maintenance may be necessary.
29. Why does my John Deere 135G lose power on slopes?
Loss of power on slopes may be due to engine or hydraulic limitations, fuel system issues, or undercarriage problems. Ensure fuel filters are clean and that the engine is producing full power under load. Check hydraulic performance and track condition; slipping tracks or worn components can mimic power loss. If the machine consistently bogs under modest loads, have engine and hydraulic performance tested.
30. Do I need to log maintenance on my John Deere 135G?
Keeping a maintenance log is strongly recommended for John Deere 135G owners. Recording dates, hours and services performed helps track intervals, supports warranty claims and improves resale value. Use the maintenance schedule from the operator’s manual as a template and update it after each service. Good records also help technicians diagnose issues by showing service history.
31. Can I pressure‑wash my John Deere 135G?
You can wash the John Deere 135G, but follow manual guidelines to avoid forcing water into electrical connectors, bearings or cab seals. Use moderate water pressure, avoid directly blasting electronics and joints, and allow the machine to dry before operation. Cleaning coolers and undercarriage is important, but be mindful not to displace grease or damage decals.
32. How do I know if my John Deere 135G undercarriage needs replacement?
Undercarriage condition can be evaluated by measuring wear on sprockets, rollers, idlers and track chains, comparing them to specifications. Excessively sharp sprocket teeth, worn roller flanges or loose track chains indicate that replacement may be due. Parts catalogs and technical manuals show new‑part dimensions and wear limits; many owners rely on dealer inspections to make replacement decisions.
33. Is my John Deere 135G safe to operate with minor leaks?
Minor seepage may occur at some joints, but active leaks of fuel, hydraulic oil or coolant are safety and reliability concerns. Small leaks can worsen quickly and create fire, slip or environmental hazards. Identify leak sources promptly and repair them rather than continuing to operate. When in doubt, have a technician inspect the system before further use.
34. Can I install additional attachments on my John Deere 135G myself?
Installing simple attachments like different buckets may be within owner capability, provided they match the coupler and machine specifications. More complex attachments such as hydraulic thumbs or breakers often require auxiliary hydraulic circuits, specific settings and structural checks. Consult technical manuals and a dealer to confirm compatibility and installation requirements.
35. When should I call a dealer for my John Deere 135G?
Call a dealer whenever you face persistent error codes, serious hydraulic or electrical faults, major leaks, or structural issues beyond basic maintenance. Dealer technicians have the diagnostic tools, software and experience needed for high‑pressure systems and electronic controls. Using professional help on complex repairs often saves time and prevents costly secondary damage.