
John Deere 54SB Snowblower Maintenance, Parts and Repair Guide
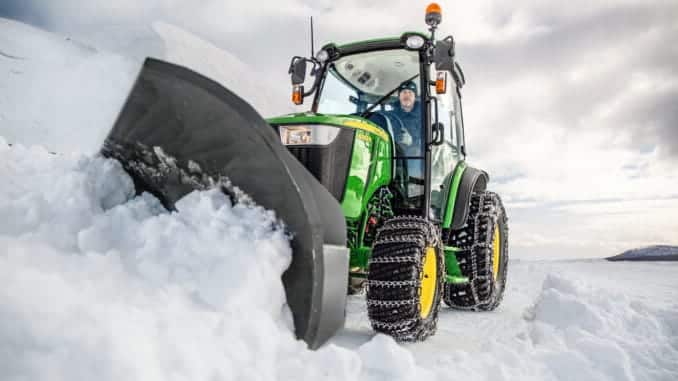
The John Deere 54SB is a front-mounted, two-stage snowblower powered by the tractor’s power take-off (PTO). This guide covers gearbox oil checks, driveline lubrication, wear at the cutting edge, and how to identify the right replacement parts. It also explains where to start when an auger stops feeding, the blower stops throwing snow, or the hydraulic chute won’t turn. Check the attachment’s full serial number and drive configuration before applying a service procedure: Deere documents both exposed-chain and enclosed-chain versions, and they are serviced differently.machinefinder+2
54SB Snowblower Maintenance
Before inspecting or servicing the blower, park on a level surface, disengage the PTO, lower the attachment fully to the ground, lock the parking brake, shut off the tractor, remove the key, and wait for all movement to stop. For service work, Deere’s Quick-Hitch manual also directs you to disconnect the battery ground strap and tag the operator station to prevent anyone from starting the tractor. With the attachment lowered and engine off, move the hydraulic controls to relieve trapped pressure before disconnecting hoses. Never work beneath an attachment held up only by hydraulics. To clear a blockage, wait at least 10 seconds after shutdown, make sure the impeller has stopped, and use a clean-out tool—not your hands.crossimplement
Maintenance Schedule and Service Points
The scheduled intervals below are from John Deere operator’s manual OMLVU33941 for the compact-tractor Quick-Hitch configuration, whose 54-inch listing starts at serial 070001. Use them only after confirming that this manual applies to your attachment. The impact and wear checks are triggered by condition, not by an hours-based schedule.crossimplement
| Maintenance task | Verified interval or trigger | Specification or inspection point | Owner action |
|---|---|---|---|
| Discharge chute lubrication | Before each use | Rotating chute base | Lubricate the chute as directed in the applicable manual. |
| Auger gearbox and separate drive gearbox, if fitted | Beginning of season | Oil should reach the bottom of the filler opening | Check the level and top up only with the specified gear oil. |
| Auger shaft, if equipped with grease fittings | Beginning of season | Fittings on the auger shaft | Lubricate the fittings shown in the manual. |
| PTO driveshaft | Every 25 operating hours and at the end of the season | Three grease points on the documented shaft | Lubricate the fittings and distribute grease through the sliding shaft as directed. |
| Exposed drive chain, if fitted | Beginning of season, every 25 operating hours, and at the end of the season | Chain deflection and condition of chain and sprockets | Disconnect the driveshaft and use the exposed-chain adjustment and lubrication procedure. |
| Hydraulic hoses | At least annually; sooner if damage is visible | Abrasion, cracks, kinks, blisters, exposed braid, or leakage | Replace damaged hoses before use. Never search for a pressurized leak with your hands. |
| Shear bolts and rotating parts | After striking an object or developing abnormal vibration | Broken shear hardware, bent flighting, or contact with the housing | Stop immediately and correct the cause before returning the blower to service. |
| Scraper blade and skid shoes | When wear, uneven clearing, or impact damage is evident | Cutting-edge wear, shoe wear, or mismatched settings | Correct the setting if the parts are sound; replace worn or damaged parts. |
Lubrication and Fluid Requirements
For the configuration covered by OMLVU33941, Deere’s gearbox level-check procedure calls for SAE 80W-90 API GL-5 gear oil when topping up. With the blower safely positioned as shown in the manual, remove the identified filler plug and check that oil reaches the bottom of the opening. Deere describes the auger gearbox and the separate blower drive gearbox, where fitted, as non-serviceable internally. An accessible fill plug lets you check and top up the oil; it does not make gearbox disassembly an owner-maintenance procedure. If the level drops again, locate the leak rather than treating regular top-ups as normal.crossimplement
Do not confuse the enclosed chain housing with either gearbox. Deere gives the enclosed housing its own oil-level procedure, which calls for removing the blower from the Quick-Hitch and setting it on level ground. Confirm the housing’s lubricant and checking instructions in the manual for your serial number before opening it. On the exposed-chain version covered by OMLVU33941, Deere specifies TY6240 chain lubricant spray or equivalent and a chain deflection of 3/16–3/8 in. (4.7–10 mm), with at least 3/16 in. throughout an auger rotation. That setting does not apply to the enclosed chain drive.crossimplement+1
For the chute base, auger fittings, and driveshaft fittings, the component procedures in OMLVU33941 call for John Deere Moly High Temperature EP Grease or equivalent. The manual’s general grease section also lists preferred Deere greases and an NLGI No. 2 all-purpose alternative. Follow the instructions for the specific point and your manual revision. If the grease already in the assembly is unknown, confirm compatibility before mixing products.crossimplement
Wear Checks That Can Reveal Repair Needs
-
Scraper blade and skid shoes: Look for an uneven cutting edge, worn-through shoes, or one shoe set lower than the other. Compare both sides on level ground. A thin layer left on gravel may be intentional; a new uneven strip on pavement calls for a closer look at the settings and wear.crossimplement
-
Auger and impeller: Look for bent auger flighting—the spiral metal that feeds snow inward—and fresh scrape marks on the housing. Metal-to-metal contact or visible shaft movement warrants inspection before the next run. A new shear bolt will not correct a bent rotating part.crossimplement
-
Driveline and hitch: Check for missing guards, a coupler that will not lock, or damaged hitch hardware. Do not engage the PTO until the shaft locks securely and all shields are in place.crossimplement
-
Chute cables and hydraulics: Look for frayed cable strands, a cable out of its pulley groove, or a hose rubbing a bracket. Identify which part is damaged before ordering; the cable assembly, cylinder, and hoses are separate repair items.crossimplement
-
Oil leaks: Identify whether the wet area starts at a gearbox, the enclosed chain housing, or a hydraulic connection. Those assemblies have different service procedures, so the nearest wet fitting is not necessarily the source.crossimplement
Preseason Preparation and Storage
Before the first snowfall, perform the beginning-of-season services for the fitted drive. Confirm the hitch latches and PTO coupler lock, the guards are in place, and the hoses run through their guides. Use the tractor and attachment manuals to confirm the correct ballast for your setup. Check that the chute travels in both directions before heading into snow.crossimplement
At the end of the season, remove snow and ice, clean the attachment and driveshaft, and touch up damaged paint to limit rust. Carry out the end-of-season lubrication, secure the disconnected driveshaft on its support, and cap and secure the hydraulic hose ends. Deere recommends storing the attachment on a nonabrasive surface or wooden blocks, with a waterproof cover if it must stay outdoors. The blower has no separate engine or fuel system to winterize.crossimplement+1
A wear check tells you what needs attention. The attachment serial number and the diagram for the fitted assembly tell you what to order.
Finding the Correct 54SB Replacement Parts
Model, Serial Number and Configuration Checks
Record the full product identification number from the snowblower’s own identification plate, not just the tractor serial number or the last six digits of the attachment number. If you cannot find the plate, use the Product Identification illustration in the applicable manual or ask a dealer to identify the plate location for your version. Also record the tractor model, identify the front hitch and PTO setup, and note whether the blower has an exposed chain or an enclosed chain housing.manuals.deere+3
Deere published OMLVU24141 for a 54-inch compact-tractor snowblower listing that starts at serial 020001. OMLVU33941 covers a later compact-tractor Quick-Hitch listing that starts at serial 070001 for the 54-inch model. These are published manual starting points, not proof that every higher serial uses the same parts or even the same manual. Deere also offers a 54-inch Quick-Hitch blower for X700 lawn tractors and select compact tractors, so confirm the attachment and tractor configuration before using a manual or diagram.manuals.deere+4
Parts Diagrams and Manuals
Use the John Deere Technical Information Store to locate the operator’s manual and the John Deere Parts Catalog to find the illustrated assembly. If the catalog shows multiple 54-inch entries, have a Deere dealer match the full attachment identification number before ordering. For hitch hardware or the tractor-side PTO, ask the dealer to check the tractor and kit listings as well as the blower diagram.techpubs.deere+2
The number beside an arrow in a diagram is a callout, not necessarily the number you order. Match it to the part number in the accompanying list and read any serial or configuration notes. If Deere lists a supersession, meaning a newer number replaces the old one, confirm whether the replacement includes different hardware or comes as a kit. Check whether you are buying the individual component or the complete assembly.partscatalog.deere+1
Replacement Parts and Fitment Checks
| Component | Fitment qualification | What to check before ordering |
|---|---|---|
| Scraper blade | The compact-tractor manual distinguishes the standard setup from an optional heavy-duty flat blade | Match the blade profile, mounting-hole pattern, and hardware to the housing diagram. The optional blade changes the documented skid-shoe clearance. |
| Skid shoes | The documented configuration allows inside or outside mounting in specific positions | Identify the shoe and hardware in the housing diagram. Confirm the mounting position for the blade and surface you use. |
| Auger or impeller shear hardware | Identify the exact attachment and the position where the bolt failed | Compare the auger-end and impeller callouts separately. Confirm the matching nut and whether the parts are supplied together. |
| Chain and sprockets | Exposed and enclosed drives have different service procedures | Match the drive illustration to the actual housing before ordering a chain, sprocket, shield, or housing component. |
| Chute cables, pulleys, and hydraulic cylinder | The documented hydraulic rotation system moves the chute through cables | Identify whether the fault is in the cable assembly, pulley, anchor, cylinder, or hose rather than ordering a complete chute. |
| PTO driveshaft, coupler, and shields | The blower-side shaft and tractor-side PTO and hitch equipment must match the installation | Identify which side of the connection needs repair. Confirm whether the coupler or guard is sold separately from the shaft. |
These distinctions come from the attachment’s documented assemblies and installation choices. Use the serial-matched catalog to establish the orderable number for the part in front of you.crossimplement+2
Shear Bolts: Auger Ends and Impeller
On the configuration covered by OMLVU33941, Deere shows shear-bolt locations at both auger ends and at the impeller. A shear bolt is designed to break under overload to protect the drive. That makes the location as important as the serial number when identifying a replacement. Do not assume the auger and impeller use the same hardware, and do not substitute an ordinary bolt or change the bolt grade. Deere calls for the same shear hardware as originally fitted.crossimplement
After a break, isolate the machine and find out what caused the overload. If you confirm that only the bolt failed and the mating parts are undamaged, follow the position-specific installation instructions in your manual. If the holes are visibly enlarged, the paddles are distorted, or the new bolt breaks again, stop rather than fitting stronger hardware.crossimplement
Parts Sources in the USA and Canada
-
USA: Start with the John Deere Parts Catalog to identify the assembly, then use John Deere’s online parts store or an authorized John Deere dealer to confirm the current orderable number and what comes with it.partscatalog.deere+1
-
Canada: Use the John Deere Parts Catalog to identify the assembly and an authorized Canadian John Deere dealer to confirm fitment and obtain a quote in Canadian dollars. If comparing a U.S. quote, check the currency and total delivered cost before ordering.manuals.deere+1
54SB Snowblower Problems and Repairs
Deere documents the 54-inch blower’s two-stage design, shear protection, PTO connection, and hydraulic chute mechanism. Those details help narrow the fault, but a symptom alone does not establish which part failed. Use what you noticed from the tractor seat to decide what to inspect after shutdown. Never run the blower with a guard off or have someone stand beside it to watch the drive.crossimplement+1
Troubleshooting at a Glance
| Symptom | Plausible causes | First safe check | Repair direction or escalation |
|---|---|---|---|
| Neither auger feeds and there is no discharge | PTO coupler not locked, obstruction, or fault in the attachment drive | Isolate the tractor; inspect the coupler and look for visible obstructions | Correct a confirmed connection problem. If the drive remains dead, have the PTO-to-blower drive path checked. |
| One side stops feeding, or the blower gathers snow but does not throw it | Auger-end or impeller shear bolt has failed; chute or impeller area is blocked | Isolate and check the relevant shear-bolt position; use a clean-out tool for any blockage | Replace only confirmed failed shear hardware after correcting the cause. Escalate if rotating parts are damaged. |
| Chute won’t rotate or stops short | Ice at the base, cable slack or damage, or a hydraulic connection or cylinder fault | Check the base, visible cable routing, and hose condition with the machine isolated | Clear ice safely, use the applicable cable procedure, or refer hydraulic faults for service. |
| Scraper leaves an uneven strip or digs into gravel | Mismatched shoe settings, worn shoes or edge, or impact damage | Compare both shoe positions and inspect the cutting edge on level ground | Set both sides for the surface. Replace worn parts or have a distorted housing checked. |
| New vibration or scraping after an impact | Debris, bent flighting or impeller, housing contact, or damaged drive parts | Stop immediately and look for trapped debris and fresh contact marks after isolation | Do not run again if a rotating part is bent, loose, or touching the housing. |
Neither Auger Feeds and Nothing Comes Out
If the blower stopped working just after installation, start at the PTO connection rather than at the gearbox. Deere’s installation procedure requires the driveshaft collar to lock onto the tractor’s front PTO. With the tractor isolated, inspect the connection according to the manual. A shaft that appears to be seated is not enough if the collar has not locked. If it will not lock or the guard is damaged, do not engage the PTO.crossimplement
If the connection is secure and no obstruction is visible, the next step is to trace power through the tractor PTO, driveshaft, and the fitted chain drive. A stationary auger does not establish that the auger gearbox has failed. Have a dealer check the drive path if the fault cannot be found without disassembly or powered testing.crossimplement+1
One Side Stops Feeding, or Snow Collects Without Being Thrown
The augers gather snow and feed it toward the center; the impeller throws it up the chute. If one side stopped feeding during the last pass, start with that side’s auger-end shear bolt. If snow was feeding inward but no longer discharged, check for a blockage and inspect the impeller shear-bolt position shown in the applicable manual. Checking only the two outer auger bolts does not rule out a fault at the impeller.crossimplement+1
If you find a blockage, clear it with the clean-out tool under the shutdown precautions above. If you find a broken bolt, address the obstruction or impact damage before fitting the correct replacement. If all applicable bolts are intact but the impeller still fails to drive, or if a bolt breaks repeatedly under otherwise normal use, have the shaft, mounting points, and drive inspected.crossimplement
Chute Won’t Rotate or Stops Short
On the compact-tractor configuration described in OMLVU33941, a hydraulic cylinder moves cables that turn the chute. A chute that stops short may have slack cables or a routing problem; a chute that does not move at all may also have ice at the base or a hydraulic connection fault. With the machine isolated, look for ice, damaged cable strands, a cable off a pulley, and a visibly damaged or disconnected hose. Do not force a frozen chute or reach into a cable pinch point.crossimplement
For that configuration, Deere specifies 100 degrees of travel to each side and directs the owner to position the chute facing right, as viewed from the seat, before shutting down and adjusting cable tension. Use that procedure only on the matching configuration, and replace a frayed cable rather than tightening it. If the cylinder fails to respond after the connections are confirmed, or if a hose or cylinder leaks, stop using the hydraulic function and have it checked.crossimplement
Scraper Leaves an Uneven Strip or Digs Into Gravel
First compare the two skid shoes on level ground. On the configuration covered by OMLVU33941, positions A or B are for smooth surfaces and C or D are for gravel or rough surfaces. Some positions require the shoes to be mounted inside or outside the housing, and the optional heavy-duty flat scraper changes the clearance. Match the setting to both the fitted blade and the surface, rather than copying the hole position from another blower.crossimplement
If sound shoes are simply mismatched, set both sides alike. If the shoes are correctly set but the cut remains uneven, inspect the edge for uneven wear and the housing for distortion. Replace a worn blade with the catalog-matched part; have a bent housing checked before fitting a new blade that may not seat correctly.crossimplement
New Vibration or Scraping After an Impact
Deere directs operators to stop immediately if the blower begins vibrating abnormally. Once it is isolated, look for an object trapped in the auger housing, bent flighting, and bright scrape marks where the auger or impeller has touched the housing. Even if you find a broken shear bolt, look for impact damage before installing a replacement.crossimplement
Do not straighten an impeller in place or run the blower again to see whether the vibration clears. If a rotating part is visibly bent, a shaft appears loose, or the housing has moved into the path of the auger or impeller, have the affected assembly checked before returning it to service.crossimplement
Owner Maintenance or Professional Repair?
For an owner who can safely isolate the attachment and follow the serial-matched manual, grease service, gearbox oil-level checks, skid-shoe adjustment, and replacement of confirmed broken shear hardware are reasonable jobs. The exposed-chain adjustment is also documented, but it requires disconnecting the driveshaft, checking deflection through rotation, and keeping the shield in place for operation. It is not the same job as checking oil in the enclosed chain housing.crossimplement
Use professional service for persistent gearbox oil loss, suspected internal drive failure, hydraulic faults that require pressure testing, a PTO coupler that will not lock, or damage to the impeller, shaft, or housing. Before deciding whether to repair or replace the attachment, get a diagnosis that distinguishes the failed part from any secondary damage. Compare the confirmed repair scope, parts availability, and local labor quote with the condition and value of the complete blower and its tractor-specific mounting equipment.crossimplement+1
Frequently Asked Questions
Does a serial number ending above 070001 automatically mean OMLVU33941 applies?
No. That is the starting number printed for the 54-inch configuration in that publication, not a universal cutoff for every 54SB. Use the full attachment identification number and tractor configuration to confirm the correct manual, especially for an X700 installation or a later attachment.machinerypete+3
Can I identify the correct shear bolt by measuring the old one?
Use the serial-matched parts listing and the bolt’s location instead. A bolt that matches the old one in diameter and length is not necessarily designed to break at the same load. Identify whether it came from an auger end or the impeller, then confirm the correct bolt and nut.crossimplement+1
Does the enclosed chain drive eliminate gearbox oil checks?
No. The enclosed chain housing has its own level-check procedure. The auger gearbox—and the separate drive gearbox if your configuration has one—has a separate check. Identify each housing before removing a plug or adding lubricant.