
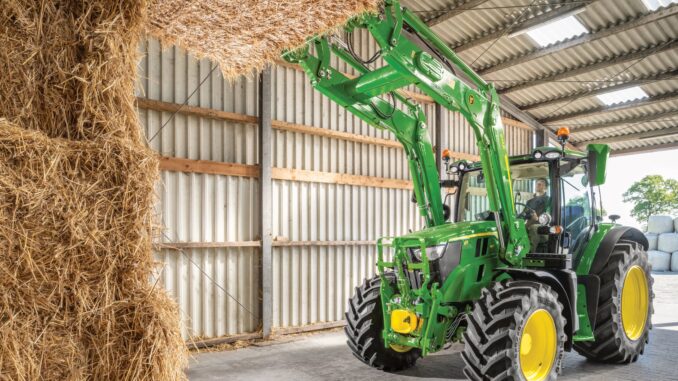
Introduction to the John Deere tool box
The John Deere tool box is a simple but essential accessory that keeps critical tools, pins, and hitch hardware within easy reach on your lawn tractor or compact utility tractor. It is typically a molded plastic or metal box mounted to the rear fender, frame rail, or loader tower, depending on your model.
This John Deere tool box Service and Repair Guide covers inspection, repair, replacement, and mounting hardware, along with where to find parts diagrams and how to decide between DIY and dealer support. It is written for homeowners and DIY users in the USA and Canada who want a clear, step‑by‑step approach.
General overview of the John Deere tool box
The John Deere tool box is designed as an accessory or factory‑installed option on many riding mowers, garden tractors, and compact tractors. In the Deere lineup it sits in the “attachments and accessories” category rather than being a core mechanical system, but it still takes abuse from daily use, vibration, and weather.
Key components of a typical John Deere tool box setup include:
-
The tool box body (plastic or metal shell)
-
Mounting bracket or plate specific to the tractor series
-
Fasteners (bolts, screws, washers, lock nuts)
-
Rubber bumpers or spacers (on some models)
-
Optional latch or strap if supplied with your model
Common John Deere tool box‑related service parts an owner might actually buy include:
-
Replacement tool box insert or shell
-
Mounting bracket kit for their series (e.g. 100‑series, X300 series, 1 Series compact utility tractors)
-
Hardware kit (bolts, nuts, washers)
-
Rubber bumpers or vibration isolators
-
Replacement latch or strap if equipped
Because John Deere uses different brackets and mounting hole patterns between series, it is important to match the tool box and bracket kit to your exact tractor model and serial number.
Troubleshooting approach for the John Deere tool box
With the John Deere tool box, troubleshooting starts with what you see and hear during normal use rather than with part numbers or diagrams. You work backward from visible symptoms like a loose box, cracked plastic, or missing fasteners.
Main symptom categories for John Deere tool box issues:
-
Mounting and stability problems (tool box wobbles, leans, or rattles)
-
Cracked, broken, or deformed tool box body
-
Missing or damaged hardware (bolts, nuts, spacers)
-
Interference with seat, fender, hitch, or rear implements
-
Water and debris getting into the tool box
-
Paint or corrosion problems on metal boxes and brackets
For most owners, a simple visual inspection with the tool box empty will reveal cracks, missing screws, or brackets that have shifted or bent.
Emergency and immediate repair needs
Not every tool box issue is an emergency, but a few problems should be addressed immediately because they can affect safe operation or cause further damage to your tractor or attachment.
John Deere tool box mounting issues
A loose or poorly secured John Deere tool box can rattle, fall off, or interfere with the seat, fender, or hitch operation. It might start as a small wobble or vibration noise and progress to cracked fenders or lost hardware.
Common causes:
-
Missing or loose mounting bolts
-
Mounting holes elongated or worn
-
Bent mounting bracket
-
Installation with incorrect hardware or spacers
-
Overloading the tool box with heavy tools
Basic checks and steps:
-
Remove all tools and empty the box.
-
Grab the tool box and try to move it in all directions; note any movement.
-
Inspect each mounting bolt for tightness and check for missing hardware.
-
Look for cracks in the bracket, fender, or frame where the bracket attaches.
-
If bolts are loose but holes and brackets are intact, tighten to a firm, snug fit; if anything is bent or cracked, plan for replacement parts rather than forcing it.
John Deere tool box cracking and damage
Cracks in the John Deere tool box body or lid can allow water in, cause tools to fall out, or lead to complete failure where the box separates from the bracket. Cracks often start at bolt holes or corners.
Common causes:
-
Overloading the box with heavy steel tools or chains
-
Vibration from rough ground, especially with loose fasteners
-
UV damage and age‑related brittleness (plastic boxes)
-
Impact from backing into obstacles or closing the seat/hood on the box
Basic checks and steps:
-
Clean dirt from the box so cracks are easier to see.
-
Inspect corners, mounting flanges, and bolt holes for fine cracks.
-
Check for deformation where the box no longer sits square on the bracket.
-
For minor hairline cracks, consider temporary reinforcement (e.g. washers and gentle tightening) and plan a replacement box.
-
For major cracks or missing material, replace the box rather than attempting structural repairs with glue.
John Deere tool box interference with implements
If the John Deere tool box contacts the rear hitch, bagger system, or attachments when raising or lowering, it can damage both the accessory and the tractor or limit motion. This is important to correct immediately.
Common causes:
-
Incorrect bracket kit for the tractor series
-
Box mounted in the wrong position or wrong set of holes
-
Deformed or bent mounting bracket
-
Oversized aftermarket tool box adapted to Deere brackets
Basic checks and steps:
-
Slowly operate the hitch or attachment while watching the tool box clearance.
-
Note exactly where and when contact occurs (fully raised, lowered, or in between).
-
Compare your current mounting location to the instructions or parts diagram for your model.
-
If the bracket or box is clearly bent, remove and straighten or replace the bracket.
-
If an aftermarket box is too large, swap to the correct John Deere tool box kit that is designed for your tractor.
DIY or dealer? John Deere tool box repair decision guide
Most John Deere tool box repairs fall firmly on the DIY side as long as you are comfortable with basic hand tools. You are usually dealing with bolts, brackets, and plastic shells rather than complex mechanical systems. The “line” where a dealer becomes necessary is usually when the tool box mounting bolts share hardware with core structures like ROPS, seat belt anchor points, or frame sections that must meet safety standards.
Good DIY jobs:
-
Replacing a plastic John Deere tool box with an OEM replacement
-
Installing or upgrading a tool box kit to an existing tractor
-
Replacing missing bolts, nuts, and washers
-
Touching up paint on metal brackets and boxes
-
Adding foam or simple dividers for tool organization inside the box
Advanced DIY or dealer jobs:
-
Replacing or repairing brackets tied into ROPS or cab structure
-
Welding or fabricating custom brackets or mounts
-
Correcting damage where the tool box failure has cracked the tractor fender or frame
-
Integrating the tool box around custom rear attachments or non‑Deere accessories
Skill level guide:
-
Beginner: Tightening bolts, cleaning the box, replacing a cracked plastic shell using existing hardware.
-
Intermediate: Installing a full John Deere tool box kit on a bare tractor, aligning brackets to avoid interference with hitch or bagger, lightly modifying non‑structural brackets.
-
Advanced: Fabricating or welding custom mounts, working around ROPS, re‑engineering mounting to clear unique attachments.
Parts needed for John Deere tool box repairs and what information you need
Before ordering parts for your John Deere tool box, gather the right identification details so you get a compatible kit and hardware. This reduces returns and ensures you follow the same layout used in Deere parts diagrams.
Information to collect:
-
Full tractor model name (e.g. S220, X350, 1025R) or mower series
-
Product Identification Number (PIN) or serial number
-
Whether the tractor has a factory‑installed tool box or requires an accessory kit
-
Any existing John Deere tool box or bracket part numbers printed or cast into the parts
-
Whether the box is plastic or metal and if you have a rear bagger, hitch, or other attachments in that area
Key John Deere tool box service parts and notes
Below is a generic example of a parts table for John Deere tool box components. Always confirm exact numbers for your tractor in the online parts catalog or your operator’s manual.
OEM vs aftermarket guidance:
-
Use OEM John Deere tool box assemblies and brackets wherever possible because they are designed for your specific tractor, clear factory attachments, and match existing holes.
-
OEM is recommended for any hardware that ties into safety‑critical structures like ROPS or seat belt mounts.
-
Aftermarket tool boxes can be used if they are clearly marketed as compatible with your tractor series and include proper brackets; however, be prepared for extra fitting and adjustment.
-
For generic hardware such as bolts and washers not tied to safety features, quality aftermarket fasteners of the same grade and size may be acceptable.
Where to find John Deere tool box parts diagrams and manuals
Good parts diagrams and manuals make John Deere tool box work much easier because you can see how the box and bracket are supposed to mount and which hardware belongs where.
Common sources:
-
Official John Deere online parts catalog and illustrated diagrams via the main Deere parts website; you can search by tractor model and navigate to “attachments/tool box.”
-
Operator’s manual for your tractor, which sometimes includes tooling and storage accessories along with mounting instructions.
-
John Deere Technical Publications store, where you can purchase PDF service and technical manuals for more complex machines.
-
Reputable Deere‑focused parts sites that host model‑specific pages and exploded diagrams for accessories such as tool boxes; look for sites that clearly mark OEM part numbers and show diagrams by model.
Use the diagrams to confirm bracket orientation, bolt lengths, and any spacers or washers before you disassemble or reassemble your tool box.
How to locate model, serial, and part numbers
Model and serial numbers are vital when ordering a John Deere tool box kit because brackets and hole patterns differ between series. Inaccurate information often leads to ill‑fitting brackets or boxes that interfere with existing accessories.
Typical places to find these numbers:
-
Look for the tractor Product Identification Number (PIN) on a metal plate or sticker, usually near the rear of the tractor frame, under the left or right rear fender, or on the frame side rail.
-
Check inside the engine compartment, under the hood, or around the dashboard area for a label showing the full model and serial number.
-
For attachments or existing John Deere tool boxes, inspect the underside or back of the box and its bracket for cast‑in or printed part numbers.
-
Compare any numbers you find to the parts catalog or online diagrams to verify you are ordering the correct kit.
-
Take clear photos of labels and the current tool box layout so you can reference them when ordering parts or seeking dealer help.
Buying John Deere tool box parts online and in stores
For John Deere tool box parts, a mixed buying strategy works best. Use OEM numbers from diagrams and manuals, then decide where to purchase based on availability and price.
General strategy:
-
Online: Use official John Deere parts websites and well‑known aftermarket retailers that list genuine OEM numbers and clearly show compatibility by model and serial range.
-
Dealer counter: Best choice when you are unsure which bracket kit you need, when your tractor falls in a serial number break, or when you want to confirm if a tool box kit will clear a specific attachment.
-
Retail stores: Suitable for generic hardware like bolts and washers, as long as you match size and grade; less ideal for brackets or complete boxes that must fit specific Deere mounting points.
Examples of useful URLs to start with (enter your tractor model once you are there):
-
John Deere Parts (official site): https://www.deere.com
-
John Deere Technical Publications: https://techpubs.deere.com
-
A reputable aftermarket/parts site with Deere diagrams, such as an illustrated parts catalog site that supports model‑based searches
Always cross‑check any aftermarket kit against your OEM part numbers and your tractor’s serial number range before ordering.
Step‑by‑step fitting guide for common John Deere tool box jobs
Replacing a cracked John Deere tool box
This job is typical when the plastic shell has cracked around the mounting holes or corners.
Steps:
-
Park the tractor on a flat surface, set the parking brake, and remove the key.
-
Empty the existing tool box completely and clean off dirt so you can see the hardware.
-
Note the location and orientation of the box and take a quick photo for reference.
-
Remove the mounting bolts and lift off the old tool box, leaving the bracket attached if it is still in good condition.
-
Position the new John Deere tool box on the bracket, aligning the mounting holes exactly as shown in the parts diagram.
-
Install the bolts with washers, tighten evenly until snug, and confirm the box is solid with no wobble.
Installing a new John Deere tool box kit on a tractor
If your tractor didn’t come with a tool box, a kit adds convenient storage for pins, hitch hardware, and small tools.
Steps:
-
Verify that the kit is designed for your exact tractor model and series before opening the packaging.
-
Park the tractor safely, set the brake, and remove the key.
-
Identify the mounting holes or locations on the frame or fender using your operator’s manual or parts diagram.
-
Attach the mounting bracket first, using the supplied bolts, washers, and spacers, and tighten them just snug so you can adjust alignment.
-
Place the John Deere tool box on the bracket, align the holes, and install the mounting hardware.
-
Tighten all bolts fully, then load a few tools and test for clearance with the seat, hitch, and other attachments.
Replacing or tightening John Deere tool box mounting hardware
Over time, bolts can loosen or go missing, leading to vibration and noise.
Steps:
-
Empty the tool box and inspect all mounting points.
-
Use a wrench or socket to check each bolt; tighten any that are loose to a firm, snug fit.
-
If any bolts are missing, match replacement bolts by size and length using the parts diagram or an existing bolt.
-
Install new bolts and washers where needed, tightening them evenly to avoid stressing the box or bracket.
-
Refill the box and test drive over a short, bumpy section of your lawn to check for rattles.
-
If vibration persists, consider adding OEM rubber spacers or a hardware kit designed for your model.
Adding a latch or strap to secure the John Deere tool box contents
On rough terrain, tools can bounce and occasionally pop the lid or jump out of a partially open box; a strap or latch helps.
Steps:
-
Choose a latch or strap compatible with your John Deere tool box (OEM or suitable aftermarket).
-
Empty the box and clean the mounting area.
-
Position the latch or strap bracket according to the instructions, ensuring it will not interfere with the seat or hitch.
-
Mark and drill any required holes if the kit instructs, being careful not to damage the box.
-
Install the latch hardware and tighten it securely.
-
Load the box and test the latch by driving slowly over rough ground to ensure it stays closed.
Maintenance to prevent John Deere tool box problems
Even though the John Deere tool box is a simple accessory, regular checks can prevent cracks, lost bolts, and annoying rattles.
Focus areas:
-
Mounting hardware: Periodically check bolts and nuts for tightness and signs of elongation in the mounting holes.
-
Load management: Avoid overloading the box with heavy steel tools or chains; store the heaviest items closer to the tractor frame when possible.
-
Weather protection: Keep lids closed, and consider removing contents or covering the box if the tractor sits outside in rain and sun for long periods.
-
Corrosion protection: For metal boxes and brackets, touch up chipped paint and remove rust so the bracket remains strong.
-
Vibration control: Use correct spacers and rubber bumpers if your model includes them, and replace them when they are worn or missing.
Maintenance schedule and year‑round checklist for John Deere tool box care
While the operator’s manual focuses on engine and drivetrain maintenance, it makes sense to align your tool box checks with your overall schedule so nothing is missed.
Daily / before each use
-
Confirm the John Deere tool box lid is closed and latched or strapped if applicable.
-
Check that the box does not visibly wobble or contact the seat, hitch, or attachments.
-
Remove any loose items that could fall out while mowing or driving.
After approximately 8 hours of operation
-
Inspect tool box mounting bolts for looseness or movement.
-
Check for new cracks around the mounting holes or corners of the box.
-
Make sure heavy tools are not deforming the box or bracket.
Every 25 hours of operation
-
Remove the contents and clean inside the John Deere tool box, removing dirt, grass, and moisture.
-
Inspect the bracket and nearby frame or fender for signs of stress, such as hairline cracks or paint flaking.
-
Re‑tighten all hardware to a snug, even torque and replace any missing or damaged fasteners.
Every 50 hours or yearly
-
Remove the tool box and bracket (if practical) to check for rust, frame damage, or elongated mounting holes.
-
Touch up any chipped paint on metal brackets or boxes, and replace severely corroded parts.
-
Reinstall the box carefully following the parts diagram or kit instructions, confirming all clearances and fit.
Seasonal checklist (pre‑season and end‑of‑season)
-
Before the mowing or working season, empty the John Deere tool box, clean it, and reorganize tools so only essential items are carried.
-
At the end of the season, remove tools that can rust or corrode, dry the box thoroughly, and leave the lid cracked open in a dry space if storing indoors.
-
For tractors stored outside, consider removing valuable or heavy tools from the box during long‑term storage to reduce stress and deter theft.
John Deere tool box – repair, upgrade, or replace?
Because the John Deere tool box is relatively inexpensive compared to major tractor components, the decision is often straightforward: if the box or bracket is badly cracked, rusted, or mis‑matched to your tractor, replacement is usually the best option. Repairs such as glue or makeshift brackets tend to be temporary and may introduce new problems like interference or stress on the fender.
Repair if:
-
Only minor cracks exist and the structure is still solid.
-
Hardware is missing or loose but the box and bracket are intact.
-
The box is slightly misaligned but can be corrected by repositioning the bracket.
Upgrade if:
-
Your tractor lacks a tool box and you want a factory‑style storage solution.
-
You want a larger or better‑organized John Deere tool box kit designed for your series.
-
You are adding other accessories and want a more durable metal or heavy‑duty box.
Replace if:
-
The box is extensively cracked or deformed.
-
The bracket is bent or rusted to the point that proper alignment is impossible.
-
The existing box or bracket interferes with factory attachments even after correct installation.
Expanded troubleshooting FAQ – John Deere tool box (30+ questions)
1. Why is my John Deere tool box rattling so much?
Rattling usually means the tool box mounting bolts are loose, a spacer is missing, or the box is overloaded with heavy tools that bounce during operation. Empty the box, tighten all mounting hardware, and check for missing washers or rubber bumpers. If rattling persists, inspect the mounting holes and bracket for elongation or cracks and replace parts as needed.
2. Why did my John Deere tool box crack around the bolts?
Cracks around the bolt holes often come from over‑tightening the hardware, running with loose bolts that allow the box to vibrate, or carrying excessive weight in the box. Once cracks form, they tend to spread with continued use. The best fix is to replace the box, use appropriate washers to spread the load, and avoid overloading the new box.
3. Can I repair a cracked John Deere tool box with glue?
You can sometimes temporarily patch small cracks with plastic‑compatible adhesives, but this is usually a short‑term fix. Glue does not restore original strength, especially at high‑stress bolt holes and corners. For long‑term reliability, replacing the tool box with an OEM unit is recommended.
4. Why does my John Deere tool box lean or sit crooked?
A leaning tool box usually indicates a bent bracket, uneven mounting surface, or missing spacer on one side. Check the bracket against a straight edge and inspect the fender or frame for deformation. Correct any bent parts, replace damaged brackets, and ensure all spacers and washers are in place before tightening the box.
5. What tools should I keep in my John Deere tool box?
Typical essentials include a hitch pin and clip, a few spare cotter pins, a small adjustable wrench, a screwdriver, and gloves. If space allows, you might add a basic pliers and a small roll of tape. Avoid overloading with heavy wrenches or chains that can damage the box and bracket.
6. Can I mount a larger aftermarket tool box on my John Deere tractor?
You can mount a larger aftermarket tool box, but you must ensure compatibility with your tractor’s mounting points and attachments. A larger box may interfere with the seat, rear hitch, bagger, or PTO. Always test fit carefully, check clearances through the full range of hitch motion, and consider reinforcing brackets if necessary.
7. Why does my John Deere tool box hit the rear bagger or hitch?
Contact usually means the wrong bracket kit is installed, the box is mounted in the wrong position, or the box is simply too large for your combination of attachments. Consult the parts diagrams for your tractor, verify you have the correct tool box kit, and reposition or replace the box as needed to restore proper clearance.
8. Is it safe to drill extra holes in my John Deere tool box bracket?
Drilling in non‑structural areas of the bracket to add mounting options can be acceptable for experienced DIYers, but it must be done carefully. Avoid drilling near welds, bends, or critical mounting points, and never modify areas that tie into safety systems like ROPS or seat belts. When in doubt, use the factory holes and orientation.
9. How much weight can a John Deere tool box hold?
John Deere does not always publish a specific weight limit for accessory tool boxes, but they are intended for small tools and hardware, not large chains, weights, or fuel cans. As a rule of thumb, keeping the load under a few kilograms (a handful of small tools) helps prevent premature wear and cracking. If you consistently need more storage, consider additional or larger storage solutions.
10. Why are my John Deere tool box bolts constantly coming loose?
Persistent loosening can be caused by vibration, missing lock washers, or using the wrong type of fasteners. Replace plain nuts with lock nuts or use thread‑locking compound where appropriate, and make sure you follow the original bolt size and grade. Regularly re‑check torque as part of your maintenance routine.
11. Can I install two John Deere tool boxes on the same tractor?
Some owners mount a second box on the opposite fender or on a loader tower, but this depends on the model and available mounting points. Check for interference with the seat, ROPS, and attachments, and ensure any added weight does not exceed the capacity of the mounting area. It may be better to use an OEM multi‑compartment box than to improvise multiple boxes.
12. Why is water collecting inside my John Deere tool box?
Water can collect if the lid does not seal fully or if the box has cracks or gaps. Inspect the lid for warping, check for cracks in the box, and ensure the box is not installed at an angle that encourages water pooling. If necessary, drill a small drain hole in a safe location or upgrade to a box with a better lid seal.
13. Can I store fuel or oil containers in my John Deere tool box?
Storing small, sealed containers of oil or fluids may be acceptable, but fuel should generally not be carried inside the tool box due to safety and spill concerns. Fuel containers can leak and cause fire hazards or damage to plastic and paint. Use appropriate fuel can holders designed for tractors instead.
14. Does the John Deere tool box affect tractor balance?
The tool box itself is light and usually does not affect balance significantly when loaded with small tools. However, overloading with heavy objects can shift weight slightly and increase stress on the mounting area. For steep slopes or heavy field work, keep the tool box load minimal and store heavier items closer to the center of the tractor.
15. Why is the paint peeling on my metal John Deere tool box?
Paint peeling often results from weather exposure, impacts, or minor scratches that expose bare metal. Over time, rust can form and lift more paint. Sand the affected area, apply rust‑inhibiting primer, and repaint with a suitable color to protect the metal and prolong the life of the box.
16. Are John Deere tool boxes interchangeable between models?
Some boxes and brackets are shared across series, but many are specific to certain models or serial number ranges. The box itself may look similar, but the brackets and mounting holes can be different. Always check the parts catalog to see if a particular box and bracket kit is approved for your specific tractor.
17. What should I do if my John Deere tool box fell off while mowing?
Safely stop the tractor, retrieve the box and any tools, and inspect the mounting area for damage. Check whether bolts broke, loosened, or were missing. Replace any damaged hardware, inspect the bracket and fender for cracks, and reinstall the box correctly or replace it if it is cracked or broken.
18. Can I paint my John Deere tool box a different color?
Yes, you can repaint a metal tool box as long as you properly prepare the surface by cleaning, sanding, and priming. For plastic boxes, use paints formulated for plastic surfaces. Keep in mind that non‑standard colors may make it harder to match OEM parts visually in the future, but functionally it is fine.
19. Why does my John Deere tool box lid no longer close properly?
A misaligned or warped lid can come from impact, overloading, or UV damage. Check for debris in the hinge area, inspect for cracks, and ensure the box is not distorted by overtightened bolts. If the lid or hinge is damaged, replacing the box is often simpler than attempting to straighten it.
20. Is it okay to remove the John Deere tool box completely?
Yes, you can run the tractor without the tool box if you do not need onboard storage. Just ensure that any mounting hardware left behind does not create sharp edges or interfere with the seat, fender, or hitch. If the bracket is removed, keep it and the box together in case you want to reinstall later.
21. How do I find the correct John Deere tool box kit for my tractor?
Start with your tractor’s full model and Product Identification Number, then use the official parts catalog or a dealer’s system to look up available accessory kits. Search within the “attachments” or “accessories” section for “tool box” entries. Confirm that the kit you select lists your specific model and serial number range.
22. Can I use generic bolts for my John Deere tool box?
You can use generic bolts if they match the size and grade specified in the parts diagram and the bolts are not part of any safety‑critical structure. Use quality fasteners and lock nuts or washers as appropriate. Avoid using low‑grade or mismatched hardware that can loosen or fail under vibration.
23. Why is my John Deere tool box bracket cracking the fender?
If the bracket is not properly supported or is tightened too hard against a plastic fender, it can focus stress on a small area and cause cracking. Ensure that all required spacers and backing plates are in place and that bolts are snug but not over‑tightened. If cracks have started, you may need to repair or replace the fender and adjust the bracket installation.
24. Can I move my John Deere tool box to a different location on the tractor?
Relocating the box is possible on some tractors, especially if alternate mounting points or accessory rails are available. However, moving the box may affect clearance with attachments and may require drilling new holes or using different brackets. Always check clearance and structural strength before changing the mount location.
25. What is the best way to organize a John Deere tool box?
Use small containers or dividers to separate pins, clips, and small tools. Keep frequently used items near the top and heavier items toward the bottom. Avoid filling the box to the lid with loose parts, as this can make lid closure difficult and increase the risk of rattling and damage.
26. Why does my John Deere tool box smell like fuel or chemicals?
Odors usually come from storing fuel, chemicals, or oily rags in the box. Remove all items, clean the box thoroughly with a mild detergent, and allow it to dry fully. Avoid storing fuel containers or heavily solvent‑soaked rags in the box to prevent odors and potential safety hazards.
27. Can I add a lock to my John Deere tool box?
Yes, many owners add simple hasp locks or latch‑and‑padlock systems to deter opportunistic theft and keep children out of the box. Choose a lock system compatible with the box material and design, and ensure it does not interfere with seat movement or access to safety equipment.
28. How can I reduce vibration noise from my John Deere tool box?
Start by tightening all mounting hardware and ensuring the box is not overfilled. Add rubber washers or spacers between the box and bracket if your model supports them. You can also line the bottom of the box with a thin rubber mat to cushion tools and reduce rattling during operation.
29. Is it okay to store electrical items in my John Deere tool box?
You can store small electrical items like spare fuses or connectors if they are kept dry and in sealed bags or containers. Avoid exposing delicate electronics to moisture, vibration, and temperature extremes by using padded or sealed containers within the box.
30. Why did my John Deere tool box kit not fit my tractor even though it said “universal”?
“Universal” kits often target a wide range of models but may not align perfectly with every tractor or attachment combination. Differences in fender shape, hitch configuration, or serial number updates can cause fit issues. It is usually better to use a kit specifically listed for your tractor model and serial range.
31. Can I install a John Deere tool box on a non‑Deere tractor?
It is possible to adapt a John Deere tool box to another brand by fabricating or modifying brackets, but this is strictly a custom DIY project. Fit and clearance will depend on your fabrication skills, and it will not be covered by Deere documentation. For simplicity, many owners choose brand‑specific or generic boxes designed for their machine.
32. What should I do if my John Deere tool box hinge pin falls out?
If the hinge pin is lost or damaged, the lid may detach or flop loosely. Check whether the hinge is designed with a removable pin, then replace it with an OEM pin or a suitable equivalent of the same diameter and length. If the hinge area is damaged or deformed, replacing the entire box is usually the most reliable solution.
33. Why does my John Deere tool box feel flimsy compared to older models?
Newer boxes may use lighter materials or different designs compared to older models. While they are still adequate for light tool storage, they can feel less solid. If you need heavier‑duty storage, consider upgrading to a metal box designed for your tractor or adding a secondary, more robust storage option.
34. Can I wash my John Deere tool box with a pressure washer?
You can clean the box with a pressure washer if you are careful not to direct high pressure at the edges of the lid, hinges, or stickers. Excessive pressure can force water into cracks or lift decals. Use moderate pressure, keep some distance, and allow the box to dry thoroughly afterward.
35. How often should I inspect my John Deere tool box?
Inspect the tool box briefly every few uses and more thoroughly at least once per season. Look for loose bolts, cracks, and signs of interference with other components. Regular inspection keeps small issues from becoming major problems and helps ensure your tools and hardware are securely stored.