
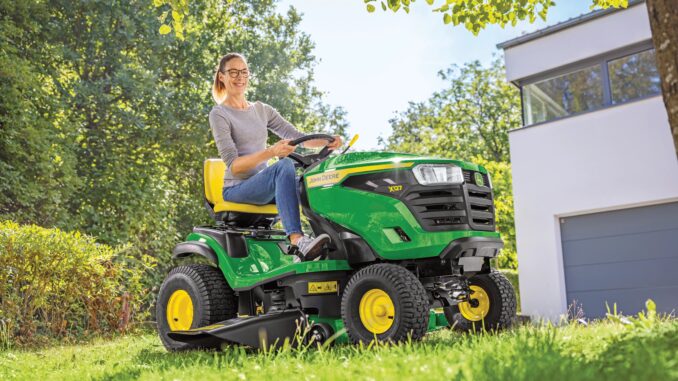
The John Deere E100 is an entry-level 100 Series lawn tractor built around a 42-inch mower deck and a gasoline engine, aimed at routine residential mowing rather than heavier estate or ground-engaging work. It suits homeowners in the USA and Canada who want a straightforward rider for regular grass cutting, light towing within rated limits, and basic seasonal yard work.
This guide covers the practical ownership side of the machine: common repairs, symptom-based troubleshooting, maintenance planning, parts sourcing, and the realistic line between safe DIY work and jobs better left to a Deere dealer.
John Deere E100 model overview
The john deere e100 sits near the basic end of Deere’s 100 Series lineup, below the larger and more feature-heavy E120 through E180 tractors listed alongside it in Deere literature. On the E100, the key owner-service systems are the engine and fuel system, the 42-inch mower and deck drive belt, the automatic transmission and drive controls, and the electrical/safety-switch system that controls starting and blade operation.
For practical ownership, the most commonly bought service parts include the fuel filter AM116304, oil filter AM125424, air filter MIU14395, spark plug M78543 or MIU11020 depending on engine specification, and Turf-Gard 10W-30 oil TY22029 listed in E100 maintenance references. Owners also regularly buy mower blades, mower drive belts, deck hardware, batteries, and switches once the tractor has a few seasons on it, especially if it has been used in dusty or rough mowing conditions.
John Deere E100 troubleshooting approach
With the john deere e100, diagnosis works best when you start from the exact symptom the owner sees instead of replacing parts at random. Deere groups troubleshooting around engine, electrical, tractor, and mower faults, which matches the most common real-world symptom categories: no-start, poor running, weak cutting performance, vibration/noise, overheating or fuel/oil leaks, drive complaints, and electrical or safety interlock problems.
The most useful first pass is to separate the problem into one of these symptom groups:
-
Starting issues, such as cranking but not firing or no crank at all.
-
Running issues, such as surging, stalling, smoking, or loss of power.
-
Cut-quality issues, such as uneven cut, strips of uncut grass, or clumping.
-
Vibration and noise, often linked to blades, pulleys, spindle areas, or belt trouble.
-
Overheating and leak problems, especially around cooling fins, fuel lines, and oil service points.
-
Drive and electrical issues, including weak traction, interlock faults, bad battery connections, or blown fuses.
John Deere E100 immediate repair needs
Some john deere e100 faults should be handled right away because they either make the tractor unsafe or can quickly damage more expensive parts. If the machine has fuel leakage, missing shields, major vibration, non-working safety switches, heavy debris packed near the muffler, or a slipping deck belt that is already overheating, stop using it until the cause is found.
John Deere E100 starting issues
When a john deere e100 will not crank or will not fire, the immediate concern is whether the issue is a simple interlock problem or an electrical or fuel-system fault that leaves you stranded. Continued key cycling without diagnosis can flatten the battery or overheat wiring and starter components.
Common causes:
-
Brake not fully applied.
-
PTO/blade engagement left on.
-
Reverse or travel pedal position issue.
-
Weak battery, corroded terminals, or blown fuse.
-
Dirty fuel, plugged fuel filter, fouled spark plug, or restricted air filter.
Basic checks:
-
Confirm the brake is firmly set and the PTO is disengaged.
-
Check battery cable tightness, visible corrosion, and fuse condition.
-
Confirm fresh fuel is in the tank and inspect the fuel filter for restriction or age.
-
Remove and inspect the spark plug and air filter if the engine cranks but will not start.
John Deere E100 cut-quality problems
On the john deere e100, poor cut quality usually shows up as ragged tips, streaks, scalping, or clumps left behind the deck. If ignored, these problems can overload the deck belt, dull blades faster, and make owners chase engine faults that are really deck setup issues.
Common causes:
-
Dull, bent, or unbalanced blades.
-
Deck out of level side-to-side or front-to-back.
-
Grass too tall, wet, or being cut too low.
-
Deck packed with debris.
-
Worn or slipping mower drive belt.
Basic checks:
-
Clean the underside and top of the deck with the engine off and key removed.
-
Inspect blade edges and check for bends or impact damage.
-
Verify tire pressures before leveling the deck.
-
Set deck pitch so the front is 1/8 to 1/4 inch lower than the rear, per Deere guidance.
John Deere E100 vibration and noise
Abnormal vibration on a john deere e100 is never something to “mow through,” because it often points to blade damage, spindle trouble, loose hardware, or belt/pulley problems. Continued operation can damage spindle bearings, crack deck parts, or throw a belt.
Common causes:
-
Bent blade or blade installed incorrectly.
-
Blade out of balance after sharpening.
-
Loose blade bolt, spindle mounting hardware, or pulley hardware.
-
Debris wrapped in spindle or pulley areas.
Basic checks:
-
Stop immediately and inspect blades after any impact with a stump, rock, or branch.
-
Check both blades and bolts as a set, not one side only.
-
Spin pulleys and spindles by hand with the plug wire disconnected to feel for roughness.
-
Replace damaged blades rather than trying to straighten them.
John Deere E100 overheating and leaks
A john deere e100 that runs hot, smells of burning debris, leaks oil, or shows fuel seepage needs fast attention because these problems can lead to fire risk and engine damage. Deere specifically calls for frequent debris removal around the muffler, manifold, engine intake screens, cooling fins, deck top, transmission area, and battery/fuse area.
Common causes:
-
Grass packed around cooling fins or muffler shield.
-
Oil overfill, underfill, or neglected oil changes.
-
Cracked fuel line or aging fuel filter connections.
-
Oil filter or drain area seepage after service.
Basic checks:
-
Shut the tractor down and let it cool before cleaning.
-
Remove built-up debris from engine cooling and exhaust areas.
-
Check engine oil level on level ground.
-
Inspect the filter, lines, and tank area for wetness or fuel smell before restarting.
John Deere E100 transmission and drive problems
If the john deere e100 hesitates, drives weakly, or feels inconsistent on slopes, the problem may be traction, linkage adjustment, drive wear, or misuse rather than a failed transmission. Keep in mind Deere also emphasizes slope limits and loss-of-traction safety, so poor drive performance can quickly become a control issue.
Common causes:
-
Low traction on wet grass or unsafe slope use.
-
Linkage or pedal issues.
-
Belt or transmission wear requiring deeper inspection.
-
Parking brake drag or wheel/hub issues.
Basic checks:
-
Test the tractor on flat, dry ground before assuming a transmission failure.
-
Make sure the parking brake is fully released.
-
Inspect for dragging brakes, damaged rear tires, or obvious linkage binding.
-
Move dealer-side diagnosis higher on the list if drive loss is severe or intermittent after basic checks.
John Deere E100 electrical problems
Electrical faults on the john deere e100 usually show up as no-crank, repeated blown fuses, dead lights, or an engine that dies when the operator shifts position. Because the tractor relies on several safety switches, electrical diagnosis should focus on battery condition, fuse protection, seat and brake interlocks, and wiring condition before replacing major parts.
Common causes:
-
Weak battery or dirty terminals.
-
Failed seat, brake, or PTO safety switch.
-
Blown fuse.
-
Damaged wiring near the battery, fuse block, or under the hood side panel.
Basic checks:
-
Clean and tighten battery terminals first.
-
Replace a blown fuse only after checking for rubbed or pinched wiring.
-
Test safety switch function in the same order Deere outlines in the controls and operating sections.
-
Hand off repeated fuse failures or harness damage to a dealer or experienced technician.
Summary:
John Deere E100 drive belt replacement steps
Starts then stalls, surges, or runs rough
How to clean a John Deere E100 carburetor
You can often cure E100 surging, stalling, or “runs only with choke” by cleaning the carburettor’s bowl, main jet, and emulsion tube—provided you first rule out stale fuel, a blocked fuel-cap vent, a dirty air filter, and poor fuel flow. Do not alter factory carburettor adjustments; Deere notes that the carburettor is calibrated by the engine manufacturer and normally should not need adjustment.manuals.deere+1
Before you begin
This procedure is for a typical bowl-type carburettor on the E100’s single-cylinder engine. Confirm the exact engine model from the label on the engine before ordering a gasket or rebuild kit, as small component details can vary by production year.
Tools and supplies
-
Safety glasses and nitrile gloves.
-
Carburettor-cleaner aerosol approved for small-engine carburettors.
-
Compressed air, ideally in a can or a low-pressure air gun.
-
Socket set and screwdrivers.
-
Needle-nose pliers.
-
Small fuel-safe container and absorbent rags.
-
Fuel-line clamp or suitable smooth-jaw clamp.
-
New fuel if the old fuel is more than a few weeks old or suspect.
-
Replacement bowl gasket/O-ring, and possibly a carburettor kit, if the original seal is swollen, torn, flattened, or leaking.
Do not clean jets with steel wire, welding-tip cleaners, twist drills, or drill bits. Briggs & Stratton advises against wire because it can damage the calibrated openings; a wooden toothpick is safer for stubborn material.briggsandstratton
Safety preparation
-
Move the mower outdoors to a well-ventilated area, away from boilers, pilot flames, cigarettes, sparks, or appliances.
-
Park on level ground, disengage the PTO/blades, set the parking brake, turn the key off, and remove it.
-
Allow the engine and muffler to cool completely.
-
Disconnect the spark-plug lead and hold it away from the plug so the engine cannot start accidentally.
-
Shut off the fuel valve if your machine has one. If not, clamp the fuel hose gently before disconnecting it. Briggs & Stratton specifically recommends isolating fuel flow before carburettor removal.briggsandstratton
-
Take clear photos of every linkage, spring, hose, and gasket before removal. This prevents the common reassembly error of reconnecting the governor or choke linkage incorrectly.
Quick bowl-and-jet clean
Try this first if the carburettor is accessible, the engine otherwise appears sound, and symptoms point to a partially blocked main jet.
-
Remove the air-cleaner cover and filter.
Remove the air-filter housing as necessary to access the carburettor. Inspect the filter first. A clogged or oil-soaked filter can independently cause rich running and roughness, so replace it if questionable.manuals.deere+1 -
Clean outside debris first.
Brush or blow grass, dust, and loose dirt from around the carburettor before opening it. You do not want debris falling into the fuel bowl or intake. -
Place a container below the fuel bowl.
The round bowl sits at the bottom of the carburettor. Put a small container and rags beneath it because fuel will spill when the bowl fastener is removed. -
Remove the bowl nut.
Carefully remove the central bowl nut/bolt. On many small-engine carburettors, this fastener also contains the main fuel jet, so do not lose it or substitute a random bolt. -
Lower the bowl carefully.
Tip the bowl down and inspect its contents. Water beads, corrosion, varnish, white powder, brown residue, or flakes point to fuel contamination. Empty the tank and flush the fuel system if the bowl contains significant water or debris. -
Remove and clean the bowl nut/main jet.
Spray carburettor cleaner through every small hole in the bowl nut/main jet. Follow with compressed air. Briggs & Stratton specifically identifies the main fuel jet in the fuel-bowl nut as a cleanable item and recommends carb cleaner plus compressed air.briggsandstratton -
Clean the emulsion tube, if accessible.
The emulsion tube/nozzle sits above the main jet. It may drop out once the bowl nut is removed, or need to be gently pushed out from the throat side depending on the carburettor version. Clean every side hole and its centre passage with spray cleaner and air. -
Clean the bowl and exposed passages.
Spray the bowl, the main-jet area, and accessible fuel passages. Avoid flooding cleaner into electrical connectors, plastic components, or painted surfaces. Do not force objects into precision orifices. -
Inspect the bowl gasket.
Reuse it only if it remains supple, undamaged, correctly shaped, and seals cleanly. Fit a new gasket/O-ring if it is cracked, swollen, flattened, hard, torn, or fuel leaks were present. -
Reassemble.
Refit the emulsion tube if removed, place the bowl gasket squarely in its groove, install the bowl, and tighten the bowl nut securely—but do not overtighten it. Over-tightening can distort the bowl, damage threads, or cause leaks. -
Restore fuel and test.
Remove the fuel-line clamp or open the fuel valve. Check for leaks before reconnecting the spark-plug wire. Reinstall the air-cleaner assembly, add fresh petrol if necessary, start the engine, let it warm briefly, and move the choke fully to RUN.
If the engine now runs smoothly with the choke open, the restriction was likely in the bowl-jet/emulsion-tube circuit.
Full carburettor removal
Remove the complete carburettor if the bowl clean does not solve it, the float needle sticks, there is substantial corrosion, or fuel flow through internal passages remains poor.
-
Document linkage positions.
Photograph the governor spring, throttle link, choke link, breather hose, and fuel hose from several angles. Briggs & Stratton recommends documenting the governor spring/linkage arrangement before disconnecting it.briggsandstratton -
Remove the air-cleaner assembly.
Take off the cover, filter, backing plate, and any breather tube attached to it. -
Disconnect fuel and electrical connections.
Clamp/shut off fuel, disconnect the fuel line, and catch remaining fuel. If the bowl has an anti-afterfire solenoid—a wire attached at the bowl bottom—unplug it before removal.briggsandstratton -
Disconnect throttle/choke/governor linkages.
Use needle-nose pliers gently. Do not bend the governor links or stretch springs. -
Remove mounting fasteners and intake gaskets.
Remove the carburettor mounting nuts/bolts and slide it off the studs. Keep track of the order and orientation of all gaskets, insulators, heat shields, and spacers. An incorrectly fitted or damaged intake gasket can create an air leak that causes surging. -
Strip only what you can reassemble confidently.
Remove the bowl, float pivot pin, float, inlet needle, bowl gasket, main jet, and emulsion tube as appropriate for your carburettor. Keep the parts laid out in removal order. -
Clean passages and components.
Spray cleaner through every metering orifice and passage, followed by compressed air. If using a soak cleaner, follow its compatibility instructions; Briggs & Stratton says not to soak metal or plastic carburettor parts for more than 15 minutes in all-purpose parts cleaner.briggsandstratton -
Inspect critical parts.
Replace rather than clean:-
Torn or stiff gaskets/O-rings.
-
A fuel-swollen float.
-
A needle with a grooved or damaged tip.
-
A corroded or permanently blocked jet/emulsion tube.
-
Cracked plastic fittings or a badly corroded carburettor body.
-
-
Reassemble and refit.
Install the needle and float so the float pivots freely. Refit gaskets in the original order, reconnect linkages exactly as photographed, reconnect fuel and electrical connectors, and reinstall the air-cleaner assembly. -
Leak-test, then run-test.
Turn the fuel on and wait 1–2 minutes with the engine off. Any drip from the bowl, hose, or carburettor inlet must be fixed before starting. Then test with PTO disengaged at full operating throttle after warm-up.
What the result tells you
Important finishing checks
-
Always reinstall the air filter before regular running; don’t operate the E100 without it.
-
Use fresh fuel after cleaning. If old fuel caused deposits, refilling with the same fuel can recreate the problem quickly.
-
Check the fuel-cap vent and replace the inline fuel filter if it is old or restricted.
-
Do not bend governor springs or adjust governor settings to suppress a surge; resolve the fuel/air problem instead.
-
If the engine still will not run correctly after a careful clean and fresh fuel, a replacement carburettor or professional diagnosis may be better value than repeated disassembly—especially if the carburettor body is heavily corroded or its passages remain blocked.
How to replace John Deere E100 fuel filter
How to clean John Deere E100 carburetor bowl
John Deere E100 surging troubleshooting steps
John Deere E100 engine surging is usually an unstable air-fuel supply issue rather than an engine-speed adjustment problem. Diagnose it in this order: fuel quality and tank vent → fuel filter/line → air intake → carburettor bowl/main jet → intake leaks → spark/governor → overheating or ignition when hot. Deere identifies fuel restriction, air-intake restriction, dirty fuel-cap vent, stale fuel, and plug faults as common rough-running/stalling causes.manuals.deere+1
Step-by-step diagnosis
1. Confirm it is engine surge
Test with:
-
PTO/blades disengaged.
-
Transmission in neutral and parking brake applied.
-
Engine at normal mowing/full governed throttle.
-
Mower deck clear of heavy grass and debris.
If the RPM repeatedly rises and falls while stationary, it is true engine surging. If it runs evenly stationary but bogs only when mowing, investigate deck load—packed grass, dull blades, seized spindle, dragging belt, or excessive ground speed—before dismantling the carburettor.
2. Start with fuel
Use known-fresh petrol
Drain and replace fuel if it is old, smells stale, looks dark, contains water, or was left untreated over storage. Even if the E100 starts, stale fuel can partially block carburettor passages and create the classic hunt/surge cycle.
Then run it long enough for fresh fuel to reach the carburettor.
Test the cap vent
Run the machine until it starts surging, then carefully loosen the fuel cap slightly.
-
Engine immediately smooths out: the cap vent is restricted.
-
No change: continue with the next steps.
Deere’s fuel-cap-vent service procedure calls for cleaning the two vents beneath the cap’s metal ring and the centre-top vent in non-flammable solvent, then allowing the cap to dry before refitting.manuals.deere
Replace or inspect the fuel filter
The E100 uses the AM116304 inline fuel filter. Check that it is not dark, contaminated, partly blocked, installed backwards, or connected to cracking/hardened fuel hose. Its arrow must point from tank to carburettor.deere+1
If the engine runs for 20–60 seconds, stops or surges, then improves again after a pause, treat that as a strong clue of restricted fuel replenishment: filter, cap vent, hose, tank outlet, or carburettor inlet/needle.
3. Check the air side
-
Remove the air-filter cover.
-
Inspect the element for grass, dust, oil, moisture, or collapse.
-
Replace a paper filter that is heavily dirty, torn, wet, or oil soaked.
-
Clean debris from the air-box and intake opening.
-
Refit the air filter before ordinary operation.
A restricted air intake can make the engine run rich and rough. Deere lists a plugged air-intake system among rough-running/stalling causes.manuals.deere+1
Diagnostic clue: if it only runs acceptably with the choke partly closed, it is usually too lean—not too rich. Focus on fuel restriction, carburettor blockage, or an intake air leak.
4. Clean the carburettor bowl and jet
If fuel is fresh, the cap vent is clear, and the filter/air filter are sound, clean the bowl and main jet.
-
Switch off, cool the engine, remove the key, and disconnect the spark-plug lead.
-
Shut off fuel or gently clamp the hose.
-
Put a catch container below the carburettor bowl.
-
Remove the bowl nut carefully.
-
Drain and inspect fuel for water, varnish, rust, or debris.
-
Spray carburettor cleaner through the nut’s centre bore and every small side hole; on many bowl-type carburettors, this nut functions as the main jet.
-
Blow passages clear with compressed air.
-
Clean the bowl and check its gasket/O-ring.
-
Reassemble without over-tightening, restore fuel, leak-test, and run with fresh fuel.
A partial main-jet blockage is a common cause of small-engine hunting/surging.small-engines
5. Inspect for an intake air leak
If it continues to surge after carburettor cleaning—and especially if it needs partial choke—inspect:
-
Carburettor mounting nuts/bolts.
-
Intake-manifold and carburettor gaskets.
-
Cracked intake spacers or plastic components.
-
Loose breather hose.
-
Damaged, kinked, disconnected, or incorrectly refitted fuel/vacuum hoses.
An intake leak adds unmetered air, creating a lean mixture that the governor repeatedly tries to correct.
Avoid spraying flammable cleaner onto a running engine. A visual gasket/hose inspection and controlled removal/reassembly with new gaskets is safer.
6. Inspect spark and governor linkage
Spark plug
Remove and inspect the plug with the engine cold:
-
Replace if the electrode is worn, insulator cracked, or deposits are severe.
-
Confirm the plug gap against the engine’s specification.
-
Check the plug boot and lead for corrosion, looseness, or damage.
Deere includes incorrect spark-plug gap in its rough-running troubleshooting items.manuals.deere
Governor and throttle linkages
With the engine off, move the throttle/choke control through its range and make sure:
-
The throttle and choke plates move freely.
-
Governor links are not bent, jammed, or disconnected.
-
Springs are present, correctly attached, and not stretched.
-
No grass/debris interferes with movement.
The governor normally responds to changes in crankshaft speed to maintain engine RPM; do not alter governor settings merely to mask surging.briggsandstratton
7. Diagnose hot-only surging
If it runs well cold but surges, loses power, or dies after about 10–20 minutes:
-
Clear the engine intake screen, cooling shrouds, and cooling fins.
-
Verify correct oil level on level ground.
-
Recheck fuel-cap venting and filter flow; heat can worsen a marginal restriction.
-
Consider ignition-coil failure if the engine dies hot, loses spark, and only restarts after cooling.
Symptom shortcut
Don’t do this
-
Do not adjust the governor to hide a fuel-system fault.
-
Do not force wire, drill bits, or oversized probes through a jet.
-
Do not run regularly with the choke partly on.
-
Do not use carburettor cleaner around a hot engine or open flame.
-
Do not assume a new carburettor is necessary until you have checked fresh fuel, cap venting, filter flow, air filter condition, and bowl/main-jet cleanliness.
Use the E100 owner-information page to obtain the manual and service material specific to your mower’s serial number; Deere advises consulting the operator’s manual for detailed directions and safety requirements.
John Deere E100 DIY vs dealer repairs
The john deere e100 is friendly to routine DIY maintenance, but the line is usually crossed when the job needs specialty diagnostics, deeper engine work, transmission teardown, or persistent electrical tracing. If the repair affects braking, interlocks, structural deck parts, repeated electrical shorts, or internal engine and transaxle work, dealer help is usually the safer and faster route.
John Deere E100 good DIY jobs
-
Engine oil and oil filter changes.
-
Air filter, fuel filter, and spark plug replacement.
-
Blade removal, sharpening, balancing, and replacement.
-
Deck cleaning, deck leveling, and belt inspection.
-
Battery cleaning, replacement, and fuse checks.
John Deere E100 advanced DIY or dealer jobs
-
Mower drive belt replacement if routing is unclear or pulleys are damaged.
-
Repeated no-start diagnostics involving safety switches and wiring faults.
-
Valve clearance inspection at 200 hours.
-
Transmission or driveline diagnosis beyond simple checks.
-
Internal engine repair, charging-system testing, or spindle housing replacement when related parts are damaged.
John Deere E100 skill level guide
-
Beginner: oil, filter, battery, spark plug, blade inspection, deck cleaning.
-
Intermediate: fuel filter, blade sharpening and balancing, belt inspection, deck leveling.
-
Advanced: deck belt replacement, electrical diagnosis, spindle replacement, deeper drive-system troubleshooting.
John Deere E100 parts information and service parts table
Before ordering john deere e100 parts, gather the full model name, the tractor Product Identification Number (PIN), the engine model and serial number, and the deck size or attachment version. Deere specifically notes that dealers need the serial number or PIN when ordering parts, and the E100 technical manual includes dedicated product-identification and engine-serial sections for that reason.
For the john deere e100, OEM parts are usually the safest choice for belts, safety switches, fit-sensitive deck parts, and anything tied to braking or blade-drive operation. Aftermarket parts can be acceptable for filters, blades, batteries, and tune-up items when the seller cross-references the exact E100 application and engine build.
John Deere E100 manuals and diagrams
The best john deere e100 references start with Deere’s own literature and then move to a reputable Deere-focused parts catalog. Use each source for a different purpose rather than relying on a single page.
-
John Deere Technical Information Store for operator’s manuals, technical manuals, and official publications ordering information.
-
OMUC23650 online contents for a quick section-by-section view of E100 operator and service topics, including controls, service intervals, mower service, electrical service, and troubleshooting.
-
JDParts / Deere parts ordering for OEM part lookup and ordering support referenced by Deere literature.
-
Green Farm Parts E100 page for model-specific illustrated aftermarket/dealer-focused browsing and cross-checking common service parts.
John Deere E100 serial number locations
The john deere e100 PIN and engine numbers matter because small running changes can affect ignition, filtration, and deck-related parts even within the same model family. Taking two minutes to record them before ordering usually saves a wrong-parts delay.
-
Park the tractor on level ground, shut it off, remove the key, and let hot parts cool.
-
Find the tractor Product Identification Number on the left side of the frame, where Deere shows the machine PIN location.
-
Open the hood and locate the engine serial number on the engine as shown in Deere’s identification section.
-
Confirm the tractor is the E100 and note that it normally uses the 42-inch mower deck service path covered in Deere’s mower section.
-
Photograph the tags and write the numbers down before buying parts online or going to the dealer counter.
John Deere E100 buying parts online and in stores
For john deere e100 parts buying, the safest strategy is to identify the OEM number first and then compare sellers, rather than shopping by a vague keyword like “E100 belt.” That approach matters most for ignition parts, deck components, and any item that can vary by engine or production run.
-
Online: confirm the OEM number, check fitment notes, and use PIN-sensitive lookup when available through JDParts or a Deere-focused catalog such as Green Farm Parts.
-
Dealer counter: best for safety switches, harness parts, deck hardware, and anything unclear from the serial number alone.
-
Retail stores: acceptable for oil, batteries, spark plugs, and some filters if the packaging clearly cross-references the E100 and its engine configuration.
John Deere E100 fitting guide for common parts
These john deere e100 jobs are among the most worthwhile DIY tasks because they directly affect starting, mowing quality, and overall reliability. Always remove the key and disconnect the spark plug wire before working around blades or belts.
John Deere E100 air filter replacement
Replacing the john deere e100 air filter helps restore normal airflow, easier starting, and cleaner running in dusty mowing conditions.
-
Park safely, stop the engine, remove the key, and open the hood.
-
Open the air-cleaner housing and remove the old filter element.
-
Wipe loose dust from the housing without pushing debris into the intake.
-
Install the new element squarely and refit the cover securely.
-
Check the filter more often if the tractor is used in dusty or dry conditions.
John Deere E100 fuel filter replacement
Changing the john deere e100 fuel filter helps fix starvation, surging, and hard-start complaints caused by restricted fuel flow.
-
Let the tractor cool and place a rag or drain pan under the filter area.
-
Slide the hose clamps back with pliers and remove the old filter.
-
Hold the fuel lines up as needed to limit fuel loss while swapping the part.
-
Install the new filter with the arrow pointing in the direction of fuel flow from tank to engine.
-
Refit the clamps and check closely for leaks before mowing.
John Deere E100 spark plug replacement
A fresh john deere e100 spark plug can improve cold starting, idle quality, and throttle response when the old plug is fouled or worn.
-
Pull the plug wire off the spark plug boot with the engine cool.
-
Remove the old plug and inspect its condition for oil fouling, heavy carbon, or damage.
-
Compare the removed plug to the replacement part number from your engine-specific listing.
-
Install the new plug carefully to avoid cross-threading, then tighten to the engine maker’s specification.
-
Reattach the plug wire firmly and test-start the tractor.
John Deere E100 mower blade service
Servicing the john deere e100 blades is one of the fastest ways to improve cut quality, reduce ragged tips, and lower deck strain.
-
Park safely, disconnect the spark plug wire, and wear gloves before working under the deck.
-
Remove both blades and inspect for bends, cracks, or severe edge wear.
-
Sharpen evenly and balance the blades before reinstalling, or replace them as a matched set if damaged.
-
Tighten hardware correctly and spin-check by hand for clearance before use.
-
Recheck cut quality and vibration after the first short test mow.
John Deere E100 maintenance to prevent repeat problems
Regular john deere e100 maintenance prevents many of the exact complaints owners call “repairs,” especially hard starting, weak mowing, vibration, and overheating. The machine benefits most when the deck, engine cooling path, fuel system, and electrical connections are kept clean and serviced on schedule.
Focus areas:
-
Starting reliability: fresh fuel, timely spark plug replacement, correct air and fuel filter service, clean battery terminals.
-
Cut quality: sharp balanced blades, deck cleaning, belt checks, and regular deck leveling.
-
Fire and overheating prevention: clean the muffler, manifold, cooling fins, deck top, and transmission area often.
-
Drive performance: inspect for leaks, dragging brakes, and poor traction conditions before blaming the transmission.
-
Electrical reliability: keep terminals clean, replace damaged wiring, and verify safety switches still work correctly.
John Deere E100 maintenance schedule and seasonal checklist
The john deere e100 service schedule is built around daily checks, an initial 8-hour lubrication service, 25-hour lubrication intervals, 50- to 100-hour or yearly engine-service items, and a 200-hour valve-clearance inspection handled by a dealer. The exact interval can vary by task, but Deere-based E100 schedules consistently emphasize lubrication, cleaning, and annual engine tune-up items.
John Deere E100 daily or before each use
-
Check or test safety systems.
-
Check tire pressure and brakes.
-
Check fuel level and engine oil level.
-
Remove grass and debris from the engine compartment, muffler area, and top of mower deck.
-
Clean the air intake screen and look for fluid leaks or loose hardware.
John Deere E100 after 8 hours
-
Lubricate mower spindles and pivot points.
-
Lubricate front axle pivot and axle spindles.
-
Check mower deck spindle brakes on manual PTO setups.
-
Lubricate front axle wheel bushings.
John Deere E100 every 25 hours
-
Lubricate front axle wheel bushings.
-
Lubricate mower spindles and pivot points.
John Deere E100 every 50 hours or yearly
-
Replace engine oil and filter, or service the Easy Change system if equipped.
-
Replace the air filter element, fuel filter, and spark plug.
-
Clean engine cooling fins.
-
Sharpen or replace mower blades.
-
Check mower drive belts, check and level the deck, clean the deck, and clean battery terminals.
John Deere E100 every 100 hours or yearly
-
Change engine oil and filter more frequently under dusty conditions.
-
Replace air filter elements more frequently under dusty conditions.
-
Replace fuel filter, spark plug, and clean engine cooling fins again as required by use conditions.
John Deere E100 every 200 hours
-
Check and adjust valve clearance through a John Deere dealer.
John Deere E100 seasonal checklist
-
Spring: change oil and filter if due, install a fresh air filter or spark plug if needed, level the deck, and sharpen blades before growth picks up.
-
Mid-season: clean cooling areas, inspect the belt and blades, and keep debris off the deck top and transmission area.
-
Fall or end of season: clean the tractor thoroughly, prepare fuel and engine for storage, and address any worn blades, battery corrosion, or leaking fuel parts before parking it long term.
John Deere E100 repair, upgrade, or replace
With the john deere e100, repair usually makes sense when the tractor is structurally sound and the problem is limited to maintenance wear items, deck parts, tune-up parts, or straightforward electrical faults. Upgrade makes more sense when the machine still works but your property or workload has outgrown an entry-level 42-inch rider, while full replacement becomes easier to justify when the tractor has major engine, transmission, and deck issues at the same time.
John Deere E100 repair if
-
The issue is a battery, plug, filter, belt, blade, switch, or deck-level problem.
-
The tractor starts and drives well after normal service work.
-
The frame, deck shell, and major driveline parts are still solid.
John Deere E100 upgrade if
-
You need faster mowing, heavier towing ability, or more comfort/features than the E100 platform provides.
-
Your property size or terrain pushes the tractor beyond routine light-duty residential work.
John Deere E100 replace if
-
The engine, transmission, and deck all need expensive work at the same time.
-
The machine has chronic electrical issues plus significant rust, vibration, or structural deck damage.
-
Repair costs approach the value of a better-condition replacement rider.
John Deere E100 Troubleshooting FAQ
1. Why will my e100 not start?
The first checks are the brake position, PTO disengagement, battery condition, fuse, and fuel quality because those are the most common no-start causes on this platform. If it cranks but does not fire, move next to the spark plug, fuel filter, and air filter. If it does not crank at all, think battery, cables, fuse, or safety switches before blaming the starter.
2. Why does my john deere e100 click but not crank?
A clicking sound usually points to low battery voltage, dirty battery terminals, or a weak connection at the starter circuit rather than an internal engine problem. Clean and tighten the terminals first, then test battery condition. If voltage is good and the click remains, the starter circuit or interlock system needs closer diagnosis.
3. Why does my e100 crank but not fire up?
When the engine cranks but will not start, focus on fuel, spark, and air. Old fuel, a blocked fuel filter, a fouled plug, or a heavily restricted air filter can all cause this. Start with the easiest service items before moving to deeper ignition or carburetor diagnosis.
4. Why does my john deere e100 start and then stall?
A start-then-stall problem often means restricted fuel flow, stale fuel, partial choke issues, or an electrical/safety fault that cuts ignition after startup. Replace an overdue fuel filter, inspect the plug, and make sure the operator-presence system is working correctly. If the problem only happens after warming up, heat-related ignition or fuel issues become more likely.
5. Why is my e100 hard to start when cold?
Cold-start trouble often comes from a worn spark plug, weak battery, stale fuel, or a dirty air filter. Seasonal tractors are especially sensitive if fuel sits too long between uses. Start by servicing the tune-up parts and using fresh stabilized fuel if the machine sits for weeks at a time.
6. Why does my john deere e100 blow black smoke?
Black smoke usually means the engine is running too rich, often because the air filter is clogged or the choke is not fully opening. Check the air filter first because it is a common and easy fix on the E100. If the filter is clean, move on to carburetion and choke-linkage inspection.
7. Why does my e100 surge at idle or while mowing?
Surging usually points to restricted fuel delivery, stale fuel, partial blockage, or air/fuel mixture issues. Replace the fuel filter if it is due, use fresh fuel, and make sure the air filter is not packed with dust. If surging remains, carburetor cleaning or dealer diagnosis may be needed.
8. Why does my john deere e100 lose power in thick grass?
Power loss in heavy grass can be normal to a point because the E100 is a residential mower, but dull blades, wet grass, a packed deck, or a worn belt make it much worse. Clean the deck, sharpen the blades, and reduce ground speed. If the engine still bogs in moderate grass, service the air and fuel side next.
9. Why does my e100 leave strips of uncut grass?
Uncut strips usually come from dull blades, low blade tip speed from belt slip, improper overlap, or an out-of-level deck. Check tire pressure before touching deck adjustments. Then inspect blade condition, deck pitch, and the mower drive belt.
10. Why does my john deere e100 cut unevenly?
Uneven cutting is commonly a deck leveling issue rather than an engine fault. Deere calls for the deck to be level side-to-side and about 1/8 to 1/4 inch lower in front than in the rear. Tire pressure must be correct first or the adjustment reading will be misleading.
11. Why does my john deere e100 scalp parts of the lawn?
Scalping usually happens when the deck is set too low for the ground contour, the anti-scalp wheels are not adjusted correctly, or the deck is not level. Raise the cutting height and recheck deck setup on a flat surface. Scalp marks are often a setup problem, not a blade problem.
12. Why does my e100 clump wet grass?
Wet grass clumps because it does not discharge cleanly and it sticks to the deck housing. Slow down, mow when the grass is drier, and keep the deck clean. Sharp blades also help reduce clumping because they cut more cleanly and move material better.
13. Why are the grass tips ragged after mowing with my john deere e100?
Ragged grass tips usually mean the blades are dull, nicked, or out of balance after poor sharpening. Service both blades together and confirm they are balanced before reinstalling. Deere’s mower-service section treats blade condition as a key part of cut quality and smooth operation.
14. Why does my john deere e100 vibrate when I engage the deck?
Vibration that appears as soon as the deck engages usually points to a bent blade, unbalanced blade, wrapped debris, or spindle/pulley trouble. Stop mowing immediately and inspect the deck. Continuing to run it can turn a blade problem into a spindle or belt failure.
15. Why does my john e100 shake after I hit a stump or rock?
A sudden shake after impact strongly suggests blade damage or a bent component in the deck drive path. Remove and inspect both blades, blade bolts, and visible spindle/pulley parts before mowing again. Even if only one blade hit, both sides should be checked as a set.
16. Why does my john deere e100 make a squealing belt noise?
A squeal often means the mower drive belt is slipping, glazed, wet, misrouted, or being overloaded by packed grass under the deck. Clean the deck, inspect the belt for wear, and check pulley condition. If the belt is cracked or shiny, replacement is usually smarter than trying to nurse it through the season.
17. Why does the john deere e100 mower belt keep coming off?
A thrown deck belt usually means worn pulleys, belt-guide issues, incorrect routing, or a damaged belt. Debris buildup and bent belt keepers can also push the belt out of line. If the belt comes off more than once, inspect the whole belt path rather than just reinstalling it.
18. Why does my john deere e100 blade engagement feel weak?
Weak engagement can come from a worn belt, drag in the deck, or a problem in the PTO control system. Start with the simple stuff: belt condition, packed debris, and free pulley movement. If the deck still feels slow to come up to speed, deeper PTO or linkage diagnosis may be needed.
19. Why does my john deere e100 mower deck plug up underneath?
A plugged deck is usually the result of mowing wet, overgrown grass or running dull blades that do not move material well. Clean the underside with the engine off and key removed, then mow at a slower pace and avoid taking off too much height at once. A cleaner deck top and underside also reduce belt heat and fire risk.
20. Why does my john deere e100 smell hot after mowing?
A hot smell often comes from debris near the muffler or engine cooling areas, a slipping belt, or oil/fuel residue collecting dust on hot parts. Deere specifically warns owners to inspect and clean these areas frequently. Do not ignore the smell until you have checked for packed debris and leaks.
21. Why is my john deere e100 running hot?
Overheating is commonly tied to blocked cooling fins, a dirty air-intake screen, heavy debris near the engine, or neglected service. Clean all cooling areas first because Deere highlights them as primary cleanout points. Then verify oil level and general tune-up condition.
22. Why is my john deere e100 leaking gas?
Fuel leaks can come from cracked lines, loose clamps, a damaged filter connection, or a problem at the tank area. Stop using the tractor until the leak is fixed because Deere’s fire-prevention guidance treats fuel leakage and debris buildup as a serious risk combination. Replace suspect lines or filters instead of trying to seal them temporarily.
23. Why is my john deere e100 leaking oil?
Oil leaks often show up around the filter, drain point, or from spill residue after recent service. Check whether the filter is seated correctly and whether the oil level is correct. If oil continues appearing after cleanup, track the source before further mowing.
24. Why does my john deere e100 move weakly uphill?
Weak uphill drive can be a combination of slope limits, wet grass traction loss, brake drag, or actual transmission wear. Deere’s safety guidance matters here because the tractor should not be pushed beyond recommended slope operation. Test it on dry, level ground before assuming the transmission is failing.
25. Why will my john deere e100 not go forward or reverse properly?
If travel is weak in both directions, check the brake release, linkage feel, tire condition, and obvious drag before concluding the transmission is bad. Some issues are external and simple, while others require dealer diagnosis. A tractor that suddenly lost drive after normal operation deserves immediate inspection for binding or broken linkage.
26. Why does my john deere e100 keep blowing fuses?
Repeated fuse failure usually means a short, rubbed wire, water intrusion, or a failing component rather than “bad luck.” Replace the fuse once for testing, but if it blows again, inspect the harness near the battery, fuse block, and side panel areas Deere highlights. Persistent electrical faults are often best handed to a dealer or experienced tech.
27. Why do the safety switches on my john deere e100 seem faulty?
Seat, brake, PTO, and reverse-related interlocks can all stop starting or shut the tractor down if they are out of adjustment or failing. The best approach is to test one system at a time in the order Deere outlines instead of swapping random switches. Loose connectors and corrosion can mimic a bad switch.
28. How often should I change oil in my john deere e100?
The Deere-based E100 schedule calls for yearly or 50-hour engine-oil and filter service, with more frequent service under tougher conditions, and a yearly or 100-hour reference also appears for some engine-service items depending on schedule interpretation and use severity. For most homeowner use, annual oil service before or early in the mowing season is the safe baseline.
29. How often should I replace the air filter on my john deere e100?
The air filter is commonly listed as a yearly or 50-hour item, with more frequent service in dusty conditions. In practice, inspect it often and replace it sooner if mowing dry dirt-prone areas. Air-filter neglect is one of the easiest ways to create rich running and poor power.
30. How often should I replace the fuel filter on my john deere e100?
The fuel filter AM116304 is listed in E100 maintenance references as a recurring service item, commonly at yearly or 50-hour intervals and again through later service points. If the tractor surges, starves, or has old contaminated fuel, replacing it early is sensible. It is inexpensive and often overlooked.
31. When should I sharpen or replace john deere e100 blades?
Blades should be sharpened or replaced whenever cut quality drops, grass tips become ragged, or impact damage is found, and the E100 service schedule specifically includes sharpening or replacing blades as a yearly or 50-hour task. Replace rather than sharpen if the blade is bent, cracked, or heavily worn. Balanced blades matter just as much as sharp ones.
32. Is it worth repairing a john deere e100?
It usually is worth repairing when the problem is limited to normal wear items like filters, blades, belts, a battery, or a switch because these are expected ownership costs on a residential tractor. It becomes less attractive when the machine needs major engine, transmission, and deck work together. The decision is mostly about total repair cost versus the condition of the rest of the tractor.
33. When should I take my john deere e100 to a dealer?
Dealer help makes sense for repeated electrical faults, valve-clearance service, persistent drive loss, internal engine trouble, or any repair that affects safety systems and cannot be diagnosed confidently at home. It is also the right move when the tractor has fuel leaks, severe vibration, or damage after an impact that may involve more than the visible part. Use DIY skills for routine service, but not when the risk or uncertainty gets high.
How to replace the mower drive belt on an E100
Here is a safe, DIY-friendly way to replace the mower drive (deck) belt on a John Deere E100 with the 42‑inch deck. Always work on level ground with the engine off and the key removed.
Safety and setup
-
Park on flat ground, set the parking brake, turn the PTO off and remove the key.
-
Let the engine and exhaust cool fully.
-
Chock the rear wheels if the tractor is on ramps or if the front is lifted for extra access.
-
Disconnect the spark plug wire before working near blades or belts.
Tools and parts you’ll need
-
Correct mower deck drive belt for an E100 42-inch deck (verify part number using your PIN through Deere or a parts catalog before you start).
-
Metric sockets (commonly 10 mm for deck shields and around 15 mm for belt guards on idler pulleys).
-
Ratchet, extension, and a flat screwdriver or pick for clip removal.
-
Work gloves and safety glasses.
If you are not 100% sure the belt routing is correct on reassembly, take clear photos of the belt path before you pull the old belt off.
Step 1 – Lower the deck and remove belt shields
-
Lower the mower deck fully with the height lever to give yourself as much room as possible.
-
On each side of the deck, remove the black plastic belt covers over the spindle pulleys using a 10 mm socket (one side typically has three bolts, the other two).
-
Lift the covers away and clear out any heavy packed grass and debris while you are there; this helps belt life and reduces fire risk.
Step 2 – Release tension and free the belt from deck pulleys
-
Make sure the blade engagement/PTO lever is in the OFF position so the deck belt is slack.
-
Identify the idler pulleys and their belt guards (small metal tangs that keep the belt from jumping off).
-
On each spindle pulley side, slightly loosen the belt-guard bolt (often 15 mm) so the guard can rock just enough to let the belt slide past.
-
Work the belt off the outer spindle pulleys by pushing the belt out while you rotate the pulley by hand, then snake it out from under the loosened belt guards.
-
Continue pulling the belt free from any small belt guides around the center idler pulleys; usually you can flex the belt past without fully removing those guides.
Step 3 – Remove the belt from the tractor side and deck
-
Follow the belt path up toward the engine pulley; slip it off the PTO pulley at the front of the tractor (underneath the frame) once there is enough slack.
-
Pull the belt completely out of the deck and out from under the tractor, noting the original routing as you go.
While the belt is off, spin each deck pulley by hand and check for roughness, noise or vertical play in the spindle bearings. Any noisy or wobbly pulley/spindle should be repaired or replaced before you install a new belt.
Step 4 – Route the new belt on the deck
-
Lay the new belt alongside the old one briefly to confirm length and width are similar before installation.
-
Feed the new belt around the engine PTO pulley from below, keeping twists out of the belt.
-
Route the belt back to the deck and around the far spindle pulley first, following the same path the old belt took. The flat back of the belt should ride on flat idler pulleys, and the V side sits in V-groove pulleys.
-
Continue routing around the center idler pulleys so the belt forms the correct “T” shape that goes both around the deck pulleys and forward to the engine pulley.
-
Finish by wrapping the belt around the near spindle pulley, again keeping the V side in the pulley groove.
Do not tighten anything yet; make sure the belt is sitting cleanly in every pulley groove and under/over each belt guide exactly as before.
Step 5 – Re‑set belt guards and tension
-
Reposition the small belt guards at the spindle pulleys so they sit close to—but not touching—the belt, then tighten the guard bolts back down firmly.
-
Confirm the belt is correctly inside all fixed belt guides by gently pulling it side to side and rotating pulleys by hand.
-
Move the blade engagement/PTO lever to ON and back to OFF while watching from the side, checking that the idler pulleys pick up tension smoothly and the belt does not jump out of any guide.
If the belt does not tighten when you engage the PTO, the routing is wrong or the idler spring is not hooked correctly and must be corrected before use.
Step 6 – Refit shields and final checks
-
Reinstall both plastic belt covers over the spindle pulleys with their 10 mm bolts, tightening them snugly but not over‑torquing into the plastic.
-
Reattach the discharge chute if you removed it for access.
-
Walk around the deck and frame and make sure no tools or loose hardware are left on or under the tractor; a forgotten socket under a shield will destroy a new belt quickly.
-
Reconnect the spark plug wire, sit on the seat, and start the engine.
-
At low throttle, engage the mower; listen for abnormal squealing and watch for belt tracking smoothly. Disengage, shut down and recheck belt position after the first test spin.
If at any point you cannot clearly see how the belt should route, or the idler assemblies or guards have been bent, it is better to stop and have a dealer or experienced technician look at it rather than guessing; misrouted belts can come off or damage pulleys and spindles.