
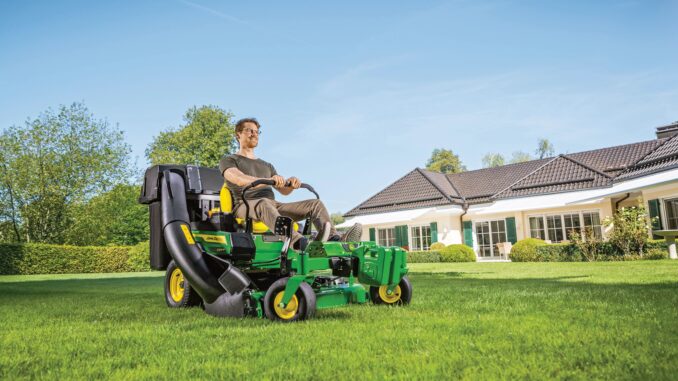
For most homeowner users, “John Deere bagger” does not refer to one single attachment. It usually means either a 2-bag cut-and-throw system, a 7-bushel rear hopper setup, or a Power Flow-based material collection system that uses a deck-mounted blower and matching chute components. In current Deere retail listings, BUC10284 is a 6.5-bushel 2-bag hopper for selected S100 42-inch tractors, while BUC11233 is a 7-bushel two-bag hopper used with either cut-and-throw rear bagger setups or a Power Flow MCS, depending on the machine and deck combination.
Homeowners typically use simpler rear baggers for routine clipping pickup on smaller lawns, while Power Flow systems are more common when dealing with heavy growth, leaves, or decks that need stronger airflow to fill bags consistently. This article covers identification, common faults, maintenance routines, parts ordering strategy, fitting guidance, and a large FAQ in the same owner-focused format used for Deere tractor and attachment service guides.
General overview of John Deere bagger types and models
Within the Deere lineup, homeowner bagger systems sit under material collection attachments for riding mowers and lawn tractors. Older literature commonly refers to “Rear Bagger” and “Rear Bagger and Power Flow,” while newer Deere retail pages often use “Material Collection System” or MCS terminology. The main systems that matter in real-world diagnosis are the hopper assembly, bags, upper and lower chutes, deck discharge interface, mounting frame, latch hardware, and on Power Flow setups, the deck-mounted blower and its belt or drive components.
Owners most often end up buying hopper assemblies, deck-specific chutes, blower assemblies, mounting brackets, bag frames, spring pins, and bagging blades rather than internal engine parts, because collection performance depends heavily on correct airflow and exact fit between deck, chute, and hopper parts. Deere also notes that some hopper kits do not include every required chute or bracket, which is why model, deck size, and compatibility checks matter before ordering.
Several commonly encountered Deere homeowner bagger-related parts and assemblies include:
-
BUC10284, 2-bag material collection system attachment, 6.5-bushel, for selected S100 42-inch tractors.
-
BUC11233, 7-bushel two-bag hopper assembly, used with cut-and-throw or Power Flow systems depending on application, and requiring appropriate chute plus BM20714 Click-N-Go brackets.
-
BG20749, High Capacity Power Flow blower kit, a deck-specific blower attachment used with compatible decks and hopper setups.
-
Deck-specific lower chute and upper chute assemblies, which vary by mower deck family and are a frequent source of fitment errors when bought by appearance instead of model compatibility.
Troubleshooting approach for John Deere bagger types and models
Start with the symptom the owner actually sees. With baggers, that usually means poor pickup, repeated chute plugging, uneven bag filling, loose mounting, strange vibration, or parts rubbing the ground rather than a single obviously failed component. Airflow, deck condition, blade choice, moisture, and exact deck-to-chute fit all affect performance, so diagnosis works best when the operator checks the whole collection path from deck opening to hopper lid.
The main symptom groups for John Deere bagger types and models are:
-
Poor collection or weak pickup.
-
Chute clogging or repeated blockage.
-
Uneven bag filling or one bag staying light.
-
Vibration, rattling, or rubbing.
-
Mounting and fitment issues during installation or removal.
-
Hopper latch, bag frame, or airflow indicator complaints.
Emergency repair needs on John Deere bagger types and models
Some bagger problems should be corrected before the machine is used again because they can cause unsafe discharge, damage the chute or blower, or let loose hardware contact the deck or tires. The highest-priority issues are cracked chutes, missing pins, loose mounting brackets, rubbing blower housings, and any blockage that forces the operator to reach into the system without fully shutting the machine down.
4.1 Poor pickup and weak collection
This usually shows up as clippings left in the discharge path or bags that never fill properly. It matters because owners often assume the hopper is at fault when the real issue is weak deck airflow, incorrect blades, or a partially restricted chute path.
Common causes:
-
Grass too wet or too tall for current ground speed.
-
Worn, dull, or wrong mower blades for bagging.
-
Wrong lower chute or mismatched deck/hopper combination.
-
Hopper lid not fully latched or bags not seated correctly.
-
Power Flow blower not installed where required for that deck/application.
Basic checks:
-
Park safely, shut off engine, remove key, and wait for all moving parts to stop before inspecting the chute path.
-
Check that the hopper lid closes fully and both bags are installed correctly in the frame slots or retainers.
-
Inspect the full airflow path for packed clippings, collapsed bags, or an incorrect chute position.
-
Confirm the machine is using the correct deck-specific chute and any required blower kit.
-
Slow ground speed and retest in drier conditions before replacing parts.
4.2 Chute plugging problems
Plugging normally appears at the lower chute or the bend into the hopper. It matters because repeated plugging can crack plastic chute sections, overload blower components, and tempt unsafe hand clearing habits.
Common causes:
-
Wet grass or leaf buildup.
-
Reduced deck airflow from dull blades or packed deck housing.
-
Lower chute not fully seated at the deck opening.
-
Overfilled bags reducing airflow through the hopper.
Basic checks:
-
Stop the machine fully before touching the chute.
-
Empty the bags and inspect whether the blockage starts low at the deck or higher at the hopper bend.
-
Clean the mower deck underside and chute interior completely.
-
Confirm rubber straps, hooks, and pins are holding the chute tightly in the intended position.
-
Test again at reduced mowing speed and with blades in better condition.
4.3 Vibration, noise, or rubbing
Owners may hear rattling at the rear frame, chute slap, or a blower housing rubbing the ground or deck. This matters because loose hardware and misalignment can quickly damage the chute, bracket, hopper frame, or blower assembly.
Common causes:
-
Missing spring pins, clevis pins, or retaining straps.
-
Hopper not fully seated on mounting posts or H-frame.
-
Bent bracket hardware after backing into obstacles.
-
Worn blades or foreign object strikes contributing to deck vibration.
Basic checks:
-
Confirm every bagger pin, spring pin, and strap shown in the operator guidance is present.
-
Wiggle the hopper, chute, and any blower housing by hand with engine off to identify the loose point.
-
Inspect for cracked plastic around mounting holes.
-
Check mower blades and deck shell if the vibration started right after hitting debris.
-
Do not keep mowing with a rubbing blower or loose hopper bracket.
4.4 Installation and fit issues
A lot of “bad bagger” complaints are really compatibility problems. Deere explicitly notes that certain hopper kits still require separate chutes, blower assemblies, or Click-N-Go brackets, so a system can be incomplete even when the owner bought a genuine Deere hopper.
Common causes:
-
Wrong deck width or wrong deck family.
-
Missing BM20714 or other required mounting hardware.
-
Attempting to mix old and new chute styles by appearance alone.
-
Not checking product identification and compatible equipment listing before ordering.
Basic checks:
-
Confirm full tractor model and deck width first.
-
Match the hopper part number to the official compatible equipment listing.
-
Verify whether the setup is cut-and-throw or Power Flow, because the required chute path differs.
-
Compare existing mounting brackets against the manual before assuming parts are missing.
DIY or dealer decisions for John Deere bagger types and models
The normal DIY line is fairly clear on these systems. Routine bagger work is realistic for most homeowners because the main jobs are cleaning, bag replacement, chute replacement, pin and bracket replacement, and occasional deck-side attachment work, but dealer help becomes more sensible when fitment is unclear, blower assemblies are damaged, or deck compatibility is in doubt.
Good DIY jobs
-
Removing blockages safely after shutdown.
-
Replacing bags, pins, straps, and many chute sections.
-
Installing or removing hopper assemblies and basic mounting brackets where instructions match the exact machine.
-
Cleaning deck underside and chute path to restore airflow.
Advanced DIY or dealer jobs
-
Diagnosing repeated poor collection caused by wrong deck/blower pairing.
-
Replacing Power Flow blower assemblies or deck-mounted drive components.
-
Straightening or replacing damaged rear support structures after impact.
-
Resolving chronic vibration that may also involve the mower deck and blades.
Skill level guide
-
Beginner: Bag removal, chute cleaning, pin replacement, bag inspection.
-
Intermediate: Hopper installation, bracket changes, lower and upper chute replacement, blade checks.
-
Advanced: Power Flow blower service, repeated alignment problems, deck-related airflow diagnosis.
Parts for John Deere bagger types and models
Before ordering, gather the full tractor or mower model, Product Identification Number or serial/PIN, exact deck size, and whether the system is a rear bagger or a Power Flow-based MCS. On tractor-based systems, the deck family matters just as much as the tractor model because chute and blower compatibility often follow deck size and deck design rather than tractor badge alone.
OEM parts are the safer choice for belts, blower housings, brackets, latch hardware, and any fit-sensitive chute component because small shape differences can ruin airflow or mounting alignment. Aftermarket parts can be acceptable for some bags, blades, and generic consumables, but only when the cross-reference is exact and the deck/application match is confirmed.
Manuals for John Deere bagger types and models
The most useful sources are Deere operator manuals, Deere retail compatibility pages, JDParts or Deere parts channels, and a reputable Deere-focused parts seller that lets you filter by model and deck. For older systems especially, Deere operator manuals are valuable because they show the exact pin, strap, and chute routing that owners frequently forget after seasonal removal.
Useful sources:
-
John Deere operator manual for rear bagger systems for installation, removal, and general safety guidance.
-
John Deere operator manual for rear bagger and Power Flow systems for combined hopper and blower-type systems.
-
John Deere Shop listing for BUC10284 for current compatibility and capacity details.
-
John Deere Shop listing for BUC11233 for hopper details and required accessory notes.
Identifying model and serial details
These numbers matter because many Deere bagger components look similar but fit differently by deck, bracket style, and tractor generation. Ordering by a photo alone is one of the easiest ways to end up with the wrong lower chute, wrong hopper hardware, or missing mounting brackets.
-
Find the tractor or riding mower model decal and record the complete model designation.
-
Record the tractor Product Identification Number or serial/PIN from the machine tag.
-
Identify the mower deck size and, if possible, the deck family shown in operator or parts information.
-
Look for labels on the hopper, chute, or blower assembly if the machine came used and the bagger may not be original.
-
Match all of that against Deere compatibility listings before ordering.
Buying John Deere bagger types and models parts
Use a two-step strategy: identify the system correctly first, then buy by exact OEM part number or exact compatible-equipment listing. That avoids the common mistake of buying a hopper without the required chute, bracket, or blower for the actual deck.
-
Online: Verify OEM numbers, compatible equipment lists, and whether the listing includes only the hopper or a more complete bagger package; Deere’s own listings are the best first check.
-
Dealer counter: Best for serial-sensitive fitment, older machines, or when the existing bagger may have been pieced together from multiple systems.
-
Retail stores: Fine for common bags or generic consumables only when packaging clearly lists the exact Deere application.
Useful links:
Fitting John Deere bagger types and models parts
The most useful DIY jobs on these systems are usually hopper installation, bag replacement, chute installation, and seasonal removal. Even when the parts are simple, the safe routine is always to park flat, disengage PTO, stop the engine, remove the key, and wait for all moving parts to stop before working around the deck or hopper.
Fit the hopper assembly
This job fixes missing or damaged rear collection capacity and is often part of spring setup.
-
Park the machine safely on level ground with engine off and key removed.
-
Install the required mounting post, receiver, or Click-N-Go bracket hardware for the exact machine.
-
Set the hopper frame onto the mounting posts or H-frame as shown in the operator guidance.
-
Insert the correct pin and spring pin or locking pin at each attachment point.
-
Confirm the hopper tilts, latches, and sits square before installing bags or chutes.
Install or replace the bags
This fixes torn bags, poor debris retention, and bad filling performance caused by collapsed or incorrectly seated bags.
-
Open the hopper lid fully.
-
Remove old bags and check the frame slots, clips, or retainers for damage.
-
Insert each bag squarely into its frame position.
-
Close and latch the hopper lid fully.
-
Recheck after a few minutes of mowing to make sure the bags have stayed seated.
Install the lower and upper chute
This job restores the airflow path and is one of the most common sources of plugging when done incorrectly.
-
Remove any mulch cover or deflector position that blocks chute installation, following the exact model instructions.
-
Seat the lower chute correctly on the deck opening or bracket and secure it with the specified pin or strap.
-
Insert the upper chute into the hopper opening.
-
Slide or connect the lower and upper chute ends together and secure the strap or latch point.
-
Check that the chute does not rub tires, the ground, or sharp deck edges.
Remove the bagger for seasonal storage
This helps prevent off-season damage and makes blade or non-bagging setup changes easier.
-
Park safely and remove key.
-
Empty the bags first to reduce weight.
-
Remove the chute sections and straps before lifting off the hopper, if the manual for that system calls for it.
-
Pull the spring pins or locking pins and lift the hopper from the support frame carefully.
-
Store pins and straps with the bagger so they do not go missing before next season.
Maintenance for John Deere bagger types and models
Most recurring bagger complaints come from neglected cleaning, worn blades, and poor seasonal storage rather than a failed hopper itself. Regular attention to airflow, mounting hardware, and bag condition does more to prevent plugging and poor fill than simply replacing random parts.
Focus areas:
-
Collection reliability: Keep chute interiors, bag mouths, and deck discharge areas clean.
-
Fill performance: Use sharp, correct blades and avoid mowing heavy wet material too fast.
-
Damage prevention: Inspect straps, pins, and latch points before use.
-
Storage life: Clean and dry bags and chutes before storing to reduce odor, mold, and material breakdown.
Maintenance schedule for John Deere bagger types and models
Deere operator literature for material collection attachments includes routine service intervals, with daily checks and periodic inspection points rather than a complex engine-style service program. For homeowner baggers, the practical schedule is centered on cleaning, inspection, fastener security, and replacement of worn airflow parts.
Daily / before each use
-
Check bags for tears, collapse, or poor seating.
-
Inspect lower and upper chutes for cracks, blockage, or loose straps.
-
Make sure hopper latches and mounting pins are secure.
-
Clean obvious buildup from the deck discharge area.
After heavy use
-
Empty bags before debris packs tightly and reduces airflow.
-
Clean wet clippings from chute bends and hopper corners.
-
Check for rubbing marks on blower housings or chute contact points.
Every 25 hours
-
Inspect all mounting hardware, brackets, and support rods.
-
Check mower blades for wear because collection quality depends on airflow.
-
Look for cracks around chute mounting holes and latch areas.
Every 100 hours or yearly
-
Inspect the full collection system for worn or damaged components before the next season.
-
Replace damaged bags, pins, and brittle chute sections.
-
Verify all required hardware is still present after seasonal removal and reinstallation.
Seasonal checklist
-
Spring or preseason: Confirm complete system compatibility, install the hopper squarely, inspect blades, and test airflow before mowing heavy growth.
-
Mid-season: Clean the system more often during wet growth and inspect for strap or pin loss.
-
Fall or leaf season: Slow ground speed, empty bags more often, and monitor for plugging because leaf volume can overload a small hopper quickly.
-
End of season: Remove, clean, dry, and store the bagger with pins and brackets kept together.
Repair or replace John Deere bagger types and models
Most Deere homeowner bagger systems are worth repairing when the problem is limited to bags, chutes, pins, brackets, or a hopper assembly that still matches a current or well-supported deck. Replacement becomes more sensible when the machine has an incomplete mixed system, several broken plastic sections, missing bracket hardware, and uncertain compatibility that turns every repair into guesswork.
Repair if:
-
The machine already has the correct compatible hopper and mounting hardware.
-
The issue is a blockage, worn bag, cracked chute, or missing pin.
-
The deck and blade setup are otherwise in good condition.
Upgrade if:
-
Current collection is consistently weak and the deck/application is better suited to a Power Flow-based setup.
-
Leaf season overwhelms a smaller rear bagger capacity.
-
You want easier filling visibility, latch convenience, or a larger hopper system.
Replace if:
-
The bagger was assembled from mismatched parts and fitment remains uncertain.
-
Multiple structural parts are broken, warped, or missing.
-
Correct replacement chutes or brackets are no longer practical to source at reasonable cost.
FAQ on John Deere bagger types and models
1. Why is my John Deere bagger not picking up grass properly?
Poor pickup usually comes from weak airflow, not the bags alone. Wet grass, dull blades, a partially blocked chute, or the wrong chute or blower setup for the deck can all reduce collection performance sharply. Check the whole path from deck discharge to hopper before ordering parts.
2. Why does my John Deere bagger keep clogging?
The most common reasons are wet material, mowing too fast, overfilled bags, and buildup at the lower chute bend. A chute that is not seated correctly at the deck can also disturb airflow and cause repeat plugging.
3. Why is only one bag filling?
Uneven filling usually points to restricted airflow, bag mis-seating, or buildup that is starting near one side of the hopper path. Clean the chute and confirm both bags are installed correctly before assuming the hopper is defective.
4. Do John Deere bagger types and models need special blades?
In many applications, bagging performance improves when the mower uses the correct blade type for collection because blade design affects lift and airflow. If the machine recently stopped bagging well after blade changes, confirm the blades are the right Deere-approved style for that deck and application.
5. What is the difference between a rear bagger and a Power Flow system?
A rear bagger uses deck airflow to move material into the hopper, while a Power Flow system adds a deck-mounted blower to increase movement through the chute. Power Flow setups are often better when grass is heavier or the deck design benefits from boosted airflow.
6. Is BUC10284 the same as BUC11233?
No. Deere lists BUC10284 as a 6.5-bushel 2-bag attachment for selected S100 42-inch tractors, while BUC11233 is a 7-bushel hopper assembly used with either cut-and-throw or Power Flow systems depending on the machine. BUC11233 also requires proper chute components and Deere notes that BM20714 Click-N-Go brackets are required.
7. Why is my hopper rattling over bumps?
Rattling usually means a missing or loose spring pin, bagger pin, bracket fastener, or an improperly seated hopper frame. Check every attachment point before continuing to mow because movement can crack plastic and enlarge mounting holes.
8. Can I use any chute that looks similar?
No. Deere bagger chutes vary by deck width and deck family, and similar-looking parts can still fit poorly or clog badly. Always order using the exact machine and deck compatibility information.
9. Why is the lower chute popping loose?
This usually means the chute is not fully seated, the strap or pin is missing, or the deck-side bracket is damaged. Repeated use in that condition can wear the chute edge and make the problem worse.
10. Why does the bagger work worse in wet grass?
Wet clippings are heavier and stick to chute walls, which reduces airflow and encourages plugging. Slower ground speed and more frequent emptying help, but very wet mowing will still reduce bagging performance.
11. Why does my John Deere bagger leave clumps behind?
Clumping often starts in the mower deck before the material even reaches the chute. Packed grass under the deck, dull blades, and overly fast mowing can all cause material to fall out or fail to move cleanly into the hopper.
12. Can a full bagger reduce performance?
Yes. As bags fill, airflow drops, especially when clippings are damp or packed tightly. Emptying earlier often prevents plugging and reduces strain on chute components.
13. Why is the hopper lid hard to close?
The bags may be seated incorrectly, debris may be packed at the top opening, or the latch area may be bent or obstructed. Clean the rim and inspect the latch before forcing it shut.
14. What causes a Power Flow bagger to rub?
Rubbing usually indicates poor alignment, loose mounting hardware, or worn support points around the blower or chute path. Stop using the machine until the contact point is corrected because rubbing can quickly damage the housing.
15. How do I know if I need a blower kit?
If Deere lists your hopper as requiring a Power Flow system or a separate blower assembly for your deck, then the hopper alone is not enough. This is why the compatible equipment listing matters more than the visual appearance of the hopper.
16. Can I run the mower without the bagger after removing it?
Yes, but follow the machine’s normal discharge or mulch setup requirements and remove any bagging-specific blade or chute arrangement if the manual says to do so. Deere operator guidance for older systems specifically notes changing mower blades back for the next mowing application when special bagging blades were used.
17. Why is my chute cracking?
Cracks often come from vibration, improper fit, forcing clogged material out, or continuing to mow while the chute is loose. Sun exposure and age can also make plastic brittle over time.
18. What should I check first if the bagger suddenly stops working well?
Check for a blockage, then inspect blade condition, bag seating, and chute attachment points. Those quick checks solve more homeowner bagger complaints than hopper replacement does.
19. How often should I clean the bagger?
Inspect and clean it before each use as needed, and clean it thoroughly after heavy wet mowing or leaf pickup. Daily inspection of blockage points is more important than any complex service interval on these attachments.
20. What maintenance matters most on John Deere bagger types and models?
Keeping the chute path clean, the blades sharp, and the mounting hardware secure has the biggest effect on reliability. Dry storage also helps bags and plastic parts last longer.
21. Why does my bagger smell bad in storage?
Moist grass left in the bags or hopper can mold and decompose during storage. Clean and dry the entire system before putting it away for the season.
22. Can I buy just the hopper without the chute?
Yes in some cases, but that does not mean the system will be complete. Deere specifically notes that BUC11233 requires the appropriate chute and that the chute is different for each mower deck size.
23. Why won’t my bagger fit even though it is genuine Deere?
Because genuine Deere parts still have to match the correct machine, deck, and collection system type. A genuine hopper for one deck family can still be wrong for another if the chute path, bracket style, or blower requirement differs.
24. Is aftermarket OK for bags and blades?
It can be, provided the cross-reference is exact and the application is proven for the same Deere deck or hopper setup. For fit-sensitive chutes, brackets, and blower-related parts, OEM is usually the safer choice.
25. Why is my bagger hard to remove?
Buildup around pins, bent hardware, or trying to remove components in the wrong order can make seasonal removal difficult. Use the operator manual’s removal sequence, especially on older H-frame and receiver-style systems.
26. Can missing front weights affect bagger use?
On some systems, Deere installation guidance includes ballast or front weights to counterbalance the bagger assembly. If your exact system calls for weights, skipping them can affect handling and safe operation.
27. Why does the bagger seem to work better at slower speed?
Slower speed reduces the volume entering the chute at one time, which helps the deck airflow keep material moving. This is especially noticeable in wet grass or heavy leaf pickup.
28. Should I pressure wash the bags?
A light rinse can help, but aggressive washing and poor drying can shorten bag life or leave them damp in storage. Gentle cleaning followed by full drying is the safer routine.
29. When is a dealer the better option?
A dealer is the better option when the machine has uncertain compatibility, repeated Power Flow fit issues, structural bracket damage, or a bagger assembled from mixed used parts. Dealer parts lookup is also useful when the owner knows the tractor but not the exact deck or chute family.
30. Is it worth repairing an older John Deere bagger?
Usually yes if the attachment is complete, the hopper frame is sound, and the needed parts are limited to bags, chutes, and hardware. It is less attractive when several major pieces are missing and the correct compatibility is no longer clear.
31. Why does my bagger blow dust out around the hopper?
Some airflow discharge around the hopper ducting is normal because Deere designs these systems to vent air while retaining clippings. Excessive blowout, though, can suggest poor lid sealing, torn bags, or a chute fit problem.
32. Can leaf collection damage the bagger?
Not by itself, but heavy leaf volume can overfill small systems quickly and increase plugging if ground speed is too high. Frequent emptying and slower travel help protect the chute and maintain airflow.
33. Why does my bagger performance change after blade replacement?
Because blade design directly affects how material is lifted and pushed toward the discharge opening. If performance changed immediately after blade service, recheck that the blades are the correct style and installed properly.
34. What should I store with the bagger over winter?
Keep the hopper, bags, chute sections, pins, straps, and any removable bracket hardware together. Deere removal guidance repeatedly shows that small retaining parts are easy to lose, and losing them creates fit and vibration problems next season.
35. What is the simplest rule for troubleshooting John Deere bagger types and models?
Start with what the owner sees: weak pickup, plugging, uneven fill, or rattling. Then check airflow, cleanliness, blade condition, and exact fit before blaming the hopper itself.