
Kubota BX23S Snow Blower Guide
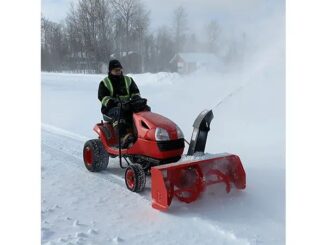
The Kubota BX23S can operate a front-mounted, mid-PTO-driven snow blower when equipped with the correct front hitch, driveline and controls. Documented options include the 50-inch BX2816 residential blower and 55-inch BX2822A commercial blower. Compatibility depends on the complete installation package, not simply the attachment’s width or Kubota branding.kubotausa
For driveway clearing, the main decisions are blower condition, mounting hardware, chute controls, traction and approved rear ballast. A used blower without its tractor-side components can require substantial additional equipment before it is usable.
This guide explains the verified attachment arrangements, how to evaluate a snow-blower package, safe operating technique, winter preparation and common faults.
Kubota BX23S Snow Blower Compatibility
The BX23S is a diesel-powered subcompact tractor-loader-backhoe with a liquid-cooled engine, four-wheel drive and a two-range hydrostatic transmission. Its standard mid PTO operates at 2,500 rpm, while the rear PTO operates at 540 rpm. These are separate drive arrangements and are not interchangeable.kubotausa
Documented front-mounted options
| Snow blower | Clearing width | Design and standard controls | Documented installation components |
|---|---|---|---|
| BX2816 | 50 inches | Two-stage residential blower; chain reduction; manual chute rotation and deflection | BX2810 front quick hitch and BX2811 mid-PTO driveline |
| BX2816A | 50 inches | Two-stage residential blower; chain reduction; manual chute rotation and deflection | BX2810 front quick hitch and BX2811 mid-PTO driveline |
| BX2822A | 55 inches | Two-stage commercial blower; oil-bath reduction gearbox; hydraulic chute rotation and manual deflection | BX2810 front quick hitch and BX2811 mid-PTO driveline |
The documented packages also identify the applicable loader valve when the tractor is not already equipped. Valve references and attachment suffixes differ between publications, so confirm the exact blower identification, tractor serial number and required components before ordering. Do not assume BX2816 and BX2816A parts, or different BX2822 versions, interchange.kubotausa+1
A two-stage blower uses an auger to gather snow and an impeller to discharge it through the chute. The BX23S powers these mechanisms mechanically through the PTO driveline; hydraulic functions lift the front attachment and operate hydraulic controls where fitted.
What to check before buying a used blower
Ask for the attachment identification plate and an inventory of everything included:
-
Tractor-side mounting brackets and BX2810 hitch components.
-
Correct BX2811 mid-PTO driveline components.
-
Complete shafts, guards, supports and locking hardware.
-
Lift hoses, couplers and any required control components.
-
Chute crank, hydraulic rotation equipment or other fitted controls.
-
Skid shoes, cutting edge and specified shear-bolt hardware.
-
Attachment and installation manuals.
“Fits a BX tractor” is not sufficient confirmation. Older BX attachments, other tractor families and visually similar hitches may use different mounting or drive components.
Choosing the Right Blower and Clearing Arrangement
Front-mounted versus rear-mounted blowers
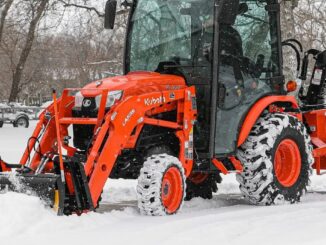
A front blower lets the operator face the clearing direction and watch the intake, driveway edges and discharge area. This is useful on long drives and around buildings, although the tractor’s front loader must be removed for the documented front-hitch arrangement.
A conventional rear-mounted blower attaches to the three-point hitch and usually clears while the tractor reverses. The BX23S requires the appropriate optional three-point-hitch equipment, and the backhoe must be removed before installing a rear three-point implement.
Do not select a rear blower solely because it has a Category I hitch. Confirm PTO horsepower requirements, implement weight, lifting geometry, driveline length and clearance with the backhoe mounting structure.
Pull-type or inverted rear blowers work while traveling forward, meaning the tractor passes over the snow first. They are a distinct attachment category, not an alternative mounting method for an ordinary rear-facing blower. This guide does not establish a specific inverted-blower match for the BX23S.
Width, snow conditions and property layout
The 55-inch commercial blower provides a wider pass than the 50-inch residential models, but width alone does not determine productivity. Wet snow, deep drifts, banked snow and limited traction can require slower travel and partial-width passes with either size.
Before purchasing, confirm the actual intake height and overall dimensions of the identified attachment. Check gate openings, storage space, turning areas and clearance around parked vehicles.
For narrow paths, steps and small parking areas, a separate walk-behind blower may be easier to maneuver and avoids seasonal tractor conversion. A tractor-mounted blower is more attractive where long driveways, repeated snowfall and limited snow-stacking space justify the installation.
A blade is often convenient for modest accumulations where snow can be pushed aside. A blower becomes more useful when banks would otherwise narrow the driveway or when snow must be thrown beyond the cleared surface.
Mounting a Kubota BX23S Front Snow Blower
The BX2810 front-hitch installation requires removal of the mid-mount mower deck and its specified bracing. Plan the seasonal changeover as a complete attachment conversion rather than simply connecting a PTO shaft.kubotausa
Use the tractor, hitch, driveline and blower instructions together.
-
Park on firm, level ground, lower the installed equipment and follow the loader-removal procedure.
-
Remove the mower deck and any bracing identified in the front-hitch instructions.
-
Install and secure the tractor-side hitch components.
-
Fit the specified PTO driveline, including its supports, guards and locking devices.
-
Connect the blower and verify every attachment latch or retaining pin.
-
Clean and connect hydraulic couplers with the engine stopped and pressure relieved as instructed.
-
Install the approved ballast arrangement.
-
Check hose routing and component clearance throughout the permitted lift and steering movements.
-
Conduct the initial functional checks in a clear area, following the prescribed PTO engagement procedure.
Never substitute an improvised shaft, remove a guard to gain clearance or modify structural mounting brackets to make an attachment fit.
The front blower does not use the loader’s bucket quick-attach interface. Loader attachment compatibility therefore does not establish snow-blower compatibility.
Check chute controls before the first storm
Manual chute rotation and deflection require different operator actions from hydraulic or electrical controls. Confirm that every control moves freely and that the chute stays within its permitted range.
A hydraulic-rotation blower still needs the correct hoses, connections and control arrangement. Do not assume the tractor’s existing valve connections provide every function without the specified installation components.
Stop and isolate the equipment before leaving the seat to make an adjustment where required. Never reach across an operating intake or discharge opening.
Kubota BX23S Traction and Ballast
Traction equipment improves grip; ballast establishes the required weight balance. One does not automatically replace the other.
A front blower adds weight ahead of the tractor. Confirm the approved rear counterweight arrangement for the actual blower and tractor configuration. Do not assume the backhoe must remain installed, must be removed or automatically provides acceptable ballast.
If the approved arrangement uses a rear three-point ballast implement, the backhoe must first be removed and the appropriate hitch installed.
Chains and tire clearance
Tire chains can improve grip on packed snow and ice, but they must fit the installed tires and available clearance.
-
Check clearance to fenders, steering components, hoses and other nearby parts.
-
Verify front-chain approval separately rather than assuming front and rear chains are equally suitable.
-
Recheck chain tension and clearance after initial operation.
-
Inspect for contact during steering and axle movement.
-
Consider possible marking of concrete, asphalt and decorative surfaces.
Chain patterns differ in ride quality and surface contact. Choose an approved arrangement for the tire and working surface rather than selecting solely by chain pattern.
Wheel weights and liquid ballast can add traction weight, but ballast position matters. Excess weight can overload the tractor, hitch, axles or transport equipment without correcting the balance in the intended way.
Four-wheel drive does not prevent sliding or eliminate longer stopping distances. Engage the differential lock only as instructed, before excessive wheelspin develops, and never while the wheels are spinning rapidly.
Preparing the Tractor for Snow-Blower Work
Diesel fuel and cold starting
Use clean, seasonally appropriate diesel from a reliable supplier. Summer fuel remaining in the tractor can become a problem when temperatures fall enough for wax to restrict the fuel filter.
If using an approved anti-gel treatment, follow its temperature requirements and dosage before fuel gels. No. 1 diesel and winter blends offer different cold-flow characteristics from No. 2 diesel; use the fuel guidance applicable to the tractor and local conditions rather than a homemade blending ratio.
Inspect the fuel-filter and water-separator arrangement fitted to the tractor. Drain water only through the designated procedure, and replace overdue filters before winter work.
If the engine loses power because fuel has gelled, stop forcing it to run. Move the tractor safely to a suitable warm location and follow the fuel-system recovery procedure. Never add gasoline, alcohol or unapproved solvents.
Use the prescribed glow-plug procedure. Do not use ether or starting fluid unless expressly permitted by the tractor instructions.
Battery, coolant and fluids
Clean and secure battery connections, inspect the ground cable and check battery condition before repeated cold starts expose a weakness. Use a maintainer compatible with the installed battery chemistry, and never charge a frozen, cracked, swollen or leaking battery.
Check coolant level only when safe, inspect hoses and test freeze protection. Use the specified coolant; an unfamiliar color does not establish compatibility.
Confirm that engine oil and transmission/hydraulic fluid meet the tractor’s requirements for the expected conditions. Do not substitute an unverified “winter” fluid or mix incompatible products.
Cold hydraulic fluid responds slowly. Warm the tractor gradually, operate permitted hydraulic functions gently and avoid immediately loading the blower or repeatedly forcing the lift against its stops.
Operating a Kubota BX23S Snow Blower
Before starting
-
Inspect the auger, impeller area, cutting edge and skid shoes with power isolated.
-
Check shear bolts, guards, hitch locks and driveline connections.
-
Look for leaks, damaged hoses and loose hardware.
-
Inspect chains and ballast security.
-
Clear snow from the radiator intake, lights, steps and controls.
-
Confirm that the discharge area is clear of people, vehicles and vulnerable property.
Mark driveway edges, culverts, ditches, low walls and other hidden hazards before snowfall. Remove hoses, cables, stones and loose objects from the clearing area.
Warm-up and initial checks
Start and warm the engine as instructed without running it in an enclosed building. Check steering, brakes and attachment lift response before beginning work.
Select the PTO operating position specified for the front blower. Engage it using the prescribed procedure, then establish the operating speed stated in the attachment manual. PTO shaft speed is not the same as engine speed.
Use low transmission range when appropriate for controlled clearing. The hydrostatic pedal regulates travel speed, allowing the operator to reduce snow intake without unnecessarily reducing blower speed.
Clearing technique
-
Plan the discharge direction before entering the snow.
-
Begin slowly and watch how the blower handles the material.
-
Reduce travel speed or take a narrower bite when snow loads the blower heavily.
-
Avoid forcing the housing into frozen banks or compacted plow piles.
-
Turn carefully and keep the discharge away from traffic, windows and bystanders.
-
Disengage the PTO before inspecting abnormal noise, vibration or loss of performance.
Slow forward movement is usually preferable to repeatedly stalling the blower in heavy snow. Throwing snow with the wind, where practical, improves visibility and reduces snow returning toward the operator.
Keep the attachment low during transport within the clearance allowed by the manual. Avoid abrupt steering, braking and hydrostatic direction changes on slippery surfaces.
Gravel and decorative surfaces
Adjust the skid shoes to maintain the prescribed cutting-edge clearance. On loose gravel, the objective is to leave a protective snow layer rather than scrape down to stone.
Frozen gravel is not automatically safe to scrape closely. Loose stones can still enter the blower and become dangerous projectiles.
Use surface-compatible wear components only where approved. Do not assume shoes or cutting edges advertised for another blower will fit correctly.
Clearing a blockage safely
Disengage the PTO, lower the attachment, apply the parking brake, stop the engine and remove the key. Wait for every moving component to stop.
Use the prescribed clean-out tool, never a hand or foot. Packed snow can hold rotating components under tension even after the engine stops.
Never reach into the discharge chute, auger housing or impeller opening. Do not rely on an interlock alone to isolate the equipment.
Maintenance and Troubleshooting
After each use, lower the blower, stop the tractor and remove packed snow before it freezes solid. Clean away salt and treated slush, allow components to dry and lubricate the specified points.
Inspect the cutting edge, skid shoes, chute mechanism and guards regularly. Service the chain-drive or gearbox arrangement identified on the actual blower; do not apply one model’s lubrication procedure to another.
Use only the specified shear bolts and fasteners. A stronger substitute can defeat the protection intended to prevent driveline damage.
| Symptom | Likely causes | Safe first checks | When professional service is needed |
|---|---|---|---|
| Blower repeatedly clogs | Wet snow, excessive intake, restricted chute, insufficient operating speed | Isolate power, clear with a tool, check prescribed operating speed and reduce travel speed | Clogging continues with vibration, damaged components or abnormal drive noise |
| Poor throwing distance | Heavy snow, low blower speed, partial blockage, wear | Check chute setting, clear restrictions safely and reduce the width of cut | Suspected impeller, bearing or gearbox damage |
| Auger or impeller stops unexpectedly | Broken shear bolt, obstruction, drive fault | Stop immediately; inspect only after complete isolation | Repeated shear-bolt failures or internal drive damage |
| Tractor struggles in deep snow | Excessive bite, wheelspin, unsuitable speed | Reduce intake and review traction and ballast | Power loss persists without blower load |
| Slow cranking or difficult starting | Weak battery, poor connections, unsuitable fuel, cold-start fault | Check battery condition, terminals, fuel and starting procedure | Repeated electrical faults, injection problems or abnormal smoke |
| Slow or jerky lift | Cold fluid, low level, restricted connection, hydraulic fault | Warm gradually and inspect fluid level and accessible connections | Persistent poor response or a high-pressure leak |
| Chains strike nearby components | Incorrect size, loose fit, insufficient clearance | Stop and remove or correct the installation before continuing | Safe clearance cannot be established |
Never check a hydraulic leak with bare hands. High-pressure leaks, internal hydrostatic faults, fuel-injection repairs, structural cracks and complex electrical problems require qualified service.
Operator protection and visibility
The BX23S commonly has an open operator station; an enclosure or cab must be suitable for the tractor and attachment installation. Do not assume a weather enclosure includes effective heat, defrosting or adequate visibility.
Keep windows clear where fitted and stop if drifting snow obscures the route. Wear close-fitting insulated clothing, gloves that preserve control feel and slip-resistant boots.
Follow the specified ROPS and seat-belt instructions. Do not drill or modify the rollover structure to mount lights or enclosure brackets.
Kubota BX23S Snow Blower FAQs
What snow blower fits a Kubota BX23S?
Documented front-mounted choices include the BX2816 and BX2816A 50-inch residential blowers and BX2822A 55-inch commercial blower. Each requires the correct installation package, and identification suffixes matter when checking components and replacement parts.
Does the front blower run from the hydraulic system?
The documented front blowers use mechanical power from the tractor’s mid PTO through the appropriate driveline. Hydraulics provide attachment lift and hydraulic chute functions where fitted.
Can the loader stay installed with the front snow blower?
The documented front-hitch blower arrangement replaces the loader for winter operation. It is not a blower mounted on the loader’s bucket carrier.
Can I leave the backhoe on for ballast?
Do not assume that the backhoe is the required counterweight. Check the approved configuration for the blower, front hitch and tractor before operating.
Can the BX23S use a rear snow blower?
A rear blower requires the correct optional three-point hitch, backhoe removal and a verified implement match. Rear PTO speed, horsepower requirements, weight, shaft length and mounting clearance must all be checked.
Can I clear a gravel driveway?
Yes, with suitable skid-shoe adjustment, controlled travel and an appropriate protective snow layer. Keep people and property outside the discharge area because gravel can be thrown.
Why does the blower clog in wet snow?
Wet snow can overwhelm the intake or restrict the chute, especially when travel speed exceeds the blower’s ability to discharge material. Maintain the prescribed operating speed, reduce the bite and clear blockages only after isolating power.
How should the blower be stored after winter?
Clean and dry it, inspect wear components, service its lubrication points and protect exposed metal as instructed. Disconnect it on approved stands or stable blocking, cap couplers and protect the driveline; never leave it suspended by hydraulic pressure.
Before the Next Snowfall
Resolve missing hitch hardware, uncertain ballast arrangements, damaged guards and recurring shear-bolt failures before the next storm. Keep the correct spare shear bolts and a clean-out tool available.
Follow the tractor, front-hitch, driveline and snow-blower manuals as a complete set. A correctly matched installation and controlled snow intake matter more than choosing the widest attachment.