
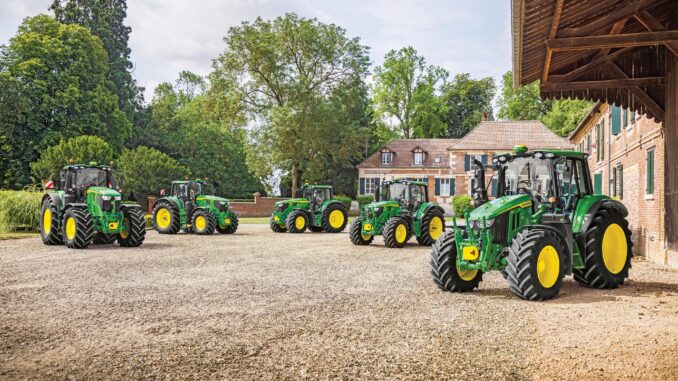
If you own a John Deere 3025E, this guide is built to help you diagnose common problems, stay ahead of routine maintenance, and decide which repairs are realistic at home versus better left to a dealer.
The John Deere 3025E is a compact utility tractor in Deere’s 3E family, aimed at homeowners, acreage owners, and light-duty property maintenance users who need more capability than a lawn tractor but do not necessarily need a larger frame compact tractor.
This guide covers the most common John Deere 3025E repair and troubleshooting issues, service parts owners regularly buy, practical maintenance intervals, and a large FAQ written around what the owner actually sees first: hard starting, poor running, hydraulic or drive complaints, leaks, warning lights, and attachment performance problems.
John Deere 3025E model overview
The John Deere 3025E is a diesel compact utility tractor in the 3E Series sold in North America, and operator documentation groups it with the 3032E and 3038E because these models share the same general platform layout and maintenance structure.
In practical use, the John Deere 3025E is commonly used for loader work, mowing with rear or mid-mount equipment where applicable, driveway maintenance, light grading, material movement, and other small acreage jobs where a hydrostatic compact tractor makes more sense than a ride-on mower.
What matters most for repair and maintenance is that the tractor combines several systems in one machine:
-
Hydrostatic transmission and drivetrain.
-
Hydraulic system and 3-point hitch.
-
PTO system.
-
Electrical system, battery, relays, fuses, and safety interlocks.
-
Cooling, air intake, and filtration systems.
General overview of the John Deere 3025E
Within the Deere lineup, the John Deere 3025E is an entry-level compact utility tractor rather than a basic lawn tractor, which means owners deal with heavier-duty service items such as hydraulic filters, transmission oil, front axle oil, and hitch or loader-related wear in addition to normal engine maintenance.
For troubleshooting, the key John Deere 3025E systems are:
Engine and fuel system
The 3025E uses a diesel engine, so starting and running complaints often tie back to battery condition, fuel delivery, sediment or water in the fuel system, dirty filters, glow/cold-start procedure, or air in the fuel side after service. Deere’s operator documentation specifically includes fuel sediment bowl service, fuel filter service, engine oil service, air filter service, cooling service, and grille/radiator cleaning as core maintenance items.
Drive system
The tractor uses a hydrostatic transmission, so drive complaints are often not “gearbox failure” in the way owners first assume. Low hydraulic oil, incorrect range selection, linkage issues, brakes dragging, clogged cooling fins, or hydro-related filter neglect can all produce weak or erratic travel symptoms.
Hydraulic system
Hydraulics power the steering, hitch functions, loader functions where equipped, and overall implement usability. Slow lift, noisy hydraulics, jerky operation, or weak loader performance often start with oil level, filter condition, air ingress, or excessive load before they point to a hard component failure.
Electrical and safety system
The John Deere 3025E includes standard electrical components plus safety interlock logic, fuses, relays, lights, dash functions, and battery connections. Deere specifically includes safety interlock testing in the maintenance section, which is a clue that many no-start complaints can be switch- or circuit-related rather than engine-related.
Common service parts owners actually buy
These are among the most commonly referenced John Deere 3025E service parts:
-
Engine oil filter: M806419.
-
Primary air filter: M131802.
-
Secondary air filter: M131803.
-
Fuel/water separator: M811032.
-
Fuel filter: MIU800645.
-
Hydraulic oil filter: LVA14703.
-
Transmission/hydraulic oil filter: LVA16054.
-
Maintenance filter pack: LVA21128.
John Deere 3025E troubleshooting approach
The best way to troubleshoot a John Deere 3025E is to start from the symptom the owner actually notices, not the part they suspect. A diesel compact tractor can show the same outward symptom for several very different reasons, so “won’t start,” “won’t move,” or “won’t lift” should each be narrowed down step by step.
The main symptom groups on the John Deere 3025E are:
-
Starting issues.
-
Running issues and loss of power.
-
Transmission or drive complaints.
-
Hydraulic and hitch performance problems.
-
Overheating or fluid leaks.
-
Electrical and safety switch problems.
-
PTO or implement operation complaints.
-
Vibration, noise, and abnormal mechanical feel.
Emergency John Deere 3025E repair needs
Some faults should be addressed immediately because they either create a safety problem or can quickly turn a small repair into an expensive one. Fuel leaks, hydraulic leaks under pressure, overheating, brake issues, steering problems, loose wheel hardware, damaged PTO shielding, and abnormal drivetrain noise should not be ignored.
1. John Deere 3025E starting issues
A no-start or hard-start problem matters because repeated cranking can flatten the battery, overheat starter components, and mask a simple fuel or interlock issue. On a diesel tractor, owners also waste time chasing “bad fuel injection” when the real issue is often much more basic.
Common causes:
-
Weak or discharged battery.
-
Dirty or loose battery terminals.
-
Safety interlock not satisfied.
-
Fuel shutoff issue or restricted fuel flow.
-
Contaminated fuel or water in fuel system.
-
Clogged fuel filter or sediment bowl issue.
-
Air in the fuel system after service.
-
Cold-weather starting procedure problems.
Basic owner checks:
-
Confirm battery voltage and inspect both terminals for looseness or corrosion.
-
Verify PTO, brake, seat, and range/start conditions are set correctly.
-
Make sure there is clean fuel in the tank and inspect the fuel sediment bowl/filter condition.
-
Check whether the engine cranks strongly, cranks weakly, or does not crank at all.
-
If the tractor recently had fuel service, suspect air intrusion or incomplete bleeding before suspecting major engine failure.
2. John Deere 3025E running and power-loss problems
A John Deere 3025E that starts but runs rough, smokes excessively, stalls under load, or feels weak usually has an air, fuel, cooling, or maintenance-related cause before it has a serious internal engine failure. Deere’s maintenance sections emphasize filter condition, grille cleaning, cooling system care, and fuel system service for a reason.
Common causes:
-
Dirty air filters.
-
Restricted fuel filter.
-
Water or debris in diesel fuel.
-
Dirty cooling fins or radiator area.
-
Old engine oil or overdue service.
-
Excessive implement load.
-
Partial fuel starvation.
Basic owner checks:
-
Inspect the primary and secondary air filters.
-
Check the radiator screen, front grille screens, and engine compartment for debris.
-
Replace overdue fuel and engine service items if history is uncertain.
-
Reduce the load and retest to see whether the symptom is load-specific.
-
Watch for smoke color patterns because black smoke, white smoke, and blue smoke point in different directions.
3. John Deere 3025E vibration and noise
Sudden vibration or new mechanical noise matters because it can indicate loose hardware, driveline issues, damaged implements, or developing axle or PTO problems. Continued use can damage bearings, shafts, couplers, and attached equipment.
Common causes:
-
Loose wheel hardware.
-
Bent or damaged implement driveline.
-
PTO shaft issues.
-
Loose loader or frame hardware.
-
Debris wrapped in rotating components.
-
Failing bearings or couplers.
-
Engine mount or accessory issues.
Basic owner checks:
-
Stop using the tractor until the source area is identified.
-
Inspect wheels, loader mounts, hitch hardware, and visible driveline parts.
-
Isolate whether the vibration happens only with PTO engagement, only while moving, or even at idle.
-
Check for fresh contact marks, loose guards, or metal dust around rotating parts.
-
Do not continue running a PTO-driven implement with strong vibration.
4. John Deere 3025E overheating and leaks
Overheating and visible leaks are high-priority because diesel engines and hydro systems do not tolerate neglected cooling or fluid loss for long. A small leak today can become a pump, hose, seal, or engine damage repair tomorrow.
Common causes:
-
Dirty radiator, oil cooler, or cooling fins.
-
Low coolant or poor coolant condition.
-
Loose hose clamps or aged hoses.
-
Engine oil leaks.
-
Fuel leaks.
-
Hydraulic hose or fitting leaks.
-
Transmission or axle seal leaks.
Basic owner checks:
-
Clean grille screens and cooling fins before assuming a major fault.
-
Check coolant, engine oil, transmission/hydraulic oil, and front axle oil levels.
-
Trace leaks upward to find the true source rather than the drip point.
-
Inspect hoses and clamps with the machine cool and parked safely.
-
Never place hands near suspected high-pressure hydraulic pinhole leaks.
5. John Deere 3025E transmission and drive problems
A John Deere 3025E that will not move properly, moves weakly, or feels inconsistent under pedal input may have a hydrostatic system issue, but not always a failed transmission. Fluid level, filters, linkage, brake drag, and operating setup should be ruled out first.
Common causes:
-
Low transmission/hydraulic oil.
-
Overdue transmission/hydraulic filter service.
-
Brake drag.
-
Range selection issue.
-
Hydraulic overheating.
-
Linkage adjustment issue.
-
Excessive load or terrain demand.
Basic owner checks:
-
Confirm transmission oil level.
-
Check whether the tractor behaves differently in different ranges.
-
Inspect for overdue hydraulic and transmission filter replacement.
-
Make sure the parking brake is fully released.
-
Test again after warming the hydraulic system properly.
6. John Deere 3025E electrical problems
Electrical issues matter because they often disable the tractor completely even when the engine and drivetrain are otherwise healthy. Deere includes fuse, relay, battery, lamp, and diagnostic display service in the operator manual, which shows how central basic electrical checks are on this platform.
Common causes:
-
Weak battery.
-
Dirty battery terminals or ground point.
-
Blown fuse.
-
Faulty relay.
-
Damaged wiring.
-
Faulty safety switch.
-
Lighting or dash panel circuit issue.
Basic owner checks:
-
Check battery state and connection tightness first.
-
Inspect fuses before replacing parts.
-
Swap relays only if the part numbers and circuit roles match.
-
Look for crushed or rubbed wiring near moving components.
-
Retest the safety interlock system before concluding there is a starter or ECU fault.
Summary:
The John Deere 3025E is generally regarded as a straightforward, durable compact tractor, but owners and troubleshooting references repeatedly point to a handful of practical issues—mainly starting/fuel delivery, hydraulic performance or leaks, loader drift, overheating in dusty work, and electrical/interlock faults. It is also easy to mistake some design limitations, especially modest horsepower and light weight, for faults.tractorpicker+1
Most common problems
Issues that are often normal limitations
The 3025E is the entry-level 3E tractor, not a high-output compact. A complaint such as “it feels underpowered” may be normal if it is being asked to run a large cutter, aggressive ground-engaging implement, or sustained loader work at low rpm. Its 24.4 hp rating, economy specification, lack of a mid-PTO, and comparatively basic hydraulic/loader features are common reasons some owners later prefer the larger 3038E rather than evidence of a mechanical defect.tractorpicker
Similarly, light rear-end traction, instability with a raised loader, and poor performance on slopes are frequently setup issues:
-
Use properly sized rear ballast when using the front loader.
-
Keep the loader low while moving.
-
Select tyres appropriate to the ground condition.
-
Avoid treating a 25-hp compact as a heavier utility tractor.
-
Maintain engine rpm for hydraulic and PTO work rather than trying to work at low revs.tractorpicker+1
Best diagnostic order
For a 3025E with a general complaint, this is the most efficient inspection sequence:
-
Check engine oil, coolant, fuel, and hydraulic/transmission fluid levels.
-
Look for leaks, damaged hoses, loose fittings, chafed wiring, and loose wheel hardware.
-
Check the battery under load—not just its resting voltage—and clean/tighten both terminals and the chassis ground.
-
Verify maintenance history for engine oil, fuel, air, and hydraulic filters.
-
Clean the radiator screen, radiator fins, and cooler area if the tractor has been mowing or brush-cutting.
-
Confirm all safety interlocks, PTO settings, range selection, and parking-brake conditions.
-
If hydraulics are weak or noisy, inspect for foamy oil, suction-side seepage, and hydraulic filter condition.
-
Escalate persistent hydraulic drift, transmission leaks, overheating, or repeated electrical no-start faults to a Deere dealer—particularly if the tractor remains under warranty.fridayparts+1
Problems worth treating urgently
Stop operating and investigate immediately if you find:
-
Hydraulic oil spraying or leaking under pressure.
-
Fuel leaks near the engine or exhaust.
-
A temperature warning, coolant boil-over, or repeated overheating.
-
Brakes that are weak, spongy, or uneven.
-
Abnormal drivetrain noise, severe steering play, or loose wheel hardware.
-
A loader or three-point hitch that drops unexpectedly with a load.
Those are safety or damage-risk issues, rather than routine maintenance annoyances.
John Deere 3025E hydro transmission sluggish fix
John Deere 3025E weak loader and transmission symptoms
John Deere 3025E hydro transmission bypass valve location
On the John Deere 3025E, the hydrostatic-transmission bypass (tow) valve is normally found low on the rear transmission/hydrostatic housing, accessible from the rear/underside of the tractor near the rear axle area. It is not the transmission oil fill point, which Deere locates on top of the right-hand rear-axle area.agriculture.papemachinery
How to find it
-
Park on level ground, lower the loader and three-point hitch, shut off the engine, remove the key, and apply the parking brake.
-
Stand behind the tractor and look beneath/around the rear axle and transmission case.
-
Look for the small bypass/tow-valve control or valve fitting on the HST/transmission housing rather than a lever at the operator’s platform.
-
Consult the operator’s manual illustration for your exact serial-number range before turning or pulling anything, because 3025E production versions can differ.
The valve may be described as the transmission bypass valve, HST bypass valve, or tow valve. Deere sells a transmission bypass valve under part number TCA19311, though a parts listing alone does not establish that part as the correct one for every 3025E serial number.shop.deere
What it does
The bypass valve temporarily relieves the hydrostatic circuit so the tractor can be moved a very short distance with the engine off—for example, to reposition a disabled tractor. If it is left in the bypass/open position, the tractor can behave as though the hydrostatic transmission is weak, slow, or unable to propel the machine properly.
For normal operation, it must be returned fully to its closed/drive position before starting and operating the tractor.
Important cautions
-
Do not tow a hydrostatic tractor at road speed or over a long distance with the engine off. The transmission relies on engine-driven oil circulation and can be damaged without it.
-
Do not use the bypass setting as a workaround for a weak HST. If it has been in the correct operating position and travel remains poor, check oil level/condition, both hydraulic filters, brake drag, range selection, and charge pressure.
-
Make sure the machine cannot roll before operating the bypass valve. A tractor on a slope can move unexpectedly once the hydrostatic holding effect is released.
-
If you cannot identify the valve confidently, use the official manual tied to the tractor’s serial number or have the dealer identify it; nearby hydraulic fittings and drain plugs should not be disturbed.
John Deere TCA19311 bypass valve application chart
What is confirmed
The earlier suggestion that TCA19311 may be the 3025E’s bypass/tow valve should therefore be treated as unverified, not as a confirmed fitment.
Why an application chart is tricky
John Deere part applicability can vary by:
-
Exact tractor model.
-
Serial-number break or production year.
-
Worldwide versus North American configuration.
-
Superseded part number.
-
Transmission variant and regional specification.
A physical match is not enough: a similar-looking valve may have different threads, spring pressure, porting, or intended location.
Correct way to verify fitment
Use Deere’s official parts system or a Deere dealer with the full tractor PIN/serial number. Search the 3025E parts catalog under the transmission/hydrostatic or hydraulic-housing section, then open the itemized diagram for “bypass valve,” “tow valve,” or the applicable HST housing assembly.
John Deere’s Technical Information Store is the official source for model-specific operator and technical publications, and Deere provides manuals and support resources through its Manuals & Training portal.deere+1
For a 3025E, the most useful information to provide a dealer is:
-
Model: John Deere 3025E.
-
Complete product identification number/serial number.
-
Market/version: North American, worldwide, etc.
-
Whether it is a replacement part inquiry or an attempt to locate the tow/bypass control.
-
Any existing number stamped on the installed valve or transmission housing.
Practical point
If your aim is to diagnose weak travel rather than replace a known damaged valve, do not order TCA19311 based only on its generic name. First verify that the bypass control is fully in its normal drive position, then inspect oil level/condition, HST and suction filters, brake drag, and range selection. A bypass valve is only one possible cause of weak hydrostatic drive; it is not the usual cause of weak loader hydraulics at the same time.
Symptoms of a failing hydrostatic transmission bypass valve
A failing or partly open hydrostatic bypass valve—also called a tow or freewheel valve—usually causes very weak or no drive in both forward and reverse, because it bleeds off the pressure the hydrostatic unit needs to propel the tractor. It does not normally cause a weak loader, steering, or three-point hitch by itself; those symptoms suggest a broader hydraulic-fluid, filter, pump, or shared-supply issue instead.manuals.deere+1
Typical symptoms
What it usually does not cause
A bypass valve directly affects the hydrostatic drive circuit, so it normally does not explain all of the following at once:
-
Slow or weak loader lift/curl.
-
Slow or weak three-point hitch.
-
Stiff or weak power steering.
-
Foam or milkiness in the transmission/hydraulic oil.
-
Hydraulic overheating affecting multiple functions.
If your 3025E has weak travel and weak loader/hitch operation, treat the bypass valve as one quick check, but focus first on shared hydraulic supply issues: correct oil level and specification, water contamination, air entering the suction side, blocked suction/HST filters, or a pump/pressure-regulation fault. Deere’s HST troubleshooting material treats a bypass valve that fails to close as a dealer-level fault.manuals.deere
Simple safe check
-
Park on level ground, lower the loader and three-point hitch, place the range selector in neutral, set the parking brake, stop the engine, and remove the key.
-
Locate the bypass/tow control using the operator’s manual for the exact 3025E serial-number range.
-
Confirm it is fully returned to the normal drive/closed position—not merely partway back from the tow/freewheel position.
-
Inspect the control and surrounding area for dirt, bent linkage, damage, oil seepage, or a control that does not fully return.
-
Start the tractor, run it at normal working rpm, select low range, release the parking brake, and test forward and reverse without a load.
Never crawl beneath an unsupported tractor or operate the bypass valve on a slope. Opening a hydrostatic bypass can remove hydrostatic braking and allow the machine to roll.hydro-gear
When repair is warranted
Have the bypass valve inspected or replaced if it will not return fully to drive position, has a damaged control/linkage, leaks, repeatedly sticks after being cleaned externally, or the tractor remains weak in both directions despite correct fluid level, clean filters, no brake drag, and a verified closed bypass setting.
Internal service should be handled cautiously: hydrostatic service information commonly calls for inspection of the bypass spool and bore for contamination or damage, verification that the spool moves freely, renewal of sealing O-rings where applicable, and confirmation that the valve closes completely.
How to test a hydrostatic bypass valve
Test a hydrostatic bypass valve in two stages: first, verify that the actuator/linkage fully moves and returns; second, compare drive and rolling resistance with the valve set for tow/freewheel versus normal drive. The test must be done safely because opening the bypass removes hydrostatic braking and can let the machine roll.toro+1
Safety first
-
Park on firm, level ground.
-
Lower the loader and three-point hitch or attachment fully.
-
Put the range/gear selector in neutral, set the parking brake, stop the engine, and remove the key.
-
Chock wheels if there is any possibility of movement.
-
Never crawl under an unsupported tractor.
-
Do not tow an HST tractor at road speed or for a long distance with the engine off.
-
Use the exact operator’s manual for your machine to identify the bypass control and its directions; bypass designs differ between manufacturers and models.
Hydrostatic manufacturers warn that actuating the bypass removes hydrostatic braking capacity, so the machine must be stationary and level before it is opened.hydro-gear+1
Basic external test
1. Inspect the control
Find the bypass/tow/freewheel control and check that:
-
The control moves through its full intended travel.
-
Its linkage is not bent, jammed, corroded, or obstructed by mud/debris.
-
A spring-return control actually returns fully to its operating position.
-
There is no obvious oil leak at the valve body.
-
The valve is fully in the drive/closed position before operating.
Many hydrostatic designs use a push-button, pull rod, lever, or screw-style valve. On Hydro-Gear units, the actuator/linkage must fully release for normal operation; one manual specifies an approximate 0.22 in / 5.588 mm button extension from the hex plug when fully released, but that measurement is not universal and should not be applied to a John Deere 3025E unless its applicable technical documentation specifies it.hydro-gear+1
2. Confirm freewheel function — engine off
With the valve in its normal drive/closed position:
-
Release the parking brake only while keeping the tractor secured on level ground.
-
Attempt to roll the machine a very short distance by hand, preferably with help and without standing in its path.
-
A hydrostatic machine should normally offer substantial resistance; it should not roll freely.
Then place the bypass in its tow/freewheel/open position:
-
The tractor should roll significantly more easily because the bypass routes oil around the hydrostatic pump/motor circuit.
-
Return the brake on as soon as the check is complete.
This is a functional comparison, not a measurement of a specific pushing force. If there is little or no difference between closed and open positions, the bypass may be stuck open, its linkage may not be moving the valve, or the transmission may have another internal fault. The bypass’s intended function is to allow low-resistance movement when the engine is not running.toro+2
3. Confirm drive function — engine running
-
Return the bypass control fully to the normal drive/closed position.
-
Confirm the parking brake is released.
-
Start the engine and allow the hydraulic oil to warm briefly.
-
Select low range.
-
At normal working engine rpm, test forward and reverse on level ground with no attachment load.
-
Watch whether the tractor moves decisively in both directions and whether it has normal engine-braking effect when the hydro pedal is released.
A correctly closed bypass should restore normal hydrostatic drive. Hydro-Gear service material states that the bypass must be fully released/closed for normal operation; a partially engaged bypass will prevent proper function.hydro-gear+1
Interpreting the results
John Deere troubleshooting material lists a bypass valve that fails to close as a cause of hydrostatic drive trouble.manuals.deere+1
If the test suggests a fault
Do not compensate by forcing the control or repeatedly operating the tractor with low drive pressure. First clean the external area and recheck that the linkage reaches its full normal position. If it still will not seat or the problem returns:
-
Verify transmission/hydraulic oil level, condition, and correct specification.
-
Check hydraulic/HST filter service history.
-
Inspect the actuator and linkage for damage.
-
Use the machine-specific Deere technical manual for the valve removal procedure and torque specification.
-
Have a qualified technician inspect the valve spool, bore, spring, seals, and charge pressure.
On serviceable hydrostatic units, the typical internal inspection is for a spool that moves freely, a clean undamaged bore, correct spring action, and intact O-rings; the valve must fully close after actuation.
How to purge air from a hydrostatic transmission
DIY or dealer? John Deere 3025E repair decision guide
For the John Deere 3025E, the normal DIY line is simple: routine service, visual inspection, filters, fluid checks, battery work, and easy-access bolt-on parts are realistic for most owners, while internal hydraulic, fuel injection, transmission, electrical diagnostic, and split-tractor repairs move into advanced territory quickly. Deere’s operator manual is strong on operation and scheduled maintenance, but major repair work belongs with the technical manual and appropriate tools.
Good DIY jobs
-
Engine oil and filter changes.
-
Air filter replacement.
-
Fuel filter and sediment bowl service.
-
Battery cleaning or replacement.
-
Cooling screen and radiator fin cleaning.
-
Checking fluid levels.
-
Replacing fuses and some relays.
-
Inspecting hoses, belts, and visible hardware.
Advanced DIY or dealer jobs
-
Hydraulic leak tracing beyond simple hose replacement.
-
Transmission or hydrostatic diagnosis.
-
Fuel injection pump or injector work.
-
PTO driveline internal repairs.
-
Wiring diagnosis beyond basic fuse/relay issues.
-
Front axle internal work.
-
Major steering or brake repair.
Skill level guide
-
Beginner: Fluid checks, air filter, battery terminals, screen cleaning, fuse replacement.
-
Intermediate: Engine oil/filter service, fuel filter service, hose replacement, battery replacement, basic no-start diagnosis.
-
Advanced: Hydraulic diagnosis, driveline repair, electrical fault tracing, axle or transmission work, technical manual-based repairs.
Parts for the John Deere 3025E: what information you need before ordering
Before ordering parts for a John Deere 3025E, collect the exact model designation, the Product Identification Number, and the engine identification details. Deere’s manuals include a product identification section for a reason: serial breaks and configuration differences can affect what actually fits your machine.
For tractors like the John Deere 3025E, the minimum information to gather is:
-
Full model name: John Deere 3025E.
-
Product Identification Number (PIN).
-
Engine model and serial number.
-
Front loader model if fitted.
-
Any attachment or implement model if the part relates to PTO, hydraulic hookups, or mounted equipment.
Key John Deere 3025E service and repair parts
OEM vs aftermarket guidance
For the John Deere 3025E, OEM parts make the most sense for filters with fit-sensitive housings, hydraulic and transmission service parts, safety-related switches, and anything where seal quality or bypass calibration matters.
Aftermarket can be acceptable for selected consumables such as batteries or some equivalent filters, but only when the cross-reference is exact and the supplier is reputable. On compact tractors, a wrong filter or poor-quality seal can create bigger problems than the money saved.
John Deere 3025E manuals and parts diagrams
Owners should use a mix of official Deere documentation and a reputable Deere-focused parts seller when planning service or repair. The official Deere operator’s manual covers operation, maintenance intervals, fluids, locations, and basic troubleshooting, while Deere’s parts catalog helps confirm fit by model and serial.
Useful sources include:
-
John Deere 3025E Operator’s Manual (North America) — best for official maintenance intervals, fluid service points, identification info, and troubleshooting section.
-
John Deere Parts Catalog — best for diagrams, exploded views, and confirming serial-sensitive part fit.
-
John Deere Technical Manual preview — useful for understanding that deeper repair procedures exist for advanced diagnostics and component repair.
-
Green Farm Parts 3025E maintenance guide — useful for commonly purchased maintenance part numbers in one place.
How to locate John Deere 3025E model, serial, and engine numbers
These numbers matter because “3025E” alone is not always enough to guarantee the right part. Deere includes product identification and record-identification sections in the manual because owners and dealers both rely on those numbers to avoid ordering errors.
Use this process:
-
Find the tractor Product Identification Number plate on the machine and record it exactly as stamped. Deere’s operator manual includes a dedicated product identification section to help owners record these details.
-
Record the full tractor model designation as shown on the machine and paperwork.
-
Locate and record the engine model and serial information from the engine tag. Deere specifically provides a section for recording identification numbers.
-
If the tractor has a loader or major attachment fitted, record that model too because hose, mount, and implement parts often depend on the attachment model rather than the base tractor alone.
-
Keep photos of all plates and tags on your phone before ordering online or visiting the dealer. This reduces mistakes when characters are easy to misread.
Buying John Deere 3025E parts online and in stores
The smartest buying strategy is to confirm the OEM number first, then compare channels. For routine John Deere 3025E maintenance parts, online ordering is often easiest, but dealer counters remain the best option for serial-specific, hydraulic, electrical, or hard-to-identify items.
Use the channel that fits the job:
-
Online: Best when you already have the OEM part number and want to compare availability or buy planned service items. Good examples are John Deere Parts Catalog, Green Farm Parts, and Deere’s manuals site.
-
Dealer counter: Best for serial-specific parts, troubleshooting support, and fit questions tied to attachments, hydraulics, or technical bulletins. Deere’s service network is built around that identification process.
-
Retail stores: Fine for batteries and some fluids if the packaging clearly cross-references the John Deere 3025E or the exact OEM number, but less ideal for sensitive filters or hydraulic components.
Step-by-step fitting guide for common John Deere 3025E parts
These are four of the most practical owner-service jobs on the John Deere 3025E because they directly affect starting, reliability, fuel delivery, and overheating prevention. Deere’s maintenance sections support these as normal service areas.
Change the engine oil and oil filter on a John Deere 3025E
This job helps protect the engine and is one of the most important routine services on the tractor. Deere’s schedule and widely referenced 3025E service guidance put engine oil and filter replacement at 200 hours or annually.
-
Park safely, lower implements, shut the engine off, and allow it to cool enough for safe service.
-
Remove the side access panel as needed and drain the engine oil into a suitable container.
-
Remove the old oil filter and confirm the old gasket did not stick to the housing.
-
Lightly oil the new filter gasket, install the new filter by hand, and reinstall the drain plug correctly.
-
Refill with the correct engine oil grade listed in the manual, run briefly, shut down, and recheck the level on the dipstick.
Replace the John Deere 3025E air filters
This job helps prevent power loss, smoke, and dust ingestion. Deere lists air filter element service in the engine and air intake maintenance sections, and Green Farm Parts identifies the primary and secondary elements as M131802 and M131803.
-
Open the hood and access the air cleaner housing.
-
Remove the outer filter carefully so dirt does not fall into the clean side.
-
Inspect the inner element and replace it if dirty or damaged rather than assuming only the outer filter matters.
-
Wipe the housing sealing surfaces clean without forcing debris inward.
-
Install the new elements correctly and secure the housing before restarting.
Service the John Deere 3025E fuel filter and sediment bowl
This job helps with hard starting, rough running, and fuel starvation. Deere includes sediment bowl and fuel filter service in the fuel system maintenance section for the 3025E.
-
Park safely and shut off the fuel supply if applicable.
-
Place a container below the fuel service area and remove the sediment bowl/filter components carefully.
-
Inspect for water, debris, or contaminated diesel, then install the new filter and seals correctly.
-
Reassemble the bowl and housing without overtightening plastic or sealing components.
-
Prime or bleed as required by the manual and confirm the tractor starts and runs cleanly without leaks.
Clean the John Deere 3025E cooling screens and radiator area
This simple job prevents many overheating and power-loss complaints. Deere specifically lists cleaning the front and side grille screens, engine compartment, and cooling fins as normal maintenance.
-
Park the tractor safely and let the cooling system cool down.
-
Open the hood and remove debris from the grille screens and screen areas.
-
Clean the radiator, fuel, and transmission cooling fin areas carefully without bending fins.
-
Clear chaff, grass, and dust from the engine compartment and around the air path.
-
Recheck more often during mowing, loader work in dusty areas, or hot-weather use.
Maintenance to prevent John Deere 3025E problems returning
Regular maintenance on the John Deere 3025E prevents more than ordinary wear. It directly reduces no-start complaints, overheating, hydraulic sluggishness, fuel restriction, premature filter plugging, and “mystery” performance loss that often turns out to be overdue service.
Focus on these areas:
-
Starting reliability: Battery connections, fuel cleanliness, sediment bowl condition, and timely fuel filter replacement.
-
Engine performance: Air filter condition, engine oil service, and unrestricted cooling airflow.
-
Overheating prevention: Frequent cleaning of grille screens, radiator and cooling fins, especially in dusty or grassy work.
-
Drive performance: Correct transmission/hydraulic oil level and on-time filter service.
-
Hydraulic reliability: Clean oil, correct filter intervals, and fast attention to leaks.
-
Electrical reliability: Battery care, clean terminals, and early attention to blown fuses or damaged wiring.
John Deere 3025E maintenance schedule and year-round checklist
Deere’s operator manual includes a maintenance interval chart covering daily service up through multi-hundred-hour and multi-year intervals, with service records broken out at 10, 50, 200, 400, 600, 1000, 2000, and 6000-hour points.
The practical owner version for a John Deere 3025E looks like this:
Daily / before each use
-
Check engine oil level.
-
Check coolant level.
-
Check transmission oil level.
-
Check front axle oil level.
-
Test the safety interlock system before startup.
-
Inspect for leaks, loose hardware, and debris buildup around screens and the engine compartment.
After initial 50 hours
-
Replace the transmission/hydraulic oil filter LVA16054 after the initial 50-hour service.
-
Review fluid levels and inspect for seepage after the machine has fully broken in.
Every 200 hours or yearly
-
Change engine oil and replace engine oil filter M806419.
-
Perform yearly maintenance items even if hour count is low. Deere’s service record section includes a yearly category in addition to hour-based service.
Every 400 hours
-
Replace hydraulic oil filter LVA14703.
-
Replace transmission/hydraulic oil filter LVA16054.
-
Replace fuel/water separator M811032.
-
Replace fuel filter MIU800645.
Every 600 hours
-
Check or replace primary air filter M131802 and secondary air filter M131803 as required.
-
Inspect intake hoses and associated connections as part of the air system service.
Every 1000 hours and beyond
-
Follow Deere’s record sections for 1000-hour, 2000-hour or two-year, and 6000-hour or six-year items rather than guessing by habit.
-
Major fluid and coolant-age-based service should be tied to the official chart for the specific machine configuration.
Seasonal checklist for the John Deere 3025E
Spring or start of heavy-use season
-
Change overdue engine oil and filter.
-
Inspect battery condition and terminals.
-
Clean cooling screens and radiator area.
-
Check tire pressures and wheel hardware.
Mid-season
-
Inspect for chaff buildup more frequently in mowing or dusty conditions.
-
Recheck fluid levels and look for small leaks before they become major ones.
-
Watch air filter restriction if the tractor is used in dry or dusty work.
Fall or pre-storage
-
Clean the machine thoroughly.
-
Address fuel quality and storage preparation according to Deere’s storage section.
-
Repair leaks, weak batteries, and overdue filters before the next season rather than parking known problems.
Repair, upgrade, or replace a John Deere 3025E?
For a John Deere 3025E, repair usually makes sense when the issue is isolated, the machine is otherwise sound, and the fix restores normal function without chasing multiple worn systems at once. Upgrade makes more sense when the tractor is mechanically fine but the work demands have outgrown it, while replacement becomes easier to justify when repeated hydraulic, electrical, driveline, or structural repairs begin stacking up.
Repair if…
-
The problem is limited to service parts, hoses, filters, switches, battery, or one identifiable leak.
-
The tractor starts, drives, and lifts normally aside from the current fault.
-
Maintenance history has been poor and a full service is likely to solve much of the complaint.
Upgrade if…
-
The tractor is working correctly, but loader capacity, PTO power, or hydraulic performance no longer matches your property needs.
-
You regularly run attachments or loads better suited to a larger compact tractor.
Replace if…
-
You are facing major transmission, hydraulic, and engine issues at the same time.
-
The tractor has severe neglect, chronic contamination, or repeated expensive failures after proper repairs.
-
Safety-critical wear, structural damage, or repair cost approaches the value of the machine.
John Deere 3025E troubleshooting FAQ
1. Why will my John Deere 3025E not start?
Start with the basics: battery strength, cable connections, safety interlocks, and fuel supply. Deere includes safety interlock testing and electrical checks in normal service documentation, which shows how often no-start complaints trace to setup or power supply rather than a major engine problem. If it cranks slowly, suspect battery or cable issues first; if it cranks well but will not fire, move toward fuel delivery and filter checks.
2. Why does my John Deere 3025E crank but not fire?
A strong crank with no start usually points toward fuel delivery, contaminated fuel, air in the fuel system, or a restriction in the fuel filter or sediment bowl. On the 3025E, Deere specifically includes sediment bowl and fuel filter service, so those are logical first checks. If the problem began right after fuel service, suspect air in the system before assuming injector failure.
3. Why is my John Deere 3025E hard to start when cold?
Cold starts on a diesel tractor are affected by battery condition, fuel quality, oil viscosity, and proper cold-weather starting procedure. Deere includes a cold weather starting aids section and a section on minimizing the effects of cold weather on diesel engines. Weak batteries often show up first in winter even when they seemed acceptable in warmer weather.
4. Why does my John Deere 3025E start and then stall?
This often happens when fuel flow is restricted or air is entering the fuel side. Dirty fuel filters, debris in the sediment bowl, poor fuel quality, or partial blockage can let the engine start and then starve. Also check whether the tank vent or fuel path is being restricted under demand.
5. Why is my John Deere 3025E losing power under load?
Loss of power under load commonly points to air restriction, fuel restriction, overheating, or simply asking too much of the tractor or attachment combination. Dirty cooling areas and clogged filters are much more common than internal engine damage. Reduce load, clean the cooling path, and review overdue maintenance first.
6. Why is my John Deere 3025E blowing black smoke?
Black smoke usually means the engine is getting more fuel than available air can burn cleanly, or it is being overloaded. Check the air filter elements, intake path, and whether the tractor is being pulled down too hard by the job. A heavily restricted air filter can make the tractor feel weak and smoke at the same time.
7. Why is my John Deere 3025E blowing white smoke?
White smoke can show up during cold starts, incomplete combustion, or fuel-related problems. If it clears as the engine warms, it may be startup-related, but persistent white smoke deserves attention to fuel quality, fuel delivery, and temperature-related running condition. Do not jump straight to worst-case conclusions without checking the basics first.
8. Why is my John Deere 3025E overheating?
On compact tractors, overheating is very often caused by debris packed into screens, radiator fins, or nearby cooling areas rather than an immediate internal engine fault. Deere specifically instructs owners to clean front and side grille screens and cooling fins. Low coolant, bad hoses, or coolant-age issues are also possible, but airflow restriction is the common first check.
9. Why does my John Deere 3025E run hot when mowing or doing loader work?
High debris exposure and sustained load make marginal cooling problems much more obvious. Grass chaff, dust, and seed fluff can quickly block airflow, especially in summer. Clean the screen and fin areas more often during those jobs and make sure coolant level is correct before assuming a thermostat or water pump issue.
10. Why is my John Deere 3025E battery always going flat?
Repeated battery discharge usually comes from a weak battery, poor cable connections, charging problems, or a machine that is stored without enough use. Deere’s maintenance section covers battery removal, cleaning, installation, and safe jump-starting because battery condition is central to reliable starting. Start by cleaning and tightening every main connection before replacing components.
11. Why does my John Deere 3025E click but not crank?
A click without strong cranking often means the battery has insufficient power, the terminals are corroded, or a starting circuit issue is preventing full current delivery. It can also be a relay, solenoid, or interlock-related symptom. Check battery voltage and cable tightness before suspecting the starter motor itself.
12. Why will my John Deere 3025E not move?
If the engine runs but the tractor will not move, check range selection, parking brake release, transmission/hydraulic oil level, and whether the hydro system has an obvious service issue. Deere provides dedicated transmission operation and maintenance sections because many “won’t move” complaints are operational or fluid-related. Low oil or overdue filter service can affect drive quality significantly.
13. Why is my John Deere 3025E weak in forward or reverse?
Weak travel can come from low hydraulic/transmission oil, filter restriction, overheating, brake drag, or operating in the wrong range for the load. Because the 3025E uses hydrostatic drive, poor performance can feel like transmission failure even when the real issue is service-related. Check the simple items before considering major hydro repair.
14. Why is my John Deere 3025E hydrostatic transmission noisy?
Hydro noise can increase when oil level is low, oil condition is poor, or the system is working under heavy load while hot. Some sound change under load is normal, but a sudden increase, whine combined with weak travel, or chatter during operation deserves inspection. Start with oil level, filter history, and cooling cleanliness.
15. Why is the John Deere 3025E 3-point hitch slow or jerky?
Slow or jerky hitch movement usually points to hydraulic oil condition, low oil level, air in the system, control linkage behavior, or hydraulic restriction. Deere includes hitch operation, rate-of-drop control, and hydraulic maintenance sections because these complaints are often adjustment- or service-related. Check fluid level and basic settings before assuming a pump problem.
16. Why is my John Deere 3025E loader weak?
If equipped with a loader, weak lift can come from low hydraulic oil, relief limitation, air in the system, hose or coupler restriction, or overload. Also make sure the issue is not attachment-specific or caused by poor ballast and unrealistic expectations for the tractor size. A loader that suddenly becomes weak deserves leak and coupler inspection first.
17. Why does my John Deere 3025E leak hydraulic oil?
Hydraulic leaks often come from hoses, fittings, couplers, seals, or damage from rubbing and age. Deere warns about high-pressure fluid hazards, so never use fingers to search for pinhole leaks under pressure. Clean the area, identify the exact source, and repair leaks early before oil loss leads to bigger hydraulic problems.
18. Why is there diesel in the John Deere 3025E sediment bowl?
Some sediment or visible contamination in the bowl means it is doing its job, but water or heavy debris means the fuel system needs attention now. Deere includes check and clean procedures for the fuel filter sediment bowl because contaminated diesel is a predictable service issue. If contamination returns quickly, inspect fuel storage practices too.
19. How often should I change the engine oil on a John Deere 3025E?
The commonly referenced interval is every 200 hours or annually for the engine oil filter service package around this tractor, and Deere’s operator manual includes a 200-hour service category in the service record structure. For low-hour owners, annual service is the practical rule. In harsh dust, heat, or heavy-duty use, watch condition closely rather than stretching intervals.
20. How often should I change John Deere 3025E hydraulic and transmission filters?
The commonly cited schedule on maintenance parts listings for the 3025E is initial transmission/hydraulic filter replacement at 50 hours, then every 400 hours, with the hydraulic oil filter also listed at 400 hours. The official Deere maintenance chart should always be the final check for your serial number and configuration. That matters especially if the machine has been updated or optioned differently.
21. What air filters fit the John Deere 3025E?
The commonly referenced primary and secondary air filters are M131802 and M131803. Those part numbers appear in Deere-focused maintenance listings for the 3025E and align with the tractor’s scheduled air system service needs. Always verify with the PIN before ordering if there is any doubt.
22. What oil filter fits the John Deere 3025E?
A widely referenced engine oil filter for the John Deere 3025E is M806419. It appears in Deere-focused maintenance parts listings and owner service guides. As with all compact tractor parts, confirm against the parts catalog using the machine identification number before ordering.
23. What fuel filters fit the John Deere 3025E?
Commonly referenced fuel-side parts include fuel/water separator M811032 and fuel filter MIU800645. These are the routine fuel service items most often listed for the model. Because fuel system contamination causes many running complaints, using the correct parts and seals matters.
24. Why does my John Deere 3025E blow a fuse?
Blown fuses usually point to a short, a rubbed wire, moisture, or a failing component on that circuit. Deere includes fuse and relay replacement procedures in the electrical maintenance section, which means owners should inspect the circuit rather than just repeatedly replacing fuses. If a new fuse fails immediately, stop and trace the cause.
25. Why do the lights or dash stop working on my John Deere 3025E?
Start with the battery, fuses, relays, and visible ground connections. Deere includes dash panel module use and replacement of light bulbs, fuses, and relays in the manual, which suggests these systems are intended to be checked systematically. Poor battery or ground condition can create multiple odd electrical symptoms at once.
26. Why does my John Deere 3025E PTO not work properly?
PTO complaints can come from engagement issues, safety conditions, driveline setup, operator error, or faults within the PTO system itself. Deere includes a separate PTO operation and PTO maintenance section because proper setup matters. Also make sure the problem is not actually in the implement rather than the tractor.
27. Why is my John Deere 3025E steering heavy?
Heavy steering may point to low hydraulic oil, air in the hydraulic system, front axle load issues, or a deeper hydraulic fault. Because steering depends on hydraulic health, heavy steering should be treated as a real safety issue. Stop using the machine on slopes or roads until the cause is understood.
28. Why are my John Deere 3025E brakes weak or dragging?
Brake complaints matter because they affect both safety and tractor performance. Deere provides brake operation and maintenance sections, and a dragging brake can also make the tractor feel underpowered or reluctant to move. Inspect adjustment, linkage condition, and whether the park brake is fully releasing.
29. Why does my John Deere 3025E vibrate when I engage the PTO?
If vibration appears mainly with PTO engagement, suspect the implement driveline, shaft alignment, guard interference, bent components, or implement imbalance before blaming the tractor itself. PTO vibration should never be ignored because it can damage both the tractor and the attached equipment. Stop and inspect before further use.
30. Why is my John Deere 3025E using more fuel than usual?
Increased fuel use usually tracks back to overload, dirty air filters, poor operating technique, or an engine working harder because cooling and airflow are compromised. A tractor that is smoking, running hot, or breathing through a dirty filter will burn more fuel for the same work. Start with maintenance condition, not injector replacement.
31. Why does my John Deere 3025E feel sluggish after sitting?
A machine that has sat for a long period may have a weak battery, stale or contaminated diesel, sticky controls, condensation-related corrosion, or minor seepage that lowered fluid levels. Deere’s storage and return-to-service sections exist because seasonal inactivity creates its own set of problems. Go through a careful restart inspection rather than jumping straight in.
32. Can I use aftermarket filters on a John Deere 3025E?
You can, but only if the cross-reference is exact and the supplier is trustworthy. The safest choice is OEM for hydraulic, transmission, and fit-sensitive service parts because seal fit, bypass behavior, and build quality matter more on compact tractors than many owners realize. Cheap filters are false economy if they create leakage or poor protection.
33. When should a John Deere 3025E problem go to the dealer?
Send it to the dealer when the fault involves high-pressure hydraulic diagnosis, fuel injection work, hydrostatic transmission internals, advanced electrical fault tracing, or any repair requiring the technical manual and special tools. Deere’s technical manual exists specifically for deeper repair and testing beyond operator-level maintenance. If the issue affects safety and you cannot isolate it confidently, dealer help is the right move.
34. Is the John Deere 3025E a good DIY maintenance tractor?
Yes, for routine owner service. Deere provides strong operator-level guidance for fluids, filters, batteries, cooling cleaning, and scheduled inspections, which makes the 3025E a reasonable DIY maintenance machine for careful owners. The limit comes when diagnosis moves beyond basic access and into hydraulic, electronic, or internal mechanical repair.
35. What is the smartest first step when troubleshooting a John Deere 3025E?
Start with the symptom, then rule out overdue maintenance and setup errors before assuming parts failure. On the John Deere 3025E, the highest-value first checks are battery condition, fluid levels, filter history, cooling cleanliness, safety interlocks, and visible leaks or loose connections. That simple sequence solves or narrows a large share of real-world owner complaints.
Final notes for owners of the John Deere 3025E
The John Deere 3025E rewards consistent maintenance far more than reactive repair. If you stay on top of filters, fluids, cooling cleanup, battery care, and leak checks, many of the most common 3025E complaints either never appear or are much easier to diagnose when they do.