
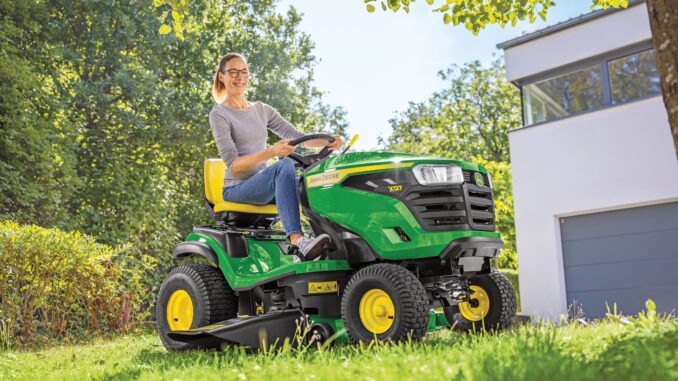
The John Deere 140 is a classic hydrostatic lawn and garden tractor that remains popular with owners who still use, restore, and maintain these machines for mowing, light hauling, and general property work. Factory literature for the model includes an operator’s manual, a dedicated hydrostatic tractor service manual, and parts documentation, which makes it one of the older Deere garden tractors that is still well supported through manuals and diagram sources.
This guide is written for homeowner and DIY users in the USA and Canada who want a practical, symptom-first repair article rather than a purely technical workshop manual. It covers troubleshooting, parts, service information, maintenance priorities, manuals, parts diagrams, and a detailed FAQ so owners can decide what is realistic to fix at home and what is better left to a dealer or experienced small-engine technician.
And See:
John Deere 140 model overview
The John Deere 140 sits in Deere’s older lawn and garden tractor range and is best known as a hydrostatic-drive machine rather than a basic lawn tractor with a simple belt-and-pulley drive. That hydrostatic layout is a major reason owners keep these tractors in service, but it also means troubleshooting needs to cover the engine, mower deck, electrical system, steering and chassis, and the hydrostatic transmission together rather than treating them as separate issues.
Typical use for a John Deere 140 includes mowing medium to larger home properties, towing light carts, and handling seasonal yard work where a heavier garden-tractor frame is useful. Compared with newer box-store lawn tractors, the 140 is often kept because of durability and parts support through manuals, used parts, reproduction parts books, and Deere-focused suppliers.
General overview of the John Deere 140
A practical John Deere 140 repair guide should start with the systems owners actually touch most often. On this model, the main systems are the gasoline engine and fuel system, the hydrostatic drive system, the mower deck and blade drive, the steering and chassis, and the electrical starting/charging circuit.
Common service and repair items owners usually look for include spark plugs, air and fuel system parts, belts, blades, deck spindles, PTO and deck-drive components, battery cables, starter-solenoid parts, and hydrostatic-drive related linkage or service items. Because older 140 tractors may have been repaired repeatedly over decades, the exact deck version, serial range, and engine specification matter before ordering even routine items.
John Deere 140 troubleshooting approach
Diagnosis should always begin with the symptom the owner can see, hear, smell, or feel during operation. That matters on an older machine like the John Deere 140 because rough running, weak mowing performance, no-crank complaints, poor ground speed, and vibration can each come from more than one worn system rather than a single failed part.
The main symptom groups for this tractor are starting issues, running issues, poor cut quality, vibration and unusual noise, overheating or fluid leaks, hydrostatic drive problems, and electrical faults. Working through those categories in order helps prevent unnecessary parts swapping and usually reveals whether the problem is simple maintenance, normal wear, or a deeper mechanical issue.
Emergency John Deere 140 repair needs
Some John Deere 140 problems should be handled immediately because they create a direct safety risk or can quickly damage expensive hard parts. Examples include fuel leaks near hot engine parts, severe blade or spindle vibration, loss of braking or steering control, hydrostatic issues that make the tractor lurch or fail to stop predictably, and electrical shorts around the battery or starter circuit.
A good rule is simple: if the machine is leaking fuel, throwing unusual smoke, making heavy metal-to-metal noise, shaking violently, or failing a safety-related control check, stop using it until the fault is confirmed. Older tractors can often keep running while damage gets worse, so the cheapest repair is usually the early repair.
John Deere 140 starting issues
Starting trouble usually shows up as no crank, slow crank, cranks but will not fire, or a machine that starts only with choke and dies quickly. On an older hydrostatic tractor, that can point to a weak battery, poor cable connections, ignition-switch or solenoid faults, stale fuel, carburetor issues, or basic engine tune-up needs.
Common causes:
-
Weak or discharged battery.
-
Corroded battery terminals or ground connections.
-
Faulty ignition switch, solenoid, or starter circuit.
-
Dirty carburetor or stale gasoline.
-
Fouled or incorrectly gapped spark plug.
-
Restricted air intake.
Basic checks:
-
Confirm the battery and cable ends are clean and tight.
-
Check for spark and inspect the spark plug condition.
-
Confirm fresh fuel is reaching the carburetor.
-
Inspect the air cleaner and choke operation.
-
If it still will not start, test the starter/solenoid circuit before buying parts.
John Deere 140 cut-quality problems
Poor cut quality usually looks like scalping, streaks, uncut strips, ragged grass tips, or a deck that cuts lower on one side. These issues matter because they often start with simple blade or deck problems, but if ignored they can overload belts, spindle bearings, and PTO drive parts.
Common causes:
-
Dull, bent, or mismatched blades.
-
Deck out of level.
-
Worn spindle bearings.
-
Loose or glazed deck belt.
-
Grass buildup under the deck.
-
Ground speed too high for conditions.
Basic checks:
-
Clean the deck underside safely with the engine off.
-
Inspect blades for sharpness, bends, and matching orientation.
-
Verify deck level side-to-side and front-to-back.
-
Check deck belt condition and pulley alignment.
-
Spin each spindle by hand and listen for roughness.
Vibration and noise on a John Deere 140
Unusual vibration is one of the most important warnings on a John Deere 140 because it can come from a bent blade, damaged spindle, worn engine mounting, loose pulley, driveline wear, or even internal hydrostatic or engine trouble. A tractor that suddenly develops strong vibration after hitting something should not be used again until the rotating parts are checked.
Common causes:
-
Bent or unbalanced blades.
-
Loose blade hardware.
-
Failing spindle bearings.
-
Worn idler pulleys or deck pulleys.
-
Loose engine mounts.
-
Damaged PTO or drive components.
Basic checks:
-
Stop mowing immediately after any impact.
-
Inspect blades, spindle shafts, and pulley faces.
-
Check belt routing and pulley wobble.
-
Tighten visible mounting hardware to specification.
-
Escalate quickly if vibration seems to come from the engine or hydro unit.
John Deere 140 overheating and leaks
Overheating or hot-running complaints on a John Deere 140 often show up as power loss, fuel boiling symptoms, smoke, or oil around the engine area. Fluid leaks and debris buildup also raise fire risk, which Deere specifically warns owners to monitor around hot engine, exhaust, deck, and transmission areas.
Common causes:
-
Blocked cooling fins or screens.
-
Old engine oil.
-
Fuel leaks at lines or fittings.
-
Worn gaskets or seals.
-
Heavy debris accumulation around the engine, muffler, or deck.
-
Operating under dusty conditions without extra cleaning.
Basic checks:
-
Let the tractor cool completely.
-
Clean the engine cooling area and screens.
-
Inspect for fresh fuel or oil seepage.
-
Check oil level and service history.
-
Do not keep running the tractor if the source of a fuel leak is unknown.
John Deere 140 hydrostatic drive problems
A weak or erratic hydrostatic drive may show up as slow travel, poor hill performance, creeping, hesitation, or a tractor that will not respond smoothly to lever input. Because the John Deere 140 is valued for its hydrostatic drive, these symptoms usually deserve attention early before owners assume the tractor is simply old and tired.
Common causes:
-
Worn or misadjusted linkage.
-
Low efficiency in the hydro unit from age or wear.
-
Brake drag.
-
Incorrect engine speed during testing.
-
Tires with poor traction or incorrect pressure.
-
Long-term neglected service.
Basic checks:
-
Confirm the engine reaches proper operating speed.
-
Check tire pressures and basic brake drag.
-
Inspect the linkage for slop, binding, or missing hardware.
-
Review the service manual before adjusting hydro-related settings.
-
Treat internal hydro repairs as an advanced job.
John Deere 140 electrical problems
Electrical faults may show up as no-crank, weak charging, intermittent ignition, lights not working, or a machine that starts one day and not the next. Age, corrosion, old wiring repairs, and poor grounds are especially common on vintage garden tractors.
Common causes:
-
Weak battery.
-
Dirty grounds or cable ends.
-
Failing ignition switch.
-
Faulty solenoid or starter.
-
Worn wiring insulation.
-
Charging-system problems.
Basic checks:
-
Clean and tighten all battery connections.
-
Inspect the main ground path to the frame and engine.
-
Check visible wiring for heat damage or brittle insulation.
-
Test charging output after the engine starts.
-
Replace one suspect component at a time, not several at once.
DIY or dealer for the John Deere 140?
The line on a John Deere 140 is usually straightforward: routine service, blade work, belt replacement, tune-up parts, deck leveling, battery work, and simple wiring repairs are reasonable DIY tasks, while internal hydrostatic repairs, major engine internal work, and certain steering or structural repairs are usually better handled by a dealer or an experienced vintage garden tractor specialist. Factory literature clearly separates routine operator service from deeper service-manual procedures, which is a good boundary for most owners.
Good DIY jobs
-
Engine oil and filter service where applicable to the engine fitted.
-
Spark plug replacement.
-
Air cleaner service.
-
Blade sharpening or blade replacement.
-
Deck cleaning and leveling.
-
Battery, cable, and terminal service.
-
Basic belt replacement using the parts book and routing diagram.
Advanced DIY or dealer jobs
-
Carburetor rebuilding.
-
Hydrostatic linkage adjustment.
-
Hydro unit diagnosis or overhaul.
-
Spindle shaft replacement if housings are damaged.
-
Steering rebuilds with worn multiple components.
-
Starter-generator or charging-system diagnosis on older electrical setups.
-
Internal engine repair.
Skill level guide
-
Beginner: Battery service, air filter, spark plug, blade inspection, deck cleaning.
-
Intermediate: Belt replacement, deck leveling, spindle checks, basic carburetor and fuel-line work.
-
Advanced: Hydrostatic diagnosis, charging-system repair, major steering or engine teardown.
John Deere 140 parts, OEM vs aftermarket, and what you need before ordering
Before ordering any John Deere 140 parts, gather the full model name, the tractor serial or PIN information relevant to the machine, the engine model and serial number, and the deck model or deck size fitted to the tractor. Deere operator literature for later tractors explicitly tells owners to record both product identification and engine serial information before seeking service, and that same habit is even more important on an older 140 where engines and decks may have been changed over time.
OEM parts are usually the safer choice for belts, fit-sensitive linkage items, safety-related switches, and parts where exact dimensions matter. Aftermarket parts can be perfectly acceptable for common consumables such as spark plugs, some filters, batteries, and certain blades, but they should always be cross-referenced against the correct John Deere part listing for the exact tractor and deck configuration.
John Deere 140 parts diagrams and manuals
The best sources for John Deere 140 diagrams and manuals are the operator’s manual, the hydrostatic tractor service manual, Deere technical publications resources, and reputable Deere-focused parts suppliers that organize diagrams by serial range. Those sources serve different purposes, so owners should use them together rather than relying on only one.
Useful sources:
-
John Deere 100 Series operator manual for a clear example of Deere identification-number location, service-interval layout, and general safety/service format on Deere lawn tractors.
-
John Deere 140 Hydrostatic Tractor service manual reference for deeper workshop procedures and troubleshooting.
-
Jensales John Deere 140 parts manual PDF listing for serial-range-oriented parts lookup and exploded views.
-
TractorData John Deere 140 overview as a quick reference point that also points owners toward the correct service-manual family.
How to locate John Deere 140 model, serial, and engine numbers
These numbers matter because the tractor model alone is often not enough to identify the right deck parts, engine tune-up items, or serial-range-specific components. Deere operator literature tells owners to record both the machine product identification information and engine serial number before seeking service, which is a good standard practice here as well.
-
Park the tractor safely, shut it off, and let hot parts cool.
-
Find the tractor identification tag on the frame area; Deere literature for lawn tractors shows the identification location on the left side of the frame, and a classic 140 owner should check the frame tag and compare it with the correct 140 manual.
-
Locate the engine model and serial number on the engine shroud or engine identification plate. Deere manuals show separate engine serial-number locations depending on engine type.
-
Record the mower deck model or deck tag as well, because deck belts and blades vary by deck.
-
Take photos of all tags before ordering parts online so you can compare them against diagrams later.
Buying John Deere 140 parts online and in stores
The most effective buying strategy is to confirm the diagram first, then buy by OEM number rather than by a generic marketplace title. That reduces the risk of ordering parts that are close enough to list under “John Deere 140” but wrong for the tractor’s serial range, engine, or deck.
-
Online: Use OEM numbers, serial-range notes, and deck/engine details before checkout. Good starting points include Jensales and Deere manual resources.
-
Dealer counter: Best for serial-sensitive items, hard parts, and any part where an older superseded Deere number may have changed.
-
Retail stores: Fine for spark plugs, fuel line, batteries, and some generic consumables if the packaging clearly matches the engine or measured part.
Step-by-step John Deere 140 fitting guide for common parts
These are the most practical DIY jobs because they solve many real-world complaints without requiring a full teardown. Always park safely, remove the key, and disconnect the spark plug wire or battery as appropriate before working around rotating parts.
Replace the spark plug on a John Deere 140
A fresh spark plug can fix hard starting, misfire, rough idle, and weak power under load when the old plug is fouled or worn. Exact plug type and gap depend on the engine fitted, so confirm the engine model first.
-
Let the engine cool fully and remove the plug wire.
-
Clean around the plug so dirt does not enter the cylinder.
-
Remove the old plug and compare it with the replacement.
-
Install the new plug carefully by hand first to avoid cross-threading.
-
Tighten to the engine specification and refit the plug wire securely.
John Deere 140 mower blade replacement
Blade replacement helps with ragged cutting, striping issues, and vibration caused by damaged blades. Replace bent or heavily worn blades instead of trying to straighten them, because Deere safety guidance warns against unsafe blade repair practices.
-
Park safely, remove the key, and secure the tractor.
-
Raise the deck safely for access and block it if needed.
-
Remove each blade and inspect the blade bolt and spindle condition.
-
Install matched blades in the correct orientation.
-
Torque the fasteners correctly and spin-check for interference before mowing.
Replace a John Deere 140 deck belt
A new deck belt can solve blade-speed loss, weak cutting in heavy grass, squealing, or a belt that keeps rolling off. Because deck layouts vary, always check the correct exploded diagram for the exact mower deck before removal.
-
Remove the deck shields and note the old belt routing.
-
Release belt tension at the idler arrangement.
-
Remove the old belt and inspect pulleys for wobble or sharp edges.
-
Route the new belt exactly as shown in the diagram.
-
Recheck tension and pulley alignment before engaging the mower.
Service the battery and cables on a John Deere 140
Battery and cable service often cures slow cranking, intermittent starting, and weak electrical operation on older tractors. Corrosion and poor grounds are common age-related issues.
-
Disconnect the negative cable first, then the positive.
-
Clean the posts, terminals, and ground connection.
-
Inspect cables for swollen insulation, broken strands, or heat damage.
-
Reinstall the positive cable first, then the negative.
-
Charge and load-test the battery if starting is still weak.
Maintenance to prevent John Deere 140 problems recurring
Regular maintenance prevents many of the repeat complaints owners blame on age alone. Deere service schedules on later tractors emphasize routine lubrication, blade inspection, oil service, air-system service, spark plug replacement, and cooling-fin cleaning, and those same maintenance priorities are directly relevant to a classic John Deere 140.
Focus areas:
-
Starting reliability: Keep the battery charged, terminals clean, plug fresh, and fuel system clean.
-
Cut quality: Keep blades sharp, deck level, and the deck underside clean.
-
Fire and overheating prevention: Clean debris from the engine, muffler, deck top, and transmission area.
-
Drive performance: Check linkage condition, tire pressure, and brake drag before assuming hydro failure.
-
Electrical reliability: Clean grounds and inspect aging wiring before replacing switches.
John Deere 140 maintenance schedule and year-round checklist
The exact interval chart for a vintage John Deere 140 should be confirmed in the correct 140 operator and service manual, but Deere’s published lawn-tractor service schedules consistently emphasize early oil service, regular blade checks, periodic air-cleaner and spark-plug attention, belt inspection, battery care, and cooling-system cleaning. That makes a practical service checklist possible even when an owner is still locating the correct vintage manual.
Daily or before each use
-
Check engine oil level.
-
Inspect for loose hardware, leaks, or obvious damage.
-
Check mower blades and deck area for damage or buildup.
-
Confirm tires look properly inflated and controls operate normally.
After initial use / early service
-
Recheck loose hardware after early operating hours.
-
Change engine oil and filter at the break-in interval where the engine/manual calls for it.
-
Clean or inspect air-cleaner elements early if conditions are dusty.
-
Inspect transmission-related operation and linkage condition.
Every 25 hours
-
Check mower blades.
-
Lubricate relevant chassis and mower points where fitted.
-
Inspect for deck wear, belt wear, and spindle play.
Every 50 hours or yearly
-
Change engine oil and filter if the engine schedule calls for it.
-
Replace or clean air-filter elements as required.
-
Replace spark plug or inspect and regap it, depending on the engine schedule used.
-
Clean engine cooling fins.
-
Sharpen or replace blades.
-
Inspect or replace mower drive belts.
-
Clean battery terminals.
Every 200 hours or similar major interval
-
Check or adjust valve clearance where the engine specification calls for it. Deere notes this as dealer work on later tractors.
-
Replace fuel filter where applicable.
-
Review steering, drive, and chassis wear more closely than during routine service.
Seasonal checklist
-
Spring: Change oil if due, inspect belts and blades, charge battery, clean cooling fins, and level the deck.
-
Mid-season: Clean the deck thoroughly, check blade sharpness, inspect for debris buildup and fuel leaks, and watch for vibration.
-
Fall or storage prep: Clean the machine, fix fuel issues, inspect wiring, and store it dry after a final full inspection.
Repair, upgrade, or replace the John Deere 140?
For most owners, the John Deere 140 is worth repairing when the chassis is solid, the deck is usable, and the hydrostatic drive still works reasonably well, because the machine’s value lies in durability and the continued availability of manuals, diagrams, and specialist parts support. Replace decisions usually make more sense when the tractor has severe rust, multiple missing systems, major engine and hydro problems at the same time, or repair costs that exceed the value of a ready-to-use replacement tractor.
Repair if…
-
The problem is limited to tune-up parts, deck work, wiring, belts, blades, or linkage.
-
The engine is fundamentally sound and the hydro still drives.
-
You can identify parts clearly from manuals and diagrams.
Upgrade if…
-
You use the tractor often and need better blades, fresh tires, improved lighting, or a more complete deck rebuild.
-
The machine is mechanically solid but overdue for a thorough catch-up service.
Replace if…
-
The engine, deck, steering, and hydro all need major work at once.
-
The frame or deck shell is badly damaged or unsafe.
-
Parts identification is impossible because key tags and components are missing or heavily modified.
John Deere 140 troubleshooting FAQ
1. Why will my John Deere 140 not start?
A John Deere 140 that will not start usually has a battery, cable, ignition, fuel, or spark issue rather than a mysterious major failure. Start with battery charge, clean terminal connections, fresh fuel, and spark-plug condition before assuming the starter or engine itself is bad.
2. Why does my John Deere 140 crank but not fire?
If it cranks but does not fire, the usual suspects are stale fuel, carburetor blockage, weak spark, or incorrect choke operation. On an older tractor, gum in the carburetor is especially common after storage.
3. Why is my John Deere 140 hard to start when cold?
Cold-start trouble often points to choke problems, weak ignition, poor compression, or a worn spark plug. It can also happen when the battery seems acceptable in warm weather but drops too much voltage during cold cranking.
4. Why does my John Deere 140 start and then die?
That symptom often means fuel delivery is restricted after initial firing, or the choke has to stay on because the carburetor is dirty. Check for stale gas, a blocked fuel path, and air leaks before replacing ignition parts.
5. Why is the John Deere 140 battery always going flat?
A battery that keeps going flat may be old, undercharged, or affected by poor cable connections and weak charging output. Corroded grounds are a common cause on older garden tractors.
6. Why does my John Deere 140 only click when I turn the key?
A single click often means the solenoid is trying to engage but the battery, cables, or starter circuit cannot carry enough current. Clean the cables first and test the battery before replacing the solenoid.
7. Why does the John Deere 140 run rough at idle?
Rough idle usually comes from fuel mixture problems, a dirty carburetor, weak spark, or air-intake issues. Tune-up items should be checked before deeper engine work.
8. Why does my John Deere 140 surge while mowing?
Surging under load often points to restricted fuel flow, a partially blocked carburetor, or governor-related adjustment issues. It can also happen when the deck is overloaded by heavy buildup or dull blades.
9. Why is the John Deere 140 losing power in tall grass?
Loss of power in grass can be an engine tune-up issue, but it is often made worse by dull blades, a slipping deck belt, or trying to mow too fast for conditions. Make sure the deck and blade system are right before blaming the engine.
10. Why does my John Deere 140 smoke?
Smoke can indicate oil burning, an overfilled crankcase, fuel-rich running, or debris and oil residue heating on hot engine parts. Any smoke combined with fuel smell or visible leakage should be treated urgently.
11. Why does the John Deere 140 cut unevenly?
Uneven cutting usually means the deck is out of level, tire pressures are uneven, or one blade or spindle is not working as it should. On vintage tractors, deck wear and past repairs can also affect cut height consistency.
12. Why does my John Deere 140 leave strips of grass?
Streaking usually comes from dull blades, low blade speed, buildup under the deck, or overlap and ground-speed issues. A worn belt can reduce blade speed enough to show up only in heavier grass.
13. Why are the grass tips ragged after mowing with my John Deere 140?
Ragged tips usually mean the blades are dull rather than sharp enough to cut cleanly. Sharpening or replacing the blades is usually more effective than changing mowing technique alone.
14. Why does my John Deere 140 scalp the lawn?
Scalping often happens when the deck is not level, the anti-scalp setup is wrong for the ground, or the lawn surface is uneven. It is also more common when mowing too low on older, wider garden-tractor decks.
15. Why is my John Deere 140 vibrating so much?
Strong vibration usually points to bent blades, spindle damage, pulley problems, or loose engine/deck hardware. Stop using the tractor until rotating components are inspected, especially if vibration started after striking an object.
16. Why does the mower deck make a rumbling noise?
A rumbling deck often suggests rough spindle bearings or worn pulleys. If the noise changes with PTO engagement, focus on the deck-drive system first.
17. Why does my John Deere 140 squeal when I engage the deck?
A squeal usually means belt slip, pulley drag, or an idler/tension issue. Inspect the belt condition and pulleys before assuming the belt alone is the problem.
18. Why does the deck belt keep coming off my John Deere 140?
Belts usually come off because of misrouting, bent guides, worn pulleys, poor alignment, or a belt that is the wrong width or length. Checking the exact deck diagram is the quickest way to avoid repeat failures.
19. Why do my John Deere 140 blades stop in heavy grass?
If the blades slow or stop, the belt may be slipping, the engine may be losing power, or the deck may be packed with grass. Heavy grass exposes weak belts and weak tune-up condition very quickly.
20. Why is the John Deere 140 hydrostatic drive weak?
Weak hydro performance can come from linkage wear, brake drag, incorrect testing at low engine speed, or wear within the hydro unit itself. External checks should be done first because internal hydro work is much more involved.
21. Why does my John Deere 140 creep when it should be stopped?
Creeping often indicates linkage or neutral adjustment issues in the hydrostatic control system. This is usually an adjustment-and-inspection job guided by the service manual rather than guesswork.
22. Why will my John Deere 140 not climb hills like it used to?
Reduced hill performance may be normal wear in the hydro, but it can also come from low traction, poor tire condition, brake drag, or an engine that is no longer making full power. Diagnose the easy external causes first.
23. Why does my John Deere 140 jerk when moving off?
Jerky takeoff can be caused by worn linkage, sticky controls, uneven engine running, or hydro response issues. Checking control movement and engine tune before deeper hydro work saves time and money.
24. Why is the steering on my John Deere 140 loose?
Loose steering usually builds up over time through wear in multiple joints, bushings, and steering components rather than a single failed part. Older garden tractors often need a full steering inspection, not just one replacement part.
25. Why are my John Deere 140 brakes weak?
Weak brakes may be caused by wear, adjustment issues, contamination, or related linkage problems. Because braking is a safety item, poor stopping performance should be fixed before further use.
26. Why is fuel leaking from my John Deere 140?
Fuel leaks can come from aged hose, clamps, fittings, or carburetor issues. Deere safety guidance is clear that fuel leaks near hot parts are a fire risk, so the tractor should not be run until the leak is found.
27. Why does my John Deere 140 overheat?
Overheating usually points to blocked cooling fins, debris buildup, old oil, or an engine working too hard because of mowing or drive-related drag. Cleaning the engine area is one of the first things to do.
28. Why do the electrical accessories on my John Deere 140 work intermittently?
Intermittent electrical issues usually come from dirty connections, weak grounds, aging switches, or brittle wiring. On an old tractor, a careful visual inspection can be more useful than immediately replacing parts.
29. Which manual do I need for a John Deere 140 repair?
For real repair work, the service manual is the key document because it covers diagnosis and procedures beyond routine operation. The operator’s manual is still useful for safe operation, identification details, and routine service guidance.
30. Where can I find John Deere 140 parts diagrams?
The best sources are Deere-focused parts-book suppliers, reproduction parts manuals organized by serial range, and technical-publication resources. Always match the diagram to the tractor serial range and exact deck fitted.
31. Can I use aftermarket parts on a John Deere 140?
Yes, but only after checking that the aftermarket part crosses correctly to the exact Deere number you need. Aftermarket is usually more acceptable for consumables than for fit-sensitive belts, safety-related items, or unusual linkage parts.
32. How often should I service a John Deere 140?
The exact answer depends on the engine and the correct vintage manual, but practical ownership still follows Deere’s normal pattern of regular pre-use checks, periodic blade and belt inspection, oil service, spark-plug attention, cooling-fin cleaning, and seasonal inspection. That routine catches most problems before they become expensive repairs.
33. Is the John Deere 140 worth restoring?
It often is, especially when the tractor is structurally sound and still has a usable deck and hydrostatic drive. Its reputation, parts-manual availability, and durable garden-tractor design are the main reasons owners continue restoring them.
34. When should I stop DIY repairs and call a dealer?
Stop at the point where the job requires internal hydro work, engine internal repair, complex precision adjustment, or diagnosis beyond safe home testing. The service manual is a good dividing line: if the procedure is beyond your tools, experience, or safety margin, hand it over.
Common John Deere 140 engine replacement options
Common John Deere 140 engine replacement options fall into three broad camps: rebuilding the original Kohler K-series single, repowering with a Briggs & Stratton Vanguard V‑twin kit, or doing a more custom swap with another modern single or twin-cylinder engine.
Stock-style replacement or rebuild
Most John Deere 140 tractors left the factory with a Kohler K-series cast-iron single-cylinder engine, commonly the K321 14 hp. Owners often either rebuild this original engine or source a like-for-like used or remanufactured unit, because it keeps the tractor closer to original and avoids mount and pulley changes.
-
Pros: Keeps original character, uses factory mounts and wiring with minimal changes, good torque for mowing and garden work.
-
Cons: Parts and machine work can add up; still only a single-cylinder with older technology.
Typical approach:
-
Full rebuild of the existing K-series (bore, piston, valves, guides, governor, carb).
-
Or sourcing another K321/K-series long block from a donor tractor or specialist.
Briggs & Stratton Vanguard V‑twin repower kits
A very common upgrade on John Deere 140s is a Briggs & Stratton Vanguard V‑twin conversion kit designed specifically for the 120/140 frame. These kits typically include an 18 hp horizontal-shaft Vanguard engine plus mounting and linkage parts to fit the 140’s chassis and driveline layout.
-
Pros: Modern V‑twin smoothness, full-pressure lubrication with oil filter, better cold starting, and long parts support from Briggs.
-
Cons: Higher upfront cost than a basic rebuild; some throttle/choke/linkage and wiring adaptation still required.
Example:
-
Small Engine Warehouse lists a “18hp HOR 1″ keyed shaft, Vanguard, ES, conversion kit fits John Deere 120 & 140 tractors” as a ready-made repower package.
-
A long-time repairer reports running a Vanguard in a 140 since the late 1980s, with good long-term reliability and easy parts availability.
This is often the go‑to choice when the original K-series is badly worn but the tractor is otherwise worth investing in.
Other custom repower options
Some owners pursue more custom swaps, such as installing another modern single-cylinder or a different twin, but these are more one‑off projects than standard kits.
Typical examples discussed in owner communities:
-
Swapping to a modern Kohler Command single-cylinder if a suitable horizontal-shaft model is available and the owner is comfortable modifying mounts and exhaust.
-
Using other Briggs or Kohler twins in place of the original single, with custom mount plates, exhaust, and wiring.
These options can work well but usually require:
-
Careful measurement of crankshaft height, PTO and drive-pulley alignment.
-
Custom wiring for charging and safety circuits.
-
Fabrication of exhaust and sometimes hood/side panel adjustments.
When to rebuild vs repower
-
Rebuild the K-series if you want originality, your block and crank are still good, and you have access to a competent machine shop.
-
Use a Vanguard kit if you want a “modernized” 140 with smoother running and long-term parts support, and you are comfortable spending near-new-mower money on the engine to keep the classic tractor.
-
Consider custom swaps only if you enjoy fabrication work and do not mind deviating from common parts and documentation.
Hydrostatic transmission issues on a John Deere 140
Hydrostatic transmission issues on a John Deere 140 are usually diagnosed by watching exactly how the tractor loses drive, then working through a few external checks (linkage, bypass, oil, leaks) before assuming the hydro unit itself is worn out.
Key JD 140 hydro symptoms to watch
Before turning a wrench, note exactly what it does. This pattern is a big clue.
-
No movement at all in forward and reverse
-
Moves cold, then gets weak or stops as it warms up
-
Creeps when the lever is in neutral
-
Jerky movement when you move the hydro lever
-
Works on flat ground but not on hills
Write down whether it happens only hot, only cold, only under load, or all the time.
Step 1 – Basic external checks (no teardown)
These are quick, low‑risk checks that often fix the “easy” hydro problems on a 140-type garden tractor.
-
Parking brake and bypass
-
Make sure the parking brake is fully released.
-
Verify the hydrostatic bypass / free‑wheel valve or rod is not partially open; on older hydros a partially open relief/bypass valve will cause weak drive or no drive.
-
-
Drive belt and pulley
-
With the engine off and deck lowered, look at the belt that drives the hydro input pulley.
-
Confirm the belt is on all pulleys, not badly glazed or cracked, and that nothing (sticks, debris) is wedged into the drive path.
-
Check the input pulley on the hydro shaft: on many lawn tractors the pulley is softer than the shaft, so splines can strip and the pulley can spin without actually driving the shaft.
-
-
Linkage and lever travel
-
Watch the hydro control linkage while someone moves the lever slowly from full reverse through neutral to full forward.
-
Look for slop, loose hardware, binding, or spots where the lever hits its stop before the hydro control arm has full travel.
-
If the tractor creeps in neutral, the neutral/return‑to‑center adjustment is off and needs to be reset per the service manual.
-
If you find a stripped input pulley, loose linkage, or a bypass left open, correcting that is often enough to restore normal drive.
Step 2 – Fluid, leaks, and filter (if serviceable)
Many hydrostatic complaints are due to fluid level/condition or a restricted filter rather than a failed pump/motor. The JD 140 hydro is a serviceable unit, so this step is important.
-
Check level and condition
-
Verify the reservoir or transmission case is at the correct oil level following the 140’s service manual.
-
Look at the oil: clean hydro oil should be clear amber/light brown.
-
Dark, burnt‑smelling oil suggests overheating; milky oil suggests water contamination; metallic sparkle suggests internal wear.
-
-
Inspect for external leaks
-
Look around hoses, fittings, axle seals, and the hydro housing for wet areas or drips.
-
Even a small leak can pull air into the system and reduce charge pressure.
-
-
Change oil and filter (if not done recently)
-
Drain the hydro oil completely, replace the correct filter, and refill with the specified fluid (older Deere hydros normally use a Hy‑Gard‑type oil, not ATF).
-
Owners often report improvement on surging or weak drive after a fluid/filter change on a 140 H3 that was running old oil.
-
-
Purge air from the system
-
Raise the drive wheels safely off the ground.
-
If the unit has a bypass, engage it and run the engine at low rpm while slowly moving the control forward and reverse several times.
-
Disengage the bypass and repeat the cycling to push remaining air out.
-
Recheck fluid level and top off as needed.
-
If drive is smoother and stronger after a proper fluid/filter service and purge, the issue was likely fluid, air, or a partially plugged filter.
Step 3 – Interpreting what the tractor does next
Use the “after service” behavior to decide if you keep going or stop at basic maintenance.
-
Still no movement in either direction
-
Re‑check that the input pulley actually turns the hydro shaft (splines not stripped) and that the bypass is closed.
-
If both are OK and fluid is correct, the internal pump/motor is likely failed.
-
-
Moves, but very weak on hills or only when cold
-
Classic sign of internal pump/motor wear or low charge pressure: the tractor feels much stronger when the oil is cold, then fades badly as it warms up.
-
This is a common “end of life” pattern for worn hydros.
-
-
Creeps in neutral or will not hold still
-
Indicates an out‑of‑adjustment neutral/return‑to‑center linkage, which is typically corrected by a neutral‑adjustment procedure and linkage tightening.
-
-
Jerky motion or surging under steady lever position
-
Often air in the system, restricted filter, marginal fluid level, or a partially sticking relief/bypass valve.
-
If it persists after oil/filter/purge, internal valving or charge‑pump problems are likely.
-
Step 4 – When to bring in a specialist
Internal diagnosis on a 140 hydro unit needs gauges and service‑manual specs. Typical “dealer‑level” checks:
-
Checking charge‑pump pressure against spec using a hydraulic gauge port
-
Inspecting/servicing internal valves, pistons, barrel plates, and bearings
-
Correctly resetting internal clearances and reassembling the unit under cleanliness standards
Hydrostatic transmission guides stress that once fluid, filter, belt, linkage, and air issues are eliminated, persistent weak drive, hot‑only failure, heavy whining, or metallic fluid all point to internal pump/motor wear—and that is usually best handled as a professional rebuild or replacement unit rather than a DIY tear‑down.