
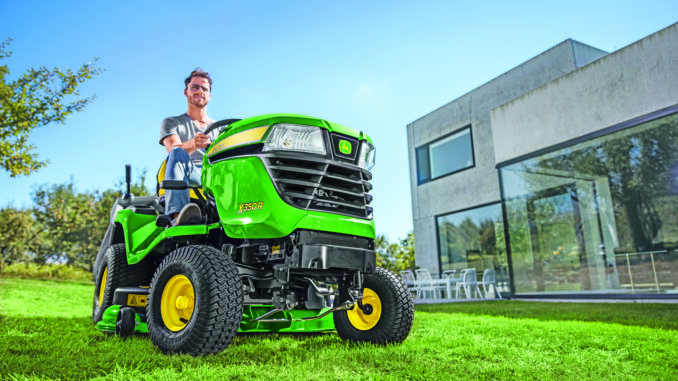
The John Deere S120 is a 100 Series lawn tractor built for home lawn mowing, with controls shared across the S100, S110 and S120 range and a 42-inch convertible mower deck option listed in Deere’s replacement parts guide. For owners in the USA and Canada, this guide focuses on practical John Deere S120 repair, troubleshooting, maintenance, parts lookup and realistic DIY repairs so you can decide what to check yourself and when dealer help makes more sense.
John Deere S120 model overview
The John Deere S120 sits in Deere’s 100 Series lawn tractor lineup and is aimed at homeowners who want a step up from a basic walk-behind mower for regular residential mowing. Deere’s operator material groups the S120 with the S100 and S110 for controls and service information, which tells owners it shares the same general operating layout and core lawn-tractor service approach as the rest of the entry S-Series family.
And See:
For most owners, the key systems are straightforward: the engine and fuel system for starting and running, the 42-inch mower deck and blades for cut quality, the traction drive system for forward and reverse movement, and the electrical and safety interlock system for cranking and safe operation. This guide covers the common issues owners actually run into, including no-start complaints, weak running, uneven mowing, belt trouble, vibration, battery and switch issues, and routine servicing that helps prevent them.
General overview of the John Deere S120
The John Deere S120 uses the standard lawn-tractor layout most DIY owners will recognize: front engine, foot-pedal hydro-style travel controls, lift lever for deck height, and an attachment engagement lever on S100/S110/S120 models. Deere also specifies a cutting-height adjustment range of about 1 to 4 inches, with transport height at about 4 inches, which matters when diagnosing scalp marks, uneven cutting and deck setup problems.
The main components owners usually deal with are:
-
Engine oil, air filtration, spark plug and fuel filter service parts for hard starting or poor running.
-
Mower blades, flat deck belt, gauge wheels and deck leveling hardware for cut-quality complaints.
-
Traction belt and transmission area components for movement issues, slipping or drive loss.
-
Battery, key switch, ignition switch area and related wiring for crank/no-crank faults.
Common John Deere S120 service parts owners often buy include:
-
Oil filter: AUC12916 for USA, Canada and Mexico.
-
Spark plug: MIU11020.
-
Air filter cartridge: MIU14395.
-
Fuel filter: AM116304.
-
Battery: TY25221B for Canada and USA.
-
Ignition switch: GY20074.
-
Traction belt: UC30568.
-
42-inch deck belt: GX25232.
-
42-inch mower blade: UC21583.
-
42-inch mulch blade: AM141033.
John Deere S120 troubleshooting approach
The best way to diagnose a John Deere S120 is to start with the symptom the owner can see, hear or feel rather than guessing at parts. Deere’s own service and troubleshooting structure separates machine care into engine, transmission, mower, electrical and general troubleshooting sections, which supports a symptom-first repair method.
Main symptom groups for this model include:
-
Starting issues, such as no crank, slow crank or starts-then-dies complaints.
-
Running issues, such as rough running, surging, weak power or smoke.
-
Cut-quality problems, such as uneven cut, scalping, streaks or uncut strips.
-
Vibration and noise, especially after blade strikes or belt wear.
-
Overheating, burning smells, debris buildup and fluid leak concerns.
-
Transmission or drive issues, including weak movement or no motion.
-
Electrical and safety-switch problems affecting starting or blade engagement.
John Deere S120 emergency and immediate repair needs
Some John Deere S120 problems should not be delayed because they affect safe operation or can damage expensive parts quickly. Deere specifically warns about fire risk from grass and debris around hot or moving parts, unsafe operation with damaged guards or blades, and slope or control problems that can cause loss of control.
John Deere S120 starting issues
If the S120 will not crank, only clicks, or starts and stalls, stop using trial-and-error until the basic interlock and fuel checks are done. Repeated cranking with a weak battery or poor connections can overheat wiring, while stale fuel can keep the engine from running properly and lead owners to replace good parts unnecessarily.
Common causes:
-
Weak or failed 12 V battery.
-
Dirty or loose battery terminals.
-
Faulty ignition switch or worn key/switch connection.
-
Safety switch or brake/PTO condition preventing cranking.
-
Stale fuel or restricted fuel filter.
-
Dirty air filter or fouled spark plug.
Basic owner checks:
-
Confirm the brake is fully applied, the PTO/attachment engagement is off, and the operator is correctly seated.
-
Check battery terminals for corrosion and tightness, then confirm the battery is not obviously discharged.
-
Inspect fuel quality and fuel level, especially if the machine has been sitting.
-
Check the air filter and spark plug service condition if the engine cranks but will not keep running.
-
If the switch feels inconsistent or intermittent, inspect the ignition switch area before condemning the starter.
Cut-quality problems on the John Deere S120
Uneven cutting, scalping, ragged tips or strips of missed grass usually point to setup or wear problems before they point to major failure. Deere places strong emphasis on tire pressure, deck level, blade condition and deck-wheel adjustment, because those are the usual root causes on homeowner tractors.
Common causes:
-
Deck out of level side-to-side or front-to-back.
-
Dull, bent or mismatched blades.
-
Incorrect tire pressure changing deck attitude.
-
Worn or loose deck belt reducing blade speed.
-
Anti-scalp wheels adjusted incorrectly.
-
Heavy buildup under the deck.
Basic owner checks:
-
Confirm tire pressures are correct before making deck adjustments.
-
Check blade edges and look for bends after any impact.
-
Level the deck side-to-side, then set the front of the deck 1/8 to 1/4 inch lower than the rear.
-
Make sure gauge wheels are set so they do not ride hard on the ground in normal mowing.
-
Clean packed grass from the underside and top of the deck.
John Deere S120 vibration and noise
A sudden new vibration on the S120 usually means stop mowing and inspect before using it again. Continued use with a bent blade, loose hardware or belt problem can damage spindles, belt guides or deck components quickly.
Common causes:
-
Bent blade after striking an object.
-
Loose blade hardware or deck fasteners.
-
Worn deck belt or pulley issues.
-
Debris wrapped around blade shafts or pulleys.
-
Tire damage or uneven inflation affecting ride feel.
Basic owner checks:
-
Park safely, remove the key and disable accidental starting before inspection.
-
Inspect blades for bends, cracks or looseness.
-
Check belt condition and pulley areas for debris or obvious wear.
-
Inspect deck shell and spindle area for impact damage.
-
Do not continue mowing until the vibration source is identified.
Overheating and leaks on the John Deere S120
Hot-running complaints, burning smells or smoke from debris are immediate attention items. Deere specifically highlights the muffler, exhaust manifold, engine intake screen, cooling fins, deck top, transmission area and wiring/battery area as key cleanout points because debris buildup there increases fire risk and can hurt performance.
Common causes:
-
Grass packed around muffler or engine cooling areas.
-
Dirty intake screens or cooling fins.
-
Oil or fuel leaks collecting debris.
-
Operating in heavy, dry material without cleanout breaks.
-
Old oil or overdue maintenance contributing to heat load.
Basic owner checks:
-
Shut the machine down and let hot parts cool before cleaning.
-
Clean the muffler area, engine intake screen, cooling fins and deck-top belt area.
-
Look below the machine for fluid leaks before the next use.
-
Confirm engine oil level is correct.
-
Repair leaks promptly so debris does not build up on oily surfaces.
John Deere S120 transmission and drive problems
If the tractor hesitates, loses pulling power or will not move properly in forward or reverse, inspect the drive system before assuming the transmission has failed. The replacement parts guide lists a specific traction belt for the S120, and belt wear or contamination is often a simpler cause than major transmission damage.
Common causes:
-
Worn, stretched or damaged traction belt UC30568.
-
Debris around transmission or driveline area.
-
Brake drag or linkage issue.
-
Operating on slopes or loads beyond what a lawn tractor should handle.
-
Internal transmission wear needing dealer diagnosis.
Basic owner checks:
-
Check for belt damage, glazing or obvious slack in the traction-belt path.
-
Clean debris from the transmission and driveline area.
-
Make sure the park brake is fully released and linkage is moving normally.
-
Test drive on flat ground before assuming a major failure.
-
If movement is still weak after belt and linkage checks, dealer diagnosis is the safer next step.
Electrical problems on the John Deere S120
Electrical issues on the S120 usually show up as no crank, intermittent crank, dead lights or inconsistent switch behavior. Because Deere routes owners toward clean battery terminals, intact safety devices and known replacement electrical parts such as the battery, ignition switch and bulb, the first checks are usually basic rather than complex.
Common causes:
-
Weak battery TY25221B.
-
Corroded battery terminals.
-
Faulty ignition switch GY20074.
-
Blown lighting component such as bulb AD2062R.
-
Wiring damage near battery or fuse-block area.
-
Safety interlock fault.
Basic owner checks:
-
Inspect battery posts, cables and grounds for corrosion or looseness.
-
Check visible wiring under the left side panel and near the battery/fuse area.
-
Test for repeatable ignition-switch function with the brake set and PTO off.
-
Replace simple service items such as bulbs or a worn key switch only after confirming the rest of the circuit basics.
-
If the fault is intermittent and wiring-related, dealer electrical diagnosis may save time.
Summary:
John Deere S120 transmission fluid change guide
The John Deere S120’s hydrostatic transmission is a sealed, non-serviceable component under normal owner maintenance. John Deere’s S120/S100-series operating guidance says no transmission fluid change or routine fluid-level check is required; if you suspect a transmission fault, the instruction is to contact an authorized dealer.manualshelf+1
Short answer
Do not follow generic John Deere hydrostatic-fluid-change instructions for the S120. Many online guides apply to older Deere lawn tractors, serviceable transaxles, or zero-turn machines, and list drain plugs, filters, reservoirs, and 4–8 L oil capacities that do not apply to the S120’s TLT200 hydrostatic transaxle. The S120 specification identifies the transmission as a TLT200 hydrostatic unit with a filter listed as “yes, not serviceable.”mynorthland+1
What John Deere specifies
John Deere provides operator and technical manuals through its Manuals & Training service, which is the safest source because specifications and service instructions can differ by model year and serial-number range.deere
Why online “change guides” conflict
You will find instructions online to:
-
Drain from one or two transmission plugs.
-
Replace a hydraulic filter.
-
Refill with 4.4 L / 4.6 qt of Low-Viscosity Hy-Gard.
-
Use a reservoir, dipstick, or sight tube.
-
Carry out a 50-hour first oil change.
Those procedures are real John Deere instructions—but for other Deere equipment with serviceable transmissions. For example, Deere documentation for a different tractor describes a 50-hour initial change, two drain points, two fill points, and 4.4 L of Low-Viscosity Hy-Gard; that should not be transplanted to an S120. Likewise, a separate Deere procedure describes a filter-and-reservoir system holding about 7.6 L, which is not the S120 layout.manuals.deere+1
What to do instead
If the reason for seeking a fluid change is reduced pulling power, slow drive, no reverse, or a tractor that weakens once hot, work through these checks first:
-
Clean around the transaxle and drive system. Packed grass and debris trap heat and can contribute to weak hydrostatic performance.
-
Inspect the traction-drive belt. Look for glazing, cracks, frayed edges, contamination with oil, poor tension, or belt dust. A worn belt can imitate internal transmission failure.
-
Check brake and linkage operation. Ensure the parking brake fully releases and that the motion-pedal/linkage mechanism returns and moves freely.
-
Confirm bypass/freewheel position. If the transmission bypass is partially engaged after pushing or towing the tractor, it may not drive normally.
-
Avoid diagnosing it on a steep hill or while towing. Test it on level, dry ground with the engine at full operating speed and the mower deck disengaged.
-
Use a dealer for internal transmission work. Opening a sealed unit or using an incorrect fluid can create leaks, contamination, or damage that outweighs the value of a residential transaxle repair.
Important distinction
The S120’s engine oil is separate from transmission oil. Its Easy Change engine-oil system is intended for engine maintenance only; it does not change hydrostatic transmission fluid. The machine is advertised with an Easy Change 30-second oil system, but that feature relates to the engine.campbelltractor
If your S120 has a particular symptom, such as “drives for 15 minutes then loses power,” “will not move forward or reverse,” or “has a visible leak,” the correct next steps differ substantially.
John Deere S120 loses drive power when warm troubleshooting
If an S120 drives normally cold but loses ground speed or pulling power after 10–30 minutes, first distinguish engine power loss from hydrostatic-drive loss. A hot, debris-covered transaxle, slipping traction belt, brake drag, or an internal hydrostatic fault are the main drive-side possibilities; the S120 transmission is normally sealed and not owner-serviceable.manualshelf+1
Confirm what is failing
Perform this test on level, dry ground:
-
Start with the engine fully cool.
-
Run at full governed throttle.
-
Leave the mower deck/PTO off for the first test.
-
Drive forward and reverse at a repeatable pedal position.
-
Continue until the fault occurs.
-
When it loses speed, listen and observe.
John Deere’s troubleshooting material lists engine overheating, overfilled engine oil, dirty air cleaner, spark-plug faults, improper fuel, and travelling too fast for conditions among causes when the engine loses power.manuals.deere
Troubleshooting order
1. Remove heat-trapping debris
With the engine off, key removed, and everything cool:
-
Raise the seat and inspect the area around the hydrostatic transaxle.
-
Remove dry grass, mud, leaves, and belt debris from the transmission housing, frame, belt path, and cooling-fan area.
-
Do not pressure-wash bearings, electrical connections, or the transaxle seal areas at close range.
-
Clean the mower deck too, particularly if the complaint appears only while mowing.
This is the least expensive and most important check. Residential hydrostatic transaxles depend on airflow over their housings; a heavily packed tractor can run acceptably cold and then lose performance as heat builds.
2. Inspect the traction-drive belt
A worn drive belt can behave much worse once it is hot. Inspect it for:
-
A shiny or glazed belt surface.
-
Cracking, frayed edges, missing ribs, or a burnt-rubber odor.
-
Black belt dust around pulleys and guards.
-
Oil contamination from an engine or transmission leak.
-
A pulley that is seized, wobbly, rough, or misaligned.
-
Damaged/missing belt guides or a weak/misrouted tension arrangement.
A slipping belt often produces noise or smell. If the engine continues to sound healthy but speed fades, do not assume the hydrostatic transmission is automatically at fault.
3. Check brake and motion linkage
Ensure the parking brake releases completely. With the tractor cold and then again immediately after the warm-loss condition:
-
Check whether a rear wheel seems unusually hot compared with the other.
-
Look for brake linkage that does not return freely.
-
Check that the forward/reverse pedals return freely rather than binding.
-
Confirm the transmission bypass/freewheel control is completely in its normal drive position.
A partially applied brake can mimic a failing transmission, and it worsens as components heat.
4. Rule out engine-side loss
If RPM drops when the fault appears, inspect the engine side before the drive system:
-
Air filter condition.
-
Fuel quality and age.
-
Fuel-filter restriction or fuel-line routing/heat exposure.
-
Spark plug condition.
-
Engine-oil level—neither low nor overfilled.
-
Cooling fins and screens for blockage.
-
Mowing load: tall, wet, or dense grass can overwork a residential tractor.
The S120 is a 22-hp, 42-inch residential lawn tractor with hydrostatic drive. It is intended primarily for routine mowing and lighter work, and it will be more affected by steep ground, heavy towing, or overly demanding grass conditions than a garden tractor.deere+1
Is it a fluid-change issue?
Usually, no. The S120’s TLT200 hydrostatic transmission is described as sealed, with a non-serviceable filter; Deere’s S100-series guidance does not specify an owner transmission-fluid change interval.manualshelf+1
Do not drill, open, or attempt to “flush” the unit based on a generic YouTube procedure. Procedures that call for Hy-Gard, drain plugs, a replaceable oil filter, and scheduled 50-hour or 200-hour changes often apply to different Deere tractor families with serviceable transmissions.manuals.deere+1
When internal failure is likely
Arrange dealer diagnosis if all of the following are true:
-
The engine holds normal RPM.
-
The deck is disengaged during testing.
-
The traction belt, pulleys, brake, linkage, and bypass position check out.
-
The transaxle area is clean and able to shed heat.
-
Forward and reverse both become weak once warm.
-
It recovers only after the tractor cools.
That pattern is consistent with an internally worn or overheating sealed hydrostatic transaxle. Because the S120’s transmission/filter are not routine-service items, repair often means professional evaluation and potentially transaxle replacement rather than a conventional owner fluid-and-filter service.manualshelf+1
Stop using it if
Stop the test and let the machine cool if you smell burning rubber or oil, see smoke, find an active oil leak, hear grinding, or feel severe vibration. Continued operation can damage the belt, pulleys, brake components, or transaxle further.
For the most accurate model-year-specific diagrams and official service information, use John Deere’s S120 owner-information page and retrieve the manual using the mower’s PIN/serial number.
John Deere S120 traction belt replacement steps
For a John Deere S120 with a 42-inch deck, the traction/transmission drive belt is John Deere UC30568, superseding GX20006. It is approximately 12.7 mm wide and 2,258 mm long (½ in × 88.9 in). Do not confuse it with the much longer 42-inch mower-deck belt, GX20072/UC32283R.deere+1
Before you start
The traction belt runs from the engine-drive pulley to the hydrostatic transaxle and through the tractor’s idler/tension system. Replacing it normally requires removing the mower deck so you can access the underside and belt path safely.
Tools and supplies
-
Correct traction belt: UC30568 / former number GX20006
-
13 mm, 15 mm, and/or socket set as required by your tractor’s hardware
-
Pliers for retaining clips/pins
-
A short breaker bar or ratchet for releasing belt tension
-
Work gloves and eye protection
-
Phone camera for photographs of the original routing
-
Wheel chocks
-
Wooden blocks or a suitable mower lift if needed
The official John Deere quick-reference material identifies UC30568 as the S120 traction-drive belt and gives its dimensions.deere
Safety preparation
-
Park the tractor on firm, level ground.
-
Disengage the PTO/mower blades, set the parking brake, place the transmission in neutral if applicable, turn off the engine, remove the key, and wait for all moving parts to stop.
-
Disconnect the spark-plug wire(s) and keep them away from the plugs. This prevents an accidental start while your hands are near belts and pulleys.
-
Let the engine, exhaust, belts, and transaxle cool fully.
-
Chock the rear wheels. Do not rely solely on the parking brake while working underneath or around the belt path.
Remove the mower deck
Lower the deck to its lowest position. Removing it gives the clearance needed to reach the drive belt and engine pulley.
-
Note or photograph the deck height-control position and deck linkage arrangement.
-
Disconnect the deck drive belt from the engine pulley. On a manual-PTO S120, first ensure the PTO is disengaged. Remove or move the belt keeper/guide only as necessary to free the deck belt.
-
Remove the retaining clips and draft-arm pins at the rear deck suspension points.
-
Remove the front draft rod or front hanger pin, depending on the deck arrangement.
-
Disconnect any remaining lift links or anti-sway connections holding the deck.
-
Slide the deck carefully out from one side of the tractor.
Do not pull on the deck belt to force the deck out. If it will not move freely, recheck for a missed retaining pin, lift link, or belt guide.
Remove the old traction belt
With the deck out, photograph the complete belt route before removal. The belt must pass correctly through belt guides and around the idler pulley(s); one incorrect side of a belt keeper can cause immediate belt damage or poor drive.
-
Remove any lower belt shields, guards, or debris covers that block access.
-
Locate the traction-belt tensioner/idler arm and spring. Use the correct socket or breaker bar on the tensioner arm/bolt to relieve tension. Keep fingers clear of the spring and pulley.
-
Slip the belt off the idler pulley first while holding the tensioner released.
-
Work the belt off the transaxle input pulley at the rear.
-
Remove the belt from the engine drive pulley. If a belt keeper prevents removal, loosen or remove only the keeper hardware needed. Do not bend belt guides unnecessarily.
-
Pull the old belt out from beneath the frame, noting every keeper and pulley it passed through.
Inspect before fitting the new belt
A new belt will not cure a seized pulley, bent guide, oil leak, or dragging brake. Check the following before installation:
-
Idler pulley: It should spin smoothly without wobble, grinding, or obvious side play.
-
Transaxle input pulley: Check for damaged grooves, wobble, or grass packed behind it.
-
Engine pulley: Inspect for rust, damaged grooves, or accumulated debris.
-
Belt keepers/guides: They should be intact and correctly positioned—not rubbing the belt during normal operation, but close enough to retain it when slack.
-
Tension spring: Check for a broken, stretched, detached, or incorrectly hooked spring.
-
Brake linkage: Ensure the parking brake releases fully.
-
Leaks: Do not fit a new belt until an engine-oil or hydrostatic-fluid leak that contaminates the belt has been addressed.
-
Cooling/debris: Clear packed grass from around the transaxle, frame, and belt path.
This is especially important if your original complaint was drive power fading once hot: a glazed traction belt, weak tensioning system, heat-trapping debris, or brake drag may be the cause rather than an internal hydrostatic failure.
Install the new belt
Route the UC30568 belt exactly as the old belt was routed, using your photographs and the belt-routing decal/diagram on the tractor if present.
-
Feed the new belt through the frame and around the engine drive pulley.
-
Route it rearward through every belt guide and keeper in the original path.
-
Install it around the transaxle input pulley.
-
Hold the idler/tensioner arm in the released position and route the belt over the idler pulley last.
-
Slowly release the tensioner. Confirm that the belt has seated fully in every pulley groove.
-
Confirm the belt’s V-side is in the V-grooved pulleys. The flat back of the belt should run only against flat idlers, if your routing includes one.
-
Refit every removed guard, keeper, and shield. A missing belt keeper can let the belt jump off when the pedal is released or direction changes.
The S120 traction belt is listed as UC30568; GX20006 is the prior/cross-reference number.deere+1
Reinstall and test
-
Slide the mower deck back under the tractor.
-
Reconnect the front hanger/draft rod, rear draft arms, lift links, anti-sway hardware, and all retaining clips in the reverse order of removal.
-
Reinstall the mower-deck belt around the engine pulley and ensure it is inside the appropriate belt keeper.
-
Reconnect spark-plug wires.
-
With the engine still off, rotate accessible pulleys by hand where safe and verify the traction belt remains centred in the pulley grooves.
-
Start the tractor outdoors on level ground. Keep the deck disengaged.
-
Test forward and reverse at low speed, then at normal operating throttle. Listen for belt squeal, rubbing, or clicking.
-
After a short drive, stop the engine and reinspect the belt position. Then test it only under a light mowing load before returning to normal use.
Common installation mistakes
Important caution
John Deere’s listing of the S120 traction belt as UC30568 does not mean every S120 build has identical guard and linkage hardware. Verify the routing decal and parts diagram against your tractor’s product identification number before loosening guides or tensioner parts. The official S120 quick-reference guide is the useful reference for belt identification, and John Deere’s S120 owner-information page provides manuals and parts/service resources.
How to remove the mower deck on John Deere S120
To remove the 42-inch mower deck from a John Deere S120, lower the deck onto two wood blocks, disconnect the manual-PTO engagement cable and its spring, remove the rear lift-link/draft-arm pins and front draft-rod pin, slip the deck belt off the engine pulley, then slide the deck out from the side. This is a no-jack job on level ground, although lifting the front of the tractor slightly can create extra clearance.manual-hubyoutube
What you need
-
Two sturdy wood blocks, roughly 75–100 mm / 3–4 in high
-
Pliers for spring-locking pins
-
Gloves
-
A phone camera, useful for recording linkage positions
-
Wheel chocks if working on a slope—ideally, work on flat concrete or asphalt
The 42-inch S120 deck uses a manual engagement cable, so you must disconnect that cable and its return spring before the deck can come away.manual-hub
Safety setup
-
Park on a firm, level surface.
-
Disengage the PTO/mower blades.
-
Set the parking brake, switch off the engine, remove the key, and wait until all moving parts have stopped.
-
Disconnect the spark-plug wires to prevent accidental starting.
-
Let the engine, muffler, pulleys, and belts cool before working near them.
-
Place a wood block under each outer side of the mower deck. Position them so they will support the deck shell, not the blades, pulleys, or anti-scalp wheels.
Remove the deck
1. Lower the deck onto the blocks
Move the deck-height/lift control to its lowest setting. The deck should settle onto the two blocks, taking tension off the lift links and pins. This makes the retaining clips much easier to remove.manual-hub
2. Disconnect the PTO engagement cable
On the left side of the mower deck:
-
Find the mower-engagement drive cable where it enters the deck bracket.
-
Remove its spring-locking pin.
-
Pull and hold the cable outward, lift it slightly, and remove it from its bracket.
-
Unhook the cable spring from the idler-sheave bracket.
Photograph this area before removal. The cable and spring must go back in the correct holes and orientation when reinstalling the deck.manual-hub
3. Disconnect the rear deck supports
At each rear side of the deck:
-
Remove the spring-locking pin and washer.
-
Disconnect the rear draft arm.
-
Disconnect the adjustable lift link.
There are attachments on both sides, so repeat the process on the opposite side. The deck should stay safely supported on the wood blocks while you do this.manual-hub
4. Disconnect the front draft rod
At the front centre of the deck:
-
Remove the spring-locking pin and washer.
-
Pull the front draft rod from the deck bracket.
Keep the pin and washer together. If you plan to run the S120 without the deck fitted, John Deere’s instructions say to remove the front draft rod from the tractor and attach it to the mower deck for storage.manual-hub
5. Remove the deck belt
Slip the mower-drive belt off the engine drive sheave/pulley above the deck.
The belt must be guided around the belt keepers on both sides of the pulley. Do not bend the keepers unless necessary; usually you can lift and roll the belt over the keeper and pulley by hand with the engine off. The S120 deck-removal video likewise starts by moving the belt off the PTO pulley and around its guards.youtube
6. Remove blocks and slide out deck
-
Check that the engagement cable, rear links, rear draft arms, front rod, and drive belt are all disconnected.
-
Remove the two wood blocks.
-
Turn the front wheels slightly if needed.
-
Slide the deck out carefully from the left side of the tractor, or whichever side gives the clearer route in your work area.
Avoid dragging it across concrete if possible; use a piece of cardboard, plywood, or a low furniture dolly if you need to protect the deck shell or floor.
Reinstallation order
Reinstallation is simply the reverse sequence:
-
Slide the deck beneath the tractor.
-
Support it on the wood blocks.
-
Reconnect the front draft rod.
-
Reconnect both rear draft arms and adjustable lift links with their washers and spring pins.
-
Route the deck belt around the engine pulley and inside all belt keepers.
-
Reconnect the PTO engagement cable and its spring.
-
Raise the deck slightly, remove the blocks, then cycle the deck through its full height range.
-
Confirm the PTO engages and disengages freely before mowing.
Checks before mowing
Before starting the engine:
-
All spring-locking pins and washers are installed.
-
The deck belt is fully seated in pulley grooves.
-
The belt runs inside its belt guides/keepers.
-
The engagement cable spring is correctly attached.
-
No linkage hangs below the deck or rubs the belt.
-
The deck raises and lowers without binding.
-
The PTO lever/control moves normally.
Start the engine outdoors with the deck initially disengaged. Engage the mower briefly at low engine speed, listen for belt rub or unusual vibration, then stop and inspect if anything sounds wrong.
A common mistake
Do not remove the deck by only taking off the belt and pulling. The deck is still held by the engagement cable, two rear draft arms, two adjustable lift links, and the front draft rod. Supporting it on blocks before removing the pins prevents it from dropping suddenly and makes the pins easier to release.
John Deere S120 safety switch troubleshooting
John Deere S120 fuse location and replacement
John Deere S120 battery size and replacement
What causes a lawn tractor battery to keep draining
A lawn-tractor battery that “keeps draining” is usually caused by one of four things: a battery that can no longer hold a charge, a charging system that is not replenishing it while the engine runs, poor cable/ground connections, or a key-off electrical drain. On an S120 or similar tractor, do not replace parts first—two multimeter voltage readings will usually point to the correct area.manuals.deere+1
Most likely causes
John Deere troubleshooting information specifically identifies a dead battery cell, dirty battery cables/terminals, low engine speed, and excessive idling as causes of a battery that will not charge normally.manuals.deere+1
Two essential voltage tests
Use a digital multimeter set to DC volts. Make sure the battery is charged first; otherwise, a low reading while the engine runs can be misleading.
1. Engine off: test battery condition
Measure directly across the battery posts—not the cable clamps.
If a fully charged battery falls significantly overnight with the negative cable disconnected, the battery itself is likely defective. Briggs & Stratton advises that a battery that cannot fully charge within about eight hours, or that will not retain charge while unused, should be replaced.briggsandstratton
2. Engine running: test charging
-
Start the tractor.
-
Set it near normal mowing/full operating throttle—not idle.
-
Measure directly across the battery posts again.
On a healthy small-engine charging system, voltage should rise above the engine-off reading. A common target range is roughly 13.5–14.5 V, though exact specifications depend on the engine and regulator fitted. If it remains in the low-12 V range at operating speed, the battery is being used but not properly recharged.briggsandstratton+1
Practical diagnostic sequence
1. Inspect the easy items
With the key off:
-
Clean battery posts and cable clamps until bright metal is visible.
-
Ensure the positive cable and the ground/negative cable are tight.
-
Trace the ground cable to the frame or engine block; remove corrosion at that connection.
-
Inspect the inline fuse and holder near the battery for heat damage, loose terminals, or corrosion.
-
Look for rubbed-through wiring at the seat hinge, PTO control, hood area, steering column, brake pedal, and deck-lift linkage.
-
Ensure the battery hold-down is fitted. Vibration can damage a battery internally and loosen connections.
A suitable battery-cleaning solution is four tablespoons of baking soda in one gallon of water; keep it out of battery cells and rinse/wipe afterward.manuals.deere
2. Eliminate the battery as the cause
Fully charge it using a proper 12 V smart charger, then let it rest for an hour and check voltage.
For a stronger test:
-
Disconnect the negative cable from the tractor.
-
Leave the fully charged battery isolated overnight.
-
Recheck voltage the next day.
If it has dropped well below roughly 12.4 V with the cable disconnected, replace or professionally load-test the battery. The tractor cannot be draining it when the battery is electrically isolated.
3. Check the charging circuit
If the battery holds charge when isolated but not during use:
-
Run at normal mowing throttle rather than idle.
-
Check the fuse and any charging-circuit connector.
-
Inspect the regulator/rectifier plug and stator wiring for looseness, corrosion, melted plastic, or damaged insulation.
-
Test charging voltage at the battery.
-
If voltage does not increase with engine speed, a technician can test stator AC output and regulator/rectifier DC output separately.
Briggs & Stratton notes that alternator-system testing normally requires identifying the alternator type and testing at the specified engine speed; depending on the system, a failed stator, diode, or regulator may be responsible.briggsandstratton
4. Test for key-off drain
If charging voltage is normal but the battery dies after it sits:
-
Fully charge the battery.
-
Switch the key off and remove it.
-
Disconnect the negative cable.
-
Set the meter to its DC amps range and move the red lead to the meter’s correct amps socket.
-
Connect the meter in series: one probe to the negative battery post and the other to the disconnected negative cable.
-
Wait a minute for any electronics to settle, then read the draw.
A basic lawn tractor should show very little key-off draw. If you see a meaningful, steady current draw, pull fuses one at a time until the reading falls; that identifies the circuit to inspect. Common causes include a stuck relay, a leaky regulator/rectifier, damaged wiring, an incorrectly connected hour meter, or aftermarket lighting/USB/charging accessories.mowermentor
Caution: Do not turn the key to START or engage the mower while the meter is on the amps range. Starter current can instantly blow the meter fuse or damage the meter.
Storage and usage effects
A lawn tractor with an 8-amp-class charging system can maintain a battery during normal mowing, but it will not rapidly recover a heavily discharged one. Frequent brief starts, long periods at idle, cold storage, or months without use can leave the battery undercharged. Use a low-amp smart maintainer during long storage and keep the battery clean, dry, and fully charged.manuals.deere+1
When to replace the battery
Replace it—or have it load-tested—if it shows any of these signs:
-
It will not reach roughly 12.6 V after a proper charge.
-
It drops below about 12.4 V overnight while disconnected.
-
It drops near 10.5 V, suggesting a failed cell.
-
It cranks slowly despite clean, tight cables and normal charging voltage.
-
The case is swollen, cracked, leaking, or has overheated.
Avoid fitting a larger fuse, bypassing wiring, or installing a more powerful battery to hide an electrical fault. Those changes do not cure the drain and can increase fire or wiring-damage risk.
DIY or dealer? John Deere S120 repair decision guide
The John Deere S120 is friendly to basic homeowner maintenance, but the line is usually this: routine service, deck setup and simple bolt-on parts are good DIY territory, while internal engine work, deep electrical tracing and internal transmission faults are better left to a dealer or an experienced technician.
Good DIY jobs
-
Engine oil and oil filter service.
-
Air filter, fuel filter and spark plug replacement.
-
Blade removal and replacement.
-
Deck belt inspection and replacement if you are comfortable with routing and guards.
-
Deck cleaning and leveling.
-
Battery replacement and terminal cleaning.
Advanced DIY or dealer jobs
-
Tracing intermittent safety-switch faults.
-
Traction-drive diagnosis beyond visible belt issues.
-
Valve-clearance inspection/adjustment at 200 hours.
-
Internal transmission repair.
-
Major engine work or persistent no-start diagnosis after basic tune-up parts.
Skill level guide
-
Beginner: air filter, spark plug, battery, blade inspection, deck cleaning.
-
Intermediate: oil service, fuel filter, blade replacement, deck leveling, deck belt replacement.
-
Advanced: electrical diagnosis, traction-drive faults, valve-clearance work, internal repairs.
John Deere S120 parts needed, OEM vs aftermarket, and what information you need
Before ordering John Deere S120 parts, gather the full model name, machine PIN, engine serial number and deck size/version. Deere states clearly that the dealer needs the serial number or PIN for the machine or attachment, and the operator’s manual shows the S120 owner should record both the machine PIN and engine serial number.
For this model, the minimum information to confirm before ordering is:
-
Full model name: John Deere S120.
-
Product Identification Number (PIN).
-
Engine serial number.
-
Deck specification, commonly the 42-inch convertible deck for the parts listed below.
OEM parts usually make the most sense for belts, safety-related switches, ignition parts and fit-sensitive deck parts because routing, dimensions and interlock reliability matter. Aftermarket parts can be acceptable for some consumables such as batteries, blades and filters if the cross-reference is exact and the part is clearly listed for the S120 and the correct deck version.
Where to find John Deere S120 parts diagrams and service manuals
Owners usually need three types of references: the operator’s manual for service intervals and procedures, the official Deere parts system for exploded diagrams and numbers, and a Deere-focused aftermarket or dealer parts page for quick lookup.
Useful sources include:
-
John Deere 100 Series operator’s manual (OMUC22642) for service intervals, operating controls, safety, deck leveling and maintenance basics.
-
John Deere Technical Information Store for official technical publications and purchasable manuals.
-
JDParts / John Deere parts ordering for diagrams, part numbers and serial-specific lookup.
-
S120 replacement parts guide PDF for quick reference to common maintenance and deck parts.
How to locate model, serial and engine numbers on the John Deere S120
These numbers matter because Deere parts and dealer support often depend on the exact machine PIN and engine serial number, especially when a model has running production changes. Ordering by “S120” alone is often not enough when electrical, engine or attachment-specific parts are involved.
-
Park the tractor safely on level ground, shut it off and remove the key before looking for identification tags.
-
Find the machine Product Identification Number on the left side of the frame, which is where the operator’s manual places the PIN location for S100, S110, S120, S130, S140, S160, S170 and S180 tractors.
-
Record the full PIN exactly as shown, including all characters.
-
Locate the engine serial number on the engine itself in the location shown in the operator’s manual engine-identification section.
-
Match your deck or attachment version before ordering deck belts, blades or accessory parts, because the replacement guide here applies specifically to the S120 with 42-inch convertible deck.
Buying John Deere S120 parts online and in physical stores
The smartest buying strategy is to confirm the OEM number first, then shop by that number rather than by a vague product title. That reduces wrong-part orders, especially for items like belts, switches and deck-specific blade sets.
-
Online: use OEM part numbers, confirm PIN-sensitive fitment, and compare pictures and descriptions carefully. Good starting points are JDParts, John Deere Technical Publications, and the S120 replacement parts guide PDF.
-
Dealer counter: best for serial-specific parts, electrical items, deck hardware and any repair where the old part is missing or unclear.
-
Retail stores: acceptable for oil, spark plugs, filters, batteries and some blades if the packaging clearly lists the John Deere S120 and the exact OEM cross-reference.
Step-by-step fitting guide for common John Deere S120 parts
These are the high-impact jobs many S120 owners can handle at home with basic tools, safe working habits and the operator’s manual nearby.
Replacing the John Deere S120 air filter
A fresh air filter helps hard-starting, rich running and loss of power caused by restricted intake airflow.
-
Park safely, shut the engine off and let hot parts cool.
-
Open the air-cleaner housing and remove the old cartridge filter.
-
Wipe dust from the housing without pushing dirt into the intake.
-
Install the new MIU14395 cartridge in the correct orientation.
-
Refit the housing securely and inspect the intake area before restarting.
Replacing the John Deere S120 spark plug
A new spark plug is one of the simplest fixes for rough running, difficult starting and misfire complaints.
-
Park safely and disconnect the spark plug lead.
-
Remove the old spark plug carefully from a cool engine.
-
Compare the old plug with the replacement MIU11020 to confirm match.
-
Thread the new plug in by hand first to avoid cross-threading.
-
Tighten correctly, reconnect the lead and test start the engine.
Replacing John Deere S120 blades
Sharp, straight blades restore cut quality and reduce tearing, vibration and stragglers.
-
Park safely, remove the key and disable accidental starting before working around the deck.
-
Raise the deck as needed for access and wear gloves around blade edges.
-
Remove the old blades and inspect for bends, cracks or uneven wear.
-
Install matching replacement blades such as UC21583, keeping orientation correct.
-
Tighten hardware to the correct specification from the operator’s manual and recheck for free rotation.
Replacing the John Deere S120 42-inch deck belt
A new deck belt can cure weak blade drive, slipping, poor cut in heavy grass or a belt that has begun to fray.
-
Park safely, lower the deck as needed and remove the key.
-
Inspect the old GX25232 belt routing before removal and photograph it if needed.
-
Release belt tension and remove the worn belt from pulleys and guides.
-
Fit the new belt exactly in the original routing, making sure it sits fully in pulley grooves.
-
Rotate pulleys by hand, confirm guides are clear, then test engagement briefly at low load.
Maintenance to prevent John Deere S120 problems reoccurring
Regular maintenance prevents most common S120 complaints long before they become real repairs. Deere’s maintenance information repeatedly points owners toward cleanout, lubrication, tune-up parts and deck inspection because those are the jobs that protect starting reliability, cut quality and fire safety.
Focus areas:
-
Starting reliability: keep the battery clean, replace the spark plug, fuel filter and air filter on schedule, and avoid stale fuel.
-
Cut quality: sharpen or replace blades, keep the deck level and inspect the deck belt.
-
Fire and overheating prevention: clean the muffler, cooling fins, intake screen, deck top and transmission area often.
-
Drive performance: inspect the traction belt area and keep debris away from driveline components.
-
Electrical reliability: clean battery terminals and inspect wiring near the battery/fuse area.
John Deere S120 maintenance schedule and year-round checklist
The official S120 service material shows an initial 8-hour service, recurring 25-hour lubrication points, annual or 50-hour routine service items, and a 200-hour valve-clearance check handled by a dealer. That schedule is the best base for a homeowner maintenance plan because it matches Deere’s own chart rather than generic riding-mower advice.
Daily / before each use
-
Check and test safety systems.
-
Check tire pressure and brakes.
-
Check fuel level and engine oil level.
-
Remove grass and debris from engine compartment, muffler area and top of mower deck.
-
Clean the air intake screen.
-
Look underneath for fluid leaks and tighten loose hardware.
After 8 hours
-
Lubricate mower spindles and pivot points.
-
Check mower deck spindle brakes on manual PTO setups.
-
Lubricate front axle pivot and axle spindles.
-
Lubricate front axle wheel bushings.
Every 25 hours
-
Lubricate mower spindles and pivot points.
-
Lubricate front axle pivot and axle spindles.
-
Lubricate front axle wheel bushings.
Every 50 hours or yearly
-
Change engine oil and replace filter.
-
Clean or replace air filter precleaner and element.
-
Replace fuel filter.
-
Replace spark plug.
-
Sharpen or replace mower blades.
-
Check or replace mower drive belt and clean battery terminals.
Every 200 hours
-
Check and adjust valve clearance; Deere directs owners to the dealer for this service.
Seasonal John Deere S120 checklist
-
Spring: inspect battery condition, change overdue service parts, level the deck and sharpen blades before first heavy mowing.
-
Mid-season: clean cooling areas often, inspect belts and blades, and recheck deck level if cut quality changes.
-
Fall or storage prep: remove all debris, repair leaks, complete overdue tune-up items and store only after the machine has cooled and been cleaned.
Repair, upgrade, or replace the John Deere S120?
For most homeowners, an S120 is worth repairing when the issue is routine service-related, a bolt-on deck part, a battery, a belt or a simple electrical item. Upgrading or replacing becomes more sensible when repeated major failures stack up, the deck shell or transmission has serious wear, or your property and workload have outgrown what a 100 Series lawn tractor is designed to do.
Repair if…
-
The problem is a tune-up item, battery, blade, belt or deck adjustment.
-
The tractor is otherwise structurally sound and cuts well after routine service.
-
The repair cost is small compared with replacement value.
Upgrade if…
-
You regularly need more traction, heavier towing or a stronger mowing setup than a basic lawn tractor comfortably delivers.
-
You are adding attachments that increase operating demands or slope risk.
-
Repairs are becoming frequent even though the machine is still usable.
Replace if…
-
The machine has major transmission or engine problems plus deck or electrical wear at the same time.
-
Safe operation is compromised by structural or repeated control issues.
-
Repair costs approach the value of a better replacement tractor.
John Deere S120 troubleshooting FAQ
1. Why will my John Deere S120 not start?
The first split is whether it will crank or not crank. If it will not crank, check brake position, PTO disengagement, battery condition, terminal corrosion and ignition-switch function first. If it cranks but will not fire, look at fuel quality, fuel filter, air filter and spark plug service condition before assuming a bigger failure.
2. Why does my John Deere S120 click but not crank?
A click usually points to a weak battery, poor cable connection or a starter circuit issue rather than a fuel problem. Clean and tighten battery terminals, charge or test the battery, and confirm the interlock conditions are correct. If the battery is known good and the issue remains, the switch or wiring needs closer diagnosis.
3. Why does my John Deere S120 crank but not fire?
That symptom usually means the engine is turning but missing fuel, spark or enough clean air. Check for stale fuel, a restricted AM116304 fuel filter, a dirty MIU14395 air filter and an overdue MIU11020 spark plug. Basic service parts often solve this faster than chasing rare faults first.
4. Why does my John Deere S120 start and then die?
A start-then-die complaint often means poor fuel delivery, stale fuel or an intake issue. It can also happen when a weak ignition or interlock-related fault shows up only after the engine first catches. Start with the fuel filter, fresh fuel, air filter and plug, then inspect wiring and switch behavior if the problem repeats.
5. Why is my John Deere S120 hard to start when cold?
Cold-start complaints often come down to weak spark, restricted airflow or battery condition. A tired spark plug, dirty air filter and weak battery make a small engine much less willing to fire cleanly after sitting. Keeping tune-up parts current and terminals clean usually makes the biggest difference.
6. Why is my John Deere S120 running rough?
Rough running usually means the engine is not getting a clean fuel-air-spark combination. Check the air filter, spark plug and fuel filter first, then consider stale fuel or debris around cooling areas if power also falls off as it warms up. If routine service does not help, more detailed engine diagnosis may be needed.
7. Why does my John Deere S120 surge at idle or mowing speed?
Surging often points to inconsistent fuel delivery or air restriction. Old fuel, a partially restricted fuel filter or a dirty air filter are common homeowner-level causes and are easier to rule out than internal carburetion problems. Clean basic service items first before moving deeper.
8. Why is my John Deere S120 losing power in heavy grass?
Loss of power in heavy mowing can be normal if grass is too tall or wet, but it also shows up when blades are dull, the deck is packed with grass or the deck belt is slipping. A restricted air filter also reduces available engine power. Clean the deck, sharpen blades and inspect belt condition before blaming the engine.
9. Why does my John Deere S120 leave uncut strips?
Uncut strips usually come from dull blades, low blade speed or a deck that is not level. Deere’s leveling procedure and blade service guidance matter here because even small setup errors show up clearly on lawn tractors. Check blades, deck level and belt condition together rather than one at a time.
10. Why is my John Deere S120 cutting unevenly?
The most common causes are uneven tire pressure, deck mislevel and worn blades. Deere says to correct tire pressure first, then level the deck side-to-side and set the front slightly lower than the rear. That sequence matters because deck adjustments are meaningless if tire height is wrong.
11. Why does my John Deere S120 scalp the lawn?
Scalping usually means the deck is set too low for conditions, the anti-scalp wheels are adjusted wrong or the lawn surface is uneven. Deere notes the deck wheels should not run hard on the ground in normal setup and gives a small clearance range above the ground. Raising the cutting height and correcting wheel setup often solves it.
12. Why are the grass tips brown after mowing with my John Deere S120?
Brown tips usually mean the grass is being torn rather than cleanly cut. Dull blades are the main cause, but an improperly pitched deck can also contribute because it wastes power and causes double cutting. Sharpen or replace blades and confirm front-to-back deck pitch is within Deere spec.
13. Why does my John Deere S120 vibrate when the blades engage?
Blade-engagement vibration often points to a blade or deck-drive problem rather than the traction system. Bent blades, debris around spindle areas or a damaged GX25232 deck belt are common places to start. Stop using the mower until the vibration source is found, because continued use can damage more parts.
14. Why does my John Deere S120 shake all the time while mowing?
Constant vibration usually means a rotating part is bent, loose or out of balance. Inspect the blades first, then the deck pulleys and belt path, especially if the problem started after striking something. Do not ignore it, because spindle and deck wear can follow.
15. Why is my John Deere S120 making a squealing belt noise?
A squeal usually means belt slip, wear, contamination or pulley trouble. On the S120, both the traction belt and the mower deck belt are known service items, so inspect the correct belt path for glazing, fraying or poor seating in the pulleys. Replace a damaged belt before it fails completely.
16. Why does my John Deere S120 smell hot after mowing?
A hot smell often comes from grass and debris collecting around the muffler, exhaust or deck-belt area. Deere repeatedly warns owners to inspect and clean these areas because combustible buildup can become a fire hazard. Shut the machine down, let it cool and clean thoroughly before using it again.
17. Why is my John Deere S120 overheating?
Overheating often starts with blocked cooling airflow rather than an internal engine fault. Clean the air intake screen, cooling fins and other debris-prone areas around the engine and muffler. Also verify the oil level and service condition, because overdue maintenance can add heat stress.
18. Why does my John Deere S120 battery keep going flat?
A repeatedly flat battery may be old, corroded at the terminals or losing charge because of poor connections. Start by cleaning the terminals and confirming the battery itself is still serviceable. If a good battery still goes flat, wiring or charging-system diagnosis is the next step.
19. What battery does a John Deere S120 use in the USA and Canada?
The S120 replacement parts guide lists battery TY25221B as the 12 V battery for Canada and USA. That is the safest OEM reference to start from when matching size and terminal layout.
20. What oil filter does a John Deere S120 use?
For USA, Canada and Mexico, Deere lists oil filter AUC12916 for the S120. Using the listed filter number reduces fitment mistakes, especially when retailers show multiple “fits many” options.
21. How much engine oil does a John Deere S120 take?
The S120 replacement parts guide lists TY22029 Turf-Gard 10W-30 engine oil at 2.6 L, or 2.8 qt. Always verify the final level on the dipstick rather than filling by quantity alone.
22. What spark plug does a John Deere S120 use?
The listed spark plug is MIU11020. That is the direct Deere reference for routine service and is the number to cross-check if buying from a non-dealer source.
23. What air filter fits a John Deere S120?
The replacement guide lists air filter cartridge MIU14395. If the mower is used in dusty conditions, inspect it more often than the normal interval because restricted intake airflow affects starting and power quickly.
24. What fuel filter fits a John Deere S120?
The listed fuel filter is AM116304. Replacing it on schedule is a simple way to avoid many fuel-delivery complaints on a mower that sits between uses.
25. What deck belt fits a John Deere S120 with 42-inch deck?
For the S120 with 42-inch convertible deck, Deere lists flat belt GX25232. Confirm that your tractor actually has the 42-inch convertible deck before ordering, because deck-specific parts are easy to mix up.
26. What traction belt fits a John Deere S120?
The replacement parts guide lists traction belt UC30568. If the machine loses drive or hesitates, this is one of the first drive components worth inspecting for wear or damage.
27. What blades fit the John Deere S120 42-inch deck?
Deere lists UC21583 as the 3-in-1 StarLock mower blade and AM141033 as the mulch blade for the 42-inch convertible deck setup shown in the guide. Matching blade style to your deck and mowing setup is important for both cut quality and fit.
28. Why does my John Deere S120 move weakly or not pull well uphill?
Some loss of performance on slopes is normal for a lawn tractor, but weak drive on flat ground often points to belt wear, debris around the driveline or a transmission-related issue. Deere also warns that slopes and attachments increase rollover risk, so traction complaints should be judged conservatively. Inspect the traction belt and clean the transmission area first.
29. Why will my John Deere S120 not move in forward or reverse?
If both directions are affected, start with the traction belt, brake release and obvious linkage or debris issues before assuming internal transmission failure. A damaged or slipping UC30568 belt is a more realistic first suspect than a failed transaxle on many homeowner machines. If the belt path checks out and the tractor still will not move, dealer diagnosis is reasonable.
30. Why do I need the PIN and engine serial number for John Deere S120 parts?
Deere says the dealer needs the serial number or product identification number for the machine or attachment when ordering parts. The manual also tells owners to record both the machine PIN and engine serial number, which helps avoid mistakes on engine, electrical and serial-break components.
31. Where is the PIN on a John Deere S120?
The operator’s manual places the machine Product Identification Number on the left side of the frame. Clean the area and copy the full number exactly before ordering parts.
32. How often should I service my John Deere S120?
Use Deere’s chart as the base schedule: daily checks before use, lubrication after 8 hours and every 25 hours, major service yearly or every 50 hours, and valve-clearance inspection at 200 hours. For dusty mowing or heavy debris conditions, inspect and clean key areas more often than the minimum schedule.
33. Can I use aftermarket parts on a John Deere S120?
Yes, but use more caution with some parts than others. Aftermarket filters, batteries and blades can be fine when they cross-reference exactly, but OEM is usually safer for belts, switches and fit-sensitive deck parts where dimensions and reliability matter more.
34. Is the John Deere S120 a good DIY mower to maintain?
Yes, for routine homeowner service it is a manageable machine. Basic maintenance items, deck leveling, blade work and common bolt-on replacements are realistic for many owners, while advanced electrical, transmission and internal engine work are better left to experienced repairers.
35. When should I stop DIY repair and take my John Deere S120 to a dealer?
Move to dealer support when the problem involves internal transmission issues, repeated no-start faults after basic service, intermittent electrical faults you cannot isolate, or the 200-hour valve-clearance check Deere assigns to dealer service. Also stop DIY work anytime safe operation is in doubt, especially with brake, control, rollover-risk or fire-risk concerns.