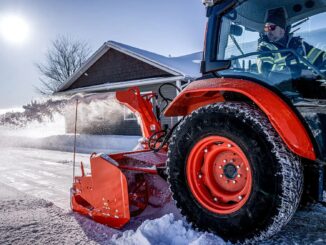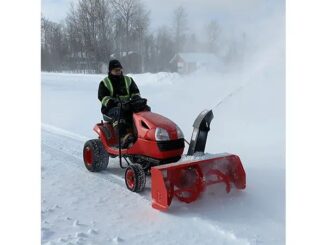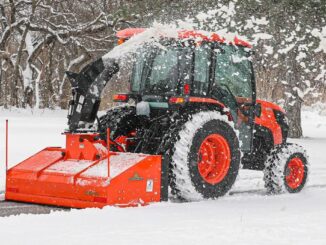

Kubota BX1500 Snow Blower Guide
The Kubota BX1500 can operate a front-mounted snow blower when equipped with the correct tractor-specific hitch, PTO drive kit, and attachment hardware. The 50-inch Kubota BX2750A is an established option, but buying a blower alone does not provide everything needed to install it. Matching the mounting and drive components to the BX1500 is essential.tractor-specs+1
This small diesel tractor is useful for clearing residential driveways and rural access areas where pushing snow would create restrictive banks. Its hydrostatic transmission lets the operator reduce travel speed as snow becomes heavier without immediately reducing blower speed.
This guide explains attachment selection, used-equipment checks, mounting, traction, operating technique, troubleshooting, and seasonal care. The main priorities are a complete compatible installation, appropriate counterweight, and a feed rate the tractor can sustain.
Kubota BX1500 Snow Blower Compatibility
The BX1500 is a four-wheel-drive subcompact tractor with a liquid-cooled, two-cylinder diesel engine, a two-range hydrostatic transmission, and a Category I three-point hitch. Its rear PTO operates at 540 rpm, while the mid-PTO operates at 2,500 rpm. These are different drive arrangements and are not interchangeable.tractor-specs+1
Front-mounted blower options
The Kubota BX2750A is a 50-inch, approximately 127-cm, front-mounted two-stage snow blower associated with the BX1500. A two-stage blower uses an auger to gather snow and an impeller to discharge it through the chute.machinerypete+1
The important distinction is between the blower assembly and the tractor-side installation equipment. BX1500 attachment listings identify the BX2711 quick hitch and BX2712 or BX2712-A mid-PTO drive kits specifically for this tractor. Other BX hitch and drive-kit numbers also appear in broader parts listings, so a shared catalog entry is not proof that every listed component fits every configuration.messicks
Before purchasing, have an authorized dealer confirm:
-
The blower model and serial number.
-
The correct BX1500 hitch and mounting brackets.
-
The matching mid-PTO drive kit and connecting shafts.
-
Required hydraulic lift components and connections.
-
Chute-control hardware and operator-station brackets.
-
Required counterweight and any interference with existing equipment.
Do not assume that a snow blower removed from another BX tractor will transfer with its existing hitch and shafts.
Why model suffixes matter
BX2750A, BX2750B, and BX2750D identify different attachment versions. Although they belong to the same general blower family, parts, controls, and installation arrangements must be checked against the exact model and serial number.
A manual labeled broadly for the BX Series does not establish that every installation component suits the BX1500. Use the tractor manual, the correct attachment manual, and the applicable mounting-kit instructions together.
Rear-mounted alternatives
A conventional rear snow blower attaches to the three-point hitch and uses the rear PTO, generally clearing while the tractor reverses. It does not use the front blower’s mid-PTO drive system.
A Category I hitch and 540-rpm PTO are only the starting requirements. Confirm the blower manufacturer’s minimum PTO power, weight, hitch geometry, driveline length, and required lift clearance. The BX1500 is a small tractor, so an oversized rear blower can exceed its useful power or handling capability even if the hitch pins connect.
An inverted or pull-type rear blower clears while traveling forward, requiring the tractor to drive through the snow first. That arrangement can become impractical when snow depth or drifting exceeds the tractor’s available clearance and traction. Do not treat conventional and inverted blowers as interchangeable purchases.
Choosing the Right Setup for Your Property
A front blower offers forward-facing visibility and avoids the sustained twisting associated with a conventional rear-mounted unit. However, it requires dedicated mounting hardware, storage space, and seasonal installation work.
| Setup | Most useful application | Main limitation |
|---|---|---|
| Compatible front-mounted blower | Repeated driveway clearing and moving snow beyond the driveway edge | Requires a complete tractor-specific mounting and drive system |
| Compatible rear-mounted blower | Properties where a suitable rear implement is available and reversing is manageable | Rearward visibility, operator posture, and attachment size |
| Separate walk-behind blower | Narrow paths, confined areas, and smaller drives | More walking and potentially greater operator effort |
| Approved blade or loader arrangement | Pushing light accumulations or relocating piles | Needs space for snowbanks and can lose effectiveness as banks build |
For the BX2750A, the verified clearing width is 50 inches. Confirm intake height and overall storage dimensions from the exact attachment manual rather than assuming another BX2750 version is identical.
Wet snow, compacted banks, and deep drifts place much greater demand on the tractor than shallow powder. Width alone is therefore a poor guide to productivity: a narrower bite at a steady feed rate can clear faster than repeatedly overloading the blower.
A separate walk-behind machine may be more practical where gates, steps, landscaping, or parked vehicles restrict tractor access. A tractor-mounted blower becomes more attractive when the same machine must clear a longer driveway repeatedly throughout winter.
Buying a Used Kubota BX1500 Snow Blower
A low-priced blower can become expensive if the seller cannot supply the BX1500 mounting and drive components. Inspect the package as a system, not simply as an auger housing.
Check completeness first
Ask the seller to lay out:
-
Tractor-side brackets, hitch, pins, retainers, and lift hardware.
-
Mid-PTO drive components and all connecting shafts.
-
Shaft guards and attachment shields.
-
Chute crank, supports, or installed powered-control equipment.
-
Hydraulic hoses, couplers, and any necessary valve components.
-
Skid shoes, scraper edge, and correct shear-bolt hardware.
Record the identification plates before ordering replacement parts. A statement that the attachment “fits a BX” is not enough.
Inspect wear and damage
With the attachment disconnected, securely supported, and isolated from power, inspect the auger flighting, impeller, housing, and chute. Look for bent components, cracks, heavy corrosion, repaired structural damage, and evidence that rotating parts have contacted the housing.
Check accessible bearings, shaft joints, drive-chain components, and gearboxes as directed in the attachment manual. Missing guards, oil leaks, badly worn splines, or improvised driveline modifications justify professional inspection before purchase.
Reject ordinary bolts substituted for specified shear bolts. These protective fasteners must fail in the intended way to limit damage during an obstruction.
Mounting and Preparing the Blower
Install the attachment on firm, level ground with suitable supports. Never work beneath a blower or hitch held up only by hydraulic pressure.
Follow the exact installation sequence in the mounting-kit instructions:
-
Park safely, lower existing equipment, disengage the PTO, stop the engine, and remove the key.
-
Remove incompatible equipment as directed, including the mower or loader where required by the installation.
-
Install the specified tractor brackets, hitch, and lift equipment.
-
Connect the correct drive components, verifying that shaft locks fully engage.
-
Connect hydraulic and electrical equipment without creating pinch points or contact with rotating shafts.
-
Fit guards and confirm that the attachment locks securely.
-
Install the required counterweight.
-
Check lifting, lowering, steering clearance, and chute operation in a clear area.
Do not shorten, weld, or substitute a PTO shaft merely to make an uncertain combination fit. Shaft length, engagement, operating angles, and guarding require proper verification.
Understand the controls
Front-blower rotation is mechanically driven through the PTO system; hydraulic lift does not mean the blower itself is hydraulically powered.
Chute equipment varies. Inspect whether the installed unit has a manual crank, powered rotation, or an adjustable deflector requiring the operator to stop before adjustment. Do not assume that an electric or hydraulic control kit fits because it appears in another blower’s manual.
Set the chute direction before entering the snow. Keep discharge away from people, vehicles, buildings, roads, and areas where stones or ice could cause damage.
Kubota BX1500 Traction and Ballast
Four-wheel drive helps distribute available traction, but it does not eliminate wheelspin, sliding, or increased stopping distance. A front blower also changes weight distribution, particularly when lifted.
Grip and counterweight serve different purposes
Tire chains improve grip. Required rear counterweight balances the front attachment and helps maintain appropriate axle loading and stability. Chains are not a substitute for ballast, and ballast does not guarantee traction on ice.
Use the weight arrangement specified for the tractor and attachment combination. Do not select an arbitrary ballast quantity or assume that any heavy rear implement is suitable.
Rear-mounted weight acts differently from weight carried in the wheels. Its distance behind the axle affects balance, overall length, maneuverability, and transport weight. Excessive ballast can overload components.
Selecting traction aids
Confirm chain size against the tires actually installed, not an assumed original tire specification. Check clearance around fenders, hitch components, hoses, and other nearby parts through the permitted operating positions.
Two-link, four-link, and diamond-pattern chains differ in coverage and ride characteristics. Choose only a design that fits the tractor’s clearance and intended surface. Steel chains can mark pavement and damage decorative finishes; alternative traction products also require fit and suitability checks.
Do not add front chains or wheel spacers without confirming approval and clearance. Recheck chain security after initial use and stop immediately if a chain contacts the machine.
Operating the Kubota BX1500 in Snow
The hydrostatic transmission allows travel speed to be adjusted independently of the throttle setting. Use that advantage to control how much snow enters the blower.
Start with a controlled feed rate
Use the PTO operating procedure and engine setting specified for the installed attachment. Do not assume maximum engine speed is automatically the correct PTO setting.
For heavy snow, use the appropriate low travel range and reduce forward speed before the engine labors or discharge weakens. Take a narrower bite when necessary. Do not force the blower into a bank as though it were a dozer blade.
Plan the clearing pattern around wind direction, safe discharge areas, and available turning space. Avoid repeatedly throwing snow onto areas that still need clearing.
Adjust for the surface
On paved drives, set skid shoes and scraper clearance to avoid unnecessary wear and catching uneven joints. On gravel, increase clearance as directed by the attachment manual to reduce stone pickup.
A frozen base can make gravel clearing easier, but it does not eliminate thrown-object risk. Use extra caution during early-season and thawing conditions when loose material is exposed.
Mark driveway edges, culverts, drainage ditches, curbs, and other hidden hazards before snowfall. Decorative surfaces may need greater clearance or a different snow-removal method.
Clear blockages safely
A stopped auger or impeller can retain stored energy. Never put a hand into the chute, impeller opening, or auger housing.
-
Stop travel and disengage the PTO.
-
Park securely and lower the attachment.
-
Stop the engine, remove the key, and wait for all movement to cease.
-
Follow the attachment manual’s isolation and blockage-clearing procedure.
-
Use a suitable clean-out tool, keeping hands out of the mechanism.
-
Identify the cause before restarting.
Do not clear a blockage while another person remains at the controls.
Cold-Weather Preparation That Supports Blower Performance
The BX1500’s diesel engine, cooling system, battery, and shared transmission/hydraulic functions all need attention before sustained snow work.
Fuel and cold starting
Buy fresh, seasonally appropriate diesel. Winter blends improve cold-flow performance; summer fuel can form wax that restricts filters during a cold snap.
Use only approved diesel treatment at the specified rate, normally before the fuel becomes too cold for effective preventive treatment. Do not add gasoline, alcohol, or unapproved solvents. If fuel has already gelled, stop repeated starting attempts and follow an approved recovery procedure in a safe, suitably warmed location.
Inspect the fuel-filter arrangement for contamination or water using the tractor’s maintenance instructions. Follow the BX1500 glow-plug starting procedure, and do not use starting fluid with the glow-plug system.
Battery, coolant, and fluids
Clean battery terminals, inspect grounds and cables, and secure the hold-down. Use a charger or maintainer appropriate for the installed battery chemistry; never charge a frozen, cracked, swollen, or leaking battery.
Check coolant level only when safe and cool, inspect hoses, and test freeze protection. Correct weak or contaminated coolant using the specified product rather than mixing unknown antifreezes.
Verify that engine oil and transmission/hydraulic fluid meet the manual’s requirements for expected temperatures. Cold oil can slow response, so warm the machine gradually and avoid immediate heavy hydraulic or PTO loads. Do not improvise a low-temperature fluid conversion.
Visibility and operator protection
The BX1500 has an open operator station. Any weather enclosure must preserve safe access, visibility, control movement, and the rollover-protection arrangement.
Use the ROPS and seat belt as instructed. Never drill, weld, or modify the ROPS to fit an enclosure or light bracket.
Wear close-fitting insulated clothing, slip-resistant boots, and gloves that preserve control feel. Keep loose scarves and clothing away from shafts and rotating parts. Never operate the diesel engine in an enclosed building, even with doors partly open.
Daily Checks and Troubleshooting
Before starting, check fuel, applicable fluid levels, leaks, attachment locks, drive guards, chains, ballast, and chute movement. Clear lights, steps, cooling screens, and air-intake areas.
During warm-up, confirm normal indicators, steering, braking, and gradual attachment response. While working, stop for unusual vibration, driveline noise, falling engine speed, or loss of control.
| Symptom | Likely causes | Safe first checks | When professional service is needed |
|---|---|---|---|
| Slow cranking | Low battery charge, poor connections, unsuitable oil | Inspect terminals and grounds; check charge and specified oil | Persistent slow cranking, damaged cables, or starter faults |
| Starts but loses power | Excessive snow feed, restricted fuel supply, winter-fuel problems | Reduce bite and travel speed; inspect fuel condition and filters as instructed | Repeated restriction, injection faults, or unexplained power loss |
| Repeated chute clogging | Wet snow, excessive feed, restricted chute, inadequate operating speed | Isolate power; clear with a tool; verify settings | Damaged impeller, drive faults, or recurring internal contact |
| Poor discharge | Incorrect PTO setting, overload, wear, partial blockage | Check operating procedure and reduce feed | Gearbox damage, severe wear, or abnormal vibration |
| Auger stops turning | Broken shear bolt, obstruction, drive failure | Shut down; inspect specified shear bolts and accessible components | Repeated bolt failure, seized bearings, or gearbox faults |
| Wheelspin or poor steering | Ice, incorrect ballast, unsuitable tires, excessive feed | Check approved ballast, chains, and operating technique | Unresolved steering problems or uncertain weight configuration |
| Slow lift or hydraulic leak | Cold fluid, low level, hose or valve fault | Warm gradually; check level and inspect visually | High-pressure leaks, damaged hoses, or persistent malfunction |
Never search for a hydraulic leak with bare hands. Internal hydrostatic faults, fuel-injection repairs, structural cracks, and complex electrical problems require qualified service.
Maintenance and Seasonal Storage
After each use, park on firm ground, lower the blower, disengage the PTO, and shut down. Remove packed snow and salt contamination without directing high-pressure water into bearings, seals, or electrical equipment.
Allow wet components to dry before freezing conditions return. Inspect for loose hardware, leaking gearboxes, damaged skid shoes, scraper wear, and missing guards.
Follow the exact attachment manual for:
-
Lubrication points and service intervals.
-
Gearbox and reduction-box lubricant.
-
Drive-chain adjustment.
-
Shear-bolt specification and installation.
-
Auger positioning after repairs.
-
Fastener torque and wear limits.
Before seasonal storage, clean and dry the attachment thoroughly, lubricate specified points, and protect exposed metal with an appropriate product. Store disconnected shafts securely with their guards, and cap hydraulic couplers.
Support the blower on approved stands or stable blocking, not on a raised hydraulic hitch. Keep mounting hardware labeled together so the BX1500-specific installation remains complete.
Before the next season, inspect for rodents, corrosion, damaged wiring, seized controls, leaks, and deteriorated hoses. Refit guards and test the attachment in a clear area before entering snow.
Kubota BX1500 Snow Blower FAQs
What snow blower fits a Kubota BX1500?
The 50-inch Kubota BX2750A is an established front-mounted option. Compatibility still requires the correct BX1500 mounting, drive, lift, and control components; the blower model alone does not establish a complete installation.
Which mounting kits should I check?
BX1500-specific listings identify the BX2711 quick hitch and BX2712 or BX2712-A mid-PTO drive kits. Have an authorized dealer verify the applicable combination using the tractor, blower, and kit identification.
Can I use a snow blower from another BX model?
Possibly, but do not assume its hitch, shafts, or controls transfer. Verify every tractor-side component before purchasing, especially when the seller cannot identify the original installation.
Is a front or rear blower better?
A front blower provides forward visibility and convenient steering through the cleared path. A conventional rear blower may suit some budgets and existing equipment arrangements, but requires suitable power matching, driveline geometry, and frequent rearward observation.
Can the BX1500 clear wet snow?
It can clear wet snow within the capacity of the installed blower and tractor. Reduce ground speed and bite width rather than forcing material into the intake or allowing sustained engine overload.
Can I use it on a gravel driveway?
Yes, with appropriate skid-shoe adjustment and cautious operation. Leave adequate clearance to reduce gravel pickup, particularly before the driveway develops a stable frozen surface.
Do I need chains and rear ballast?
Required counterweight must follow the approved installation. Chains depend on traction needs, tire size, clearance, and surface sensitivity; they do not replace counterweight.
Why does the blower keep breaking shear bolts?
Possible causes include hidden objects, frozen obstructions, incorrect bolts, seized components, or mechanical misalignment. Isolate power before inspection and obtain service if correct replacement bolts fail repeatedly without an obvious obstruction.
Before the Next Storm
Prioritize a complete BX1500-compatible installation, sound PTO guards, correct shear bolts, and the specified counterweight. Test lift, chute movement, steering, and blower operation before snow accumulates.
Follow both the tractor and attachment manuals, and resolve vibration, repeated plugging, fuel restriction, or driveline faults before the next use.