
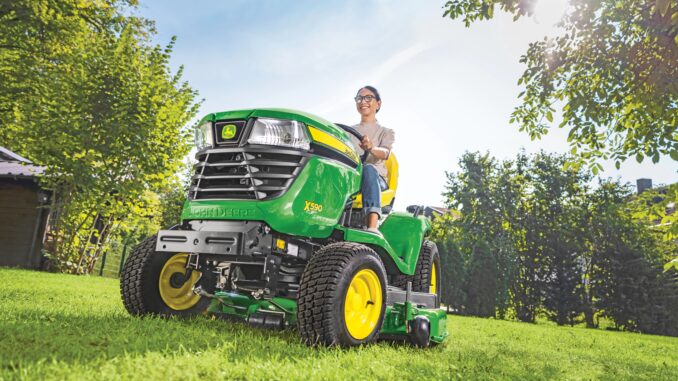
The John Deere S130 is a residential lawn tractor built for homeowners who need a step up from an entry-level rider without moving into commercial equipment. It is designed for mowing medium-sized lawns, pulling light lawn attachments, and handling seasonal yard duties in typical US and Canadian conditions. The model uses a 22 hp V-twin engine, a 42-inch Edge mower deck, a hydrostatic transmission, and an electric PTO system, so most repair issues fall into recognizable groups: starting faults, cut-quality problems, vibration, heat-related performance loss, and electrical faults.
This guide focuses only on the John Deere S130 with 42-inch deck and is written in technical but clear language for owners who want practical troubleshooting, sensible parts-buying advice, and a maintenance plan that helps prevent repeat failures.
1. John Deere S130 – Model Overview and Main Systems
At a general level, the S130 is a homeowner-focused lawn tractor intended for regular mowing and light towing rather than heavy-duty agricultural or commercial work. It is meant to balance cutting performance, operator comfort, and straightforward maintenance for suburban and rural residential properties.
From a technical standpoint, the S130 uses a 22 hp air-cooled V-twin gasoline engine, a 42-inch Edge mower deck with two blades, and a belt-driven hydrostatic transaxle controlled by side-by-side pedals. The tractor also uses an electric attachment engagement switch rather than a manual lever, and the machine relies on multiple interlock switches to manage safe starting and blade operation.
John Deere S130 – Main assemblies
-
Engine group: carburetor, ignition coils, spark plugs, air filter, fuel filter, cooling shrouds, and oil service system.
-
Mower deck group: deck shell, spindle assemblies, two blades, deck belt, idler pulleys, anti-scalp wheels, and discharge components.
-
Drive system: engine pulley, drive belt, hydrostatic transaxle, hydro cooling fan, rear axle, and bypass/free-wheel mechanism.
-
Electrical system: battery, starter, solenoid, PTO clutch, key switch, seat/brake/PTO interlocks, fuses, and wiring harness.
Why this matters for troubleshooting
Most S130 failures are not random. If the machine will not crank, the cause is usually in the battery, wiring, solenoid, or interlock circuit; if it cuts poorly, the issue is usually blade condition, deck setup, or operating technique; if it loses drive after warming up, belt, fan, hydro, or cooling problems are the main suspects.
2. John Deere S130 – Troubleshooting Approach for the S130
A good troubleshooting routine begins with the exact symptom rather than guessing at parts. For the S130, the fastest approach is to sort the problem into one of six categories: starting, cut quality, vibration/noise, overheating or leaks, drive/transmission, or electrical/PTO.
Before any repair work, park on level ground, disengage the PTO, set the parking brake, remove the key, and disconnect the negative battery cable if you are going beyond inspection. The operator’s manual also emphasizes cleaning debris from hot and moving areas before and after operation because debris buildup affects both reliability and fire risk.
3. John Deere S130 – Starting Issues
Starting faults are among the most common owner complaints because they stop all use of the tractor. In general, the S130 either fails to crank at all, cranks but will not start, or starts and then dies after a short run period.
John Deere S130 – No crank at all
A no-crank condition usually means the starter never turns the engine when the key is moved to START. That generally points to battery condition, cable condition, solenoid function, or the start-permission logic of the interlock system.
Typical causes:
-
Weak or discharged battery.
-
Dirty or loose battery terminals or frame ground.
-
PTO switch left on, brake switch not satisfied, or related interlock issue.
-
Faulty key switch or starter solenoid.
Step-by-step checks:
-
Measure battery voltage at rest; a healthy fully charged battery should be around 12.6 V, while a much lower reading suggests recharge or replacement is needed.
-
Inspect and clean both battery terminals and the frame ground connection.
-
Confirm PTO switch is fully OFF and brake pedal is fully depressed before cranking.
-
Listen for a solenoid click when the key is turned; a click without starter rotation points toward high-resistance cables, weak battery under load, or a failed starter/solenoid contact set.
John Deere S130 – Cranks but will not start
When the engine turns over but never fires, the problem is normally fuel delivery, ignition, or both. On S130-type machines, stale fuel, restricted filters, and partially clogged carburetor circuits are very common after storage.
Checks:
-
Verify fuel freshness and replace old fuel if necessary.
-
Replace the fuel filter; the S130 maintenance sheet lists fuel filter GY20709.
-
Test for spark at both cylinders using a spark tester or grounded test plug.
-
If spark is present and fuel flow is adequate, inspect the carburetor for varnish, debris, or restricted jets.
John Deere S130 – Starts, runs briefly, then dies hot
This failure pattern often points to a heat-sensitive electrical component or overheating due to blocked airflow. On the S130, likely causes include ignition coil breakdown when hot, a failing fuel-shutoff solenoid, or debris-packed cooling fins under the engine shrouds.
Checks:
-
Test spark immediately after hot shutdown; if spark disappears only when hot, suspect coil failure.
-
Listen or feel for fuel-solenoid actuation with key on.
-
Remove the hood and inspect cooling fins and intake screens for grass and dust buildup.
4. John Deere S130 – Cut Quality Problems
Cut quality issues are often the most visible sign that something is wrong, even when the tractor still starts and drives normally. On the S130, ragged grass tips, striping errors, uneven height, and clumping usually come from blade wear, deck setup, or mowing technique rather than a lack of engine power.
Common causes
-
Dull or bent blades.
-
Incorrect deck leveling or front-to-rear pitch.
-
Mowing too fast or with insufficient engine speed.
-
Heavy deck buildup reducing airflow.
John Deere S130 – specific checks
The 42-inch S130 uses a two-blade setup, and the maintenance sheet lists blade set GY20850. If the machine tears grass or leaves stringers, inspect blade edges first, then check deck level using Deere’s specified method and the 3–6 mm front-to-rear pitch target from the operator’s manual.
John Deere S130 – Deck leveling notes
The operator’s manual gives two methods, including use of blocks and direct blade-tip measurement. For the S130, the front of the deck should be 1/8–1/4 inch lower than the rear to prevent double-cutting and brown grass tips.
5. John Deere S130 – Vibration and Noise
Some vibration is normal when the deck is engaged, but strong shaking, rumbling, metallic clatter, or belt slap is not. These symptoms should be treated early because they often point to parts that will damage adjacent components if left in service.
Common causes on the John Deere S130
-
Bent blade after impact.
-
Worn or rough spindle bearings.
-
Cracked, stretched, or misrouted deck belt.
-
Belt-stay or guide misalignment causing belt slap near the PTO pulley.
What to check
-
Spin each blade by hand with the engine off; any grinding or looseness suggests spindle wear.
-
Inspect the deck belt; the S130 sheet lists deck belt GX20072.
-
Confirm belt routing matches the official diagram.
-
Engage PTO at low throttle and observe for abnormal belt oscillation from a safe distance.
6. John Deere S130 – Overheating, Leaks, and Power Loss
If the S130 loses power, slows down after mowing for a while, or feels heat-stressed, do not assume the engine is worn out. Many heat-related complaints are caused by dirty cooling passages, hydro cooling fan issues, or slipping belts rather than internal engine damage.
John Deere S130 – Overheating
The S130’s engine is air-cooled, so packed debris on cooling fins, intake screens, and around the blower housing reduces heat rejection quickly. The manual specifically highlights engine intake screens, cooling fins, mower top, transmission area, and battery/fuse-side areas as key cleanout points.
John Deere S130 – Oil or fuel leaks
Leaks are important not only because of lubrication or fuel loss, but also because oil or fuel residue attracts debris and increases fire risk. Check around the oil service area, fuel filter, hoses, carburetor, and drain points during routine inspections.
John Deere S130 – Drive power loss
If drive performance fades when hot, inspect the drive belt, hydro area, and especially the hydro cooling fan for damage or packed debris. If purge procedures and external repairs do not restore performance, internal hydro wear becomes more likely.
7. John Deere S130 – Hydraulics and Transmission
The S130 uses a hydrostatic transaxle rather than a geared transmission that requires constant manual shifting. For the owner, this makes operation easier, but it also means most drive problems trace to belt drive, cooling, bypass settings, or internal transaxle wear rather than adjustment of a clutch linkage.
John Deere S130 – Common hydro/drive symptoms
-
Tractor will not move or barely moves.
-
Weak uphill performance.
-
Jerky motion after storage.
-
Hydro whine and reduced pulling power when hot.
Checks
-
Confirm the free-wheel/bypass control is fully in the drive position.
-
Inspect drive belt condition and tension.
-
Check hydro cooling fan for broken blades or debris.
-
Perform hydro purge procedure if the unit has sat unused for a long time or has recently been serviced.
Repair limits
External repairs like belts and fans are realistic DIY jobs. Internal hydrostatic transaxle repair or replacement is usually an advanced DIY or dealer-level task because of access, cost, and the need to avoid misdiagnosis.
8. John Deere S130 – Electrical and PTO Problems
Electrical problems on the S130 often show up as either no-start issues or deck engagement failures. Because the tractor uses interlocks and an electric PTO clutch, electrical troubleshooting should always begin with battery condition, fuses, and switch logic before replacing major parts.
John Deere S130 – Common symptoms
-
PTO will not engage.
-
Engine dies when blades are engaged.
-
Headlights or electrical accessories fail.
-
Fuses blow repeatedly.
Checks
-
Verify battery voltage and charging condition.
-
Inspect fuses and replace only with correct amperage ratings.
-
Test PTO switch continuity using the wiring diagram and switch pin layout from service literature.
-
Check for voltage at the PTO clutch connector when the switch is on; voltage present with no clutch response usually indicates clutch failure.
-
Inspect seat, brake, and PTO interlock switches and their connectors.
Summary:
Common S130 problems
The S130 uses a hydrostatic transaxle, so owners sometimes describe any weak-drive condition as a “transmission failure.” In practice, Deere-focused troubleshooting guidance points first to the drive belt, hydro cooling fan, debris accumulation, bypass setting, and purge procedure—especially where drive becomes weak only after the mower warms up.tractorsby
Problems worth taking seriously
Stop using the tractor and investigate promptly if you notice:
-
A sudden loss of drive, especially accompanied by severe whine, burning-belt smell, or a broken hydro cooling fan.
-
Persistent oil leakage, falling oil level, or oil appearing around the Easy Change filter/cap area.
-
Strong deck vibration, as a cracked or bent blade or failing spindle can damage the deck and create a safety risk.
-
Repeated blown fuses, hot wiring, intermittent starting, or a PTO that engages unpredictably.
-
A mower that starts normally but loses power badly under load; check for a slipping belt and engine tune/fuel problems before assuming an engine fault.
How to level a John Deere S130 mower deck
To level a John Deere S130’s 42-inch mower deck, park it on a truly level surface, set tyre pressures correctly, level the deck side-to-side using the rear lift-link nuts, then set the front of the deck slightly lower than the rear—by 3–6 mm3\text{–}6\text{ mm} (1/8–1/4 in). This slight forward pitch gives a cleaner cut and avoids repeatedly recutting clippings.manuals.deere+1
What you need
-
Flat, hard, level floor or driveway—not a sloped lawn
-
Tape measure or mower-deck levelling gauge, such as Deere AM130907
-
Gloves
-
A suitable spanner/wrench for the adjustment nuts
-
Three pieces of wood, each about 51 mm (2 in.) thick, if using the block method
Before working beneath the deck, park safely: disengage the PTO, set the parking brake, turn off the engine, remove the key, and allow moving parts to stop. Keep the deck wheels off the ground during levelling; they are anti-scalp wheels, not deck supports.manuals.deere+1
Set up the tractor
-
Park the S130 on a hard, level surface.
-
Check that all four tyres are inflated to the pressure shown on their sidewalls. Unequal pressure changes the apparent deck height and can make a correctly adjusted deck cut unevenly.manuals.deere
-
Raise the deck fully, clean accumulated grass from the deck shell if necessary, and check that the blades are not bent or badly worn. A bent blade can make a level deck appear out of adjustment.
-
Lower the deck to the normal levelling/cutting-height setting of about 2.5 in. Deere’s 100-Series procedure uses the 2.5-inch position for this adjustment.manuals.deere+1
Level side-to-side
There are two practical methods: measuring blade tips is generally the most accurate; the three-block method is convenient for setting the deck shell.
Blade-tip method
-
With the engine off and key removed, rotate both outer blade tips so the blades point side-to-side, across the tractor.
-
Measure from the left outer blade tip to the ground.
-
Measure from the right outer blade tip to the ground.
-
The two readings should be within 3 mm (1/8 in.).manuals.deere+1
-
If one side is higher or lower, adjust the rear lift-link levelling nuts:
-
Turn the relevant rear levelling nut clockwise to raise that side of the deck.
-
Turn it counter-clockwise to lower that side.manualshelf
-
Adjust a little at a time, lower the deck back into position if needed, then re-measure until the two blade-tip measurements match within the 1/8-inch tolerance.
Three-block method
-
Raise the deck.
-
Place three equal 2-inch blocks beneath the deck: one under the front centre edge and one under each rear corner/edge.
-
Lower the deck to the 2.5-inch position.
-
Adjust the rear lift-link nuts until the rear deck edges just touch their blocks. The blocks should slide in and out with light resistance rather than being loose or heavily trapped.manuals.deere
Set front-to-rear pitch
Once the deck is level side-to-side, set the front slightly lower.
-
Rotate one blade so a tip points straight forward and the opposite tip points straight rearward.
-
Measure the distance from the front blade tip to the ground.
-
Measure from the rear blade tip to the ground.
-
The front measurement should be 3–6 mm (1/8–1/4 in.) lower than the rear measurement.manuals.deere+1
-
Adjust the nut on the front draft arm:
-
Turning the nut counter-clockwise lowers the front of the deck.
-
Deere’s published procedure specifically calls for turning it counter-clockwise by roughly one to two full turns when needed to achieve the 1/8–1/4-inch forward pitch.manuals.deere+1
-
Recheck side-to-side level after changing the front draft arm, because a substantial front adjustment can slightly affect your previous readings.
Final checks
-
Set the anti-scalp wheels so they are close to the ground at your chosen cutting height but do not normally touch it.manuals.deere
-
Confirm the belt is correctly routed and the deck hangers/lift links are seated properly.
-
Mow a short test strip on level grass. If the cut is still uneven, inspect tyre pressures again, sharpen/balance the blades, and check for worn spindle bearings or a bent deck shell—deck levelling cannot correct those faults.
A useful target at a 2.5-inch setting is: equal left/right blade-tip readings within 1/8 inch, with the front blade tip 1/8–1/4 inch lower than the rear. John Deere lists the AM130907 levelling gauge as the applicable deck-levelling tool for the S130.
Signs your lawn mower deck is out of level
An out-of-level mower deck usually shows up first in the lawn: one side cuts lower, the mower leaves visible stripes or missed grass, or it scalps high spots. But those symptoms can also come from tyre-pressure differences, damaged blades, worn spindles, or a bent deck—so confirm the deck’s measurements before adjusting it.deere+1
Visible mowing symptoms
-
One side of the cut is consistently lower. You may see a long low stripe on either the left or right side of every pass. This usually indicates that the deck is not level side-to-side.
-
Alternating high and low bands after overlapping passes. If each pass leaves a noticeably different height than the adjacent pass, the deck may be tilted left-to-right, producing a stepped or striped appearance rather than an even finish.support.koenigequipment
-
Scalping on gentle rises. Grass is cut extremely short or soil is exposed, especially near the centre of a pass or on minor undulations. Excessive nose-down deck pitch, low anti-scalp wheels, or a deck that is generally set too low can cause this.support.koenigequipment
-
Uncut strips or tufts of grass. A deck that is high on one side—or improperly pitched fore-and-aft—can leave grass standing along the cutting path. Dull blades, excessive ground speed, wet grass, and poor airflow can create the same symptom.fridayparts
-
Uneven grass height between the two rear wheel tracks. This is a classic sign of side-to-side deck error: one blade is cutting closer to the ground than the other.
-
Ragged or torn-looking grass tips. It can occur alongside an unlevel deck, but it more strongly points to dull, damaged, or unbalanced blades. Level the deck only after inspecting blade condition.fridayparts
Pitch-related clues
A mower deck does not need to be perfectly flat front-to-rear. For a John Deere 100-Series tractor such as the S130, the front blade tips should normally be about 1/8–1/4 in. lower than the rear tips.youtube
Quick confirmation check
Before altering the S130’s deck links:
-
Park on a hard, level surface, set the parking brake, switch off the engine, remove the key, and disconnect the spark-plug leads.
-
Inflate all tyres to their specified pressures. Even a slightly soft tyre changes the cutting height and can mimic an unlevel deck.landproequipment
-
Lower the deck to the levelling/cutting-height position.
-
Rotate the outer blades so their tips point side-to-side. Measure each outer blade tip to the floor. A left/right difference greater than 1/8 in. means the deck needs side-to-side adjustment.youtube
-
Rotate a blade so one tip points forward and one rearward. The front tip should be 1/8–1/4 in. lower than the rear.youtube
Rule out look-alikes
A deck can measure correctly yet cut badly. Check these before repeatedly changing the level:
-
Blade damage: A bent blade alters tip height and may cause vibration. Remove and inspect it if you hit a root, kerb, stone, or other obstruction.
-
Worn spindle bearings or bent spindle mounts: Side play, noise, or a blade that sits physically lower than the other indicates a hardware fault rather than a simple levelling problem.youtube
-
Bent deck shell or lift linkage: A hard impact can distort the deck or brackets, so adjustment nuts may not restore a proper cut.youtube
-
Anti-scalp wheels: They should sit just above the surface at the selected cutting height, not carry the deck’s weight.fridayparts
-
Belt and engine speed: A slipping deck belt or mowing at reduced engine speed can reduce blade-tip speed and leave uncut grass, even with a perfectly level deck.
For an S130, the practical standard is equal left/right blade-tip height within 1/8 inch, plus a front edge 1/8–1/4 inch lower than the rear. If your mower meets those dimensions but still leaves a one-sided cut, inspect the blades, spindle assemblies, deck shell, and tyre pressures rather than making further levelling adjustments.
How to check mower tire pressure for a level cut
Check tire pressure before measuring or levelling the mower deck. On a John Deere S130, unequal pressure from left to right changes the tractor’s stance and can produce a visibly uneven cut even if the deck linkage is correctly adjusted. Deere recommends using an accurate low-pressure gauge and matching the correct pressure on each side.deere+1
Correct S130 pressures
For the John Deere S130, the operator’s manual lists:
Check the tyre sidewalls and your own operator’s manual as the final authority, particularly if your tractor has replacement tyres; sidewall markings and specifications should agree with the machine’s approved operating pressure.deere+1
How to check accurately
-
Park on a flat, hard, level surface with the engine off, PTO disengaged, parking brake set, and key removed.
-
Let the tyres cool if you have just mowed or driven a distance. Pressure readings are most consistent when tyres are cold.
-
Remove the valve cap from one tyre and press a low-pressure tyre gauge squarely onto the valve stem. Hold it firmly until the gauge settles.
-
Record all four readings rather than checking only one tyre:
-
Front left: 14 psi
-
Front right: 14 psi
-
Rear left: 10 psi
-
Rear right: 10 psi
-
-
Add air in short bursts if pressure is low. Recheck after each burst.
-
If a tyre is high, briefly press the centre pin in the valve stem to release air, then recheck. Do this gradually because small lawn-tractor tyres change pressure quickly.
-
Refit all valve caps. Then, and only then, measure the mower deck’s side-to-side height and front-to-rear pitch.
Why left-to-right equality matters
It is not enough for the tyres to be “roughly inflated.” The two fronts must match each other, and the two rears must match each other.
For example, if the left rear is 7 psi while the right rear is 10 psi, the left side of the tractor sits lower. That makes the left side of the deck appear low and may leave a low stripe in the grass. Adjusting the deck to compensate would make it wrong once the tyre is restored to 10 psi.
Overinflation is also unhelpful: Deere notes that overinflated tyres can make the tractor bounce, causing a rougher ride and an inconsistent cut.deere
Inspect while checking
Use the tyre-pressure check as a quick condition inspection:
-
Look for punctures, cracking, cuts, bulges, missing valve caps, or a valve stem that leaks when touched.
-
Check for a tyre that repeatedly loses air; that suggests a puncture, leaking valve core, damaged valve stem, or bead/rim leak.
-
Compare tyre size and tread depth across each axle. Mismatched or severely worn tyres can affect deck height.
-
Do not set deck level with a flat or visibly sagging tyre, and do not rely on pressing the tyre with your hand—use a gauge.humber
Best order for a level cut
-
Inspect tyres and set all four pressures.
-
Inspect blades for sharpness, damage, and tight mounting.
-
Put the mower on level ground.
-
Set the deck side-to-side level.
-
Set the deck front about 1/8–1/4 in. lower than the rear.
-
Adjust anti-scalp wheels so they normally sit just clear of the turf.
This sequence prevents the common mistake of “fixing” the deck when the real cause of a one-sided cut is simply unequal tyre pressure.
John Deere S130 anti-scalp wheel height adjustment
John Deere S130 recommended tire pressure
John Deere S130 replacement tire sizes
The standard John Deere S130 replacement tyre sizes are 15 × 6.00–6 for the front and 20 × 10.00–8 for the rear. Use the same size on both sides of each axle to preserve mower-deck level, steering behaviour, and cut quality.shop.deere+1
Correct replacement sizes
John Deere’s M123810 15 × 6.00–6 tyre is listed as fitting the S130, and aftermarket parts listings identify the corresponding rear size as 20 × 10–8.shop.deere+1
Understanding the sizes
-
15 × 6.00–6 means approximately 15 inches overall tyre diameter, 6 inches section width, and a 6-inch rim.
-
20 × 10.00–8 means approximately 20 inches overall tyre diameter, 10 inches section width, and an 8-inch rim.
The last number is the rim diameter, so a front 15 × 6.00–6 tyre cannot fit an 8-inch rear rim, and a rear 20 × 10.00–8 tyre cannot fit a 6-inch front rim.
What to match when buying
Choose a lawn/turf-pattern tyre in the original size, with an equal or greater load rating than the original tyre. For routine mowing, turf tread is the sensible choice because it provides traction while minimising grass damage when turning.
Replace tyres in matched pairs when possible, especially rear tyres. A difference in outside diameter from left to right can make the tractor lean and leave an uneven cut even after the 42-inch deck has been correctly levelled.
After fitting replacement tyres, set cold pressures to:
-
Front: 14 psi / 97 kPa
-
Rear: 10 psi / 69 kPa
Then recheck the mower deck’s side-to-side level and anti-scalp-wheel clearance.
John Deere S130 turf vs bar tires
Best tire chains for John Deere S130 turf tires
For a John Deere S130 with its standard 20 × 10.00–8 rear turf tyres, the best direct-fit choice is the genuine John Deere TY16200 single-ring tyre-chain set. It is specifically listed for 20 × 10–8 and 20 × 10–10 tyres, so it matches the S130’s rear-tyre size.shop.deere+1
Best choice
TY16200 is a pair of chains, designed for the two rear tyres. Deere identifies its compatibility as 20 × 10–8 and 20 × 10–10, and its parts data lists it for the 20 × 10.00–8 tyre size.shop.deere+2
Why these suit turf tyres
Keep the S130’s turf tyres and add chains only when needed. This provides considerably more traction for snow or slick ground while avoiding the year-round lawn damage that bar/lug tyres can cause.
Single-ring chains have cross chains joined in a ring-style pattern across the tread. Compared with basic wide-spaced ladder chains, that pattern can provide more frequent contact points as the tyre rotates, which helps on packed snow and ice. A 2-link ladder chain is also a strong choice when it fits correctly and includes tensioners; it has closely spaced cross chains and is often marketed as a replacement for Deere part TY25229, but verify the stated tyre size rather than buying by part-number cross-reference alone.lowes+1
Before buying
Confirm these four points:
-
Rear size: Your S130 should have 20 × 10.00–8 rear tyres. Check the size moulded into the sidewall—replacement wheels/tyres may differ from standard specification.shop.deere
-
Clearance: With the chains installed, slowly rotate each wheel by hand and check clearance to the fender, axle, transaxle area, brake linkage, and any implement hardware.
-
Pair and tensioners: Buy a matched pair. Add proper rubber chain tensioners if not included; chains must remain tight and centred, not droop or strike the tractor.
-
Use case: Chains are for low-speed traction work—such as light snow pushing or moving over a slick drive—not routine grass mowing.
Installation basics
-
Park on flat ground, engage the parking brake, turn off the engine, remove the key, and disengage the PTO.
-
Lay each chain behind its rear tyre with hooks and fasteners facing outward, following the chain maker’s fitting orientation.
-
Drive or roll the tractor gently onto the chain until the ends can meet over the tread.
-
Connect the inside side chain first, then the outside. Choose the tightest practical link position without forcing the hardware.
-
Install tensioners evenly around the outer side chain if your chain kit includes or requires them.
-
Drive forward a few metres, stop, and retighten. Recheck after the first 10–15 minutes of use.
Do not run chains loose: a thrown cross chain can strike the fender, tyre valve, transaxle, or deck hardware.
Important limits
-
Use chains on both rear wheels, never just one.
-
Avoid paved surfaces whenever possible, especially bare tarmac or concrete; chains accelerate wear and can mark the surface.
-
Remove chains before ordinary lawn mowing. They can tear turf during turns and compact or rut soft ground.
-
Chains improve forward and reverse traction, but they do not eliminate sideways sliding on slopes or ice. Avoid mowing slopes when wet and do not treat chains as a safety upgrade for steep terrain.
-
If fitting chains for a snow blade or frequent snow work, rear ballast or wheel weights may improve traction—but only use weight that is approved for the tractor and attachment setup.
How to install tire chains on a John Deere S130
9. John Deere S130 – DIY or Dealer? Repair Decision Guide
Not every S130 problem should be handled the same way. In general, routine service, visible wear parts, and straightforward deck work are well within reach of a careful owner, while deep electrical diagnostics, hydro replacement, and internal engine repairs are usually better left to a dealer or experienced shop.
John Deere S130 – Good DIY jobs
-
Oil service and Easy Change cartridge replacement; the S130 service sheet lists AUC12916 for the Easy Change system.
-
Fuel filter, air filter, and spark plug replacement.
-
Blade replacement and sharpening.
-
Deck belt replacement and deck leveling.
-
Battery service and cable cleaning.
Dealer-level or advanced jobs
-
Hydrostatic transaxle replacement.
-
Engine internal repairs or valve adjustment; Deere notes valve-clearance service at 200 hours through the dealer.
-
Intermittent wiring faults and advanced PTO diagnostics.
10. John Deere S130 – Parts Needed, Part Numbers, and Identification Information
Buying the right S130 part starts with accurate machine identification. Deere’s manuals state that the dealer needs the Product Identification Number (PIN) and engine serial number for correct parts lookup and service support.
Important information to collect
-
Model: John Deere S130.
-
PIN/serial number from the left side of the frame.
-
Engine serial number from the engine label.
-
Deck size and configuration: 42-inch deck.
-
Existing part number, if still legible on the removed part.
Common John Deere S130 – service parts from the maintenance sheet
11. John Deere S130 – Where to Get Parts Diagrams and Service Manuals
Owners should rely on official Deere documentation first, then use reputable retailer and dealer pages for quick part references. The operator’s manual points owners to JDParts/Deere online ordering and to Deere’s Technical Information Store for parts catalogs and technical manuals.
Useful sources:
-
Deere technical publications: https://techpubs.deere.com/
-
Deere online parts ordering: http://JDParts.deere.com
-
S130 operator’s manual PDF hosted by Lowe’s: https://pdf.lowes.com/productdocuments/d86bb92f-3476-489e-a70f-88887119b2c9/42705454.pdf
12. John Deere S130 – How to Locate the Model Number, Serial Number, and Engine Number
This is one of the most important practical steps when buying parts. Deere’s operator’s manual states that the machine PIN is located on the left side of the frame, and the engine serial number is shown on the engine itself.
Step-by-step
-
Park the tractor safely on level ground and remove the key.
-
Stand on the left side of the tractor and inspect the frame near the seat/chassis area for the machine PIN label.
-
Record the complete PIN exactly as shown, including all letters and numbers.
-
Locate the engine serial number label on the engine and record it separately.
-
Keep both numbers in your maintenance log and bring them when buying parts in-store or online.
13.John Deere S130 – OEM vs Aftermarket Parts
The OEM versus aftermarket decision is mostly about fit certainty, performance consistency, warranty comfort, and price. Deere recommends John Deere quality parts and lubricants through its dealer network, which simplifies matching and reduces the chance of fitment errors.
When OEM is usually the safer choice
-
PTO clutch and electrical components.
-
Deck belts and drive belts where exact dimensions matter.
-
Structural or safety-related deck and steering parts.
-
In-warranty repairs or where a dealer may need to support a claim.
When aftermarket can make sense
-
Blades, filters, and batteries from reputable brands.
-
Older machines out of warranty where cost control matters more.
-
Emergency local purchases where OEM is not immediately available.
Practical advice
Use OEM or premium aftermarket only, and always verify the cross-reference to the exact S130 part number. Cheap belts and low-grade blades may fit poorly, vibrate, wear quickly, or reduce cut quality compared with known OEM-spec parts.
14. John Deere S130 – Where to Buy Parts Online and In Physical Stores
For S130 owners in the USA and Canada, the best buying strategy is to compare one official Deere source with one dealer source and one large retailer source. That gives you a balance of fit confidence, price, and stock availability.
Recommended online or dealer/retail URLs
-
John Deere Parts / JDParts: http://JDParts.deere.com
-
John Deere Technical Publications / manuals: https://techpubs.deere.com/
-
Lowe’s S130 parts and maintenance reference PDF: https://pdf.lowes.com/productdocuments/17e8f435-4f40-4db2-a446-fa6628d71946/42703172.pdf
Physical store guidance
-
John Deere dealers are best for exact PIN-based parts matching, warranty-sensitive jobs, and technical advice.
-
Big-box retailers may be convenient for blades, belts, oil, and filters, especially if the listed item numbers match the S130 maintenance sheet.
-
Local small-engine parts counters can be useful for batteries, spark plugs, and common tune-up items, but always verify exact fit before purchase.
15. John Deere S130 – Step-by-Step Fitting Guide for Common Parts
For inexperienced owners, the safest approach is to start with the most common wear parts: blades, filters, and deck belts. These jobs teach you the machine layout and can solve a large share of real-world S130 problems without opening the engine or transmission.
John Deere S130 – Blade replacement
-
Park safely, remove key, disconnect negative battery cable, and wear gloves.
-
Lower the deck to the lowest setting or remove it for easier access.
-
Wedge a block of wood between the blade and deck shell to stop rotation.
-
Remove the blade bolt and note hardware order.
-
Install the new blade in the same orientation as the old one; incorrect orientation will ruin cut quality and can be unsafe.
-
Tighten to the manual’s torque specification.
-
Repeat on the second blade and test for smooth operation.
John Deere S130 – Deck belt replacement
-
Lower or remove the mower deck.
-
Take a photo of belt routing before removal.
-
Relieve tension from the idler and remove the old belt.
-
Confirm the new belt is the correct GX20072 or verified equivalent.
-
Route the belt according to the diagram and make sure it sits correctly in each pulley groove.
-
Reapply tension, reinstall guards, and test PTO engagement at low throttle first.
John Deere S130 – Air and fuel filter replacement
-
Replace the air filter element with GY21435 if dirty or restricted, especially in dusty mowing conditions.
-
Replace fuel filter GY20709 at the yearly/50-hour interval or sooner if contaminated.
-
Check hoses for cracks when replacing the filter.
16. John Deere S130 – Maintenance to Prevent Repeat Problems
Preventive maintenance is the best way to stop the same faults from returning. Deere’s maintenance schedule emphasizes lubrication, blade condition, filters, and regular inspection of deck and axle points, and those recommendations directly target the most common S130 complaint areas.
Focus areas
-
Starting reliability: keep battery charged, terminals clean, and fuel fresh.
-
Cut quality: sharpen or replace blades regularly and keep deck level.
-
Heat management: clean engine intake screens, cooling fins, deck top, transmission area, and fuse/battery side areas often.
-
Drive performance: inspect drive and deck belts before they fail.
-
Fire prevention: remove dry debris from muffler, deck, wiring, and hydro areas before storage.
17. John Deere S130 – Maintenance Schedule and Seasonal Checklist
The S130 maintenance reminder sheet gives a straightforward interval plan. It lists lubrication after 8 hours, deck and front axle lubrication every 25 hours, and major annual or 50-hour tasks such as oil and filter, air filter service, fuel filter replacement, and blade service.
After 8 hours
-
Lubricate mower spindles and pivot points.
-
Check mower deck spindle brakes on manual PTO models; this note appears on the sheet even though the S130 itself uses electric PTO, so use the model-appropriate instructions from the operator’s manual for your machine.
-
Lubricate front axle pivot, axle spindles, and wheel bushings.
Every 25 hours
-
Lubricate mower spindles and pivot points.
-
Lubricate front axle pivot, axle spindles, and wheel bushings.
Yearly or every 50 hours
-
Change engine oil and replace filter.
-
Clean or replace air filter and precleaner.
-
Replace fuel filter.
-
Sharpen or replace mower blades.
-
Check or replace mower drive belt.
Every 200 hours
-
Check and adjust valve clearance through a dealer.
John Deere S130 – Seasonal checklist
Spring
-
Fresh fuel, battery check, oil service, blade inspection, belt inspection, deck leveling.
Mid-season
-
Clean cooling system, recheck belt wear, verify cut quality, inspect hydro fan and transmission area.
Fall / storage
-
Clean all debris, stabilize fuel if storing with fuel, maintain battery, and store the tractor dry.
18. John Deere S130 – Repair, Upgrade, or Replace?
This decision depends on the type of failure and the overall condition of the tractor. Wear-part problems on an otherwise solid S130 almost always justify repair, while repeated hydro, engine, and deck-structure problems on a worn machine may point toward replacement.
Repair if
-
The problem is limited to blades, belts, battery, filters, switches, or deck adjustments.
-
The engine and hydro are fundamentally sound.
-
The frame and deck shell are not badly rusted or cracked.
Upgrade if
-
The machine works well, but you want better mulching, bagging, or seasonal versatility through accessories such as the mulch cover listed on the S130 sheet.
Replace if
-
Hydro drive is failing internally and the tractor has high hours.
-
Engine has major internal faults and the deck or chassis also needs significant work.
-
Your property or workload has outgrown a 42-inch residential lawn tractor.
19. John Deere S130 – Troubleshooting FAQ
1. Why does my John Deere S130 do absolutely nothing when I turn the key?
This is usually a no-crank electrical problem rather than a fuel problem. Start by checking battery voltage, battery terminal condition, and the frame ground connection because corrosion and low battery charge are the most common causes. Then confirm the PTO switch is OFF and the brake pedal is fully depressed, since the interlock system will block cranking if the tractor does not see the correct inputs.
2. Why do I hear one click but the engine still will not turn over?
A single click often means the starter solenoid is trying to work but the battery cannot deliver current under load, the cable connection has too much resistance, or the starter/solenoid contacts are faulty. Check battery voltage during crank, then clean and tighten both battery cables and the ground point before assuming the starter has failed. If voltage and cables are good, test the solenoid and starter circuit more directly.
3. My S130 cranks strongly but will not start. What should I check first?
Check fuel freshness first, then fuel flow through the filter, then spark at both cylinders. On tractors that have sat for weeks or months, old fuel and restricted carburetor jets are extremely common. The maintenance sheet lists fuel filter GY20709, so replacing that early in the diagnostic process is sensible and inexpensive.
4. Why does my S130 only start with the choke on?
That usually points to a lean fuel mixture caused by varnish or debris in the carburetor’s main or idle circuit. The choke is artificially enriching the mixture enough for the engine to run. Cleaning the carburetor properly is usually more effective than repeatedly adding fuel treatments once the blockage exists.
5. Why does it start, run for a few minutes, then die and restart later?
This hot-failure pattern often indicates ignition coils that fail when hot, a fuel-shutoff solenoid that stops operating, or overheating from blocked cooling fins. Test spark immediately after the shutdown while the engine is still hot; if spark disappears only then, coil failure becomes the main suspect. Also inspect and clean the intake screens and cooling fin areas under the shrouds.
6. Why is my battery always dead after winter storage?
Small batteries discharge over time, especially in cold climates or when stored without a maintainer. The best practice is to remove the battery or keep it on a smart maintainer during off-season storage, and to clean terminals before the season starts. If a charged battery still drops quickly, it may simply be aging out and need replacement.
7. Can bad fuel really cause that many problems on the S130?
Yes. Deere specifically warns that stale, contaminated, or improper fuel can damage the engine and fuel system and may not be covered by warranty. In practical terms, stale fuel leads to poor starting, rough running, carburetor varnish, and fuel-filter contamination. Fresh fuel and proper storage habits prevent many spring no-start complaints.
8. Why does my S130 cut unevenly from one side to the other?
The first things to check are tire pressure and deck side-to-side level, because both directly affect blade height relative to the ground. Deere’s manual states the outside blade tips should not differ by more than 1/8 inch side to side. Blade damage or one worn spindle can also create an uneven cut if the deck adjustment is correct.
9. Why does the lawn look torn and brown after mowing?
Brown tips usually mean the grass is being torn instead of cut cleanly. Deere’s deck setup instructions note that incorrect pitch can cause double cutting and brown tips, while dull blades also shred the grass rather than slicing it. The fix is usually sharpening or replacing the blades and confirming the front of the deck is 1/8–1/4 inch lower than the rear.
10. Why does my S130 leave strips of uncut grass between passes?
Striping errors usually come from blade wear, poor deck airflow, incorrect deck pitch, or driving too fast for conditions. Wet or overly tall grass also overwhelms airflow in a 42-inch residential deck. Check blade condition first, then deck level and underside cleanliness, and reduce ground speed in heavy grass.
11. Do I really need to run at full throttle when mowing?
Yes, in most mowing conditions. Full throttle gives the blade tip speed and airflow the deck was designed around, which improves cut quality and discharge performance. Reducing throttle may sound gentler, but it often creates tearing, clumping, and extra engine strain under load.
12. Why does my tractor vibrate badly when I engage the blades?
That usually points to a bent blade, rough spindle bearing, or a belt running incorrectly or slapping against a guide. Start by inspecting both blades for impact damage, then spin each spindle by hand and feel for roughness or play. Also inspect the deck belt and compare routing with the official diagram.
13. Can I keep mowing if there is only a small amount of vibration?
A slight change in feel after blade sharpening may be minor, but a new vibration should always be investigated. Continued use can damage spindle bearings, pulleys, and the deck shell over time, especially if the cause is an imbalanced blade or belt issue. It is better to stop early than to turn a blade problem into a spindle replacement.
14. Why does my deck belt keep slipping or jumping off?
Common causes are a worn belt, incorrect belt routing, weak idler tension, seized idler pulley bearings, or damaged belt guides. The S130 maintenance sheet identifies GX20072 as the deck belt, so confirm you are using the correct belt before troubleshooting anything else. Also check for a bent bracket or guard if the problem began after an impact or prior repair.
15. My S130 loses drive power after 20–30 minutes. What is happening?
Heat-related hydro drive issues are common on small hydrostatic tractors when the cooling fan is damaged, the drive belt slips, or debris packs around the transmission. Inspect the hydro cooling fan and clean the transmission area thoroughly. If external components are good and the issue repeats only when hot, internal hydro wear becomes more likely.
16. Why does the S130 move weakly uphill but seem OK on flat ground?
This often points to early hydro weakness, a slipping drive belt, or a machine being worked near its design limits. Confirm that the bypass control is fully engaged for normal driving and inspect the belt and hydro fan before assuming the transaxle is bad. Also remember the S130 is a residential tractor, not a heavy tow or steep-slope machine.
17. What does hydro whine mean on this tractor?
Some hydro noise is normal, especially under load, but increasing whine combined with poor movement can mean overheating, belt slip, air in the system, or internal wear. Clean the hydro area, inspect the fan, check the belt, and perform the purge procedure if appropriate. Persistent whine with weak drive usually means deeper wear than routine maintenance can correct.
18. Why will the mower blades not engage even though the engine runs fine?
That usually narrows the fault to the PTO switch, PTO clutch, fuse, wiring, or an interlock condition that blocks engagement. Check battery voltage and fuses first, then test the PTO switch and look for voltage at the PTO clutch connector when the switch is turned on. Voltage present with no engagement usually points to a failed clutch coil.
19. Why does the engine die when I turn the PTO on?
This often means the safety logic is seeing an invalid condition, such as a seat switch not confirming operator presence, or there is an electrical issue causing the engine to lose ignition feed when PTO is applied. Inspect the seat switch and connectors first, since they are exposed to vibration and moisture. Also check for rubbed-through wiring under the seat or near the PTO harness.
20. Can a bad seat switch really stop the machine from working properly?
Yes. The S130 uses interlock logic to control safe operation, and the seat switch plays a major role in whether the engine can continue running under certain conditions. A failing or misadjusted seat switch can cause shutdowns when releasing the brake, engaging the PTO, or shifting the operator’s weight on the seat.
21. Why do my fuses keep blowing?
Repeated blown fuses mean there is likely a short circuit, damaged wiring insulation, or a component drawing excessive current. Replacing the fuse without finding the cause usually leads to another failure. Inspect harness sections near sharp metal edges, moving linkages, and hot engine components first because those areas are common rub points.
22. Is it safe to pressure wash the S130?
Light washing is fine, but direct high-pressure spray into spindle areas, electrical connectors, the PTO clutch, and bearings can shorten component life. Deere emphasizes machine cleanout and debris removal, but it is wise to use air or gentle rinsing around sensitive parts. Avoid forcing water into places that are supposed to stay dry or only lightly contaminated.
23. Why is there oil around the engine area?
Oil residue can come from the oil service point, a loose filter system, minor seepage, or overfilling. Deere also warns that oil on the machine becomes a collection point for grass and debris and raises fire risk. Clean the area first, then recheck after running to find the actual leak path rather than guessing from old residue.
24. Why is there fuel smell around the tractor?
Fuel odor usually means seepage at the filter, hose, carburetor, or tank cap area, and it should be investigated immediately. Fuel leaks are not only a running problem but also a fire hazard when mixed with hot muffler or engine surfaces. Inspect hoses, clamps, filter body, and carburetor joints carefully with the engine off.
25. How often should I replace the blades on an S130?
That depends on use, but Deere’s maintenance sheet calls for sharpening or replacing mower blades yearly or every 50 hours. Sandy soil, hidden debris, and rough mowing conditions shorten blade life significantly. Replace rather than sharpen if the blade is bent, badly thinned, cracked, or damaged around the center hole.
26. How often should I replace the deck belt?
There is no single universal lifespan because wear depends on hours, heat, alignment, and operating conditions. Deere’s sheet says to check or replace the mower drive belt at the yearly or 50-hour interval. Replace sooner if the belt is cracked, glazed, frayed, stretched, or repeatedly coming off.
27. What parts should I keep in stock if I use my S130 regularly?
A practical owner kit includes spare blades, one deck belt, one fuel filter, one air filter, and the correct oil service parts because those solve many common in-season failures. If you mow a large property, also keeping spark plugs and a battery maintainer on hand reduces downtime. These are all relatively low-cost compared with losing peak mowing weeks.
28. Do I need the serial number every time I buy parts?
Strictly speaking, not for every simple wear item if you already know the exact part number, but it is still the safest habit. Deere’s manuals state the dealer needs the serial number or PIN and engine serial number for parts support and service information. Serial number use becomes especially important when production changes affect compatibility.
29. Where exactly is the PIN on the S130?
The operator’s manual states that the machine Product Identification Number is located on the left side of the frame. Clean the area if needed and record the full number exactly. Also record the engine serial number from the engine label because deck and chassis parts may use the tractor PIN while engine parts often require engine identification.
30. Should I buy OEM or aftermarket parts for my S130?
For critical components such as belts, PTO parts, and safety-sensitive items, OEM is usually the safer choice because fit and function are more predictable. For wear items such as blades and filters, reputable aftermarket can work well if it clearly cross-references the S130’s OEM part number. The real risk comes from low-grade parts sold only by generic dimensions or vague “fits many models” descriptions.
31. What online stores are best for S130 parts?
A balanced approach is to use Deere’s own parts system for exact numbers and diagrams, then compare with a local dealer or large retailer for stock and price. Good starting points are JDParts for OEM lookup, Deere Tech Publications for manuals, and retailers such as Lowe’s for common maintenance items when the item number and part number match the official S130 reference sheet.
32. Should I buy from a dealer or a big-box store?
Dealers are best when you need exact PIN-based fitment, warranty support, or technical advice about assemblies and diagrams. Big-box stores can be convenient for fast access to oil, blades, filters, and belts, especially if the S130 reference sheet clearly matches what is on the shelf. The safest approach is to use dealer help for anything uncertain and retail convenience for verified routine parts.
33. Can I do my own deck leveling without special tools?
Yes. Deere’s manual provides a block method and a blade-tip measurement method using a level surface, and an optional leveling gauge is available if you want extra precision. For most owners, careful measuring and patience are enough. Tire pressure must be correct before any deck-level adjustment or your measurements will be misleading.
34. What maintenance matters most if I only have time for a few tasks?
Focus on fresh fuel, battery condition, blade condition, deck cleanliness, and air/cooling cleanliness first because those affect the most common S130 problems directly. If you add one more task, inspect the belts before peak season. These few actions prevent a large share of no-start, poor-cut, and overheating complaints.
35. When should I stop repairing and replace the tractor?
If the S130 has simultaneous hydro weakness, major engine problems, and significant deck or chassis deterioration, replacement can make more sense than stacking repairs.