
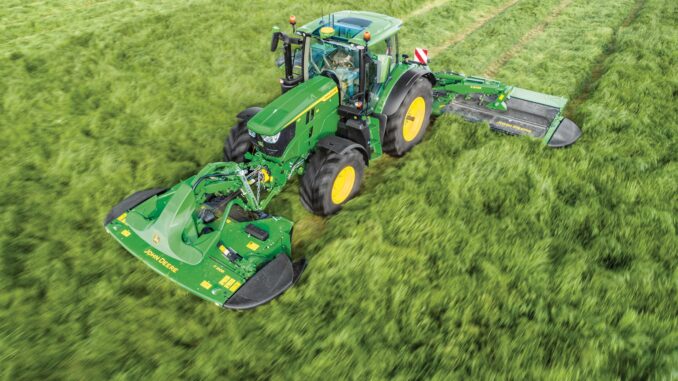
The John Deere 7520 is a large articulated four-wheel-drive farm tractor built for demanding tillage, heavy draft work and high-horsepower PTO applications. It is very different from a modern compact tractor or lawn machine: its diesel engine, articulation joint, drivetrain, hydraulics and brakes require methodical servicing and a realistic approach to DIY repairs.
This John Deere 7520 repair guide covers common faults, maintenance priorities, parts identification, practical repair boundaries, manuals and diagrams, and a detailed troubleshooting FAQ. It is written for owners who are comfortable carrying out inspections and routine service, while recognising when a heavy repair should go to an experienced agricultural tractor technician.
General Overview of the John Deere 7520
The John Deere 7520 was part of Deere’s original high-horsepower four-wheel-drive tractor range. It uses an articulated chassis, a six-cylinder diesel engine, hydrostatic power steering, hydraulic wet disc brakes and a 1,000-rpm rear PTO.
Unlike a conventional row-crop tractor, the 7520 turns at the center articulation joint. That joint, along with the front and rear driveline assemblies, is central to both steering and power delivery. Wear in the articulation pivot, driveline joints, axle components or steering system can create costly problems if ignored.
Key John Deere 7520 systems include:
-
Six-cylinder John Deere diesel engine and fuel system
-
Engine cooling system, radiator and fan-drive components
-
Articulated four-wheel-drive chassis and center pivot
-
Transmission, differential and final-drive assemblies
-
Hydraulic system for steering, remotes and three-point equipment
-
Wet-disc braking system
-
12-volt electrical and charging system
-
Rear 1,000-rpm PTO system
-
Cab heating and air-conditioning equipment on equipped tractors
Common service and repair parts owners may need include:
-
Engine oil filter
-
Fuel filters
-
Air-cleaner elements
-
Hydraulic and power-steering filters
-
Engine belts
-
Radiator hoses and thermostat
-
Alternator and starter components
-
Battery cables and battery isolator parts
-
Hydraulic hoses and couplers
-
PTO seals and driveline seals
-
Brake components
-
Articulation-joint bushings, pins and seals
-
Steering-cylinder seals and hydraulic fittings
John Deere 7520 Troubleshooting Approach
Start diagnosis with the symptom rather than replacing parts based on guesswork. A hard-starting 7520, for example, may have a fuel supply problem, weak batteries, poor cable connections, air entering the system, a failing starter or an engine mechanical issue. Replacing the starter first may not solve the fault.
The main fault categories on a John Deere 7520 are:
-
No-start, slow-crank and hard-start problems
-
Rough running, low power and excessive smoke
-
Overheating, coolant loss and oil leaks
-
Hydraulic steering or remote-hydraulic problems
-
Transmission, traction and driveline faults
-
Brake and PTO problems
-
Vibration, clunks and articulation-joint wear
-
Electrical charging, lighting and gauge faults
Before beginning repairs, park on level ground, lower all equipment, engage the parking brake, shut down the engine and remove the key. Support raised components with approved stands; never rely on hydraulic cylinders, a jack or loader equipment alone.
John Deere 7520 Starting Issues
A John Deere 7520 that will not start, cranks slowly or starts only after extended cranking needs attention before it becomes a fuel-system or starter failure. Long cranking can overheat starter components and drain the battery system.
Common causes include:
-
Weak or mismatched batteries
-
Corroded battery terminals or poor ground connections
-
Loose starter cables
-
Failing starter motor or solenoid
-
Fuel shutoff not opening fully
-
Plugged fuel filters
-
Water or contamination in diesel fuel
-
Air leaks on the fuel-supply side
-
Poor cold-weather fuel quality
-
Low compression or injector problems
Basic checks:
-
Check both batteries, cables and grounds before condemning the starter.
-
Clean and tighten battery terminals, especially the chassis and engine ground connections.
-
Confirm the fuel shutoff is operating and fuel is reaching the filters.
-
Drain water from the fuel system if the tractor has been stored or fuel quality is uncertain.
-
Replace restricted filters and bleed the fuel system according to the operator’s manual.
-
If it still cranks normally but will not fire, have injection and compression faults checked professionally.
John Deere 7520 Running and Power Problems
Loss of power, black smoke, uneven running or a tractor that stalls under load usually points to fuel, air, exhaust or engine-condition problems. Do not continue heavy tillage work while the engine is smoking heavily or losing power.
Common causes include:
-
Restricted primary or secondary fuel filters
-
Dirty air-cleaner elements
-
Collapsed or restricted fuel lines
-
Water-contaminated diesel
-
Air entering the fuel system
-
Injector faults
-
Incorrect injection-pump timing
-
Turbocharger or intake restriction, where fitted
-
Exhaust restriction
-
Engine overheating
-
Internal engine wear
Basic checks:
-
Inspect the air-cleaner restriction indicator if fitted.
-
Check the intake piping and air-cleaner housing for loose clamps or damaged hoses.
-
Replace fuel filters if service history is unknown.
-
Inspect the fuel tank, sediment bowl and supply line for debris or water.
-
Check coolant level and radiator cleanliness before working the tractor again.
-
Arrange professional testing if there is persistent blue smoke, heavy blow-by or low power after basic service.
Vibration and Noise on the John Deere 7520
A new vibration, clunk or driveline noise should be treated as an urgent inspection item. Because the John Deere 7520 has an articulated chassis and high-torque drivetrain, a worn universal joint, loose wheel hardware or articulation component can quickly damage more expensive assemblies.
Common causes include:
-
Loose wheel nuts or damaged wheel centers
-
Worn driveshaft universal joints
-
Driveline imbalance
-
Worn articulation-pivot pins or bushings
-
Loose engine or transmission mounting hardware
-
Differential or final-drive damage
-
Worn PTO driveline components
-
Failing bearings
-
Damaged tires or uneven tire pressures
Basic checks:
-
Park the tractor safely and inspect all tires for damage, low pressure and sidewall separation.
-
Check wheel-nut torque against the correct specification.
-
Inspect visible universal joints for excessive play, missing grease or failed seals.
-
Check the center articulation area for loose hardware, leaking seals and abnormal movement.
-
Listen for whether the noise changes with engine speed, ground speed, steering angle or PTO engagement.
-
Stop operation and seek professional inspection if the noise comes from the transmission, final drive or articulation pivot.
John Deere 7520 Overheating and Leaks
Overheating can damage head gaskets, cylinder liners, pistons and bearings. A small coolant leak, blocked radiator core or loose fan belt can become a major engine repair when the tractor is used under a heavy load.
Common causes include:
-
Low coolant level
-
External coolant leaks
-
Plugged radiator or oil cooler
-
Dirty grille screen
-
Loose, glazed or damaged fan belt
-
Failed thermostat
-
Weak radiator cap
-
Water-pump problems
-
Collapsed coolant hose
-
Internal engine or head-gasket fault
Basic checks:
-
Allow the engine to cool completely before opening the cooling system.
-
Check coolant level and inspect hoses, clamps, radiator seams and the water pump for leaks.
-
Clean the grille, radiator and cooler stack using low-pressure air or water.
-
Inspect belt condition and tension.
-
Check engine-oil appearance for signs of coolant contamination.
-
Stop using the tractor if coolant is being pushed out, oil appears milky or the engine repeatedly overheats.
John Deere 7520 Transmission and Drive Problems
The 7520’s driveline, transmission, differentials and axle systems handle substantial torque. Slipping, poor pull, grinding, intermittent movement or metal noise should never be ignored.
Common causes include:
-
Incorrect transmission or hydraulic oil level
-
Contaminated oil or restricted filter
-
Clutch adjustment or clutch wear
-
Transmission linkage problems
-
Internal gear or bearing wear
-
Differential or final-drive damage
-
Low hydraulic pressure
-
PTO clutch or engagement-system problems
-
Driveline universal-joint failure
-
Tire mismatch or major differences in rolling circumference
Basic checks:
-
Check fluid level using the correct procedure and tractor position.
-
Look for leaks around axle seals, PTO seals, hydraulic lines and transmission housings.
-
Confirm shift linkages move fully and are not obstructed.
-
Check whether the problem occurs in every gear or only one range.
-
Note whether the fault changes with steering angle or PTO engagement.
-
Stop operation if there is grinding, metal debris in oil, repeated gear jump-out or loss of traction.
John Deere 7520 Electrical Problems
Electrical faults are often caused by poor connections rather than major component failure. On an older agricultural tractor, cable corrosion, weak grounds, worn switches and aging insulation are common.
Common causes include:
-
Loose battery terminals
-
Corroded grounds
-
Weak batteries
-
Alternator failure
-
Damaged alternator belt
-
Faulty ignition switch
-
Starter-solenoid problems
-
Blown fuse or corroded fuse holder
-
Damaged wiring harness
-
Poor gauge or sender connections
Basic checks:
-
Inspect battery terminals and both main ground paths.
-
Check charging-belt condition and tension.
-
Test battery voltage and charging voltage with a multimeter.
-
Check fuses and connectors for corrosion or heat damage.
-
Wiggle-test suspect wiring only with the engine off.
-
Use a wiring diagram before bypassing any switch or circuit.
DIY or Dealer Repair Guide
The practical repair line on a John Deere 7520 is determined by weight, system pressure and the cost of getting a repair wrong. Routine service, external adjustments and straightforward component replacement are realistic for a capable owner. Internal engine, hydraulic, transmission, axle and articulation repairs often require lifting equipment, measuring tools, factory procedures and experience.
Good DIY Jobs
-
Changing engine oil and filters
-
Replacing fuel filters and bleeding the fuel system
-
Servicing the air cleaner
-
Replacing belts, hoses and common clamps
-
Cleaning the radiator and cooler stack
-
Replacing batteries and battery cables
-
Repairing lights, switches and simple wiring connections
-
Greasing pivots, driveline joints and linkage points
-
Replacing accessible hydraulic hoses
-
Inspecting tire pressure and wheel hardware
-
Replacing basic gauges or sending units
Advanced DIY or Dealer Jobs
-
Injector-pump timing and injection-system calibration
-
Injector removal and testing
-
Engine internal repairs
-
Clutch replacement
-
Transmission removal or overhaul
-
Differential and final-drive repair
-
Hydraulic-pump replacement and pressure diagnosis
-
Brake-pack repair
-
Articulation-pivot rebuilding
-
Steering-cylinder overhaul
-
PTO clutch and gearbox repairs
-
Cab air-conditioning repair
Skill Level Guide
-
Beginner: inspections, lubrication, fluid checks, battery care and radiator cleaning
-
Intermediate: filters, belts, hoses, basic electrical diagnosis and fuel-system bleeding
-
Advanced: hydraulic testing, steering-cylinder repair, linkage adjustment and driveline repairs
-
Dealer or specialist: engine overhaul, injection-pump work, brake packs, transmission, axles and articulation rebuilds
John Deere 7520 Parts Needed Before Ordering
Always identify the tractor correctly before ordering parts. John Deere 7520 tractors were produced over multiple years, and serial-number breaks can affect component design, part numbers and service procedures.
Gather the following information:
-
Full tractor model: John Deere 7520
-
Product Identification Number or tractor serial number
-
Engine model and engine serial number
-
Transmission configuration
-
PTO configuration
-
Cab or open-station specification
-
Original part number when replacing an existing component
-
Measurements for belts, hoses and seals if the original number is unreadable
OEM parts are usually the best choice for belts, hoses with unusual routing, safety-critical parts, seals, brake components, hydraulic parts and anything that must match an original design precisely.
Aftermarket parts can be suitable for batteries, filters, selected hoses, lamps, gauges and some wear components when the supplier provides a verified cross-reference. Avoid buying a part solely because a listing says “fits John Deere 7520”; compare the OEM number and check serial-number applicability.
John Deere 7520 Parts Diagrams and Manuals
Use parts diagrams before disassembly. They show how components stack together, reveal hidden washers or seals, and help confirm whether a part is retained by a clip, bolt, snap ring or internal fastener.
Useful sources include:
-
John Deere Technical Publications for official operator, service and parts literature
-
John Deere Parts Catalog for model lookups, exploded diagrams and current part-number information
-
John Deere 7520 tractor parts at Green Farm Parts for maintenance-oriented parts guidance
-
John Deere 7520 parts at Yesterday’s Tractors for replacement and restoration-oriented parts categories
-
All States Ag Parts for used, remanufactured and aftermarket agricultural tractor parts
The operator’s manual is best for routine maintenance, lubrication, controls and normal operating checks. A technical or service manual is needed for specifications, torque values, test procedures, component teardown and adjustment instructions. The parts catalog is essential for correct exploded diagrams and serial-number-specific part identification.
How to Locate John Deere 7520 Numbers
The model and serial numbers matter because older tractors may have production changes that are not obvious from appearance. A parts supplier or dealer can identify the correct component much more accurately when you provide the full PIN or serial number.
-
Park the tractor safely, shut off the engine and clean dirt from identification-plate areas.
-
Find the tractor identification plate or serial-number stamping on the tractor frame or transmission area.
-
Record the number exactly, including letters, prefixes and suffixes.
-
Locate the engine identification information on the engine block or engine data plate.
-
Photograph the plate and the failed component before ordering parts.
If an identification plate is missing or unreadable, a dealer or tractor specialist may be able to help identify the tractor from casting numbers, engine details and physical configuration. Do not rely on paint color, decals or a previous owner’s description alone.
Buying John Deere 7520 Parts
A smart parts-buying strategy starts with the original part number, then compares reputable OEM and aftermarket options. For an older high-horsepower tractor, the lowest-priced option can become expensive if it does not fit, fails prematurely or causes damage to another component.
-
Online: Use the OEM part number, confirm serial-number breaks and compare reputable suppliers before ordering
-
John Deere dealer counter: Best for hydraulic, brake, PTO, driveline and serial-specific components
-
Agricultural parts specialist: Useful for remanufactured starters, alternators, radiators, steering components and used major parts
-
Retail stores: Suitable for broadly specified batteries, oils, grease and certain filters when the cross-reference is confirmed
Useful online starting points include:
John Deere 7520 Engine Oil and Filter Change
Regular oil and filter changes protect the engine from contamination, soot buildup and wear. Complete the work only when the engine is warm enough for oil to drain well but cool enough to work around safely.
-
Park on level ground, lower implements, apply the parking brake and shut off the engine.
-
Place a drain pan large enough for the engine’s oil capacity beneath the drain plug.
-
Remove the drain plug carefully and allow oil to drain completely.
-
Remove the old oil filter and clean the filter-mounting surface.
-
Lubricate the new filter gasket with clean engine oil and install the filter by hand according to its instructions.
-
Refit the drain plug, refill with the correct oil type and quantity, start briefly, then recheck the oil level and inspect for leaks.
John Deere 7520 Fuel Filter Service
Fuel-filter maintenance helps prevent hard starting, loss of power and injection-system damage. Keep the work area clean because dirt introduced during fuel service can create new problems.
-
Shut off the engine and close the fuel supply if the system has a shutoff valve.
-
Clean the filter housing and nearby fuel lines before opening the system.
-
Remove the old filter or filters and inspect the fuel for water, rust or debris.
-
Install the correct replacement filters and new seals as required.
-
Reopen the fuel supply and bleed the system using the correct manual procedure.
-
Start the engine, check for leaks and confirm it runs smoothly before returning to work.
John Deere 7520 Air Cleaner Service
A restricted air cleaner reduces power, increases fuel use and can contribute to black exhaust smoke. Do not run the tractor without the air-cleaner assembly installed.
-
Shut off the engine and open the air-cleaner housing carefully.
-
Remove the outer element without knocking dirt into the intake tract.
-
Inspect the element for tears, crushed pleats, damaged seals or excessive dirt.
-
Clean the housing with a clean lint-free cloth and inspect the intake piping.
-
Replace the element if it is damaged, contaminated or beyond the recommended service condition.
-
Refit the cover securely and confirm all clamps and intake connections are tight.
John Deere 7520 Cooling-System Service
Cooling-system care prevents overheating during high-load work. Clean airflow through the radiator and cooler stack is just as important as the coolant level.
-
Allow the engine to cool fully before checking the radiator or coolant reservoir.
-
Inspect the grille, screens, radiator core and oil cooler for chaff, dust and mud.
-
Blow debris outward from the engine side using regulated low-pressure air.
-
Check coolant level, hose condition, clamps, radiator cap and belt condition.
-
Replace damaged hoses, weak clamps or worn belts before heavy work.
-
Recheck coolant level after the tractor reaches operating temperature and inspect for leaks.
John Deere 7520 Battery and Cable Maintenance
The 7520’s starting system depends on clean, high-capacity battery connections. A poor ground cable can mimic a weak starter or charging-system failure.
-
Shut off the tractor and disconnect the negative cable first.
-
Inspect battery cases for swelling, cracks, acid leakage or loose hold-downs.
-
Clean terminals and cable ends with an approved battery-terminal cleaner.
-
Inspect the main positive cable, starter connection and ground straps for corrosion or heat damage.
-
Reconnect positive cables first and negative cables last.
-
Test charging voltage after startup if the tractor has been experiencing slow cranking or battery discharge.
Preventing John Deere 7520 Problems
Regular maintenance is far cheaper than repairing an engine, transmission or hydraulic system after damage has developed. The most important habit is to inspect the tractor before a long day of work rather than waiting for a warning gauge or a serious failure.
Focus on these areas:
-
Starting reliability: keep batteries charged, terminals clean and fuel filters serviced
-
Engine life: maintain oil level, oil quality, cooling-system condition and clean intake airflow
-
Cooling performance: clean the radiator and cooler stack before heavy work
-
Hydraulic reliability: inspect hoses, fittings and fluid levels before operating implements
-
Driveline life: grease universal joints and inspect for looseness or missing seals
-
Articulation safety: inspect the center pivot for wear, leaks and abnormal movement
-
Electrical reliability: repair damaged wiring before it creates intermittent faults
-
Brake and PTO safety: investigate poor braking, PTO noise or engagement problems immediately
John Deere 7520 Maintenance Schedule
Always use the operator’s manual for the exact service intervals, fluid specifications and lubrication points for your tractor’s serial number and equipment. The schedule below is a practical owner checklist based on the types of routine service required by older high-horsepower agricultural tractors.
Daily or Before Each Use
-
Check engine-oil level
-
Check coolant level only when the engine is cool
-
Check fuel level and drain water or sediment if applicable
-
Inspect for oil, coolant, fuel and hydraulic leaks
-
Inspect tires, wheels and wheel hardware
-
Check radiator screen and airflow paths
-
Test brakes, steering and warning lights before travel
Every 8 to 10 Hours
-
Grease points specified for daily lubrication
-
Inspect articulation-joint area for excessive movement or grease loss
-
Inspect driveshaft universal joints and protective seals
-
Clean debris from the cooling-system intake area
-
Check for loose bolts, clamps and hose fittings
Every 25 Hours
-
Inspect engine belts and hose condition
-
Check battery terminals and cable routing
-
Inspect air-cleaner condition and restriction indicator
-
Check transmission and hydraulic fluid levels
-
Inspect steering-cylinder rods and hydraulic fittings
-
Inspect the PTO shaft and driveline guards
Every 50 Hours or Yearly
-
Change engine oil and filter as required by the manual and operating conditions
-
Service fuel filters if due or if fuel contamination is suspected
-
Lubricate all chassis and driveline points
-
Inspect brake operation and pedal linkage
-
Inspect front and rear axle seals for leakage
-
Check alternator and starter connections
Every 200 Hours or As Scheduled
-
Service hydraulic and power-steering filtration according to the official maintenance chart
-
Inspect hydraulic oil condition for water, discoloration or metal contamination
-
Replace air-cleaner elements when required by restriction or service interval
-
Check valve clearance and engine service requirements according to the technical manual
-
Inspect cooling-system condition and test coolant protection
-
Have injector and fuel-system performance evaluated if power or smoke problems develop
Seasonal Checklist
-
Service the tractor before major spring or fall fieldwork
-
Clean the cooling system thoroughly before sustained heavy-load operation
-
Inspect tires for weather cracking and correct inflation before road travel
-
Grease the articulation joint and all driveline points before storage
-
Fill the fuel tank for storage and manage fuel quality appropriately
-
Repair leaks before storage so dirt and moisture do not enter the system
-
Remove batteries or maintain them with a suitable charger during long storage periods
Repair, Upgrade, or Replace?
A John Deere 7520 can remain a capable working tractor when its engine, drivetrain and hydraulic systems are fundamentally sound. The decision should be based on total repair cost, parts availability, safety, intended workload and whether the tractor’s power and configuration still suit your operation.
Repair If
-
The fault is isolated to a hose, belt, filter, starter, alternator, seal or external component
-
The tractor has good oil pressure, stable operating temperature and strong driveline performance
-
Parts are available and the repair restores reliable operation
-
The tractor is otherwise suited to your acreage and implements
-
Repair cost is reasonable relative to the tractor’s condition and value
Upgrade If
-
You need modern hydraulics, easier shifting, better visibility or more reliable cab comfort
-
Your implements require features the 7520 does not provide
-
You need lower operating downtime during critical work periods
-
Parts sourcing and specialist labor are becoming difficult in your area
-
You want more efficient fuel use or more convenient operator controls
Replace If
-
The tractor requires simultaneous engine, transmission and major hydraulic repair
-
The articulation joint, axles and drivetrain all show major wear
-
Repair cost exceeds the value of a more reliable replacement tractor
-
Safety-related repairs have been deferred for too long
-
Downtime is costing more than replacement would
John Deere 7520 Troubleshooting FAQ
1. Why will my John Deere 7520 not start?
Start with battery condition, cable connections and fuel supply. Check both batteries, the ground cables, starter connections and the fuel shutoff system. If it cranks well but does not fire, inspect fuel filters and check for air or water in the fuel system. Persistent no-start issues may require injector, injection-pump or compression testing.
2. Why does my John Deere 7520 crank slowly?
Slow cranking is commonly caused by weak batteries, corroded cable ends, poor engine grounds or a failing starter. A heavy tractor diesel needs strong current delivery, so even minor cable corrosion can cause a major cranking problem. Clean and tighten every main connection before replacing electrical components. Test voltage drop under load if basic inspection does not identify the fault.
3. Why does my John Deere 7520 start and then die?
This usually indicates restricted fuel flow or air entering the fuel system. Check the fuel shutoff, sediment area, filters, tank outlet and supply hoses. A plugged tank vent can also restrict fuel delivery after a short period of running. Bleed the system properly after filter replacement or fuel-line repair.
4. Why is my John Deere 7520 losing power under load?
Start with the simple air and fuel checks. A dirty air cleaner, restricted fuel filter, contaminated diesel or a collapsing fuel hose can reduce power significantly. If basic service does not help, investigate injection, turbocharger or internal engine condition. Avoid heavy work until the fault is corrected.
5. Why does my John Deere 7520 produce black smoke?
Black smoke usually means too much fuel, too little air or the engine is working beyond its available power. Check the air filter, intake piping, turbocharger system if equipped, exhaust restriction and fuel quality. Heavy black smoke with low power may indicate injection-system faults. Do not assume the engine needs an overhaul until air and fuel restrictions have been ruled out.
6. Why does my John Deere 7520 produce blue smoke?
Blue smoke often indicates engine oil entering the combustion chamber. Possible causes include worn rings, cylinder wear, valve-guide problems or turbocharger seal issues on equipped engines. Check oil consumption and crankcase blow-by. This is usually a specialist diagnosis rather than a routine DIY repair.
7. Why does my John Deere 7520 produce white smoke?
White smoke can occur during cold starts, but persistent white smoke may indicate unburned fuel, injector problems, poor compression or coolant entering the cylinders. Confirm that the engine is reaching normal operating temperature. If the smoke remains after warm-up, arrange an engine evaluation. Coolant loss or a milky oil condition makes the issue more urgent.
8. Why is my John Deere 7520 overheating?
Low coolant, a blocked radiator, poor airflow, a loose fan belt, thermostat failure or water-pump problems are common causes. Clean the grille and radiator core first, then inspect coolant level and belt condition. Do not remove the radiator cap while hot. Repeated overheating should be treated as a stop-work condition.
9. Why is coolant leaking from my John Deere 7520?
Inspect hose clamps, radiator seams, water-pump weep holes, thermostat housing, heater hoses and engine freeze plugs. Coolant leaks may only appear when the system is hot and pressurised. A cooling-system pressure test helps locate small leaks. Do not keep topping up coolant without repairing the source of the loss.
10. Why is engine oil milky on my John Deere 7520?
Milky oil can mean coolant contamination, which is serious. Stop operating the tractor until the cause is identified because contaminated oil can damage bearings and internal components. Possible causes include a failed head gasket, cracked head, liner seal problem or oil-cooler fault. Drain and inspect the oil only after the underlying cause is repaired.
11. Why does my John Deere 7520 have low oil pressure?
First confirm the reading with a mechanical test gauge if possible. Low oil level, incorrect oil viscosity, a restricted pickup, worn bearings, pump wear or a faulty sender can all be responsible. Do not continue working the tractor with confirmed low oil pressure. Engine damage can happen quickly under load.
12. Why does the John Deere 7520 steering feel heavy?
Low hydraulic oil, a restricted filter, air in the hydraulic system, leaking hoses, worn steering cylinders or pump problems can cause heavy steering. Check fluid level and obvious external leaks first. Also inspect the articulation area for mechanical binding. Steering problems should be repaired promptly because they affect safe operation and road travel.
13. Why does my John Deere 7520 wander while driving?
Uneven tire pressure, worn steering components, articulation-pivot wear, loose wheel hardware or hydraulic steering faults can cause wandering. Inspect tires and wheel fasteners before diagnosing the hydraulic system. Excessive movement at the articulation joint requires prompt attention. Do not use the tractor at road speed until steering behavior is normal.
14. Why does my John Deere 7520 make a clunk when turning?
A clunk during articulation can indicate worn pivot components, dry grease points, driveline movement or loose hardware. Grease the specified points and inspect for visible play. If the tractor has noticeable side-to-side movement at the center joint, stop using it until it is assessed. Articulation repairs can require specialised lifting and alignment equipment.
15. Why is my John Deere 7520 vibrating?
Check tire condition, tire pressure, wheel hardware, driveshaft universal joints and PTO equipment first. Vibration that changes with engine speed may come from the engine or accessory drive. Vibration that changes with ground speed often points to wheels, driveline or transmission-related components. Stop operation if vibration begins suddenly or is severe.
16. Why does my John Deere 7520 have a driveline noise?
Universal joints, driveshaft splines, differential components, final drives and PTO shafts can all create driveline noises. Listen for when the noise occurs: under load, during coasting, while turning or when the PTO is engaged. Grease accessible universal joints and check for play. Internal axle or transmission noise needs professional diagnosis before damage spreads.
17. Why will my John Deere 7520 not move in gear?
Check that the correct range and gear are selected and that linkage moves fully. Confirm fluid level and inspect for obvious driveline failure or axle damage. If the engine runs but the tractor will not pull, do not repeatedly force the transmission or clutch. Internal clutch, transmission or differential faults may be present.
18. Why does my John Deere 7520 jump out of gear?
Worn shift linkage, incomplete gear engagement, internal gear wear or worn detents may be responsible. Start by inspecting external linkage and adjustment. If the problem persists, the transmission may need internal inspection. Avoid operating in a gear that repeatedly jumps out because it can worsen the damage.
19. Why is my John Deere 7520 hydraulic system weak?
Low fluid level, restricted filters, suction leaks, worn pump components, relief-valve issues or internal leakage can reduce hydraulic performance. Check oil level, oil condition and filter history first. A pressure and flow test is often needed to identify the actual cause. High-pressure hydraulic diagnosis should be handled carefully because injection injuries are a serious risk.
20. Why are the hydraulic remotes slow on my John Deere 7520?
Slow remote operation may be caused by low engine speed, cold hydraulic oil, restricted filtration, a weak pump, remote-valve wear or an implement-cylinder problem. Compare operation with more than one implement if possible. If only one remote circuit is affected, the valve or coupler may be the issue. If every function is slow, investigate supply pressure and flow.
21. Why does my John Deere 7520 hydraulic oil get hot?
Hot hydraulic oil can result from overloading, restricted filters, incorrect oil, a relief valve stuck open, internal leakage or a cooler problem. Check the system for a function that is constantly bypassing oil. Clean any hydraulic cooler surfaces and ensure correct fluid is installed. Continued overheating can damage seals, pumps and valves.
22. Why are the brakes weak on my John Deere 7520?
Weak brakes may be caused by linkage adjustment issues, contamination, worn internal brake components or hydraulic problems depending on the system configuration. Do not use the tractor for road transport with poor brakes. Check pedal travel and external linkage first. Internal wet-brake repair is typically a dealer or specialist job.
23. Why does the PTO on my John Deere 7520 not engage?
Check the PTO control linkage, related hydraulic or mechanical engagement components and the condition of the attached implement driveline. Confirm the implement is not seized or overloaded. PTO faults can also be caused by internal clutch or gear damage. Stop testing if there is grinding, heavy vibration or a burning smell.
24. Why does the PTO make noise under load?
A worn implement driveline, incorrect PTO shaft length, failing universal joint, internal PTO bearing or clutch issue may be responsible. Disconnect the implement and inspect its shaft, guards and universal joints. If the noise continues with no implement attached, investigate the tractor PTO system. Never work near a rotating PTO shaft.
25. Why is my John Deere 7520 battery not charging?
Inspect the alternator belt, battery cables, ground straps and alternator connections. A loose belt can prevent adequate charging even when the alternator itself is functional. Test voltage at the batteries with the engine running. If charging voltage remains low, have the alternator and regulator system tested.
26. Why do the lights or gauges work intermittently?
Intermittent electrical problems usually come from corrosion, loose connectors, damaged wiring or poor grounds. Check fuse holders, switch terminals, cab harness connections and battery grounds. Older wiring can become brittle near heat and vibration points. Repair damaged wiring properly rather than twisting wires together temporarily.
27. What oil should I use in a John Deere 7520?
Use the oil grade and performance specification stated in the operator’s manual for your climate and engine configuration. Oil selection depends on temperature range, operating conditions and service interval. Avoid mixing unknown oils or relying only on a generic viscosity recommendation. For an older tractor, frequent oil and filter service is more important than using an exotic oil formulation.
28. How often should I change the engine oil on a John Deere 7520?
Follow the interval in the correct operator’s manual, adjusted for severe dust, heavy load, extended idling or uncertain service history. If you have just bought the tractor and do not know when it was last serviced, changing oil and filters is sensible baseline maintenance. Monitor oil condition and level between changes. Always replace the filter at the same time unless the manual specifies otherwise.
29. How often should I grease a John Deere 7520?
Grease intervals vary by location, especially around driveline and articulation components. High-load pivots and universal joints may require frequent attention. Use the official lubrication chart to identify every fitting and interval. Grease until clean lubricant appears only where the fitting and seal design permits it.
30. How do I find the right John Deere 7520 part number?
Use the tractor model and full serial number in the John Deere parts catalog. Then identify the component through the correct exploded diagram rather than searching only by description. Compare the old part number when available. For engine components, also provide the engine serial number.
31. Can I use aftermarket filters on a John Deere 7520?
Yes, if the filter cross-reference is from a reputable supplier and matches the correct Deere specification. The replacement must have the correct thread, gasket, bypass setting and filtration characteristics where applicable. Avoid unbranded filters with incomplete fitment information. Keep a record of the part number used for future service.
32. Can I repair John Deere 7520 hydraulic hoses myself?
Simple external hose replacement can be a practical DIY job if you have the correct pressure-rated hose, fittings and routing information. Relieve hydraulic pressure before disconnecting lines and keep contaminants out of the system. Never search for a high-pressure leak with your hands. For complex hose routing or custom assemblies, use an agricultural hydraulic-hose specialist.
33. Can I rebuild the John Deere 7520 engine myself?
An experienced mechanic with a proper shop, lifting equipment, measuring tools and the technical manual may be able to rebuild the engine. For most owners, however, an engine rebuild is a specialist-level project. Accurate measurements, liner installation, bearing clearances, torque procedures and fuel-system setup are critical. A poor rebuild can cost more than a professional repair.
34. Is a John Deere 7520 worth restoring?
It can be worth restoring if the tractor is complete, structurally sound and has a drivetrain that can be repaired economically. Value depends on originality, condition, local collector demand and whether you need a working tractor or a show machine. Inspect engine, transmission, articulation pivot, axles and hydraulics before committing to a restoration budget. A complete but tired tractor is often a better starting point than one missing major components.
35. Where can I find a John Deere 7520 service manual?
Start with John Deere Technical Publications for official literature and the John Deere Parts Catalog for diagrams. Reputable agricultural manual suppliers may also carry printed or digital reproductions of technical and parts manuals. Make sure the manual specifically covers the 7520 and matches your tractor’s configuration. Use the operator’s manual for routine maintenance and the technical manual for internal repairs and specifications.