
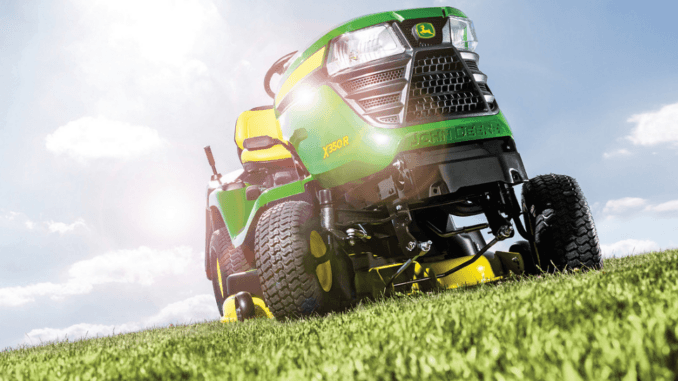
Adjustable width” mower decks do exist, but they are still relatively niche compared with fixed‑width decks.
They are mostly found in commercial or semi‑commercial mowers used in orchards, vineyards, parks, or large‑area turf where row spacing or boundary conditions vary. Below is a detailed look at how adjustable‑width decks work, where they are used, and what options are available today.
What “adjustable width” really means
When people ask about “adjustable width” decks, they usually mean the working width of the cutting unit can be changed without swapping the entire deck. This is different from:
-
Adjustable cutting height (very common): the deck stays the same width, but you raise or lower it to change how much grass is cut.
-
Interchangeable decks (also common): you bolt on a 48‑inch deck vs a 54‑inch deck, but the deck shell itself is not “sliding” or reconfigurable.
True adjustable‑width technology either:
-
Moves the entire deck laterally on a frame (extendable axle / frame), or
-
Uses multi‑section “wings” or side‑by‑side units whose overlap can be changed, so the effective cutting width changes.
Types of adjustable‑width mower decks
1. Wing‑style orchard / vineyard mowers
One of the clearest examples is in orchard and vineyard rotary mowers, where the crop rows might be irregular or where the operator needs to switch between in‑row and inter‑row mowing.
-
These decks often use V‑belt‑driven “wings” or separate cutter sections that can be slid or pivoted laterally.
-
The manufacturer can integrate the drive and mounting so that the working width is changed by adjusting the position of the side sections, sometimes via hydraulic or manual linkages.
-
Typical use cases:
-
Vineyards with varying row spacing.
-
Orchards where you must avoid trunk damage or keep the mower double‑row rather than triple‑row on tighter sites.
-
In practice this gives the operator a “narrow” mode for tight rows and a “wide” mode for open‑row strips, all without detaching the deck.
2. Multi‑section “variable width” flail mowers
The Perfect NX‑460 flail mower is a good example of a commercial, trailed variable‑width unit.
-
It has two separate flail mowers mounted side‑by‑side on a reinforced frame, each about 240 cm wide.
-
By changing the overlap between the two units using hydraulic cylinders, the operator can adjust the effective cutting width from roughly 290 cm (9ʹ 7ʺ) up to 460 cm (15ʹ 1ʺ).
-
For transport, the total width is limited to 300 cm (9ʹ 10ʺ) so the machine can travel on roads.
This is ideal for:
-
Parks and set‑aside land where some areas are narrow and others are wide.
-
Stubble or cover‑crop work (corn, sunflowers, etc.) where you want to match the swath to the field layout or tractor lane position.
Here the “adjustable width” is achieved by sliding or repositioning two independent cutter units rather than stretching a single rigid deck.
3. Modular / extendable‑axle decks (OEM platforms)
Some OEM platforms advertise “adjustable deck width” by using modular frames or extendable axles.
-
Koham, for example, has shown an extendable‑axle mower OEM platform where the frame can be lengthened or reconfigured, which in turn supports decks of different widths or even variable‑width configurations for different lot sizes.
-
These are often sold to dealers or brands as private‑label machines, so you might see them under different names in the field.
With this approach the deck width can be changed at the factory or by reconfiguring the frame, but it is not always a “on‑the‑fly” adjustment in the field.
4. Variable‑width “flex” or modular decks on commercial mowers
In the zero‑turn and commercial‑zero market, there are also designs that use multiple independent decks whose spacing or orientation can be altered.
-
The Lastec WZ400 zero‑turn, for instance, uses three independently flexing decks that can be configured in different arrangements, giving cutting widths of 61ʺ or 73ʺ.
-
Although the flex is mainly for contouring, the modular architecture implies that deck configuration can be changed in service (e.g., different deck sizes or layouts), which is a step toward adjustable width.
More recently, some modular deck tech (such as Koham’s “variable width” or “flex deck” OEM concepts) is being marketed specifically for variable‑lot‑size mowing, where the deck or axle can be re‑set to match different property widths.
How adjustable‑width decks are engineered
Implementing a genuinely adjustable‑width deck is mechanically more complex than a fixed deck, and machine designers must solve several problems:
1. Deck frame and axle geometry
-
In wing‑style or extendable‑axle designs, the deck or frame must slide or extend while keeping the blade‑tip‑to‑ground geometry consistent.
-
This often involves telescoping side rails, stop pins, or indexed positions where the deck can be locked at specific widths.
-
The drivetrain (belts, shafts, or hydraulic motors) must either relocate with the deck sections or be mounted on a central power unit that feeds multiple cutter units.
2. Drive and belt alignment
Adjusting width usually changes the distance between pulleys or between the engine and the deck.
-
On belt‑driven systems, designers may use:
-
Longer belt runs with multiple idlers.
-
Modular drive shafts that can be lengthened or re‑coupled.
-
-
Alternatively, manufacturers may shift to individual electric or hydraulic motors on each deck section, so the engine‑to‑deck belt path does not change when the width is adjusted.
3. Deck suspension and leveling
A fixed deck can be statically levelled once and then adjusted only for height. In an adjustable‑width deck:
-
The suspension points must still keep the deck parallel to the ground at all configured widths.
-
Independent‑flexing decks (like the Lastec WZ400) use linkages that allow each deck section to move up and down locally while maintaining overall levelness.
-
On trailed units such as the NX‑460, this is handled partly by a rear roller and flexible mounting points that adapt to ground contour as the working width changes.
4. Safety and overlap control
When the cutting width changes, the interaction between the blades or flails must be controlled:
-
For overlapping flail or rotary decks, the overlap must be small enough to avoid excessive power draw but large enough to eliminate uncut strips.
-
Some systems use hydraulic or mechanical stops so the operator can only set the width at safe increments.
-
Clear guards and shields must still fully cover the cutting zones at every width setting, which constrains how much the deck can extend or slide.
Where adjustable‑width decks are actually used
1. Orchards and vineyards
This is perhaps the most mature application.
-
Row spacing varies across regions and even within a single vineyard (older vs newer plantings, replanting, etc.).
-
A fixed‑width mower may either be too narrow (double‑rowing instead of single, slowing production) or too wide (risking tree/vine damage).
-
Adjustable‑width decks let one machine handle both narrow and wide rows, reducing the need for multiple mowers or frequent manual trimming.
2. Parks, municipal areas, and set‑aside land
Large parks and municipal land often combine:
-
Narrow strips along roads or fences.
-
Wide open areas between them.
A variable‑width flail mower such as the NX‑460 can switch between a narrow swath where space is tight and a very wide swath in open fields, which improves efficiency and reduces the number of passes.
3. Commercial turf and golf
While most commercial mowers are still fixed‑width, there is growing interest in:
-
Multi‑deck or modular decks that can be reconfigured for different job types (e.g., strip mowing vs open‑field mowing).
-
Some OEM modular concepts are being pitched to landscapers who service both small residential lots and larger open greens or sports fields.
However, these are not yet common in the mainstream consumer market.
4. Remote‑control and all‑terrain mowers
Some remote‑control and multi‑terrain mowers are being developed with modular deck‑size options and even basic width‑adjustable frames, so dealers can spec a machine for different site conditions.
-
These are often aimed at slopes, rough terrain, or sites with multiple obstacle densities, where a single fixed width would be suboptimal.
-
In these systems, “adjustable width” may still mean factory reconfiguration or dealer‑level changes rather than quick‑on‑the‑fly adjustment by the operator.
Why adjustable‑width decks are not mainstream
Despite the obvious benefits, genuine adjustable‑width decks are not yet common on consumer and many professional mowers for several reasons:
1. Mechanical complexity and cost
-
Adding sliding frames, multiple drives, or hydraulic‑actuated sections increases the number of parts, seals, and potential failure points.
-
For a typical homeowner, this complexity is hard to justify when simply buying a mower with a fixed width that matches their yard is cheaper and simpler.
2. Power and traction implications
-
A wider swath draws more horsepower and can increase skid or traction issues on slopes or soft ground.
-
If the deck width is adjustable, the machine must either be over‑sized for the narrowest setting (inefficient) or undersized for the widest setting (risking bogging down).
3. Market fragmentation
-
Most manufacturers segment products by deck size (21ʺ, 42ʺ, 54ʺ, 60ʺ, etc.) and sell different models for each size.
-
This is easier to manufacture, stock, and service than a single model with a fully adjustable deck.
4. Reliability and service
-
Fixed decks are simpler to service, level, and maintain.
-
Operators and technicians are very familiar with them, whereas adjustable‑width decks introduce new failure modes (binding sliders, mis‑aligned sections, belt‑length issues, etc.).
Practical takeaways for choosing a mower
If you are asking whether adjustable‑width decks exist (for example, for a compact tractor or zero‑turn), the short answers are:
-
Yes, they exist, but almost entirely in commercial, semi‑commercial, orchard, or industrial‑scale mowing (orchard mowers, variable‑width flail mowers, modular OEM decks).
-
For typical residential or small‑commercial lawn tractors and zero‑turns, you will normally choose a fixed deck width (e.g., 42ʺ, 48ʺ, 54ʺ) and, if needed, buy a different mower model or deck for different job sizes.
In practice, the most realistic way to get “adjustable” working width today is:
-
Use different decks (if your tractor or mower supports deck swaps).
-
File narrow strips with a walk‑behind or remote‑control mower, and wide areas with a larger‑deck ride‑on.
-
Consider a modular or wing‑style commercial mower if you routinely work in orchards, vineyards, or mixed‑width municipal sites.
Compact Tractor with Mid‑Mount Mower
For a compact tractor with a mid‑mount mower, you are looking at the same overall reality: true “adjustable width” (same deck, different swath) is very rare, but there are a few practical workarounds and a handful of designs that at least move toward that concept.
Do true adjustable‑width mid‑mount decks exist?
In the mainstream compact‑tractor mid‑mount market (John Deere, Kubota, Kioti, etc.), mid‑mount decks are almost always fixed width:
-
You pick a single cutting width (for example, 60.9ʺ ≈ 155 cm) for each deck model.
-
Some tractors (e.g., John Deere 2000R‑ and 3000R‑series) offer AutoConnect mid‑mount decks in one main width per deck family, with height adjustment only, not width.
-
Other compact tractors (Kubota BX, Kioti CX, etc.) let you choose different deck sizes from the factory, but each deck is a separate, fixed‑width unit.
That means:
-
No built‑in lateral‑slide or “telescoping” mid‑mount deck like you sometimes see on trailed flail or orchard mowers.
-
Any “variable width” capability has to come from either swapping decks or using auxiliary tools (walk‑behind, side‑mower, or remote‑control mower) for the narrow bits.
What you can change on a mid‑mount deck
Even though the deck width is fixed, you can usually adjust several things:
1. Cutting height (many increments)
Most mid‑mount decks come with multi‑position height‑adjustment levers or dials, often in 1/4ʺ or 1 cm steps.
-
This lets you fine‑tune the height for different grass types or contamination conditions, but does not change the working width.
2. Discharge / collection options
You can often switch between:
-
Rear discharge
-
Side discharge
-
Mulching kit
-
Grass collection via rear‑mounted cassettes or bags
Again, this changes material handling, not the physical cutting width.
3. Deck‑change options on the same tractor
Some compact tractors are designed so you can:
-
Swap mid‑mount decks of different widths (e.g., 48ʺ vs 60ʺ) for different jobs.
-
Use quick‑detach or “drive‑over” style decks so you don’t have to crawl under the tractor to unhook hydraulic or PTO links.
For example:
-
Iseki’s TM‑series tractors list 54ʺ and 60ʺ mid‑mount decks as options.
-
Kubota and Kioti offer different mid‑deck sizes on the same basic tractor platform.
From a workflow‑design standpoint, this is the closest thing to “adjustable width”: you spec the tractor for two or more deck sizes, and change them when you move between tight, narrow strips and open fields.
Why “adjustable width” is so rare on mid‑mounts
There are several technical and market reasons:
1. PTO, driveline, and deck geometry
-
Mid‑mount decks are driven by a mid‑PTO at a fixed speed, with a shaft or belt running to a single deck.
-
If the deck were to “slide” left or right, the drive line would need to telescope or be re‑routed, which adds complexity and cost.
2. Deck suspension and leveling
-
Compact‑tractor mid‑mount decks use three‑point‑style links and height‑adjustment points at the front and rear.
-
Making those links slide or extend laterally would compromise the deck’s ability to stay level and follow ground contours.
3. Market demand and cost
-
Most buyers pick a single deck width that matches their typical job size (e.g., 60ʺ for general lawns and light commercial work).
-
If somebody needs both narrow and wide mowing, the cheaper solution is two decks or a different machine rather than a fully adjustable‑width deck.
How to simulate “adjustable width” with a mid‑mount
If you want one compact tractor as the main workhorse, here are realistic ways to get close to adjustable‑width performance:
1. Own two mid‑mount decks
-
Example setup:
-
Narrow deck (48ʺ–54ʺ) for tight gardens, tree runs, and narrow strips.
-
Wide deck (60ʺ–66ʺ) for open paddocks, fields, or large lawns.
-
-
Use a tractor with AutoConnect or drive‑over decks so deck changes are quick and tool‑free.
This is the most common and reliable way spec‑oriented landscapers and small‑farm owners practically “adjust” working width.
2. Use the mid‑mount for wide areas, a walk‑behind or side mower for tight spots
-
Keep the mid‑mount set up in wide‑cut mode for efficiency.
-
Use a walk‑behind, side‑mount mower, or remote‑control mower for:
-
Narrow borders
-
Tree runs
-
Along stone walls or fences
-
-
This avoids constant deck swaps while still giving you effective “narrow” and “wide” coverage.
3. Look at specialty or modular mid‑mount systems (limited)
There are a few niche or semi‑industrial mid‑mount systems that hint at adjustable‑width thinking, though they are not mainstream:
-
Some European mid‑mount mowers (e.g., Matev MOW‑MM 152) use a fixed 152 cm width but can be configured for rear ejection, side ejection, or mulching, trying to maximize versatility without changing the deck.
-
Tractor‑mounted orchard mowers and vineyard units can have V‑belt or gear‑driven “wings” where the working width is adjusted, but these are usually rear‑mounted or trailed, not mid‑mount.
So far, no major compact‑tractor brand advertises a true adjustable‑width mid‑mount deck; they rely on multiple fixed‑width decks or different implement types instead.
Practical recommendation for your compact tractor
Given your compact‑tractor‑with‑mid‑mount context, here is what I’d suggest:
-
Pick a mid‑mount deck width that matches your largest typical area (e.g., 60ʺ or 152 cm) to maximize productivity.
-
Keep a second, narrower deck (or a walk‑behind/side‑mower) for:
-
Narrow strips
-
Tight corners
-
Around trees, fences, or buildings
-
-
If you frequently change between very narrow and very wide jobs, choose a tractor whose manufacturer explicitly supports easy deck swaps (AutoConnect, drive‑over, or quick‑hitch style).
In short, true “adjustable‑width” mid‑mount decks are effectively not available on standard compact tractors today. The realistic path is multiple fixed‑width decks plus a secondary mower type (walk‑behind or side‑mount) to cover the narrow parts of your job.
How to attach mid-mount mower to Kubota BX or John Deere 1 series
Prep: universal checks (before either machine)
Do these first on both tractors so you’re not stuck halfway:
-
Work on a level, firm surface (concrete, asphalt, or compacted gravel).
-
Make sure the deck is clean and greased at:
-
PTO input shaft
-
height‑adjustment pins
-
any linkage pivot points.
-
-
Read the deck install manual and tractor manual sections for mower hookup.
-
Check:
-
Mid‑PTO and hydraulic controls.
-
Whether your deck has AutoConnect, drive‑over, or standard hook‑on style.
-
Kubota BX mid‑mount mower installation (non‑drive‑over)
Most BX‑series mowers are non‑drive‑over; you hook the deck to the tractor’s belly‑mount links, height‑adjustment nose gear, and mid‑PTO.
Step‑by‑step
-
Position the deck
-
Park the deck on a level surface with wheels unlocked and the deck flat.
-
If needed, tilt the deck 90° on one side so it’s easier to slide under the tractor.
-
-
Hook the three‑point‑style links
-
Lower the BX’s mower lift arms (belly lift points) to the lowest position.
-
Slide the deck rear brackets back under the tractor so the lift‑arm pins line up with the deck’s rear attachment holes.
-
Insert the pins in both rear brackets and confirm they are fully seated and locked.
-
-
Attach the front nose gear
-
Find the front nose‑gear bar that hangs from the tractor’s frame.
-
Lower the deck so the front ears of the deck sit into the nose‑gear hooks.
-
Pin or latch the front nose gear as per your manual; this provides front height adjustment.
-
-
Connect the mid‑PTO shaft
-
Pull the mid‑PTO lever to the rear‑PTO position (engine off) so the mid‑PTO stub is extended.
-
Slide the deck PTO shaft onto the tractor’s mid‑PTO stub until it “clicks” and locks.
-
If the deck has a drive‑over or AutoConnect style, note that the PTO shaft may already be attached to the deck; you just align and lower the deck.
-
-
Final checks and first test
-
Confirm all pins are in and locked, and gauge wheels are set as per manual.
-
Raise the deck slightly with the mower‑lift lever, start the tractor, and engage the mid‑PTO (only with no one near the blades).
-
Verify the mower rotates smoothly, then lower it to the recommended cutting height and adjust the deck level if needed.
-
If you want to make it easier on your back, many BX owners use a front loader bucket to lift the front of the tractor, then roll the deck under; watch “Back Saving Tip – Install Kubota BX Mid Mount Mower Deck THIS WAY” for a practical demo.
John Deere 1‑Series mid‑mount mower (AutoConnect / drive‑over style)
John Deere 1‑Series (e.g., 1025R, 1026R, 2xxxR, 3xxxR) typically use AutoConnect mid‑mount decks (54D, 60D, 72D, etc.), where the tractor drives over the deck instead of hooking it manually.
Step‑by‑step (AutoConnect style)
-
Prepare tractor and deck
-
Park the tractor on a level surface with the loader or rear arms neutral so they don’t hit the deck.
-
Ensure the deck is on a firm, level surface, gauge wheels unlocked, and PTO shaft greased.
-
-
Engage mid‑PTO mode and drive‑over position
-
Turn the tractor to forward.
-
Pull the 3‑point‑hitch lever all the way up so the mower‑height knob can be turned.
-
Rotate the mower‑height knob to the top “drive‑on/drive‑off” position.
-
Push the 3‑point‑hitch lever all the way down so the linkage is at its lowest.
-
-
Align the tractor with the deck
-
Back the tractor so the inside of the left front tire lines up with the rub rail on the deck.
-
This alignment helps the front mower bar slide under the tractor as you drive forward.
-
-
Drive over the deck
-
Put the tractor in forward, hold the 3‑point‑hitch lever down, and move slowly over the deck.
-
The front mower bar should slide under the tractor frame and latch, and the front AutoConnect hooks will engage automatically.
-
If it doesn’t fully engage, drive off, reposition slightly, and try again.
-
-
Engage the PTO and verify
-
With the tractor in neutral and the brakes on, pull the 3‑point‑hitch lever up; the deck should rise and confirm it is hooked.
-
Move the PTO control to mid‑PTO position, switch the PTO button on, and verify the mower engages.
-
Adjust the mower‑height knob to your desired cutting height and re‑lock the gauge wheels.
-
For removal, simply reverse the process: drive the tractor forward off the deck while the 3‑point‑hitch is down, then lower the tractor enough so the hooks disengage.
Kubota BX vs John Deere 1‑Series: key differences
Safety and trouble‑shooting tips
-
Always lower the loader or remove rear attachments if they interfere with deck height or clearance.
-
If the deck won’t lift or binds, check:
-
Are all pins fully in and not misaligned?
-
Is the mid‑PTO stub clean and the deck PTO shaft fully seated?
-
-
For uneven cuts, re‑level the deck by adjusting the front nose‑gear (Kubota BX) or the AutoConnect linkage (Deere 1‑Series) per the manual.
If you tell me your exact model (e.g., Kubota BX2380 or John Deere 1025R and deck width, such as 54ʺ or 60ʺ), I can walk you through the specific attachment points and even suggest a safe “deck‑change workflow” for frequent swaps.
Maintenance steps for mid-mount mower PTO shaft on compact tractors
1. Safety first
-
Stop the engine, engage the parking brake, and disengage the PTO before touching the shaft.
-
Wear gloves and avoid loose clothing; a spinning PTO shaft can entangle anything in seconds.
-
Work on a level, solid surface with the mower deck safely lowered and any mower blades locked or disengaged.
2. Pre‑operation visual inspection (each use)
Do this every time you hook up the deck:
-
Check for damage
-
Look for bent tubes, cracks, or severe dents in the shaft housing.
-
Inspect universal joints (U‑joints) for play, broken caps, or missing needles.
-
-
Check the telescoping section
-
Slide the inner and outer tubes in and out; they should move smoothly without binding.
-
If the tube sticks or grinds, it needs cleaning and fresh grease.
-
-
Verify safety guards
-
Confirm the PTO shield (sleeve that spins around the shaft) is intact, not cracked or missing.
-
Check that the restraining chain (if fitted) is attached both to the tractor and the mower and not tangled.
-
-
Inspect the PTO stub and coupler
-
Look for sheared pins, rounded splines, or rusted PTO stub on the tractor.
-
Make sure the deck input yoke clicks securely into the tractor stub and doesn’t slip under load.
-
If you see any cracks, bent sections, or badly worn U‑joints, replace the PTO shaft or that section before using it again.
3. Lubrication routine (every 8–20 hours)
Lubrication intervals depend on manufacturer spec, but a good rule of thumb:
-
Universal joints and slip‑type bearings: grease every 8 hours of use.
-
Telescoping splines (inner/outer shaft): grease every 20 hours of use or whenever noticeable drag appears.
How to grease the shaft
A. Universal joints
-
Wipe dirt and old grease from the grease nipple (zerk) on each U‑joint.
-
Attach a grease gun and pump until fresh grease oozes from the joint seals.
-
Wipe off excess so grit doesn’t stick to the outside.
B. Telescoping (sliding) spline
-
Pull the PTO shaft apart so the inner shaft fully extends out of the outer tube.
-
Remove the plastic dust cap / shroud if it has one (often clipped with plastic fasteners).
-
Clean old grease and debris from the exposed spline section with a rag and, if needed, penetrating oil.
-
Apply a generous, even layer of grease along the full length of the exposed spline.
-
Push the shafts back together, lining up any flat or key marks (if present) so the joint reassembles in the same phase.
C. End‑of‑shaft and coupler area
-
Add a few drops of oil into the lock‑pin hole or any small coupling‑pin bore so the lock mechanism stays free.
-
Smear a light film of grease on the inside of the coupling yoke to prevent corrosion and ease engagement.
After re‑assembly, run the PTO at low speed (no load if possible) and listen for smooth rotation; any grinding or “clunking” means a joint or bearing is worn.
4. Hook‑up and take‑down care (each use)
How you attach and remove the PTO makes a big difference in long‑term life:
-
Align before engaging
-
Line up the tractor mid‑PTO stub and deck input yoke so splines engage straight, not at an angle.
-
If the PTO stub seems to “bind,” clean both stub and socket with a rag or light wire brush and a little grease.
-
-
Avoid side loading
-
Don’t let the mower deck drag the PTO shaft sideways as you roll it under the tractor.
-
On Kubota BX‑style mid‑mounts, make sure the deck is level and the PTO shaft is straight before lifting the deck.
-
-
Check for “slip‑off”
-
Some users report the mid‑PTO shaft slipping off after a few minutes; this is usually due to a bad lock pin or misaligned yoke.
-
If this happens, inspect the lock pin, spring, and retaining clips and replace any worn or broken parts.
-
5. Storage and off‑season care
When the mower is not in use:
-
Wipe the shaft clean of dirt, mud, and grass clippings, especially around U‑joints and the telescoping section.
-
Store the PTO shaft in a dry place, preferably hanging or laid flat off the ground to avoid bending or water‑pooling.
-
Before storing for long periods, re‑lube the shaft so seals stay supple and splines don’t rust.
-
If the tractor will sit idle, remove the PTO shaft and store it separate from the deck so it does not get accidentally damaged.
6. When to replace the PTO shaft
Even with good maintenance, a mid‑mount PTO shaft doesn’t last forever. Replace it if you see:
-
Excessive play or “clunking” in one or more U‑joints.
-
Visible wear on needle‑bearing caps, missing needles, or a “caved‑in” U‑joint housing.
-
Cracked or bent housing, or a PTO shield that is loose, broken, or missing.
-
Stripped splines on the tractor stub or deck input yoke (often caused by a worn‑out PTO shaft stressing the mating parts).
Using a badly worn PTO shaft risks sudden disconnection, belt/ gearbox damage, or a whipping shaft that can pull nearby objects into the spinning guard.