
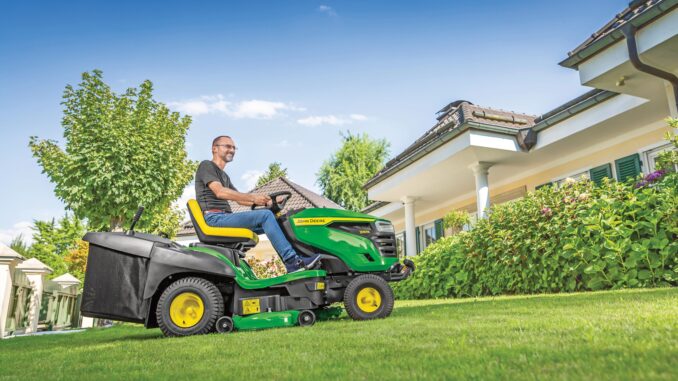
The correct tire pressure for garden and lawn tractors typically falls between 10 and 20 psi, depending on the machine, tire size, load, and type of land .
Most residential lawn tractors run around 10–14 psi on the rear tires and 12–16 psi on the front tires, while zero‑turn mowers and heavier garden tractors may need slightly higher pressures—often 12–16 psi on all tires, or up to 20–25 psi for stiff commercial‑style tires.
Why tire pressure matters on lawn and garden tractors
Tire pressure is not just about how “soft” or “hard” the ride feels; it directly affects cutting quality, traction, tire life, safety, and fuel or battery efficiency. Under‑inflated tires can cause poor tracking, scalping, uneven cuts, and increased rolling resistance, while over‑inflated tires lead to a harsh ride, reduced grip, and higher risk of sidewall damage or bead failure on sharp turns.
For garden tractors that also haul carts, spreaders, or other attachments, correct pressure also helps carry the extra load without burying the tires into the lawn or overstressing the structure of the tire.
Typical pressure ranges by machine type
1. Standard residential lawn tractors
Most classic riding lawn tractors (e.g., Cub Cadet, John Deere L‑series, Husqvarna residential models) recommend:
-
Rear tires: 10 psi
-
Front tires: 12–14 psi
These values reflect a balance between comfort, traction, and floatation on soft turf. You will often see similar numbers in the operator’s manual or on the tire sidewall as a “max” pressure hint, even if the tractor manufacturer calls for a lower working pressure.
2. Zero‑turn mowers (ZTRs)
Zero‑turn mowers ride low to the ground and often carry heavier decks, so pressures are usually a bit higher:
-
Exmark, Toro, Bad Boy, Country Clipper: about 12–16 psi on all four tires.
-
Some stiff, high‑load tires (such as heavy commercial turf tires) may be rated up to 25 psi front, 15–20 psi rear, but you should still stay within the manufacturer’s recommended range, not the sidewall “max” pressure.
3. Compact and utility garden tractors
Compact garden tractors that do more than mow (e.g., brush hogging, light grading, towing) often need slightly higher pressures:
-
Front tires: 14–18 psi
-
Rear tires: 12–16 psi
These values help the tractor handle light ballast, implements, and uneven ground without the tires rolling off the rim on sharp turns.
4. Very low‑pressure “turf” setups
Some owners purposely run extra‑low pressures (6–8 psi) on the rear tires for a very soft ride and wide footprint on good turf. However, this can:
-
Increase the risk of bead failure on fast turns.
-
Reduce top speed and increase heat buildup if the tractor is used frequently on hard surfaces.
Always treat such low pressures as special‑case tuning, not standard practice.
Step‑by‑step: How to find the exact correct pressure
1. Check the operator’s manual first
The most accurate starting point is the owner’s manual for your specific model. Look for a section titled “Tire Inflation Pressures,” usually near the lubrication or maintenance table. This table typically lists:
-
Front and rear tire sizes.
-
Recommended cold pressure (psi) for no load vs with ballast or heavy implements.
If you don’t have the manual, search online using the format:
"[Brand] [Model] Owner’s Manual tire inflation pressure" (e.g., “John Deere L130 tire inflation pressure”).
2. Check the tire sidewall
If the manual is missing, the next‑best guide is the tire itself. On the sidewall you will usually see:
-
Size (e.g., 18×8.5–8).
-
PLY RATING (e.g., 2‑ply, 4‑ply).
-
Service description and MAX PSI.
Important: the MAX PSI is the maximum safe pressure, not the ideal working pressure. As a rule‑of‑thumb many owners use:
-
Run 50–75% of the sidewall max pressure, adjusted for the tractor’s weight and terrain.
For example, a tire marked “Max 14 psi” is commonly run around 8–11 psi on a light‑duty lawn tractor.
3. Measure cold tire pressure
Always check and adjust tire pressure when the tires are cold (tractor has sat at least 2–3 hours, preferably overnight). Warm tires can read 1–3 psi higher than they actually should, so setting them hot can lead to under‑inflation later.
Use a low‑pressure gauge (often labeled for ATV/UTV or lawn‑equipment use) that reads accurately down to 5 psi or less. Standard car gauges tend to be inaccurate at these low pressures.
4. Adjust for load and terrain
Your tractor’s weight and what you’re pulling matter:
-
Mowing only (no cart, no weights): use the lower end of the manual’s recommended range (e.g., 10 psi rear, 12 psi front).
-
Towing carts, spreaders, or rear ballast: move toward the higher end (e.g., 12–14 psi rear, 14–16 psi front) to keep the sidewalls from collapsing.
On soft, spongy turf, a slightly lower pressure (within the safe range) improves floatation and reduces visible ruts. On hard, compacted, or road surfaces, a bit more pressure helps with traction and heat dissipation.
Signs your tire pressure is wrong
1. Under‑inflation symptoms
-
Tires look over‑bulged at the top and very “flat” at the bottom contact patch.
-
Traction degrades; the tractor slips more easily on slopes or wet grass.
-
Tires feel hot to the touch after use, which is a sign of excessive flex and heat buildup.
-
The ride may feel softer, but sharp turns can cause the tire to roll off the rim or break the bead seal.
-
Excessive sidewall scrubbing on the lawn or paths, leading to quicker wear.
2. Over‑inflation symptoms
-
Tires look round and hard with little “flat” area where they contact the ground.
-
The tractor feels harsh and bouncy, especially on rough or uneven lawns.
-
Cutting quality suffers: you may see scalloping, scalping in ruts, or uneven cut because the deck floats independently of the wheels.
-
Higher risk of pinch‑flatting or impact damage from bumps and rocks due to less cushioning.
Practical tips for setting and maintaining tire pressure
1. Start with the manual, then fine‑tune
-
Use the manufacturer’s recommended psi as your baseline.
-
After a few mowing sessions, re‑check pressures and adjust by 1–2 psi if you notice too much bounce, too much wallow, or visible tire distortion.
2. Match front and rear for balanced handling
Front and rear tires often call for different pressures (e.g., 12 psi front, 10 psi rear). Keeping them close but not identical helps with:
-
Steering feel.
-
Deck leveling and cut quality.
If you’re unsure, a common “safe” starting point is 12 psi on all tires for many residential lawn tractors and ZTRs, then adjust up or down as needed.
3. Adjust for different jobs
-
Mowing flat lawns: use the lower end of the range (e.g., 10 psi rear).
-
Mowing hills or slopes: increase pressure slightly (e.g., 11–12 psi) to reduce sidewall flex and improve stability.
-
Towing or hauling: increase to the higher end of the recommended range (e.g., 14 psi rear) to support the load.
4. Check pressure regularly
Tire pressure can drop over time even without a visible leak. Good practice:
-
Check every 20–30 hours of use or at least once per mowing season.
-
Check more often if you use undersized tires, carry heavy loads, or operate on rough terrain.
5. Seasonal and storage considerations
-
In hot weather, watch for over‑inflation: if the tires read above the top of the recommended range when warm, bleed a little air so they fall back into range when cold.
-
Before winter storage, check that pressures are at or near the recommended level and top them off if needed; this helps prevent flat spots and uneven wear.
How to adjust tire pressure safely
1. Tools you need
-
Low‑pressure tire gauge (ATV or lawn‑tractor style).
-
Air compressor with a regulated output (or a hand‑pump suitable for low‑pressure tires).
-
Tire valve stem tool (if you need to remove caps or service valves).
2. Step‑by‑step adjustment
-
Park on level ground and turn off the mower. Engage the parking brake.
-
Remove the valve stem caps and screw the gauge onto each valve.
-
Record each tire’s pressure and compare it to the recommended range.
-
To inflate, attach the air hose and add air in short bursts, checking frequently.
-
To bleed air, lightly press the valve core (often with a small tool or screwdriver) until pressure drops to the target.
-
Re‑check all tires once more and reinstall the valve stem caps.
3. Balancing left‑to‑right
Ensure both left and right tires on each axle are at the same pressure within ±1 psi. Uneven pressures can cause:
-
Pulling or drifting to one side.
-
Uneven deck wear and scalping on one side.
-
Accelerated tire wear on the lower‑pressure side.
Addressing common misconceptions
1. “Whatever the sidewall says is the right pressure”
The sidewall’s MAX PSI is the absolute ceiling for safety, not the recommended operating pressure. For most residential lawn‑tractor tires, the real working pressure is well below that, often around 50–75% of the max.
2. “Higher pressure always gives better traction”
On soft turf, too much pressure actually reduces the contact patch, which can hurt traction and increase the risk of slipping on slopes. A modest reduction within the safe range often improves grip and cut quality.
3. “Tire pressure doesn’t matter if the tires look fine”
Tires can look normal visually while still being significantly under‑ or over‑inflated. Without a proper gauge, you’re guessing; small differences (even 2–3 psi) can noticeably change ride, handling, and tire life.
Word‑count framing for your post
To reach your target of 2,000–2,500 words, you can expand the sections above with:
-
Real‑world examples (e.g., “John Deere L110: 10 psi rear, 14 psi front”).
-
A short troubleshooting table translating symptoms to pressure‑adjustment actions.
-
A maintenance checklist (“Check tire pressure every 20 hours, match left/right, etc.”).
-
A small FAQ section on questions like “Can I run 8 psi on the rear?” or “What if my tires are different sizes?”
If you tell me the specific brands and models you want to focus on (e.g., John Deere, Husqvarna, Toro, Cub Cadet), I can tailor this into a full, ready‑to‑publish article with exact recommended pressures and example tables for each.
Would you like that next version formatted as a full blog‑style article with headings, bullet points, and a sample table?
How to check and adjust tire pressure on lawn tractors safely
1. Prepare the tractor and tires
-
Park the tractor on level, solid ground and set the parking brake. Turn the engine off and let the tires sit for at least 2–3 hours (ideally overnight) so pressures are “cold”.
-
Put the transmission in park/neutral and remove the key or switch.
-
Put on gloves, safety glasses, and sturdy footwear; when working with compressed air, eye and hand protection are important.
2. Find the correct pressure
-
Check the operator’s manual first; many manuals list front and rear tire pressures separately (for example, 12 psi rear, 14 psi front).
-
If the manual is missing, check the tire sidewall for size and MAX PSI and, if present, recommended operating pressure. Run at or below the recommended value, typically 2–3 psi below the max for safety.
-
For many residential riding mowers, 12–14 psi on the rear tires and 12–16 psi on the front is a common safe range as long as it matches the tire rating.
3. Check the current pressure
-
Use a low‑pressure tire gauge calibrated for ATVs or lawn equipment; standard car gauges are often inaccurate below about 20 psi.
-
Remove each valve stem cap and screw the gauge firmly onto the valve to get a reading. Record the pressure for every tire.
-
Check both left and right tires on each axle and note any differences. Uneven pressure causes uneven cutting and handling.
4. Adjust pressure safely
Inflate tires safely
-
Connect an air compressor or hand pump with a long hose if possible. Stand off to the side, not directly in front of or behind the tire during inflation.
-
Add air in short bursts and recheck with the gauge so you don’t overshoot.
-
If the tire is close to the MAX PSI on the sidewall, stop before you reach it; aim for 2 psi below the maximum for added safety.
Deflate if over‑inflated
-
If a tire is above the recommended pressure, use the valve core tool (often built into some gauges) or a small screwdriver to press the center pin briefly and release air.
-
Recheck frequently so you don’t drop too far below the target.
-
If a tire is way over the max (e.g., 30+ psi on a tire marked 14 psi max), suspect an earlier mistake and bring it down carefully to the safe range.
5. Balance and double‑check
-
Ensure both front tires are at the same pressure (within ±1 psi) and that both rear tires match.
-
Re‑tighten all valve stem caps to keep moisture and dirt out of the valve.
-
Walk around the machine and visually check that no tire looks excessively bulged (under‑inflated) or over‑round and hard (over‑inflated).
6. Safety reminders during inflation
-
Never stand directly in front of or behind the tire during inflation; if a tire or rim fails, the bursting force travels in line with the tread.
-
Use a long hose and gauge setup so you can stay at least a few feet away from the tire while monitoring pressure.
-
If the tire looks damaged, cracked, or heavily worn, or if the rim is bent, do not inflate to full pressure; have the tire or wheel inspected or replaced first.
7. When to repeat the check
-
Check tire pressure every 20–30 hours of use or at least once per mowing season.
-
Also check before using heavy attachments (carts, spreaders, ballast) and after long storage, because pressure can drop slowly even without a visible leak.
Tire pressure differences for turf vs ribbed tractor tires
Typical pressure ranges
For garden tractors and small utility tractors (not heavy‑duty farm machines), a good rule of thumb is:
-
Turf tires (R‑3 / “lawn”‑style): commonly 8–14 psi, depending on axle load and manufacturer spec.
-
Ribbed / standard agricultural tires (R‑1, F‑1, etc.): often 12–20 psi, and can safely run higher because they are built for more aggressive field work and heavier loads.
These ranges assume similar tire sizes and relatively light loads; very large or very heavy setups will shift into higher pressures and may need pressure‑by‑load charts.
Why turf tires usually run lower
Turf tires are designed to:
-
Minimize ripping or tearing of sod and leave minimal rutting.
-
Provide a softer ride on lawns, paths, and hard surfaces.
To achieve this:
-
They are often wider or have larger air volume relative to load, allowing safe operation at lower pressures (e.g., 8–12 psi).
-
Running them too high (e.g., 18–20 psi on a tire rated max 14 psi) increases soil compaction, scuffing, and scalping, defeating the purpose of turf‑friendly tires.
Why ribbed/aggressive tires run higher
Ribbed or “ag”‑style tires (R‑1, R‑2, F‑1, etc.) are built to:
-
Grip loose soil, mud, and sloped fields.
-
Carry heavier implements and ballast without the tire folding or rolling off the rim.
Because of deeper tread and more aggressive sidewalls:
-
They can be safely inflated to higher pressures (often in the 14–20 psi range) for field work and road travel.
-
On firm surfaces or during transport, raising pressure toward the upper end of the spec improves traction and reduces rolling resistance.
How to set pressure for each type
For turf tires
-
Start with the manufacturer’s spec for that tire size and load (manual or sidewall). Many turf‑pattern tires are spec’d for 10–12 psi on light‑duty mowers or garden tractors.
-
If the tire is only used on lawns and light paths, running 50–75% of the sidewall “MAX” pressure is common and safe, as long as the contact patch looks wide and the sidewall is only moderately deflected.
-
Drop pressures toward the lower end (e.g., 8–10 psi) when working on soft turf or sensitive lawns to reduce compaction and ruts.
For ribbed / agricultural tires
-
Use the load‑and‑pressure chart from the tire manufacturer or the tractor manual; many agricultural‑pattern tires on small tractors are spec’d around 14–18 psi for typical loads.
-
If you switch between fields and roads, it is ideal to lower pressure for the field (e.g., 10–12 psi) and raise it for road travel (e.g., 16–18 psi or as the chart allows).
-
Avoid running ribbed tires too low for field work; below the tire’s design range, you risk sidewall folding, bead failure, and over‑flexing.
Practical comparison table (garden‑tractor scale)
Safety and handling tips
-
Always match front and rear pressures within ±1–2 psi on the same axle; big differences can cause uneven handling and scalping.
-
If you swap from turf to ribbed tires (or vice versa), re‑check and adjust pressure for the new tire type; the same tractor can feel very different on a given psi with different tread patterns.
-
When in doubt, use the tire manufacturer’s spec rather than the sidewall “MAX”; the spec accounts for the tire’s available load and design, while the MAX is just the pressure limit of the casing.