
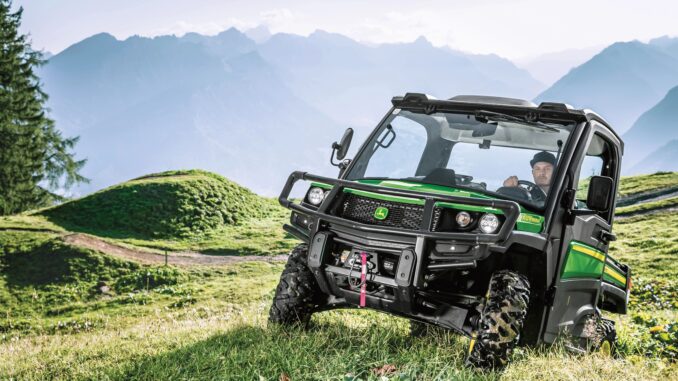
John Deere Gator Parts and Repair Guide
Practical information is most useful when it answers the complete sequence of questions that arise between identifying a problem and returning a utility vehicle to reliable service.
A replacement part is only one part of the process. Accurate repair decisions depend on identifying the exact Gator model, confirming the Product Identification Number (PIN) or serial number, understanding the fault, locating the correct component in a parts diagram, checking fitment, choosing an appropriate replacement option and following safe repair or maintenance procedures.
This guide brings those needs together in one place. It covers John Deere Gator parts identification, fitment checks, common troubleshooting categories, routine maintenance, manuals, diagrams, OEM and aftermarket options, used parts, repair-planning considerations and safety boundaries.
For Detailed Guide to Specific Models please click links to series guides below.
John Deere Gator Models by Series
| Predecessor (AMT) Series | Original / Traditional Series | Compact Gator Series |
| RSX Gator Series | Electric Gator Series | ProGator Series |
Important: John Deere Gator utility vehicles have been produced in many model families, engine configurations, drivetrain layouts and production versions. Always confirm the exact Gator model and PIN before ordering a part or beginning a major repair.
Identify the Exact Gator
The John Deere Gator name includes a wide range of utility vehicles. Different model families use different engines, belts, clutches, brakes, axles, filters, steering components, electrical systems, cooling systems and body parts.
Possible Gator categories include:
-
Traditional 4×2 and 6×4 work Gators.
-
TS, TX, TE and TH models.
-
HPX utility vehicles.
-
XUV 550, XUV 560 and XUV 590 mid-size crossover Gators.
-
XUV 625i and XUV 825i models.
-
XUV 835M, 855M, 865M and similar full-size crossover Gators.
-
Gasoline/petrol, diesel and electric models.
-
Two-wheel-drive, four-wheel-drive and six-wheel-drive configurations.
-
Utility vehicles with factory or aftermarket cabs, winches, snow-removal equipment, lighting kits, hydraulic accessories, cargo-box options, wheels and tyres.
The model designation alone may not identify every part correctly. Differences can result from production changes, engine variations, serial-number breaks, drivetrain configurations, options and regional specifications.
Information required for accurate parts research
Before looking up parts, manuals or repair information, collect:
-
Full model designation.
-
Product Identification Number or serial number.
-
Approximate production year, where known.
-
Engine model and engine serial number, where relevant.
-
Fuel type.
-
Drivetrain layout.
-
Front or rear location of the affected component.
-
Left- or right-side location where applicable.
-
Original part number, if readable.
-
Photographs of the component, fittings and electrical connectors.
-
Measurements where a component is broken, missing or has been replaced previously.
-
Details of optional equipment that may affect fitment.
John Deere’s parts-search process supports searches by model number, equipment type, model title, parts catalogue number or PIN. Its parts information also notes that parts catalogue searches use the “PC” prefix.
On many Gator models, the Product Identification Number label is located toward the rear of the utility vehicle, including the rear-right area near the hitch or the right side between the rear tyre and cargo box. The engine serial number is located on the engine. Identification-tag position can vary by model, so the correct operator’s manual should be checked where there is uncertainty.
Find and Identify the Correct Part
Parts identification is often the first repair challenge. A component may be visibly worn, damaged, leaking, missing or disconnected, but its technical name and original part number may not be known.
Common parts-identification needs include:
-
Identifying a broken belt, pulley, clutch component or guard.
-
Finding a leaking hose, fitting, seal, gasket or pump.
-
Recognising a worn CV boot, axle, bearing or hub.
-
Identifying a steering joint, tie rod, ball joint, rack component or bushing.
-
Finding brake components such as pads, rotors, calipers, hoses or master cylinders.
-
Identifying a fuse, relay, electrical connector, switch, wiring section or sensor.
-
Finding cargo-box, latch, seat, roof, windshield, hitch and body components.
-
Identifying missing clips, fasteners, brackets, seals, washers and hardware.
Use parts diagrams and catalogues
A parts diagram helps identify the correct assembly and shows how individual components fit together. It can reveal:
-
Official component names.
-
Original part numbers.
-
Position within an assembly.
-
Related items required for installation.
-
Whether the part is sold individually or as part of a larger unit.
-
Differences between similar assemblies.
-
Hardware and seals that may be needed at the same time.
John Deere provides Parts Lookup support for finding part numbers and diagrams, while its manuals and training resources include access to parts catalogues, operator manuals, technical publications and engine-maintenance information for Gator utility vehicles.
Confirm the source of the failure
A damaged part may not always be the underlying cause of the fault.
For example:
-
A failed drive belt can be linked to clutch wear, incorrect installation, heat, contamination or driveline resistance.
-
A wheel-bearing failure may be connected to damaged seals, loose hardware, water ingress, overloading or impact damage.
-
A torn CV boot can allow dirt and moisture to damage the CV joint, potentially making a complete axle replacement necessary.
-
A blown fuse may be caused by damaged wiring, a short circuit, a failed switch, a corroded connector or another electrical component.
-
Uneven brake-pad wear can indicate a seized caliper, damaged slide mechanism, hydraulic issue or contaminated components.
Reliable repair information should identify the likely part while also explaining what should be inspected to prevent repeated failure.
Check Parts Fitment Before Ordering
Fitment confirmation is one of the most important requirements when researching John Deere Gator parts. Many components are physically similar but differ in dimensions, mounting points, electrical connectors, belt profile, clutch specification, spline count, brake design or serial-number applicability.
High-risk fitment categories include:
-
Drive belts.
-
Primary and secondary clutch parts.
-
CV axles and CV boots.
-
Wheel bearings and hubs.
-
Brake pads, discs, calipers and master cylinders.
-
Steering racks, tie rods and ball joints.
-
Starters, alternators, ignition switches, relays and sensors.
-
Fuel filters, pumps, injectors and fuel-system components.
-
Oil, air and fuel filters.
-
Radiators, fans, hoses, water pumps and thermostats.
-
Engine gaskets, seals and ignition components.
-
Transmission and differential parts.
Fitment checklist
Confirm the following before ordering:
-
Exact John Deere Gator model.
-
Product Identification Number or serial-number range.
-
Original John Deere part number where available.
-
Engine information when the part is engine-specific.
-
Drivetrain configuration.
-
Front or rear position.
-
Left or right position.
-
Physical dimensions and mounting arrangement.
-
Belt width, profile, length and clutch compatibility where applicable.
-
Electrical connector type, terminal count and harness connection.
-
Included seals, clips, bolts, fittings, gaskets, pins or hardware.
-
Supplier warranty and return terms.
-
Suitability of the part for the repair type and safety risk.
Parts listings that use broad language such as “fits John Deere Gator” require further verification. A correct fitment decision should be based on the model, PIN, original part number and technical comparison rather than product photographs alone.
Diagnose Starting, Charging and Electrical Problems
Starting and electrical faults are among the most common reasons for searching John Deere Gator repair information. These problems can affect work schedules and may be difficult to diagnose without a systematic approach.
Typical symptoms include:
-
No crank condition.
-
Clicking when the key is turned.
-
Slow cranking.
-
Engine cranks but will not start.
-
Engine starts then stalls.
-
Repeated flat battery.
-
Battery does not charge.
-
No dashboard power.
-
Headlights, taillights or work lights do not operate.
-
Blown fuses.
-
Intermittent electrical faults.
-
Damaged wiring or connectors.
Parts and systems to inspect
Possible components include:
-
Battery.
-
Battery terminals and cables.
-
Ground straps.
-
Fuses.
-
Relays.
-
Starter motor.
-
Starter solenoid.
-
Ignition switch.
-
Safety switches and interlocks.
-
Alternator or charging-system components where fitted.
-
Wiring harnesses.
-
Electrical connectors.
-
Fuel pump and fuel-system wiring.
-
Engine-management sensors and modules on applicable models.
-
Lighting circuits and switches.
Practical diagnostic order
A basic fault-check process should begin with the simplest and most common causes:
-
Confirm battery charge and condition.
-
Inspect battery terminals, cables and ground connections.
-
Check fuses, relays and visible connectors.
-
Look for damaged insulation, corrosion, rodent damage, loose plugs or signs of overheating.
-
Confirm that operating controls and safety conditions are correctly set.
-
Check fuel level, fuel condition and visible fuel-system faults.
-
Inspect the fuel filter and fuel lines where accessible.
-
Refer to the correct technical information before replacing major electrical or fuel-system components.
A clicking no-start condition may result from a low battery, poor connection, weak ground, starter solenoid problem or starter-motor fault. A crank-no-start condition can involve fuel delivery, ignition, air intake, compression, electrical controls or safety-system inputs. Accurate diagnosis should come before parts replacement.
Do not bypass safety circuits, use temporary wiring that can overheat or short, or operate a Gator with leaking fuel, damaged electrical insulation or signs of burning.
Diagnose Drive, Belt, Clutch and Transmission Problems
A Gator that starts and revs but does not move correctly creates a high-priority repair requirement. Loss of movement, poor pulling power, hard shifting, belt noise, clutch noise or axle clicking can arise from several systems.
Typical symptoms include:
-
Engine revs but vehicle does not move.
-
Gator barely moves under load.
-
Loss of power on slopes.
-
Slipping or shuddering drive.
-
Squealing, burning or belt-related noise.
-
Rattle, clunk or grinding from the clutch or driveline.
-
Difficult gear selection.
-
Failure to move in forward or reverse.
-
Clicking during turns.
-
Driveline vibration.
-
Intermittent loss of drive.
Common component areas
Potential causes can include:
-
Drive belt or CVT belt wear.
-
Glazed, cracked, stretched, contaminated or incorrectly specified belt.
-
Primary clutch wear or damage.
-
Secondary clutch wear or damage.
-
Clutch sheave wear.
-
Shift cable or shift linkage problems.
-
Driveshaft or universal-joint wear.
-
CV axle or CV-joint failure.
-
Torn CV boot and contaminated joint.
-
Differential issue.
-
Gearbox, transaxle or transmission fault.
-
Brake drag.
-
Hub, wheel-bearing or axle damage.
-
Tyre mismatch or drivetrain loading issue.
Drive-belt and clutch inspection requirements
A belt should not be replaced automatically without assessing the surrounding system. Inspect for:
-
Cracking, glazing, fraying, chunks missing or abnormal wear.
-
Oil, grease, coolant, water or debris contamination.
-
Burning smell or evidence of overheating.
-
Incorrect belt profile or dimensions.
-
Worn, damaged or contaminated clutch sheaves.
-
Damaged clutch covers, vents or cooling-air paths.
-
Signs of clutch binding or abnormal movement.
-
Excessive load, towing or repeated hard-use conditions.
-
Brake drag or other sources of drivetrain resistance.
Technical material for certain Gator models can cover CVT drive, electrical, steering, brake and other diagnostic systems. Major clutch, transmission and driveline work should use the correct model-specific technical information and tools.
Important repair boundary
CVT clutch disassembly can involve spring-loaded components and specialised procedures. Transmission, differential and major driveline repairs may require lifting equipment, pullers, torque specifications, adjustments and diagnostic checks. Where correct procedures or tools are unavailable, professional repair support is the safer option.
Diagnose Brake, Steering, Suspension and Wheel Problems
Brake, steering, suspension and wheel faults require immediate attention because they can affect control and safe stopping.
Common symptoms include:
-
Soft, sinking or unusually long brake pedal.
-
Reduced braking performance.
-
Brake noise.
-
Brake-fluid loss.
-
Brake drag.
-
Loose steering.
-
Wandering or pulling.
-
Excessive steering-wheel movement.
-
Clunking from the front or rear.
-
Wheel wobble.
-
Uneven tyre wear.
-
Clicking while turning.
-
Vibration through the steering or floor.
-
Visible damage to steering or suspension components.
Brake-related parts
Potential brake parts include:
-
Brake pads.
-
Brake discs or rotors.
-
Calipers.
-
Caliper hardware.
-
Brake hoses and lines.
-
Master cylinders.
-
Reservoirs.
-
Brake switches.
-
Seals, fittings and fluid components.
Steering, suspension and wheel parts
Potential components include:
-
Tie rods.
-
Ball joints.
-
Steering rack.
-
Rack boots.
-
Control arms.
-
Bushings.
-
Shocks and springs.
-
Wheel bearings.
-
Hubs.
-
Wheel studs.
-
Wheel nuts.
-
CV axles.
-
CV boots.
Immediate safety checks
Stop using the Gator and inspect the system if there is:
-
A significant brake-fluid leak.
-
A brake pedal that feels unusually soft, sinks, or provides poor stopping.
-
Severe grinding, metal-on-metal noise or brake binding.
-
Loose steering or severe steering play.
-
A visibly damaged tie rod, ball joint, control arm or suspension component.
-
Wheel wobble.
-
Loose wheel hardware.
-
A damaged axle, major vibration or severe CV-joint noise.
Brake and steering repair information should distinguish between visual inspection, routine component replacement, hydraulic repair, bleeding procedures, torque-sensitive wheel work, alignment-sensitive suspension repairs and situations requiring workshop support.
Diagnose Cooling, Engine and Exhaust Problems
Overheating, coolant loss, engine-power loss, oil leaks and abnormal engine noise should be investigated promptly. Continued operation can turn a manageable cooling or service issue into major engine damage.
Typical symptoms include:
-
Engine overheating.
-
Temperature warning.
-
Coolant leak.
-
Steam from the cooling system.
-
Cooling fan not operating.
-
Loss of engine power.
-
Rough running.
-
Oil leak.
-
Exhaust noise.
-
Burning smell.
-
Coolant contamination.
-
Excessive smoke.
Common cooling and engine components
Potential parts include:
-
Radiator.
-
Cooling fan.
-
Fan motor.
-
Fan relay.
-
Thermostat.
-
Water pump.
-
Coolant hoses.
-
Hose clamps.
-
Radiator cap.
-
Coolant reservoir.
-
Air filter.
-
Intake boot.
-
Fuel filter.
-
Fuel pump.
-
Spark plugs or ignition components.
-
Gaskets and seals.
-
Exhaust components.
-
Engine belts and pulleys.
Cooling-system inspection priorities
Check for:
-
Low coolant level.
-
Visible leaks at hoses, clamps, radiator, reservoir or water pump.
-
External blockage of the radiator by mud, grass, leaves, chaff or debris.
-
Fan operation.
-
Damaged electrical connectors or fan wiring.
-
Damaged hoses.
-
Contaminated fluid.
-
Warning lights or overheating history.
Do not remove a radiator cap when the engine is hot. Stop operating an overheating Gator, allow it to cool and investigate the cause before returning it to use.
Plan Routine Maintenance and Service Parts
Routine maintenance helps reduce breakdowns, extends service life and provides an opportunity to inspect belts, brakes, steering, cooling, battery condition and driveline components before they fail.
Important maintenance areas include:
John Deere Gator service-parts documents for specific models list maintenance components such as engine oil filters, air filters, fuel filters, spark plugs and drive belts. Exact part numbers differ by model and must be verified before ordering.
Seasonal inspection priorities
A pre-season or pre-work inspection should include:
-
Engine oil and filter status.
-
Air-filter condition.
-
Fuel quality and fuel-filter service.
-
Battery condition and terminals.
-
Tyre pressure and tyre damage.
-
Brake function and fluid condition.
-
Steering play and suspension wear.
-
Wheel hardware.
-
Belt and clutch-area inspection where applicable.
-
CV boots and axles.
-
Cooling-system cleanliness and fluid level.
-
Lights, switches, warning functions and horn where equipped.
-
Cargo-box latch, hitch and accessory mounting points.
Use the Correct Manuals and Diagrams
Gator repair and parts research becomes more accurate when the right documentation is used for the task.
John Deere’s manuals and training support provides access to operator manuals, parts catalogues, engine-maintenance information and technical manuals for Gator utility vehicles.
When technical information is essential
Use the correct model-specific technical information before attempting:
-
Brake hydraulic repairs.
-
Brake bleeding.
-
CVT clutch removal or disassembly.
-
Transmission, differential or gearbox repairs.
-
Steering-rack or major suspension repairs.
-
Wheel-bearing work requiring torque procedures.
-
Fuel-system repairs involving leaks or complex components.
-
Wiring-harness diagnosis.
-
Advanced electrical testing.
-
Cooling-system diagnosis beyond basic inspection.
-
Engine repairs or internal adjustments.
A parts diagram identifies components, but it does not replace a technical repair procedure.
Choose Between OEM, Aftermarket, Used and Rebuilt Parts
Replacement-part selection depends on cost, availability, quality, safety and how long the Gator is expected to remain in service.
Genuine John Deere OEM parts
OEM parts are generally the lowest-risk option where fitment, specification and durability are important. They are especially appropriate for:
-
Drive belts and clutch components.
-
Brake parts.
-
Steering parts.
-
Bearings and hubs.
-
Electrical sensors and controls.
-
Fuel-system components.
-
Cooling-system parts.
-
Engine gaskets and seals.
-
Safety-critical fasteners and hardware.
Aftermarket parts
Aftermarket parts can provide cost savings and may be suitable for selected maintenance and repair tasks. Quality varies by manufacturer and supplier.
Before choosing aftermarket parts, check:
-
The OEM part number being replaced.
-
Model and PIN compatibility.
-
Dimensions and technical specifications.
-
Warranty terms.
-
Supplier reputation.
-
Product reviews from users of the same Gator model.
-
Whether hardware, gaskets, clips or seals are included.
-
Whether the part is safety-critical.
Used parts
Used parts can be practical for older machines and non-safety-critical items, including:
-
Body panels.
-
Cargo boxes.
-
Seats.
-
Roofs.
-
Windshields.
-
Wheels.
-
Brackets.
-
Latches.
-
Trim pieces.
-
Older or discontinued accessories.
Used components require additional caution when they involve brakes, steering, suspension, wheel bearings, electrical systems, fuel systems, driveline parts, clutches, transmissions, seals or rubber components.
Confirm the donor vehicle model, serial/PIN range, condition, return policy and complete fitment details before purchase.
Reconditioned or rebuilt parts
Rebuilt assemblies can make sense for costly items such as starters, alternators, clutches, steering racks, transmissions, differentials and engines. Check:
-
What components were replaced during rebuilding.
-
What testing was completed.
-
Warranty length and conditions.
-
Core-return requirements.
-
Compatibility with the Gator model and PIN.
-
Whether installation requires setup, adjustment or specialist tools.
Decide Whether Repair Is Worthwhile
A repair decision depends on more than the price of one part. A Gator may need a belt, clutch, axle, battery, brake repair, cooling-system work, wiring repair or transmission work, but the overall condition of the utility vehicle matters.
Factors to consider include:
-
Age and overall condition.
-
Engine condition.
-
Frame, cargo-box and body condition.
-
Brake condition.
-
Steering and suspension condition.
-
Tyre condition.
-
Service history.
-
Existing faults.
-
Availability of repair parts.
-
Cost of the immediate repair.
-
Likelihood of additional repairs.
-
Value of the machine when working.
-
Cost of downtime.
-
Cost and availability of replacement equipment.
A well-maintained older Gator with a sound engine, good chassis, usable tyres and one defined repair need may be worth keeping in service. A Gator with major structural corrosion, repeated electrical problems, brake issues, drivetrain failure and engine trouble may require a more cautious cost assessment.
John Deere Gator Parts and Repair Content Structure
A complete information resource should connect model identification, fault diagnosis, parts lookup, repair guidance and maintenance planning.
Main guide
John Deere Gator Parts, Repair, Troubleshooting and Maintenance Guide
This is the central page covering identification, PIN information, diagrams, manuals, maintenance, troubleshooting and parts options.
Identification and fitment pages
-
John Deere Gator Serial Number and PIN Guide.
-
John Deere Gator Parts Diagram Guide.
-
John Deere Gator Part Number Lookup Guide.
-
John Deere Gator Parts Fitment Guide.
-
John Deere Gator OEM vs Aftermarket Parts Guide.
Symptom-led repair pages
-
John Deere Gator Will Not Start: Troubleshooting Guide.
-
John Deere Gator Starts Then Dies: Diagnosis Guide.
-
John Deere Gator Revs but Will Not Move.
-
John Deere Gator Drive Belt and Clutch Problems.
-
John Deere Gator Transmission and Shift Problems.
-
John Deere Gator Brake Problems.
-
John Deere Gator Steering Problems.
-
John Deere Gator Battery and Charging Problems.
-
John Deere Gator Electrical Problems.
-
John Deere Gator Overheating Guide.
Component-led parts pages
-
John Deere Gator Oil, Filters and Service Kits.
-
John Deere Gator Drive Belts and Clutches.
-
John Deere Gator CV Axles and CV Boots.
-
John Deere Gator Brake Parts.
-
John Deere Gator Steering and Suspension Parts.
-
John Deere Gator Wheel Bearings and Hubs.
-
John Deere Gator Battery, Starter and Charging Parts.
-
John Deere Gator Fuel-System Parts.
-
John Deere Gator Cooling-System Parts.
-
John Deere Gator Cargo Box, Body and Accessory Parts.
Model-specific information pages
Model-specific pages should be created where they provide unique technical value, not merely a substituted model name. Suitable topics include major Gator model families such as TS, TX, TH 6×4, HPX, XUV 550, XUV 560, XUV 590, XUV 625i, XUV 825i, XUV 835M and XUV 865M.
Each page should include verified information relevant to that model, such as:
-
Engine configuration.
-
Drivetrain arrangement.
-
Parts fitment considerations.
-
Service items.
-
Common repair areas.
-
Manual and diagram references.
-
PIN or serial-number notes.
-
Links to relevant symptom and component guides.
Parts and Repair Checklist
Use this checklist before ordering parts or beginning a significant repair:
-
Identify the exact John Deere Gator model.
-
Record the Product Identification Number or serial number.
-
Record engine details where relevant.
-
Identify the affected assembly from a parts diagram.
-
Confirm the original part number where possible.
-
Check for model-year and serial-number differences.
-
Confirm left/right and front/rear position.
-
Compare dimensions, connectors, splines, mounting points and fittings.
-
Confirm what is included with the replacement part.
-
Order seals, clips, fasteners, gaskets, fluids or other related items where needed.
-
Choose between OEM, aftermarket, used or rebuilt based on safety, cost and expected service life.
-
Check the supplier’s warranty and return policy.
-
Use the correct operator, parts or technical manual.
-
Confirm that the repair is suitable for available tools, working conditions and skill level.
-
Stop and seek professional support where the repair involves brakes, steering, lifting, electrical safety, fuel leaks, transmission systems or engine internals.
Final Thoughts
John Deere Gator parts and repair information must support the complete path from a fault, symptom or maintenance requirement to an accurate and safe outcome.
The essential process is:
-
Identify the Gator precisely.
-
Locate the PIN or serial number.
-
Diagnose the fault before ordering parts.
-
Use a parts diagram to identify the correct component.
-
Confirm fitment against model and PIN information.
-
Choose a suitable OEM, aftermarket, used or rebuilt replacement.
-
Use correct repair procedures and safety precautions.
-
Carry out regular maintenance to reduce future downtime.
John Deere’s owner-support resources are organized around this same process, using accurate machine identification, parts catalogues, operator manuals, engine maintenance information and technical publications.
Accurate Gator repair begins with correct identification. Whether the requirement is an oil filter, drive belt, brake part, CV axle, battery, starter, radiator component, steering part, service kit or major repair information, the correct answer depends on the exact vehicle, the verified fault and the correct part fitment.
Frequently Asked Questions
1. How do I identify the correct John Deere Gator model before ordering parts?
Start with the model designation and Product Identification Number (PIN), sometimes referred to as a serial number. Record the full model, PIN, engine model where relevant, fuel type, drivetrain configuration, and the location of the part on the vehicle. The model name alone may not identify the correct part because specifications can change during production, and components may differ between engine, drivetrain, trim, or option packages.
Use the PIN and model information when searching John Deere Parts Lookup, consulting a parts catalogue, or asking a dealer or supplier to confirm fitment. John Deere’s parts-search guidance supports searches using the model number, equipment type, catalogue number, model title, or PIN.
2. Where is the PIN or serial number located on a John Deere Gator?
The position varies by model, but the identification tag is commonly found toward the rear of the Gator. It may be located in the rear-right area above or near the hitch, or on the right side of the vehicle between the rear tyre and cargo box.
Check the operator’s manual for the exact Gator model if the tag cannot be found. The engine serial number is located on the engine and can be important when ordering engine-specific filters, fuel-system components, ignition parts, gaskets, or repair components.
3. Why does the John Deere Gator PIN matter when buying parts?
The PIN identifies the exact vehicle and can help distinguish between production changes within the same Gator model. John Deere may use different components during a model run, including belts, filters, brakes, axles, clutches, electrical parts, body components, or engine-related parts.
Using the PIN reduces the risk of ordering a part that appears correct but does not fit because of a serial-number break, engine variation, drivetrain difference, or option package.
4. Can parts be ordered using only the name “John Deere Gator”?
No. “John Deere Gator” describes a large group of utility vehicles rather than one specific machine. There are older 4×2 and 6×4 work Gators, TS, TX, TE, TH, HPX, XUV 550, XUV 560, XUV 590, XUV 625i, XUV 825i, XUV 835M, XUV 865M and other models with different parts requirements.
Always identify the exact model and PIN before ordering. For some repairs, engine identification, front/rear location, left/right side and drivetrain configuration are also required.
5. What information is needed to find the correct Gator part number?
The most useful information includes:
-
Exact Gator model designation.
-
PIN or serial number.
-
Approximate production year if known.
-
Engine model and engine serial number where relevant.
-
Original OEM part number, if readable.
-
Description of the affected system.
-
Front or rear location.
-
Left or right side where applicable.
-
Photographs of the part and mounting points.
-
Measurements, electrical connector details, spline count, belt dimensions or hose size where relevant.
A parts catalogue or exploded parts diagram is usually the best way to confirm the official component name and original reference number.
6. What is the difference between a John Deere Gator parts catalogue and a service manual?
A parts catalogue identifies assemblies and original part numbers. It usually contains exploded diagrams that show the relationship between components, fasteners, seals, clips and subassemblies.
A technical or service manual explains how to diagnose, remove, install, adjust and test components. It may include specifications, torque values, electrical-testing procedures, repair sequences and safety information.
An operator’s manual is different again: it focuses on safe use, controls, routine maintenance, fluids and regular inspections. John Deere provides access to parts catalogues, operator manuals, technical information and engine-maintenance resources through its manuals and training support.
7. How can a John Deere Gator parts diagram help with repairs?
A parts diagram can help identify an unknown component, confirm whether a part is sold individually, identify related seals or fasteners, and find the original John Deere part number.
For example, a diagram can show whether a leaking item is a hose, fitting, O-ring, seal, pump, reservoir or complete assembly. It can also reveal whether a replacement part requires additional clips, bolts, washers, gaskets, pins or hardware.
Use the diagram to identify the component, then consult the appropriate technical information before attempting major repair work.
8. What are the most common John Deere Gator maintenance parts?
Common service items vary by model but may include:
-
Engine oil and oil filter.
-
Air filter and pre-cleaner.
-
Fuel filter.
-
Spark plugs on applicable gasoline models.
-
Battery.
-
Drive belt or CVT belt on applicable vehicles.
-
Brake pads and brake fluid.
-
Coolant and cooling-system components.
-
Grease and lubricants.
-
Tyres, valve stems and wheel hardware.
-
Belts, hoses, clamps and seals.
John Deere parts literature for specific Gator models includes maintenance items such as oil filters, air filters, fuel filters, spark plugs and drive belts. Exact part numbers vary by model and must be checked before ordering.
9. How often should a John Deere Gator be serviced?
Service intervals vary by model, engine, operating conditions, workload and age. The correct intervals are found in the operator’s manual for the exact machine.
A Gator working in dust, mud, heat, cold, deep snow, hilly terrain, towing conditions or commercial use may need more frequent attention than one used lightly on dry, level ground. Regular checks should include engine oil, air filter, fuel system, tyre condition, brake performance, steering play, battery condition, cooling-system cleanliness, belt condition, CV boots and wheel hardware.
10. What causes a John Deere Gator to crank but not start?
A crank-no-start condition can be caused by several systems, including:
-
Low battery voltage or poor electrical connections.
-
Faulty ignition switch, relay, fuse, solenoid or safety interlock.
-
Fuel supply issue.
-
Clogged fuel filter.
-
Faulty fuel pump.
-
Contaminated, stale or incorrect fuel.
-
Ignition fault.
-
Damaged wiring or corroded connectors.
-
Sensor or engine-management problem on applicable models.
-
Engine mechanical issue.
Start with basic checks such as battery condition, terminal cleanliness, cable condition, fuses, relays, visible wiring, fuel level and fuel quality. Do not replace major components until the fault has been narrowed down.
11. Why does a John Deere Gator click but not start?
A clicking sound when the key is turned can indicate that the starter circuit is attempting to operate but does not have enough power or continuity to turn the engine.
Possible causes include:
-
Weak or discharged battery.
-
Loose, dirty or corroded battery terminals.
-
Damaged battery cable.
-
Weak ground connection.
-
Faulty starter solenoid.
-
Starter motor fault.
-
High resistance in a cable or connector.
-
Fault in the ignition or safety-interlock circuit.
Battery and cable checks should come before replacing the starter or solenoid.
12. Why does a John Deere Gator start and then die?
A Gator that starts but stalls may have a fuel-delivery, air-intake, ignition, electrical, sensor or safety-system problem.
Possible causes can include a restricted fuel filter, fuel pump issue, poor-quality fuel, blocked vent, damaged fuel line, dirty air filter, loose electrical connector, charging-system issue, ignition problem, or model-specific engine-management fault.
The correct repair depends on the exact model, engine type and operating conditions. Begin with simple inspection and maintenance checks before replacing components.
13. Why does a John Deere Gator rev but not move?
This symptom commonly leads to a search for a drive belt, clutch or transmission part, but it can have several causes.
Potential causes include:
-
Worn, glazed, damaged or contaminated drive belt.
-
Incorrect belt specification.
-
Primary or secondary clutch issue.
-
Shift linkage or shift cable problem.
-
Driveshaft or universal-joint failure.
-
Failed CV axle or CV joint.
-
Differential, gearbox, transaxle or transmission fault.
-
Brake drag.
-
Hub or wheel-bearing damage.
Inspect the belt and clutch area, but avoid assuming that the belt is automatically the cause. Repeated belt failure may indicate clutch wear, contamination, overheating, poor ventilation or a deeper driveline problem.
14. What are the signs of a worn John Deere Gator drive belt?
Signs can include:
-
Squealing or chirping noise.
-
Burning-rubber smell.
-
Reduced pulling power.
-
Slipping under load.
-
Poor hill-climbing performance.
-
Cracks, glazing, fraying or missing material.
-
Belt contamination.
-
Abnormal heat in the belt or clutch area.
-
Intermittent loss of drive.
A worn belt should be inspected alongside the clutch sheaves, belt cover, ventilation path and driveline. A new belt may fail quickly if the underlying cause is not corrected.
15. Can any belt that looks similar be used on a John Deere Gator?
No. A visually similar belt may have different width, length, profile, cord construction or operating characteristics. Incorrect belts can cause poor drive performance, clutch damage, overheating, rapid wear or unsafe operation.
Confirm the correct belt by exact Gator model, PIN where needed and OEM part-number reference. Do not rely only on a photograph, broad “fits Gator” description or measurements taken from a severely worn old belt.
16. What causes John Deere Gator clutch noise?
Clutch-related noise may be caused by a worn or damaged drive belt, contaminated clutch surfaces, worn clutch components, damaged sheaves, bearings, rollers, springs, poor alignment, overheating, debris or driveline resistance.
Because clutch systems can involve rotating and spring-loaded components, inspection and repair should follow the correct model-specific procedures. Avoid dismantling a clutch assembly without the appropriate tools and technical information.
17. Why is a John Deere Gator hard to shift?
Hard shifting can result from a number of issues, including driveline load, poor idle condition, belt or clutch problems, damaged shift linkage, worn shift cable, transmission issue, brake drag or internal gearbox problems.
The best diagnostic path depends on whether the issue occurs only when the engine is running, only when cold, only under load or in a particular gear range. Use the correct technical information before adjusting cables or dismantling drivetrain components.
18. What causes clicking when turning a John Deere Gator?
Clicking during turns can indicate a worn CV joint, damaged CV axle, torn CV boot, worn wheel bearing, loose hub hardware, steering-joint wear or another driveline problem.
Inspect CV boots for tears, grease leakage and contamination. Check for wheel play, loose hardware, damaged boots and steering wear. Severe clicking, vibration, wheel wobble or a damaged axle should be treated as a reason to stop using the Gator until repaired.
19. What does a torn CV boot mean on a John Deere Gator?
A torn CV boot allows grease to escape and lets water, grit and dirt enter the CV joint. If found early, the boot and grease may sometimes be addressed before the joint is badly damaged. If the Gator has been operated for some time with a torn boot, or if clicking and vibration are present, the complete axle or CV joint may require replacement.
The correct repair depends on the model, axle design, availability of boot kits, condition of the joint and cost of the full axle assembly.
20. Why are the brakes weak or soft on a John Deere Gator?
Weak, soft or unusually long brake-pedal travel can result from worn pads, fluid loss, air in the hydraulic system, damaged brake hoses, master-cylinder problems, caliper issues, leaks, contaminated brake components or other brake-system faults.
A soft pedal, major fluid loss, reduced braking performance or brake warning should be treated as a safety issue. Do not continue operating the Gator until the brake system has been inspected and repaired correctly.
21. Can John Deere Gator brake pads be replaced without replacing rotors?
Sometimes. Brake pads can be replaced alone if the discs or rotors are within specification, undamaged and not excessively worn, scored, warped or contaminated.
However, pad replacement should include inspection of the rotor condition, caliper movement, hoses, brake fluid, hardware and any evidence of uneven wear. Follow the correct model-specific procedure and specifications.
22. Why does a John Deere Gator pull to one side when braking?
Pulling under braking can be caused by uneven brake-pad wear, a sticking caliper, contaminated pads or rotor, brake-fluid issue, damaged hose, different tyre pressures, suspension damage or wheel-alignment-related problems.
Because uneven braking affects control, inspect the Gator before further use. Do not assume that replacing pads alone will correct the cause.
23. What causes loose steering in a John Deere Gator?
Loose or wandering steering can be caused by worn tie rods, ball joints, steering-rack components, bushings, wheel bearings, hubs, suspension joints, loose fasteners, damaged tyres or incorrect tyre pressures.
Steering play should be investigated promptly. A visibly worn or damaged steering component should be replaced before the Gator is used again.
24. What causes wheel wobble on a John Deere Gator?
Wheel wobble can be caused by loose wheel nuts, damaged wheel, worn wheel bearing, loose hub, damaged tyre, bent suspension component, steering wear, axle problem or incorrect wheel fitment.
Stop and inspect the vehicle if wheel wobble is severe, sudden or accompanied by noise, vibration or steering difficulty. Check wheel hardware first, but do not continue operating if there is play in a wheel bearing, hub, steering joint or suspension component.
25. Why is a John Deere Gator overheating?
Overheating can result from low coolant, coolant leaks, blocked radiator fins, cooling fan failure, faulty fan relay, damaged wiring, thermostat problem, water-pump issue, blocked hose, radiator-cap problem, excessive load or internal engine fault.
Check for visible leaks, coolant level, debris blockage and cooling-fan operation after the machine has cooled. Do not remove the radiator cap when hot or continue operating an overheating engine.
26. Why is the cooling fan not working on a John Deere Gator?
A cooling-fan fault may involve the fan motor, fuse, relay, wiring, connector, temperature switch or sensor, control system or mechanical damage.
Begin with visible electrical checks and correct model-specific diagnostic information. The fan circuit can differ between Gator models, so avoid fitting parts based only on a general description.
27. What causes a John Deere Gator coolant leak?
Coolant leaks may come from hoses, clamps, radiator, water pump, thermostat housing, reservoir, radiator cap, gasket, seal or damaged fitting.
The location of dried coolant residue, wetness, steam or coolant smell can help identify the source. A cooling-system pressure test may be required for difficult leaks. Repair should be completed before operating the Gator if coolant loss or overheating is present.
28. How do I find the correct oil filter for a John Deere Gator?
Identify the full Gator model, engine type and PIN where applicable. Then consult the correct operator’s manual, parts catalogue or authorized parts source to confirm the oil-filter reference.
Do not assume that the same filter fits all Gators. Different engines and production versions may use different filter specifications. Confirm the thread, gasket, bypass-valve and fitment requirements rather than relying solely on the shape of the existing filter.
29. Are aftermarket John Deere Gator parts reliable?
Some aftermarket parts can be reliable, but quality and fitment vary. Reliability depends on the manufacturer, material quality, production control, design accuracy, warranty support and suitability for the specific repair.
For low-risk maintenance items from reputable suppliers, aftermarket parts may offer good value. For brakes, steering, drivetrain, fuel systems, cooling systems, electrical controls and other safety-critical or precision components, OEM parts or thoroughly verified high-quality alternatives are generally the safer choice.
30. Are used John Deere Gator parts a good idea?
Used parts can be worthwhile for body panels, cargo boxes, seats, roofs, windshields, brackets, trim, wheels and discontinued non-safety-critical components.
Use caution with used brake parts, steering components, wheel bearings, suspension joints, CV axles, clutches, fuel-system components, electrical components and drivetrain assemblies. Verify the donor model and PIN range, inspect the condition, understand the return policy and account for installation labour before buying.
31. What should be checked before buying a used Gator axle or CV joint?
Confirm:
-
Exact Gator model and donor-machine PIN range.
-
Front or rear position.
-
Left or right side.
-
Drive configuration.
-
Spline count and hub connection.
-
Overall length.
-
Boot condition.
-
Evidence of grease leakage.
-
Signs of impact damage.
-
Joint smoothness.
-
Return policy.
A used axle may look acceptable externally but have worn joints, damaged splines, hidden corrosion or water contamination.
32. What should be replaced with a John Deere Gator drive belt?
Depending on the model and repair findings, additional items may include clutch-cover seals, damaged guards, worn clutch components, damaged bolts, cooling-duct components or related hardware.
A complete replacement decision should be based on inspection. The belt itself is not always the only worn item, and repeated belt failure often indicates that the surrounding clutch or driveline system needs attention.
33. Does a replacement part include bolts, seals, clips or gaskets?
Not always. Listings vary widely. A part may be supplied as a bare component, a partial kit or a complete assembly. Before ordering, check the product description, diagram and package contents.
For repairs involving fluid systems, axles, hubs, brakes, cooling components or engine covers, determine whether new seals, O-rings, gaskets, retaining clips, fasteners, grease, fluids or thread-locking compounds are required.
34. When should a John Deere Gator be taken to a dealer or professional workshop?
Professional support should be considered when the repair involves:
-
Brake hydraulic systems or brake bleeding.
-
Steering racks, alignment or major suspension work.
-
Wheel bearing or hub repairs requiring torque specifications.
-
CVT clutch disassembly.
-
Transmission, transaxle, differential or gearbox repairs.
-
Fuel leaks or complex fuel-system problems.
-
Wiring-harness diagnosis or advanced electrical testing.
-
Engine-management faults.
-
Engine internal repairs.
-
Major cooling-system faults.
-
Frame, hitch or structural damage.
-
Any task requiring lifting equipment, special tools or procedures not available.
A dealer or qualified workshop can also confirm correct part fitment from the PIN and parts system before a costly order is placed.
35. How can repeat Gator repair problems be reduced?
Repeated failures are often reduced by correcting the cause rather than replacing only the visibly failed component.
Useful preventive steps include:
-
Use model-correct replacement parts.
-
Follow service intervals.
-
Keep the air-intake and cooling systems clean.
-
Inspect belts, clutch areas and ventilation paths.
-
Check CV boots for damage.
-
Inspect brakes, steering, wheel bearings and suspension regularly.
-
Keep battery terminals clean and secure.
-
Repair fuel and coolant leaks promptly.
-
Avoid overloading and inappropriate towing.
-
Use correct tyre sizes and maintain recommended pressures.
-
Store the Gator clean, dry and protected where possible.
-
Keep a record of the PIN, service dates, part numbers and completed repairs.
36. Is a John Deere Gator worth repairing?
The answer depends on the Gator’s overall condition, the nature of the fault, repair cost, parts availability and expected future use.
Repair is often worthwhile when the frame, engine, brakes, steering and drivetrain are generally sound and the problem is clearly defined. The decision becomes more difficult when several major systems require work at the same time, such as engine, transmission, brakes, electrical system, tyres and structural components.
Compare the full cost of repair—including labour, fluids, seals, related parts and likely follow-on repairs—with the Gator’s working value, replacement cost and the value of avoiding downtime.
37. What records should be kept for a John Deere Gator?
Useful records include:
-
Model designation.
-
PIN or serial number.
-
Engine model and engine serial number.
-
Operator, parts and technical manual references.
-
Service dates.
-
Oil and filter changes.
-
Fuel-filter and air-filter replacements.
-
Battery replacement details.
-
Drive-belt, clutch, axle and brake repairs.
-
Tyre size and pressure information.
-
Part numbers used.
-
Receipts and supplier information.
-
Notes on recurring faults.
-
Photographs of wiring, hoses, component locations and previous repairs.
Keeping accurate records makes future parts research faster, supports resale value and helps identify repeated faults.
38. What is the safest order for researching a John Deere Gator repair?
A reliable research sequence is:
-
Identify the exact Gator model.
-
Record the PIN or serial number.
-
Confirm engine and drivetrain details where relevant.
-
Describe the symptom accurately.
-
Inspect for obvious damage, leaks, loose hardware or worn components.
-
Consult the correct operator’s manual and parts diagram.
-
Narrow down likely causes before ordering parts.
-
Confirm OEM part numbers and fitment.
-
Decide whether OEM, aftermarket, used or rebuilt parts are appropriate.
-
Check whether related seals, fluids, clips, bolts or gaskets are required.
-
Use appropriate repair instructions and safety procedures.
-
Test the repair safely and inspect for related faults.
39. What is the most important rule when buying John Deere Gator parts?
The most important rule is to verify fitment before purchase.
Confirm the exact Gator model, PIN, original part number where available, component location and relevant engine or drivetrain information. A part that looks correct, carries a similar description or is advertised broadly for “John Deere Gator” use may still be incorrect for the vehicle.
40. Where can correct manuals, parts catalogues and support information be found?
John Deere’s manuals and training resources provide access to official support material, including operator manuals, parts catalogues, engine-maintenance information and technical publications. Parts Lookup guidance explains ways to search parts information using machine-identification details.