
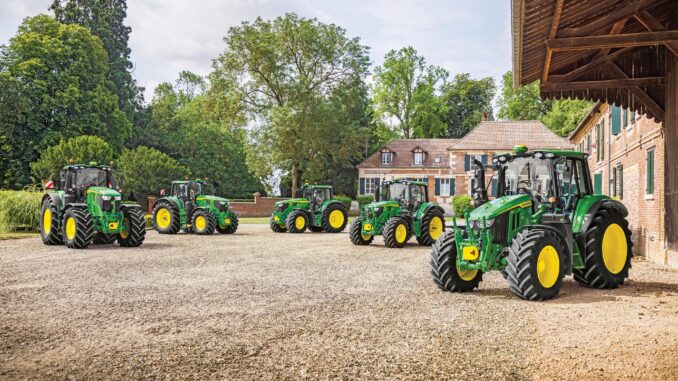
If you are searching for a John Deere Harvester Works parts, repair, or manual guide, the first thing to understand is that Harvester Works is the factory and product family context, not one exact machine model. John Deere uses the Harvester Works name for the East Moline, Illinois facility that builds combines and front-end harvesting equipment, so repair information, diagrams, and service parts always depend on the exact combine, header, and serial range you own.
For owners and operators in the USA and Canada, that means the right troubleshooting process starts with the symptom you are seeing, then narrows the issue by machine family, header type, and product identification number. This guide explains how John Deere Harvester Works equipment is organized, which parts owners commonly need, where to find manuals and diagrams, what jobs are realistic DIY work, and when it makes more sense to involve a dealer.
John Deere Harvester Works overview
John Deere Harvester Works is located in East Moline, Illinois and has been producing harvesting equipment there since 1912, with Deere describing it as one of the world’s largest and most modern combine production facilities. Harvester Works builds advanced combines along with front-end equipment, which together make up the complete harvesting system used in grain crops.
In practical terms, “Harvester Works” usually points you toward machine families such as S-Series, S7, X9, and related front-end equipment rather than toward one universal repair manual. That matters because service intervals, wear parts, and diagnostic procedures differ between combine models, corn heads, draper platforms, auger platforms, and belt pickups.
John Deere Harvester Works parts and systems
Most John Deere Harvester Works machines share a few major systems that owners end up dealing with regularly: the engine and cooling system, fuel and air intake, threshing and separation components, grain handling system, hydraulics, electrical and sensors, and the front-end header drive and wear components. When a machine underperforms, the problem is often not “the combine” in general but one subsystem such as feederhouse drive, header height sensing, separator loss setup, dirty air filtration, or worn belts and chains.
Common service and repair parts on Harvester Works-built equipment include:
-
Engine oil and filters.
-
Fuel filters and water separator elements.
-
Engine and cab air filters.
-
Belts, chains, sprockets, and tensioners.
-
Knives, guards, gathering parts, and header wear items.
-
Bearings, seals, hydraulic hoses, and sensors.
-
Feederhouse, draper, or corn head drive components depending on the header fitted.
Because Deere’s parts system is machine-specific, there is no single “Harvester Works parts number list” that applies to every unit. Owners need the exact combine model, the header model, and usually the serial number before ordering anything beyond basic consumables.
John Deere Harvester Works troubleshooting approach
The safest and most effective way to troubleshoot John Deere Harvester Works equipment is to start with the symptom, not the suspected part. A no-start issue, a header that will not engage, grain loss, poor crop feeding, vibration, or overheating each point toward different systems and should be diagnosed in that order.
Main symptom groups owners commonly face on combines and front-end equipment include:
-
Starting and charging issues.
-
Engine power loss or overheating.
-
Poor feeding or plugging at the header.
-
Excessive grain loss or poor threshing quality.
-
Belt, chain, and drive failures.
-
Hydraulic leaks or slow hydraulic response.
-
Electrical faults, warnings, and sensor-related shutdowns.
Emergency John Deere Harvester Works repair needs
Some issues on John Deere Harvester Works equipment should be addressed immediately because they can create fire risk, expensive secondary damage, or unsafe field operation. Dry crop residue around hot engine or exhaust areas, slipping belts, leaking hydraulic hoses, damaged feederhouse or header driveline parts, and unusual vibration all fall into that category.
Starting and charging issues
If the combine will not crank, cranks slowly, or loses electrical power during operation, the problem may be as simple as battery condition or cable connections, but modern harvesting machines also rely on multiple sensors, control modules, and safety interlocks. Continued low-voltage operation can create misleading fault symptoms elsewhere in the machine.
Common causes:
-
Weak batteries.
-
Dirty or loose battery terminals.
-
Failed starter or charging system.
-
Blown fuse or relay issue.
-
Wiring or ground faults.
Basic checks:
-
Inspect battery connections for looseness or corrosion.
-
Confirm battery voltage and charging performance.
-
Check visible fuses and relays.
-
Look for harness damage near heat, vibration, or pinch points.
-
Move to dealer-level diagnostics if fault codes or controller issues appear.
John Deere Harvester Works feeding and plugging problems
When crop flow is uneven, the feederhouse slugs, or the header plugs repeatedly, the root cause may be poor setup, worn cutting components, incorrect reel or draper settings, or a drive issue in the front-end equipment. Ignoring feeding problems often leads to belt wear, chain damage, and reduced field capacity.
Common causes:
-
Dull or worn cutter components.
-
Improper reel or draper adjustment.
-
Worn chains, belts, or feeder components.
-
Bent, missing, or damaged header parts.
-
Crop conditions exceeding current setup.
Basic checks:
-
Stop and clear the machine safely before inspecting.
-
Inspect visible wear parts and replace broken items.
-
Check chain and belt condition and tension.
-
Confirm header setup matches crop and field conditions.
-
Escalate to dealer support if plugging is tied to driveline timing or control calibration.
Vibration and noise
New vibration, rumbling, squealing, or knocking should never be ignored on a combine or header. These symptoms often point to failing bearings, damaged drive components, or material imbalance, and secondary damage can spread very quickly under harvesting loads.
Common causes:
-
Worn bearings.
-
Damaged pulleys or sheaves.
-
Bent rotating parts.
-
Failing chains or sprockets.
-
Foreign material in moving components.
Basic checks:
-
Shut the machine down and isolate the area the sound seems to come from.
-
Check for hot bearings, wobble, or visible runout.
-
Inspect belts, chains, and rotating shafts.
-
Look for wrapped crop residue or lodged debris.
-
Do not continue harvesting if the source is not clear.
Overheating and fire risk
Harvesting machines work in dusty, dry crop residue, so cooling and cleanliness matter as much as fluid level. Restricted coolers, residue buildup near hot components, slipping belts, or oil and fuel leaks can quickly become expensive or dangerous.
Common causes:
-
Dirty cooling package.
-
Low coolant or leaks.
-
Belt slippage.
-
Oil, hydraulic, or fuel leaks.
-
Heavy residue accumulation.
Basic checks:
-
Clean chaff and residue from cooling areas.
-
Inspect coolant and visible hose condition.
-
Check for active leaks.
-
Inspect belts for glazing or slip.
-
Stop operation immediately if smoke, burning smell, or rapid temperature rise appears.
John Deere Harvester Works electrical and sensor problems
Electrical faults on newer combines are often more than simple switch failures because the machine depends on sensors and control logic for normal operation. A bad sensor, damaged harness, or low voltage condition can cause warnings that look like bigger mechanical failures.
Common causes:
-
Low system voltage.
-
Sensor contamination or failure.
-
Damaged harnesses.
-
Poor grounds.
-
Controller or software-related faults.
Basic checks:
-
Correct any battery or charging issues first.
-
Inspect connectors in exposed areas.
-
Clean obvious contamination around accessible sensors.
-
Record any fault codes before cycling power.
-
Use dealer diagnostics for persistent electronic faults.
DIY or dealer work on John Deere Harvester Works equipment
The normal line for John Deere Harvester Works equipment is straightforward: owners can usually handle routine service, visual inspections, and simple wear-part replacement, while deeper repairs involving driveline timing, hydraulic testing, software diagnostics, or internal threshing and separation components are better left to experienced technicians. That line matters more on combines than on lawn tractors because downtime, complexity, and the cost of a mistake are much higher.
Good DIY jobs:
-
Oil and filter changes.
-
Fuel and air filter replacement.
-
Basic belt and chain inspection.
-
Battery and terminal service.
-
Cleaning coolers and residue-prone areas.
-
Replacing simple header wear parts.
Advanced DIY or dealer jobs:
-
Hydraulic diagnosis and hose routing issues.
-
Major belt drive replacement with timing concerns.
-
Feederhouse driveline work.
-
Sensor and controller diagnostics.
-
Internal separator, rotor, or cleaning-shoe repairs.
-
Calibration-related electronic faults.
Skill level guide:
-
Beginner: Filters, cleaning, lubrication, visual inspections.
-
Intermediate: Basic belt, chain, battery, and some accessible wear-part replacement.
-
Advanced: Driveline, hydraulic, electrical diagnostic, and timing-sensitive repairs.
John Deere Harvester Works parts table
Before ordering parts for any Harvester Works-built machine, gather:
-
Full combine model.
-
Full header/front-end model.
-
Product identification number or serial number.
-
Engine information if engine parts are involved.
-
Market/version details if the machine has regional differences.
OEM parts are usually the safer choice for belts, sensors, fit-sensitive driveline items, and safety-critical components. Aftermarket can be reasonable for some filters, batteries, knives, and basic consumables, but only if the supplier clearly cross-references the exact Deere model and serial break.
John Deere Harvester Works diagrams and manuals
The best places to find parts diagrams and manuals for Harvester Works equipment are:
-
John Deere Technical Information Store for operator’s manuals, parts catalogs, and technical manuals.
-
John Deere Technical Information Bookstore for parts catalogs, test manuals, and service publications.
-
John Deere harvesting equipment pages for current family overviews and product context.
-
John Deere Harvester Works official page for factory and product-family background.
Use the operator’s manual for maintenance intervals, safety checks, and routine setup. Use the parts catalog for exploded diagrams and exact replacement numbers, and use the technical manual or dealer support for diagnostic, repair, adjustment, and theory-of-operation work.
How to locate John Deere Harvester Works machine numbers
These numbers matter because the same broad combine family may still have serial-range changes that affect parts, software, and service procedures. Ordering from only the marketing name is risky once you move beyond basic consumables.
General process:
-
Find the combine identification tag or PIN plate on the machine frame area indicated in the operator’s manual.
-
Record the exact combine model and full serial/PIN.
-
Record the header or front-end equipment model and serial number separately.
-
Record the engine model and serial if you need engine service parts.
-
Use those numbers when searching Deere publications or speaking with a dealer.
Buying John Deere Harvester Works parts
The most reliable strategy is to identify the exact OEM part number first and then decide whether to buy from Deere, an authorized dealer, or a trusted aftermarket supplier. On complex harvesting equipment, a correct serial-based lookup saves more money than gambling on a visually similar part.
Buying options:
-
Online: best when you already have the OEM number and serial information.
-
Dealer counter: best for serial-sensitive parts, electronics, hydraulic components, and unclear supersessions.
-
Retail stores: acceptable for universal consumables such as some batteries or fluids, but only when the packaging clearly matches the machine specification.
Useful sources:
John Deere Harvester Works fitting basics
Because Harvester Works covers many machines, there is no one universal fitting guide, but a few high-impact service jobs are common across combine families.
Replacing engine oil and filter
This service helps protect the engine under heavy harvest loads and should always follow the machine’s official service interval. Use the exact oil grade and filter specified for the machine and engine combination.
-
Park safely, shut down, and allow hot components to cool.
-
Drain the engine oil into a suitable container.
-
Remove and replace the filter with the correct part.
-
Refill with the specified oil type and quantity from the manual.
-
Start, check for leaks, then recheck the oil level.
John Deere Harvester Works air filter service
Air filtration directly affects power, fuel efficiency, and engine life in dusty harvest conditions. Restricted filters can mimic fuel or turbo problems, so inspection matters.
-
Open the access panel and inspect the primary filter.
-
Replace heavily loaded or damaged elements rather than trying to over-clean them.
-
Check the housing for dust bypass or seal damage.
-
Refit the new element carefully to avoid sealing issues.
-
Reset any service indicator if the machine uses one.
Header wear-part replacement
Knives, guards, gathering parts, and similar front-end wear items strongly affect feeding quality and grain loss. Uneven or worn header components often cause symptoms long before a major breakdown happens.
-
Lower and secure the header safely.
-
Identify the worn or broken wear components.
-
Match the exact header model before ordering replacements.
-
Replace damaged parts in matched sets where appropriate.
-
Check alignment and fastener security before returning to work.
Belt and chain inspection or replacement
Belts and chains are common service items on both the combine and the front-end equipment. Poor tension, wear, or misalignment can quickly turn into downtime during harvest.
-
Inspect for glazing, cracking, stretch, or damaged links.
-
Check sprockets, pulleys, and tensioners at the same time.
-
Replace worn mating components if needed.
-
Set tension to manual specification.
-
Recheck after initial operation.
John Deere Harvester Works maintenance schedule
A true maintenance chart has to come from the exact operator’s manual for the combine and header you own, because Deere publishes that information by equipment model and publication, not by factory name alone. Even so, the general maintenance pattern on Harvester Works equipment usually centers on cleaning, lubrication, fluid checks, and inspection of wear areas during harvest season.
Daily or before each use
-
Check engine oil, coolant, and fuel/water separator condition.
-
Inspect belts, chains, and obvious leaks.
-
Remove crop residue and dust buildup from fire-risk areas.
-
Check header wear points and visible damage.
-
Verify lights, warnings, and basic electrical function.
Every 25 hours or frequent in-season intervals
-
Lubricate points specified in the operator’s manual.
-
Inspect air filtration and cooling package cleanliness.
-
Recheck chain/belt condition and tension.
-
Inspect bearings and listen for developing noise.
Every 50 hours or yearly
-
Change filters and fluids as called for in the manual.
-
Inspect hoses and hydraulic connections.
-
Check header setup, wear components, and drive systems.
Seasonal checklist
-
Preseason: full inspection, fluid service, battery check, belt/chain review, and header wear-part replacement as needed.
-
In season: daily cleaning, leak checks, and close attention to vibration, heat, and feeding quality.
-
End of season: deep cleaning, repairs before storage, and documentation of parts needed before next harvest.
Repair, upgrade, or replace
Repair makes sense when the problem is isolated, the machine is otherwise sound, and the parts cost is small compared with harvest value. Upgrade makes sense when a better-matched front-end setup, improved wear parts, or a newer electronics package solves a recurring capacity or crop-loss issue, while replacement becomes more realistic when breakdown frequency, obsolescence, and repair cost start to stack up across multiple systems.
Repair if:
-
The issue is one system or a normal wear part.
-
The machine still meets your acreage and crop needs.
-
Parts and service support remain good.
Upgrade if:
-
Header performance is holding the combine back.
-
Precision and automation features would reduce loss or improve throughput.
-
Repeated downtime is tied to outdated supporting equipment.
Replace if:
-
Major mechanical, hydraulic, and electrical issues are piling up together.
-
Support or parts access is becoming difficult for the exact model.
-
Repair cost approaches the value of the machine or a meaningful step-up option.
John Deere Harvester Works FAQ
1. What is John Deere Harvester Works?
John Deere Harvester Works is Deere’s harvesting equipment factory in East Moline, Illinois, not one individual machine model. It produces combines and front-end equipment, so any repair or parts question still has to be tied to the exact combine or header you own.
2. Is there one John Deere Harvester Works parts catalog?
No. Deere organizes parts catalogs by machine model and serial range, not by Harvester Works as a single service unit. You need the exact combine and front-end model before ordering most parts.
3. Why does my Harvester Works-built combine need a serial number for parts?
Serial numbers matter because Deere can change designs, suppliers, or assemblies within the same model line. A part that fits one serial range may not fit another.
4. Where can I find John Deere Harvester Works repair manuals?
The official sources are Deere’s Technical Information Store and Technical Information Bookstore. Those sites provide operator’s manuals, parts catalogs, and technical or test publications depending on the machine.
5. What kinds of equipment come from Harvester Works?
Harvester Works produces advanced combines and front-end equipment used for harvesting crops. Deere specifically describes the facility as building combines and front-end equipment rather than one single machine family only.
6. Why won’t my combine start?
Start with battery condition, cable connections, fuses, and the charging system before assuming a bigger failure. On newer machines, low voltage can also trigger electronic or sensor faults that complicate diagnosis.
7. Why does the header keep plugging?
Header plugging is often caused by worn cutting components, incorrect setup, or crop conditions exceeding the current adjustment. Drive issues in chains, belts, or feeder components can also contribute.
8. Why is my combine losing grain?
Excessive grain loss is commonly linked to setup, crop conditions, or worn threshing and front-end components rather than a single failed part. Header choice and setup can also have a major effect on overall crop capture.
9. What causes vibration on a combine or header?
Vibration usually points to worn bearings, bent rotating parts, damaged pulleys, chain issues, or material imbalance. It should be treated as urgent because secondary damage can happen quickly in harvest conditions.
10. Can I use aftermarket parts on Harvester Works machines?
Yes, for some consumables and certain wear parts, but fit-sensitive and safety-critical items are usually better sourced as OEM. Cross-reference accuracy is essential, especially when serial breaks are involved.
11. What parts should I keep in stock during harvest?
Most operators benefit from keeping basic filters, belts, chain-related wear items, common header wear parts, and service consumables on hand. The exact list depends on the combine and front-end models you run.
12. Where do I find the machine identification number?
The exact location depends on the machine, so the operator’s manual is the best guide. Record the combine model and serial, then do the same for the header separately.
13. Why is my machine overheating?
Overheating usually comes down to restricted cooling airflow, residue buildup, fluid loss, or belt slip. In harvest conditions, cleaning and inspection are just as important as topping up fluids.
14. Are Harvester Works guides the same for S-Series, X9, and T-Series machines?
No. Those are different combine families with different components, capacities, and service details. A generic overview can help, but real repairs still need the exact model-specific manual and parts catalog.
15. What is front-end equipment on a John Deere combine?
Front-end equipment refers to the harvesting attachment at the front of the combine, such as drapers, corn heads, auger platforms, or belt pickups. The front-end choice has a big effect on feeding, crop loss, and daily performance.
16. Why does poor header setup affect the whole machine?
The combine can only process crop as well as it is fed. Uneven feeding, plugging, or excessive loss at the header will often show up as reduced capacity or inconsistent threshing deeper in the machine.
17. What manual should I use for maintenance intervals?
Use the official operator’s manual for your exact combine and header model. Deere publishes routine maintenance tasks and intervals there, not under one general Harvester Works schedule.
18. What manual should I use for exploded parts diagrams?
Use the parts catalog. That is the Deere publication designed to show assemblies, breakdowns, and part numbers.
19. What manual should I use for in-depth repair procedures?
Use the technical manual or test manual for the exact machine. Those publications cover diagnostics, test, adjustment, repair, and theory of operation.
20. Are battery and cable issues common causes of false faults?
Yes, weak voltage can create confusing symptoms on electronically controlled machines. It is usually smart to confirm basic electrical health before chasing sensor faults.
21. What causes repeated belt failure?
Repeated belt failure usually means there is an underlying issue such as misalignment, bad tension, pulley damage, bearing drag, or overload. Replacing the belt alone often does not solve the root cause.
22. What causes repeated chain failure?
Chain failures are often related to stretch, poor lubrication, sprocket wear, bad alignment, or shock loading from plugs and slugs. Chains and sprockets should be inspected as a matched system.
23. Should I clean the machine every day during harvest?
Yes, daily cleaning is one of the most important routines on harvesting equipment because residue buildup affects cooling, reliability, and fire risk. It also helps you notice leaks and wear before they become major failures.
24. Why are hydraulic leaks urgent?
Hydraulic leaks reduce system performance and can quickly contaminate hot areas with flammable oil. On a harvest machine, that makes them both a reliability issue and a safety issue.
25. Can a bad sensor stop normal operation?
Yes. Modern combines rely on sensor inputs and control logic, so a failed sensor or damaged harness can affect engagement, warnings, and automatic functions. That is why recording fault codes before cycling power is useful.
26. Should I buy parts online or from a dealer?
Online works well when you already know the exact OEM number. The dealer counter is usually better for superseded, serial-sensitive, or technically confusing items.
27. Why do I need both the combine model and the header model?
Because the front-end equipment has its own wear parts, setup needs, and diagrams. Many harvesting complaints start at the header, not in the base combine itself.
28. Is poor crop feeding usually a header issue or a combine issue?
Often it starts at the header or front-end setup, though feederhouse and driveline issues can contribute. That is why symptom-first diagnosis matters more than guessing at one expensive component.
29. When is a repair too big for DIY?
Once the job involves major driveline timing, advanced hydraulics, controller diagnostics, or internal threshing and separation components, dealer or specialist support is usually the safer choice. The cost of a wrong repair can be high during harvest.
30. Is there a single maintenance checklist for all Harvester Works machines?
No. There are common patterns like daily cleaning, fluid checks, lubrication, and inspection, but the official checklist still comes from the exact machine’s operator’s manual.
31. What is the safest first step before any repair?
Park on safe ground, shut down fully, isolate moving systems, and allow hot areas to cool before inspecting anything. Harvest equipment combines heat, residue, stored energy, and heavy moving parts, so rushing the first step is risky.
32. Why does Deere separate operator, parts, and technical manuals?
Each publication serves a different purpose: the operator’s manual covers use and maintenance, the parts catalog covers exploded diagrams and numbers, and the technical manual covers diagnostics and repair. Using the right publication saves time and reduces parts-order mistakes.
33. What is the best way to build a Harvester Works parts list for my machine?
Start with the machine model, header model, and full serial information, then pull the official parts catalog and write down your routine service items first. After that, add your most common in-season wear parts based on your crops and previous downtime history.
34. Is Harvester Works relevant if I only need a combine manual?
Yes, but mainly as background. It tells you the machine family context, while the actual manual lookup still depends on the exact combine and header models.
35. What is the best next step after reading a general Harvester Works guide?
Use this kind of overview to understand the systems and parts strategy, then move straight to the official Deere publications for your exact model. That is the only reliable way to get the right diagrams, part numbers, and service intervals for a real repair job.