
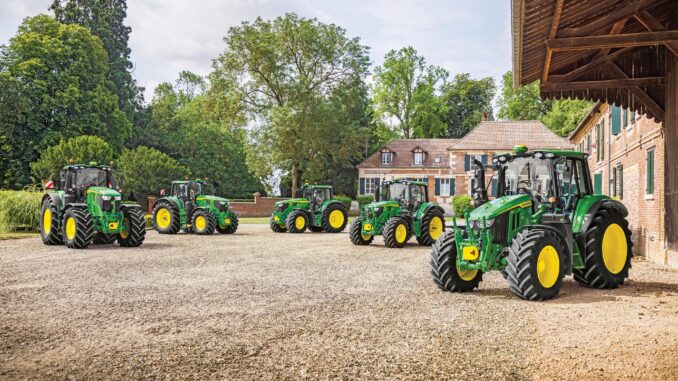
The John Deere 2520 is a compact utility tractor built for homeowners and acreage owners who need something heavier-duty than a lawn tractor but still manageable for regular mowing, light loader work, driveway upkeep, and general property maintenance. Its combination of diesel power, hydraulic capability, PTO-driven attachments, and compact size makes it popular with owners who want one machine to do several jobs.
This guide covers the John Deere 2520 from a practical ownership angle: what commonly goes wrong, how to troubleshoot by symptom, which repairs are usually realistic for DIY owners, what parts information you need before ordering, and how to stay ahead of repeat failures with a sensible maintenance routine. It is written for USA and Canada owners who are comfortable doing basic service and some intermediate repairs, but who also need clear limits on when dealer support is the smarter choice.
John Deere 2520 model overview
The John Deere 2520 sits in Deere’s compact utility tractor range rather than its lawn tractor lineup, so owners are dealing with a more capable machine that has stronger driveline, hydraulic, PTO, and attachment support than a typical residential mower. That also means troubleshooting needs to consider more systems, especially when the same symptom could involve fuel delivery, interlocks, PTO controls, hydraulics, or driveline setup.
On a John Deere 2520, the main systems owners typically work around are:
-
Engine and fuel system, including air and fuel filters, fuel shutoff components, and oil service items.
-
Hydraulic and transmission system, including hydraulic oil, filter service, and performance-related issues tied to drive and implement operation.
-
Electrical and safety system, including starter safety switch, seat switch, oil pressure switch, battery, and charging components.
-
PTO and mower/attachment system, especially when the tractor is used with mid-mount mowers or other PTO-driven implements.
Common service parts owners frequently buy for the John Deere 2520 include:
-
Engine oil filter M806419.
-
Hydraulic/transmission filter LVU800097.
-
Air filter primary M131802 and secondary M131803.
-
Fuel filter MIU800645, with some parts listings also referencing fuel filter element M811032 depending on configuration and cataloging.
-
Filter pack LVA21201.
-
PTO switch AM118802, neutral start switch AM37643, seat switch RE43526, battery TY26498, fan belt M801821, thermostat M811034, radiator hoses LVU802460 and LVU802461.
John Deere 2520 troubleshooting approach
The best way to diagnose a John Deere 2520 is to start with the exact symptom the owner sees rather than guessing at a part. A no-start, weak PTO, poor mowing result, hydraulic sluggishness, or charging problem can each have several causes, and jumping straight to parts replacement often wastes time and money.
For this model, the main symptom groups usually fall into:
-
Starting issues.
-
Running or power-loss issues.
-
PTO and mower performance problems.
-
Vibration and unusual noise.
-
Overheating or fluid leak issues.
-
Transmission, drive, or hydraulic performance problems.
-
Electrical and safety-switch faults.
A simple rule helps: start with the easiest checks first, confirm fluid level and condition, inspect visible wiring and linkages, verify filters and service history, and only then move toward component replacement. That matters on the John Deere 2520 because many complaints that feel “major” are often caused by old filters, poor connections, interlock faults, contaminated fuel, or neglected hydraulic service.
Emergency John Deere 2520 repair needs
Some John Deere 2520 problems need immediate attention because they affect safety or can cause expensive secondary damage if the tractor keeps running. Stop using the tractor if you notice severe vibration, overheating, oil-pressure warning behavior, hydraulic leaks under pressure, steering loss, or safety switch bypassing.
4.1 John Deere 2520 starting issues
A starting problem may show up as no crank, slow crank, or crank-but-no-start. On a compact utility tractor like the John Deere 2520, that can involve the battery and charging system, neutral or seat safety switches, fuel delivery, or cold-start related diesel issues rather than one single “bad starter” diagnosis.
Common causes:
-
Weak battery or poor cable connections.
-
Faulty neutral start or seat switch.
-
Fuel restriction from a dirty fuel filter.
-
Fuel shutoff solenoid or related fuel system issue.
-
Starter or charging-system fault.
Basic owner checklist:
-
Check battery charge and both cable ends for corrosion or looseness.
-
Confirm the tractor is in the correct start condition and PTO is disengaged.
-
Check whether the neutral start switch or seat switch is acting intermittently.
-
Inspect fuel level, recent fuel quality, and the condition/service age of the fuel filter.
-
If cranking remains weak, test battery and charging output before replacing the starter.
4.2 John Deere 2520 PTO and cut-quality problems
If the John Deere 2520 is being used with a mower deck, the owner may notice uneven cutting, poor lift, scalping, ragged grass tips, or weak blade performance. These issues often matter because owners assume the deck or PTO is failing when the real problem is usually setup, blade condition, belt condition, or deck-level adjustment.
Common causes:
-
Dull or damaged blades.
-
Incorrect deck leveling.
-
Worn or slipping mower belt.
-
Wrong cutting height or gauge wheel setup.
-
PTO engagement or driveline problem.
Basic owner checklist:
-
Inspect blades for wear, bends, or edge damage.
-
Verify deck height setting and side-to-side level.
-
Check belt condition, glazing, cracks, or loss of tension.
-
Confirm the PTO is engaging correctly and the driveline is fully connected.
-
Recheck anti-scalp/gauge wheel settings after leveling.
4.3 John Deere 2520 vibration and noise
New vibration on a John Deere 2520 should be treated seriously because it can mean rotating damage, driveline wear, loose hardware, or bearing trouble. Running through it can quickly damage belts, shafts, mower components, bearings, or mounting points.
Common causes:
-
Damaged mower blade or blade imbalance.
-
Loose mounting hardware.
-
Worn bearings.
-
Belt damage or pulley misalignment.
-
PTO shaft or attachment driveline issue.
Basic owner checklist:
-
Stop operation immediately and inspect the attachment and tractor visually.
-
Check blade condition, spindle area, and visible pulley alignment.
-
Inspect belts for fraying or separated ribs.
-
Tighten obvious loose hardware to specification.
-
If vibration remains, avoid further use until the rotating assembly is inspected more deeply.
4.4 John Deere 2520 overheating and leaks
Overheating or visible leaks on a John Deere 2520 are not minor issues. A coolant leak, bad hose, failing thermostat, fan-belt problem, or hydraulic leak can turn into engine or hydraulic-system damage very quickly if the tractor is kept in service.
Common causes:
-
Low coolant level.
-
Worn upper or lower radiator hose.
-
Thermostat issue.
-
Fan belt wear.
-
Dirty cooling surfaces or heavy debris buildup.
-
Hydraulic hose or fitting leak.
Basic owner checklist:
-
Shut the tractor down and let it cool fully.
-
Check for coolant loss, hose swelling, cracks, or wet areas.
-
Inspect fan-belt condition and tension.
-
Clean debris from screens and cooling surfaces.
-
Do not keep topping up fluids without locating the source of the leak.
4.5 John Deere 2520 transmission, drive, and hydraulic problems
Owners may describe these as weak drive, slow loader response, poor steering feel, weak hydraulic function, or odd whining noises. On the John Deere 2520, these complaints often point first to hydraulic oil condition, hydraulic filter condition, service interval neglect, or restrictions in the system before deeper transmission failure is assumed.
Common causes:
-
Hydraulic oil overdue for service.
-
Hydraulic/transmission filter restriction.
-
Low fluid level.
-
Air in the system after service.
-
Internal wear requiring advanced diagnosis.
Basic owner checklist:
-
Verify the hydraulic/transmission fluid level.
-
Review when the hydraulic filter was last changed.
-
Look for external leaks and wet hose/fitting areas.
-
Note whether the symptom changes cold versus hot.
-
If hydraulic or drive performance is consistently weak after basic service checks, move toward dealer-level diagnosis.
4.6 John Deere 2520 electrical problems
Electrical problems on the John Deere 2520 often appear as no-crank conditions, intermittent shutdowns, warning-light behavior, failed lights, or charging complaints. Because the tractor uses multiple switches and safety circuits, owners should inspect wiring and switch inputs before assuming a module or major component has failed.
Common causes:
-
Low battery or charging fault.
-
Bad PTO or neutral safety switch.
-
Faulty seat switch.
-
Corroded grounds or battery terminals.
-
Failed oil pressure switch or lighting-related electrical fault.
Basic owner checklist:
-
Test battery voltage and charging output.
-
Clean and tighten grounds and cable connections.
-
Check switch operation at the PTO, neutral, and seat circuits.
-
Inspect visible wiring for rub-through or connector looseness.
-
Replace failed switches with the correct part number rather than bypassing safety functions.
DIY or dealer for the John Deere 2520
The John Deere 2520 is very owner-serviceable for routine maintenance and some bolt-on repairs, but the line usually gets crossed when diagnosis requires hydraulic pressure testing, internal transmission work, major engine work, or fault tracing beyond simple switches and visible wiring. Owners who stay within that line usually save money without creating bigger problems.
Good DIY jobs
-
Engine oil and filter service.
-
Air filter replacement.
-
Fuel filter replacement.
-
Battery replacement.
-
Basic belt replacement.
-
Switch replacement when diagnosis is clear.
-
Mower blade service and deck leveling.
Advanced DIY or dealer jobs
-
Hydraulic/transmission troubleshooting beyond routine filter and fluid service.
-
Cooling-system diagnosis after repeated overheating.
-
Starter, alternator, or charging diagnosis if test results are unclear.
-
PTO engagement or driveline problems involving internal wear.
-
Injection, fuel-solenoid, or engine compression issues.
Skill level guide
-
Beginner: filters, battery, greasing, visual inspections, mowing setup checks.
-
Intermediate: belt replacement, switch replacement, deck leveling, spark/starting circuit checks on equipped systems, hose replacement where access is straightforward.
-
Advanced: hydraulic diagnosis, internal driveline work, cooling-system fault tracing under load, fuel-system component testing, and major electrical diagnosis.
John Deere 2520 parts, OEM vs aftermarket, and info to gather
Before ordering parts for a John Deere 2520, gather the full model name, the tractor Product Identification Number, the engine model and serial details, and the exact mower deck or attachment size/version if one is installed. That matters because filters may be straightforward, but belts, switches, attachment parts, and some service items can vary by build details or implement setup.
OEM parts are the safer bet for belts, fit-sensitive cooling parts, hydraulic filters, and safety-related switches because fit and behavior matter more than a small upfront saving. Aftermarket parts can be reasonable for batteries, some filters, bulbs, and selected maintenance items, but only when the cross-reference is exact and the supplier is reputable.
John Deere 2520 manuals and parts diagrams
Owners should use a mix of operator information, parts diagrams, and technical references when working on a John Deere 2520. The operator information helps with routine service and adjustments, parts diagrams help confirm fit and assemblies, and technical manuals are more useful when a repair goes beyond normal owner maintenance.
Useful sources include:
-
John Deere operator manual sources, including archived/manual listing pages, for operating procedures and routine service guidance.
-
Technical manual references for deeper repair information on engine, electrical, fuel and power-train systems.
-
Jack’s Small Engines parts diagrams for exploded views and category-based parts lookup.
-
Green Farm Parts maintenance guide for commonly serviced John Deere 2520 maintenance parts and interval summaries.
John Deere 2520 serial and engine numbers
These numbers matter because the John Deere 2520 may have configuration differences across production and attachment setups, and engine-specific service items can require exact identification before ordering. Getting the correct number first is usually cheaper than returning the wrong part later.
Use this process:
-
Locate the tractor identification tag on the machine frame area specified in your operator or service literature.
-
Record the full model and Product Identification Number exactly as shown.
-
Locate the engine model and serial tag on the engine itself and photograph it.
-
If a mower deck or attachment is fitted, record that model and serial separately.
-
Keep all numbers in your phone notes before ordering parts online or visiting the dealer counter.
Buying John Deere 2520 parts online and in stores
The smartest parts-buying strategy for a John Deere 2520 is to confirm the OEM number first, then compare dealer, Deere-focused aftermarket, and general retail options. That prevents the common mistake of buying by model name alone when the actual fit depends on build details or attachment configuration.
Practical options:
-
Online: check exact OEM numbers first and compare against trusted sellers such as Green Farm Parts and Jack’s Small Engines.
-
Dealer counter: best for serial-sensitive items, hydraulic parts, switches, hoses, and anything with uncertain supersessions.
-
Retail stores: acceptable for selected consumables such as batteries, bulbs, and some filters if the packaging clearly cross-references the John Deere OEM number.
Step-by-step fitting guide for common John Deere 2520 parts
These are the most realistic owner-level jobs on a John Deere 2520 because they address common reliability complaints without opening major systems. Always park on level ground, lower implements, remove the key, and allow hot components to cool first.
Engine oil filter on the John Deere 2520
This job supports engine life and is one of the most important routine services on the tractor. The listed engine oil filter for routine maintenance is M806419.
-
Warm the engine briefly, then shut it down and park safely.
-
Drain the engine oil into a suitable container.
-
Remove the old oil filter and make sure the old gasket comes off with it.
-
Lightly oil the gasket on the new M806419 filter and install it by hand.
-
Refill with the correct engine oil, start briefly, then shut down and recheck for leaks and final level.
Air filters on the John Deere 2520
Dirty air filters can cause power loss, smoky running, and premature engine wear, especially on dusty properties. The routine primary and secondary air filters listed for the John Deere 2520 are M131802 and M131803.
-
Open the air-cleaner housing carefully so dirt does not fall into the intake.
-
Remove the primary filter and inspect the housing for dust buildup.
-
Replace the secondary filter only if needed and avoid unnecessary handling.
-
Wipe the housing clean and install the new filters in the correct order.
-
Seal the housing properly so unfiltered air cannot bypass the elements.
Fuel filter on the John Deere 2520
A restricted fuel filter can cause hard starting, weak running, or stalling under load. The maintenance listing identifies MIU800645 as the routine fuel filter for this model.
-
Shut the tractor down and work cleanly around the fuel system.
-
Remove the old fuel filter carefully and catch any spilled fuel.
-
Compare the old and new filters to confirm matching size and connection style.
-
Install the new filter in the correct flow direction and secure all fittings.
-
Prime or bleed as required by the fuel-system design before restarting.
Hydraulic/transmission filter on the John Deere 2520
This is a high-value service item when owners report weak hydraulics, noisy operation, or overdue maintenance history. The listed hydraulic/transmission filter is LVU800097, with an initial change after 50 hours and then every 200 hours.
-
Park safely and make sure implements are lowered and pressure is relieved.
-
Drain fluid as required by the service procedure and remove the old filter.
-
Clean the mounting area and inspect the old filter for contamination signs.
-
Install the new LVU800097 filter with a clean gasket surface.
-
Refill with the correct hydraulic oil, start the tractor, cycle functions gently, and recheck the fluid level.
Battery replacement on the John Deere 2520
Battery faults often show up first as slow cranking or intermittent no-start complaints. Battery TY26498 is listed as a common replacement part for the model.
-
Turn everything off and remove the key.
-
Disconnect the negative cable first, then the positive.
-
Remove the old battery and clean the tray and cable ends.
-
Install the new battery, securing it properly.
-
Connect positive first, then negative, and confirm a strong crank afterward.
John Deere 2520 maintenance to prevent repeat problems
Regular maintenance on the John Deere 2520 does more than extend service life; it prevents the exact owner complaints that usually trigger “repair” searches in the first place. Hard starts, low power, poor hydraulic response, overheating, and electrical gremlins often trace back to neglected filters, weak batteries, dirty cooling areas, or delayed fluid service.
Focus areas:
-
Starting reliability: keep the battery healthy, terminals clean, and fuel filter current.
-
Engine protection: change engine oil and filter on time and keep air filtration in good condition.
-
Cooling and fire prevention: keep debris off hot areas and replace aging hoses and belts before they fail.
-
Drive and hydraulic performance: monitor fluid level, change hydraulic filter on schedule, and investigate leaks early.
-
Electrical reliability: replace failing switches rather than bypassing them and keep grounds clean and tight.
John Deere 2520 maintenance schedule
The maintenance listings available for the John Deere 2520 show a first hydraulic filter service after 50 hours, repeated hydraulic and engine oil filter service at 200 hours or annually, annual air filter replacement as conditions require, and fuel filter replacement at 400 hours or annually. Dust, heat, and heavy use can justify more frequent attention.
Daily / before each use
-
Check engine oil level.
-
Check coolant and look for visible leaks.
-
Check hydraulic/transmission fluid level and obvious hose or fitting leaks.
-
Inspect tires, lights, and visible safety items.
-
Clear debris from screens and hot engine areas.
After first 50 hours
-
Replace the hydraulic/transmission oil filter LVU800097 at the initial 50-hour interval.
Every 25 hours
-
Grease loader, steering, mower, and chassis points as equipped and required. Grease is listed as a regular as-needed service supply for this tractor.
-
Inspect belts, hoses, and battery terminals.
Every 50 hours or yearly check interval
-
Review hydraulic oil condition and service status, especially if the tractor sees attachment work or heavy hydraulic use.
-
Inspect cooling-system parts and fan belt condition.
Every 200 hours or yearly
-
Replace engine oil filter M806419 and change engine oil.
-
Replace hydraulic/transmission filter LVU800097 after the initial service, then every 200 hours.
Every 400 hours or yearly
-
Replace fuel filter MIU800645.
Annual / as conditions require
-
Replace primary air filter M131802.
-
Replace secondary air filter M131803.
-
Check battery condition and charging performance before cold-weather use.
Seasonal checklist
-
Spring: inspect battery, service filters if due, check mower setup, and inspect belts and cooling system before mowing season.
-
Mid-season: clean debris buildup, inspect blade condition and deck level, and watch for hydraulic leaks under regular workload.
-
Fall or pre-winter: check battery strength, fuel condition, hoses, and whether yearly engine or fuel service is due before storage or cold use.
Repair, upgrade, or replace the John Deere 2520?
Most John Deere 2520 owners should repair rather than replace when the machine is structurally sound and the problem is limited to maintenance items, switches, hoses, filters, belts, battery, or attachment setup. Upgrade makes more sense when the tractor is mechanically sound but no longer matches the workload, while replacement becomes easier to justify when major hydraulic, driveline, and engine repairs stack together on a worn machine.
Repair if:
-
The issue is clearly isolated.
-
Service history has been neglected and the fix is mostly maintenance catch-up.
-
The tractor still starts, drives, and operates attachments without major internal noise.
Upgrade if:
-
You regularly need more lift, hydraulic flow, or attachment capacity.
-
The tractor is functional but undersized for current property demands.
Replace if:
-
There are multiple major system failures at once.
-
Repair costs approach the value of the tractor.
-
The machine has chronic hydraulic, electrical, and engine issues together.
John Deere 2520 troubleshooting FAQ
1. Why will my John Deere 2520 not start?
Start with the basics: battery charge, terminal condition, PTO disengagement, and start-position requirements. On the John Deere 2520, no-start complaints can also involve the neutral start switch, seat switch, fuel filter restriction, or starter/charging problems, so testing is better than guessing.
2. Why does my John Deere 2520 crank slowly?
Slow cranking usually points to a weak battery, dirty cable ends, poor ground connection, or a charging system that has not been keeping the battery up. Check the battery first before replacing the starter because battery and cable faults are more common and cheaper to fix.
3. Why does my John Deere 2520 crank but not fire?
If it cranks but does not start, look at fuel delivery and recent fuel quality first. A restricted fuel filter, fuel shutoff issue, or air in the fuel system after service can all create a crank-no-start condition.
4. Could a safety switch stop my John Deere 2520 from starting?
Yes, the John Deere 2520 uses safety/interlock components such as neutral start and seat-related switch circuits. If the problem is intermittent, especially after moving on the seat or shifting position, a switch or connector fault is worth checking.
5. What is the neutral start switch part number for the John Deere 2520?
A commonly listed neutral start switch for the John Deere 2520 is AM37643. Always confirm against the tractor identification details before ordering because catalogs and supersessions can vary.
6. What is the seat switch part number for the John Deere 2520?
A commonly listed seat switch for the John Deere 2520 is RE43526. Replace failed switches rather than bypassing them, because safety circuits are part of the tractor’s intended operating design.
7. Why is my John Deere 2520 losing power under load?
Power loss often comes from restricted air or fuel flow, overdue maintenance, or attachment load that exceeds current engine condition. Start with the air filters, fuel filter, and service history before assuming an internal engine problem.
8. Can a dirty air filter make the John Deere 2520 run poorly?
Yes, dirty air filters can reduce performance and increase engine stress, especially in dusty mowing or property-maintenance conditions. The commonly listed primary and secondary air filters are M131802 and M131803.
9. How often should I change the engine oil filter on a John Deere 2520?
The maintenance listing for this model shows engine oil filter M806419 replaced every 200 hours or annually, whichever comes first. If use is severe, owners often inspect oil condition more frequently and shorten intervals accordingly.
10. What oil filter does the John Deere 2520 use?
A commonly listed engine oil filter for the John Deere 2520 is M806419. Confirm with your engine and tractor details before ordering if there is any uncertainty about build variation.
11. What air filters does the John Deere 2520 use?
The maintenance listings commonly show primary air filter M131802 and secondary air filter M131803 for the John Deere 2520. These are routine service items and especially important if the tractor works in dust.
12. What fuel filter does the John Deere 2520 use?
A commonly listed fuel filter for routine maintenance is MIU800645, while some parts pages also reference fuel filter element M811032. Use the exact tractor and engine details to confirm which listing matches your machine.
13. How often should I change the fuel filter on the John Deere 2520?
The maintenance listing shows the fuel filter replaced every 400 hours or annually. If fuel quality has been poor or the tractor sits for long periods, earlier replacement may be sensible.
14. Why is my John Deere 2520 overheating?
Overheating can be caused by low coolant, aging radiator hoses, thermostat problems, belt issues, or debris packed into cooling areas. Stop using the tractor until the cause is found because repeated overheating can create much larger repair bills.
15. What fan belt does the John Deere 2520 use?
A commonly listed fan belt for the John Deere 2520 is M801821. This is a good part to inspect when owners notice charging weakness or cooling problems.
16. What thermostat is listed for the John Deere 2520?
A commonly listed thermostat for the model is M811034. If the tractor repeatedly overheats, do not replace only the thermostat without checking hoses, coolant level, and belt condition too.
17. Why is my John Deere 2520 leaking coolant?
Common causes include aging upper or lower radiator hoses, loose clamps, thermostat-area issues, or a damaged cooling component. The commonly listed upper and lower radiator hoses are LVU802461 and LVU802460.
18. Why is my John Deere 2520 hydraulic system weak?
Weak hydraulics often trace back to low fluid, overdue service, a restricted hydraulic filter, or an external leak. The first routine hydraulic filter service is listed at 50 hours, then every 200 hours after that.
19. What hydraulic filter does the John Deere 2520 use?
A commonly listed hydraulic/transmission filter for the John Deere 2520 is LVU800097. This is one of the highest-value routine service parts on the tractor because hydraulic performance depends heavily on clean fluid and filtration.
20. How often should I change the hydraulic filter on a John Deere 2520?
The schedule listing shows an initial hydraulic filter change after 50 hours, then every 200 hours. If your tractor’s history is unknown, catching up on overdue hydraulic service is often a smart first move.
21. Why does my John Deere 2520 steer or lift slowly?
Slow steering or loader response usually points to hydraulic fluid level, filter condition, cold oil behavior, or a leak rather than an immediate major failure. Check service status and external leaks first, then move to deeper diagnosis if the symptom persists warm.
22. Why is my John Deere 2520 making a whining hydraulic noise?
Hydraulic whining can come from restricted flow, low fluid, aeration, or a system working harder than usual under load. If the noise is new and paired with weak performance, stop and check fluid level, filter service, and external leakage.
23. Why is my John Deere 2520 mower cutting unevenly?
Uneven cutting usually comes down to deck leveling, blade condition, wheel setup, and cutting-height adjustment rather than engine trouble. The mower setup guidance for tractors in this family includes checking blade height and level side-to-side and front-to-rear.
24. How do I level the mower on a John Deere 2520?
The mower setup guidance for the 2520 family describes checking blade-tip measurements on a level surface and adjusting the lift or hanger points until the deck sits within spec. Measure carefully before turning adjusters, because guessing often makes the cut worse rather than better.
25. Why does my John Deere 2520 scalp the lawn?
Scalping usually means the cutting height is too low for the ground conditions, the deck is out of level, or the gauge-wheel setup is wrong. Check level, wheel clearance, and the height setting before assuming there is a deck failure.
26. Why does my John Deere 2520 leave ragged grass tips?
Ragged tips are most often caused by dull blades or mowing conditions that are too wet or heavy for a clean cut. Inspect and sharpen or replace blades before chasing deck or engine-related causes.
27. Why is my John Deere 2520 vibrating when mowing?
Mowing vibration often points to a bent or damaged blade, spindle-area problem, worn belt, or pulley issue. Stop immediately and inspect because continued use can damage the deck or PTO components further.
28. What should I do if my John Deere 2520 has an electrical intermittent fault?
Intermittent electrical problems usually respond best to a methodical check of battery terminals, grounds, switch connectors, and visible harness rub points. Random parts replacement is expensive and often misses the real fault on tractors with multiple interlock circuits.
29. What battery is commonly listed for the John Deere 2520?
A commonly listed battery for the John Deere 2520 is TY26498. Match terminal layout and physical size carefully before buying from a non-dealer source.
30. Is the John Deere 2520 easy to maintain at home?
Yes, for routine service it is generally owner-friendly, especially for filters, battery work, inspections, belt checks, and mower setup. The machine becomes less DIY-friendly once the problem moves into internal hydraulic diagnosis, driveline work, or deeper electrical troubleshooting.
31. Should I buy OEM or aftermarket parts for a John Deere 2520?
OEM is usually the better choice for belts, hydraulic filters, switches, and fit-sensitive cooling or driveline parts. Aftermarket can be fine for selected batteries, bulbs, and some cross-referenced maintenance items, but only when the supplier and part match are solid.
32. What information do I need before ordering John Deere 2520 parts?
Get the full model name, Product Identification Number, engine model and serial, plus any mower deck or attachment model details. That simple step prevents many ordering mistakes, especially for attachment-related and serial-sensitive parts.
33. Where can I find John Deere 2520 parts diagrams?
Good starting points include Deere literature sources, Deere-focused parts sellers, and online exploded-diagram pages such as Jack’s Small Engines. Parts diagrams are especially useful when a repair involves several small washers, brackets, switches, or routing details.
34. Is there a maintenance kit for the John Deere 2520?
Yes, a commonly listed maintenance filter pack for the John Deere 2520 is LVA21201. It is useful for owners catching up on service because it groups major filters into one package.
35. When should a John Deere 2520 go to the dealer instead of DIY repair?
Send it to the dealer when the tractor has persistent hydraulic weakness after proper service, repeated overheating without an obvious cause, internal PTO or driveline concerns, or engine/fuel-system problems that need deeper testing. Those are the jobs where proper tools and model-specific service procedures matter most.
How to troubleshoot common hydraulic issues on a JD 2520
Most common hydraulic issues on a John Deere 2520 come down to low/old oil, clogged filter/screen, air in the system, control‑valve problems, or internal leaks; start with simple checks (oil level, filter age, visible leaks) before assuming a failed pump.
Below is a practical, step‑by‑step way to troubleshoot the main symptom types you’re likely to see on a JD 2520.
Know the key hydraulic components on a John Deere 2520
For basic troubleshooting, think in terms of four pieces of the system:
-
Oil supply: hydraulic/transmission oil level and condition, sump, and suction screen.
-
Filtration: main hydraulic/transmission filter (and any screens/strainers).
-
Pump and charge pump: create system pressure and flow.
-
Controls and consumers: steering, SCVs/loader valve, 3‑point hitch, and any other hydraulic circuits plus hoses/fittings/cylinders.
Most owner‑level faults are in supply, filtration, or controls/consumers rather than a failed pump.
Symptom 1: Slow loader or 3‑point hitch
“Slow lift” or “weak hydraulics” is usually a supply or restriction problem, not instantly a bad pump.
Likely causes:
-
Low fluid level or wrong fluid type.
-
Clogged hydraulic filter or suction screen.
-
Air in the system after a recent service.
-
Partially closed or mis‑set control valve, diverter, or SCV.
-
Internal leakage in a cylinder or valve block (less common but possible).
Step‑by‑step checks:
-
Check fluid level and type
-
Park level with loader/3‑pt down, engine off.
-
Verify level on the dipstick/sight glass; top up only with the recommended trans/hydraulic fluid.
-
-
Inspect filter and service history
-
If the hydraulic/transmission filter is overdue or unknown age, change it first; restricted filters are a very common cause of slow hydraulics.
-
If the tractor has a suction screen, make sure it has been cleaned at the recommended interval.
-
-
Bleed air after service
-
After filter/fluid work, run at low‑to‑mid rpm and slowly cycle loader and 3‑pt several times, topping up fluid if the level drops as air purges.
-
-
Check for external leaks and warm spots
-
Look for wet hoses, fittings, valve blocks, and around cylinder seals.
-
A “mystery” drop in performance with no visible oil loss can still be an internal valve or cylinder leak, but rule out obvious drips first.
-
-
Verify valves and diverters are set correctly
-
Make sure any rear SCVs, loader valve, or power‑beyond plumbing are connected as intended; mis‑plumbing can starve some functions.
-
If oil level and filter are correct, no major leaks are visible, and hydraulics are still slow or weak when hot and cold, you’re at the point where pressure testing (dealer or advanced DIY with gauges) is needed to distinguish a pump issue from internal leakage.
Symptom 2: Hydraulic functions dead or intermittent
If steering, loader, and 3‑pt all stop together, think “no pressure or no flow” rather than a single bad cylinder.
Likely causes:
-
Extremely low oil level (sucked air).
-
Totally plugged filter or screen.
-
Pump not being driven or charge pump not supplying.
-
Mis‑routed loader/SCV plumbing tying the system in a loop.
Checks:
-
Verify fluid level immediately
-
If it’s off the stick, do not keep running the tractor. Top up to spec and reinspect for the leak that caused the loss.
-
-
Check for recent work or plumbing changes
-
If you recently added or removed a loader, changed quick‑couplers, or worked on SCVs, confirm supply and return lines are on the correct ports and couplers are fully seated. Mis‑connected loader plumbing on JD compacts is a frequent cause of “nothing works.”
-
-
Inspect filter/screen again
-
If the filter is very old or the oil looks contaminated, change filter and clean screen before anything else; heavy contamination can starve the pump.
-
-
Listen for pump noise
-
A pump that is cavitating (sucking air) or running dry will often be loud and “growling.” If that noise appears with low/no hydraulics, shut down and resolve oil supply issues before more running.
-
If the tractor still has no hydraulic function after basic checks, it’s time for a pressure test at a rear port or test point to see if the pump is making pressure or if there is an internal leak/charge‑pressure issue. That is typically dealer or advanced‑DIY territory.
Symptom 3: Loader lifts but won’t curl (or vice versa)
If only one loader function is weak or dead but others work normally, the problem is usually in the loader valve, joystick linkages, or that specific circuit’s hoses/cylinder, not the main pump.
Likely causes:
-
Sticking or worn spool in the loader valve.
-
Faulty quick‑coupler on that function.
-
Rod‑end or base‑end cylinder seals leaking internally.
Checks:
-
Check quick‑couplers first
-
Make sure the couplers for the affected function are fully latched; swap couplers side‑to‑side briefly to see if the problem moves with the coupler.
-
-
Watch for oil movement and cylinder behavior
-
If you command curl, see if any hoses jump or flex; if they do and the bucket barely moves, you may have internal cylinder leakage.
-
-
Move joystick through full travel
-
Feel for “notches” or stiffness that suggest the spool is partially blocked or not moving fully into position. Objects wedged around the joystick can also limit throw.
-
-
Check for visible leaks on the affected cylinders and hoses
-
Wet rods or fittings indicate seals or connections that need attention.
-
If other hydraulic functions are strong and only one loader axis is weak even after coupler checks, plan on loader‑valve or cylinder diagnosis/repair as the next step.
Symptom 4: Hydraulics noisy, foamy, or jerky
Noisy, jerky, or “foamy” hydraulics usually indicate aeration or contamination.
Likely causes:
-
Low oil level sucking air on hills.
-
Wrong fluid, water contamination, or severely aged oil.
-
Loose suction side fitting or cracked suction hose.
Checks:
-
Inspect oil visually
-
Oil that looks milky (water) or full of bubbles (air) will cause erratic operation. If it’s very contaminated, plan a full drain and refill plus filter change.
-
-
Check suction‑side plumbing
-
Look for loose clamps or damaged hoses between sump and pump; these can pull air without always leaking oil out.
-
-
Top up oil level and operate gently
-
Once level and connections are corrected, run at moderate rpm and slowly cycle hydraulics to purge air; re‑check level.
-
If noise continues after fresh fluid/filter and you’ve confirmed no obvious suction leaks, internal wear or pump problems should be professionally assessed.
Symptom 5: Visible hydraulic leaks
Leaks are both a performance and safety issue; escaping high‑pressure oil can penetrate skin and also starve the system.
Common leak points:
-
Hose crimps and fittings at the loader valve, cylinders, and SCVs.
-
Cylinder rod seals.
-
Hard lines and junction blocks.
Basic approach:
-
Clean first, then inspect
-
Wipe down oily areas with rags/degreaser, run the tractor briefly, and then re‑check to see exactly where fresh oil appears.
-
-
Replace damaged hoses and seals promptly
-
Do not wrap high‑pressure leaks with tape; replace the hose or have it rebuilt.
-
-
Re‑torque fittings to spec, don’t over‑tighten
-
Slightly seeping fittings may only need a careful re‑tighten; badly damaged flares or seats need parts replacement instead of more torque.
-
When to stop and get dealer help
Hydraulic troubleshooting on a JD 2520 is DIY‑friendly up to the point where you need accurate pressure/flow checks or have obvious internal leakage without a clear source.
Get professional help when:
-
You have no hydraulics even with correct oil and new filter.
-
Hydraulics are weak and hot, and a pressure test shows low pressure or charge pressure issues.
-
There is suspected internal leakage in the transmission, charge circuit, or main pump.
-
You are not comfortable working around high‑pressure hydraulics safely.