
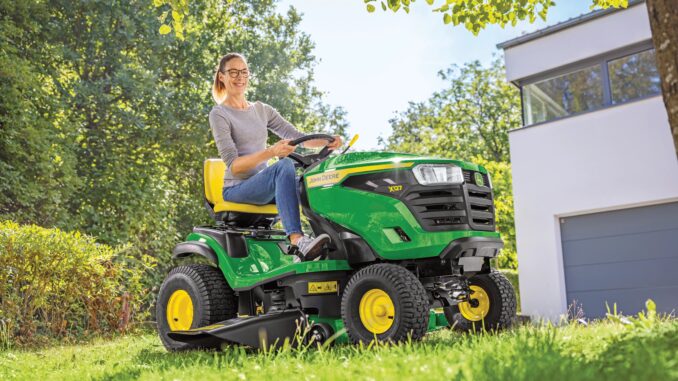
The John Deere D100 is a 100 Series lawn tractor built for routine residential mowing, light towing, and general homeowner yard work rather than heavy ground-engaging jobs. It uses the same basic owner-service pattern as other entry-level Deere riding mowers, so most routine maintenance and a fair number of common repairs are realistic for a careful DIY owner in the USA or Canada.
John Deere D100 model overview
The John Deere D100 sits in Deere’s 100 Series lawn tractor range and is aimed at homeowners who need a simple riding mower for regular lawn cutting and light seasonal work. Deere’s owner-support material classifies it under the D100 100 Series tractor line, while the D100 Series operator’s manual groups these tractors as residential lawn tractors with service sections for engine, transmission, mower, electrical, and troubleshooting.
For most owners, the important systems are the engine and fuel system, mower deck and blade drive, mechanical controls and safety interlocks, battery/starting circuit, and the basic transmission/drive setup. In practice, this guide focuses on the problems owners actually notice first: hard starting, rough running, weak cutting, belt noise, vibration, poor drive response, and electrical no-start conditions.
General overview of the John Deere D100
The D100 is designed first as a mowing tractor, so the mower deck, belt drive, blades, engine air/fuel system, and safety switches are the components that most often affect day-to-day reliability. The operator’s manual includes dedicated service sections for engine, transmission, mower, electrical, and troubleshooting, which is a good sign that these are the main service areas owners should expect to deal with over time.
Common service parts owners regularly replace include the engine oil filter AM125424, in-line fuel filter AM116304, air filter MIU14395, spark plug M78543 or MIU11020 depending on engine specification, 42-inch deck drive belt GX20072, and 42-inch blade kits such as AM141031 or GY20850 for compatible 42C decks. Deere-focused parts listings also show the D100 as compatible with the LG266 home maintenance kit for many non-California D100 applications.
Troubleshooting approach for the John Deere D100
Diagnosis on a D100 should always start with the symptom, not with random parts replacement. Deere’s manual is organized around service systems and troubleshooting, but for owners the more useful order is: what the machine is doing, what changed recently, and which simple checks can be done safely before any teardown.
Main symptom groups for the John Deere D100 are:
-
Starting issues, such as no crank, slow crank, or crank-no-start.
-
Running issues, such as surging, misfiring, smoke, or stalling under load.
-
Cut-quality problems, such as uneven cut, uncut strips, clumping, and poor discharge.
-
Vibration and noise, especially after blade impact or belt wear.
-
Overheating, burning smells, fuel or oil leaks, and debris buildup around hot areas.
-
Transmission or drive concerns, including weak motion on slopes or delayed response.
-
Electrical and safety-switch issues affecting starting or PTO operation.
Emergency John Deere D100 repair needs
Some D100 problems should be handled immediately because they create a direct safety risk or can quickly damage major components. Deere specifically warns about blade-stop problems, debris buildup near hot components, missing guards, unsafe slope use, fuel leaks, and abnormal vibration after impact.
4.1 John Deere D100 starting issues
A D100 that will not crank or only clicks may have a battery, cable, brake/clutch switch, seat switch, PTO switch, or starter-circuit problem. This matters because repeated low-voltage cranking can overheat cables, damage the battery, and leave owners chasing fuel problems when the real fault is electrical.
Common causes:
-
Weak or dirty battery connections.
-
Discharged or aging battery.
-
PTO left engaged.
-
Brake/clutch pedal not fully applied or switch misadjusted.
-
Seat switch or wiring issue.
Basic checks:
-
Confirm the PTO is off and the brake/park function is fully set.
-
Check battery terminals for corrosion and looseness. Deere lists battery cleaning as routine service.
-
Charge and load-test the battery before replacing other parts.
-
Inspect visible switch connectors and harness plugs for looseness or corrosion.
4.2 John Deere D100 cut-quality problems
If the John Deere D100 leaves streaks, scalps, clumps, or ragged grass tips, the issue is usually deck setup, blade condition, belt condition, mowing speed, or deck cleanliness rather than a major failure. Deere’s maintenance chart specifically calls for blade service, belt inspection, deck leveling, and deck cleaning because these directly affect cut quality.
Common causes:
-
Dull, bent, or unbalanced blades.
-
Deck out of level.
-
Worn or slipping mower belt.
-
Grass packed under the deck.
-
Mowing too fast or in wet/heavy grass.
Basic checks:
-
Inspect blades for damage and uneven wear.
-
Clean the underside of the deck only with the engine off, key removed, and blades stopped.
-
Check deck level side-to-side and front-to-back. Deere includes deck level checks in the service schedule.
-
Inspect the deck belt for glazing, cracks, frayed edges, or heat damage.
4.3 John Deere D100 vibration and noise
Sudden vibration on a D100 often points to blade damage, a blade adapter issue, loose hardware, spindle trouble, or belt damage after striking an object. Deere instructs operators to stop and inspect the machine after impact or abnormal vibration rather than continue mowing.
Common causes:
-
Bent or unbalanced blade.
-
Loose blade bolt or deck hardware.
-
Failing spindle bearing.
-
Belt damage or debris in pulleys.
-
Debris wrapped around blade shafts.
Basic checks:
-
Shut the machine down immediately after abnormal vibration begins.
-
Inspect blades and blade mounting hardware.
-
Spin pulleys and spindles by hand only after the machine is safely disabled.
-
Replace damaged blades in matched sets to preserve balance, as Deere advises.
4.4 Overheating and leaks
Heat buildup, burning smells, smoke, or fuel/oil seepage on a John Deere D100 should be addressed quickly because the manual repeatedly warns about fire risk from debris and fuel leaks. Debris around the muffler, engine screens, top of deck, and transmission is a known hazard area on this tractor family.
Common causes:
-
Grass and chaff packed around engine cooling areas.
-
Dirty cooling fins.
-
Oil leak attracting debris.
-
Fuel line, cap, or filter seepage.
-
Belt overheating from drag or misrouting.
Basic checks:
-
Let the machine cool fully before cleaning.
-
Clean engine screens, cooling areas, muffler surroundings, and top of deck.
-
Inspect for wet spots around the fuel filter, fuel line, and crankcase areas.
-
Do not keep mowing if you smell burning rubber or see smoke from the deck area.
4.5 John Deere D100 transmission and drive problems
Weak ground speed, poor hill performance, hesitation, or inconsistent motion on a D100 may be caused by belt-related drive loss, linkage issues, traction limits, or internal transmission wear. Because the D100 is a residential lawn tractor, owners should treat persistent drive complaints carefully and avoid assuming every slow-drive issue is “normal.”
Common causes:
-
Drive belt wear or slippage.
-
Linkage misadjustment or drag.
-
Low traction from tires or wet slopes. Deere warns against mowing wet grass and steep slopes.
-
Internal transaxle wear or overheating.
Basic checks:
-
Confirm the complaint is not simply wet-grass traction loss.
-
Inspect visible belt condition and pulley operation.
-
Check tire pressure, because uneven pressure affects traction and cut quality.
-
If motion weakens badly once hot, dealer diagnosis is usually the smarter next step.
4.6 Electrical and safety-switch faults
Electrical problems on the D100 usually show up as no crank, intermittent crank, dead PTO, or sudden engine shutdown when a switch circuit opens. Deere emphasizes keeping guards and switches in place and working, which is especially important on homeowner tractors where seat, brake, and PTO interlocks are common failure points.
Common causes:
-
Corroded battery terminals.
-
Blown fuse or damaged wiring.
-
Faulty seat, brake, or PTO switch.
-
Loose ground connection.
Basic checks:
-
Clean and tighten battery terminals first.
-
Check the fuse and visible harness damage near heat or vibration points.
-
Test switch operation logically, one circuit at a time, instead of bypassing safety devices.
-
Replace failed switches with correct part-numbered parts matched to model and serial details.
DIY or dealer?
For the John Deere D100, the normal line is fairly clear: routine service, deck work, blades, filters, spark plugs, battery service, and many belt replacements are realistic DIY jobs, while internal transmission work, repeated electrical diagnosis, engine internal repair, and safety-system faults that are not obvious are better left to a dealer or an experienced small-engine technician. Deere’s manuals support owner maintenance, but they also clearly separate dealer-level procedures such as valve-clearance work.
Good DIY jobs
-
Engine oil and oil filter changes.
-
Air filter, fuel filter, and spark plug replacement.
-
Blade sharpening or blade replacement in sets.
-
Deck cleaning, deck leveling checks, and routine greasing.
-
Battery terminal cleaning and battery replacement.
-
Many mower deck belt replacements.
Advanced DIY or dealer jobs
-
Complex no-start diagnosis involving multiple interlock circuits.
-
Repeated belt-throwing caused by pulley alignment or spindle issues.
-
Spindle replacement if hardware is seized or deck damage is present.
-
Transmission or transaxle diagnosis.
-
Valve-clearance checks and adjustments, which Deere lists as dealer work at 200 hours.
Skill level guide
-
Beginner: Oil, filter, spark plug, battery, blades, deck cleaning.
-
Intermediate: Deck belt replacement, deck leveling, fuel filter changes, switch replacement with proper testing.
-
Advanced: Electrical diagnosis with a meter, spindle or pulley work, recurring drive complaints, engine mechanical testing.
Parts for the John Deere D100
Before ordering anything, gather the full model name, the tractor Product Identification Number, the engine serial number, and the deck size or deck designation. Deere’s manual explicitly tells owners to provide the product model and identification numbers plus the engine serial number when seeking service information, and the Shop.Deere owner-support page is the best starting point for serial-aware parts lookup.
OEM parts are usually the safest choice for belts, safety switches, exact-fit deck parts, and anything serial-number sensitive because routing, length, and switch geometry matter. Aftermarket parts can be acceptable for consumables like batteries, some filters, and even blades, but only when the cross-reference is exact and the seller clearly states D100 fitment by deck and serial range.
John Deere D100 manuals and parts diagrams
The best sources for D100 repair information are:
-
John Deere D100 Owner Support, useful for model-specific owner support and parts navigation.
-
John Deere D100 Series Operator’s Manual PDF, useful for official service intervals, safety, operating limits, and baseline troubleshooting.
-
Green Farm Parts D100 maintenance guide, useful for commonly replaced maintenance parts and cross-checking service kit contents.
-
Green Farm Parts Deere parts lookup, useful as a Deere-focused illustrated-parts lookup starting point.
These links work best together: use the operator’s manual for intervals and procedures, Deere owner support for official model identification and parts navigation, and a Deere-focused retailer to verify current OEM numbers for wear parts. That combination helps reduce the most common owner mistake, which is ordering the right part family but the wrong variation.
How to locate John Deere D100 serial and engine numbers
These numbers matter because D100 parts can vary by engine version, deck fitment, and production details. Deere says to record both the machine Product Identification Number and the engine serial number because service information and parts support depend on them.
-
Park the tractor safely on level ground, remove the key, and let hot parts cool. Deere’s parking procedure in the manual is the right baseline.
-
Find the tractor PIN on the left side of the frame. The operator’s manual identifies that location directly.
-
Locate the engine serial number on the engine shroud area as shown in the manual for the single-cylinder or V-twin layout.
-
Confirm the mower deck size physically and through any deck tag or previous parts paperwork before ordering blades or belts. Deere parts listings separate 42-inch and other deck variants.
-
Photograph all tags before shopping online or visiting a dealer, so you can match characters exactly. Deere recommends having these numbers available when contacting service support.
Buying John Deere D100 parts
The smartest strategy is to identify the exact OEM number first, then compare dealer, Deere, and reputable Deere-focused aftermarket sellers. That is especially important on a D100 because many parts look similar across 100 Series tractors but differ by deck, engine, or serial range.
-
Online: Best for routine parts if the listing clearly states D100 fitment and deck size, such as Deere owner support, Green Farm Parts, or RDO Equipment for maintenance kits.
-
Dealer counter: Best for serial-sensitive items, electrical parts, guards, linkages, and anything where the old part number has been superseded.
-
Retail stores: Fine for oil, batteries, and spark plugs if the packaging clearly matches the exact D100 engine and service part number.
Useful links:
Step-by-step fitting guide for common John Deere D100 parts
These are four high-impact DIY jobs that solve a large share of real D100 owner complaints: hard starting, rough running, poor cutting, and belt slip. Always remove the key, set the park brake, and disable ignition before working around blades or belts.
Change the engine oil and oil filter
This service helps starting, engine life, and hot-weather reliability, and Deere calls for an initial oil/filter change at 8 hours followed by yearly or every 50 hours service on this series.
-
Run the engine briefly to warm the oil, then shut it off and park safely on level ground.
-
Drain the oil into a suitable container and remove the old oil filter.
-
Lightly oil the seal on the new filter, then install it hand-tight. This is standard filter practice and aligns with Deere maintenance-kit usage.
-
Refill with the correct oil grade and quantity for the engine version, then check the dipstick.
-
Start the engine, inspect for leaks, shut down, and recheck oil level.
Replace the air filter and fuel filter
This job often fixes hard starting, rich running, hesitation, and loss of power under load. Deere lists both the air filter and fuel filter as regular service items on the D100 schedule.
-
Remove the air-cleaner cover and inspect the element for dust, oil saturation, or physical damage.
-
Replace the air filter with the correct element, commonly MIU14395 where applicable.
-
Clamp or control fuel flow as needed, then remove the in-line fuel filter noting flow direction.
-
Install the new AM116304 filter in the correct direction and secure the clamps.
-
Start the engine and check for proper running and any fuel seepage.
Replace the spark plug on the John Deere D100
A fresh spark plug can cure misfire, rough idle, hard starting, and poor fuel burn. Deere includes spark plug replacement in the yearly or 50-hour service list for this tractor family.
-
Let the engine cool fully and pull the plug wire straight off.
-
Remove the old plug and compare it to the replacement part number for your engine variant, such as M78543 or MIU11020 where listed.
-
Check the new plug gap to specification for the engine, even if it is sold as pre-gapped.
-
Thread the new plug in by hand first to avoid cross-threading, then tighten properly.
-
Refit the plug wire firmly and test start the tractor.
Replace the 42-inch mower deck belt
This job helps when the deck slips in heavy grass, squeals, or stops driving blades correctly. Deere-focused parts listings identify GX20072 as a common 42-inch deck belt for D100 applications.
-
Park safely, lower the deck, remove the key, and disconnect the spark plug wire.
-
Remove deck guards or covers as needed to access belt routing.
-
Note the exact belt path around engine pulley, idlers, and deck pulleys before removal.
-
Install the new GX20072 belt with the V-side and flat-side oriented correctly to each pulley.
-
Rotate pulleys by hand, confirm belt seating, reinstall guards, and test engagement at low throttle first.
Maintenance to stop John Deere D100 problems coming back
Regular maintenance prevents most D100 complaints because the common failure pattern is gradual: dirty cooling areas, worn blades, neglected belts, stale service items, and battery corrosion. Deere’s official intervals focus heavily on oil, filter, belt, blade, cooling-fin, deck, and battery service for exactly that reason.
Focus areas:
-
Starting reliability: Keep the battery terminals clean, replace spark plug and filters on schedule, and avoid stale fuel issues.
-
Cut quality: Keep blades sharp, the deck clean, and the deck level checked yearly.
-
Fire and overheating prevention: Clean engine screens, cooling fins, muffler surroundings, and the top and underside of the deck.
-
Drive performance: Inspect belts and tire pressure before blaming the transmission.
-
Electrical reliability: Keep battery terminals clean and inspect visible wiring and switch connections.
John Deere D100 maintenance schedule
The official D100 Series schedule includes an initial 8-hour service, 25-hour lubrication intervals, yearly or 50-hour routine service, and a 200-hour valve-clearance check by a dealer. These intervals come directly from the D100 Series operator’s manual and are the best baseline for homeowner use in the USA and Canada.
Daily / before each use
-
Check engine oil level.
-
Test safety systems before mowing.
-
Inspect for loose, missing, or damaged parts.
-
Check the mowing area for debris and hazards.
After first 8 hours
-
Change engine oil and filter.
-
Lubricate mower spindles and pivot points.
-
Lubricate front axle pivot, axle spindles, and front wheel bushings.
-
Check or adjust mower deck belt tension and spindle brakes on manual PTO models.
Every 25 hours
-
Lubricate mower spindles and pivot points.
-
Lubricate front axle pivot and axle spindles.
-
Lubricate front axle wheel bushings.
Every 50 hours or yearly
-
Change engine oil and filter.
-
Replace air filter element.
-
Replace fuel filter.
-
Replace spark plug(s).
-
Clean engine cooling fins.
-
Sharpen or replace mower blades.
-
Check or replace mower drive belts.
-
Check and level the mower deck.
-
Clean mower deck and battery terminals.
Every 200 hours
-
Check and adjust valve clearance through a John Deere dealer.
Seasonal checklist
Spring
-
Change oil and filter if due, inspect battery, install sharp blades, and clean the deck thoroughly.
-
Inspect deck belt condition before the heavy mowing season starts.
Mid-season
-
Grease spindles and front axle points at the 25-hour interval and inspect for debris buildup in hot areas.
-
Recheck blade condition and deck cleanliness if cut quality begins to drop.
Fall / storage prep
-
Clean the entire tractor, especially engine, muffler, transmission area, and deck. Deere highlights this as a fire-prevention measure.
-
Replace overdue service items before storage so the machine is ready next season.
Repair, upgrade, or replace?
For a John Deere D100, repair usually makes sense when the machine has one or two straightforward faults and the deck, frame, and engine are fundamentally sound. Upgrade or replacement starts to make more sense when repeated drive issues, structural deck wear, multiple electrical faults, or a pattern of neglected maintenance turns the mower into a chain of medium-cost repairs rather than one clear fix.
Repair if:
-
The issue is a belt, blade, filter, spark plug, battery, switch, or normal wear part.
-
The tractor starts and drives reasonably well aside from one system complaint.
-
The deck shell and frame are still solid.
Upgrade if:
-
You regularly mow more lawn than an entry-level 100 Series tractor is comfortable handling. Deere positions the D100 as a homeowner model, not a heavy-duty machine.
-
You want more deck width, stronger towing capability, or a higher-duty transmission than this class normally offers.
Replace if:
-
The machine has major engine, transmission, and deck issues at the same time.
-
Safety systems, guards, or structural parts are compromised and repair cost approaches the value of a better mower.
-
Parts needs have become serial-specific and cumulative enough that a newer platform is more practical.
John Deere D100 troubleshooting FAQ
1. Why will my John Deere D100 not start?
Start with the basics: PTO off, brake fully applied, charged battery, and clean battery terminals. On the D100, no-start complaints are often caused by interlock-switch conditions or battery/connection issues before they are caused by major engine faults. Deere also lists battery terminal cleaning as regular maintenance, which shows how common voltage-related issues are.
2. Why does my John Deere D100 click but not crank?
A click usually means the starter circuit is trying to engage but does not have enough current or does not have full circuit continuity. The most common causes are a weak battery, corroded terminals, poor ground, or a failing starter/solenoid connection rather than a fuel problem. Check voltage and cable condition before replacing parts.
3. Why does my John Deere D100 crank but not fire?
If it cranks well but will not fire, check fuel delivery, spark, and air flow in that order. A clogged fuel filter, old spark plug, dirty air filter, or stale fuel can all create this symptom, and all three service items are part of the regular D100 maintenance pattern.
4. Why does the John Deere D100 start and then die?
That usually points to restricted fuel flow, a venting issue, dirty carburetion, or an interlock problem that appears once the machine is moved or the operator shifts position. Start by checking the fuel filter, visible fuel line condition, and seat-switch behavior before assuming an internal engine issue.
5. Why is my John Deere D100 running rough?
Rough running on a D100 is commonly caused by old fuel, a dirty air filter, a worn plug, partial fuel restriction, or debris affecting cooling and combustion stability. Because Deere specifically calls for regular air filter, spark plug, and cooling-fin service, those are the right first checks.
6. Why is the John Deere D100 surging at idle or part throttle?
Surging often means the engine is running lean from restricted fuel flow or air leaks, or the carburetor is dirty after storage. Owners should first replace overdue service items and verify clean fuel before moving on to carburetor work.
7. Why does my John Deere D100 lose power in thick grass?
This usually happens when blades are dull, the deck is packed with grass, the engine service items are overdue, or the deck belt is slipping. Deere includes blade service, deck cleaning, and belt inspection in the normal maintenance chart because these directly affect mowing load performance.
8. Why does my John Deere D100 leave uncut strips?
Uncut strips are usually caused by dull blades, deck level issues, bent blades, or mowing too fast for grass conditions. Start by checking blade condition and deck level, because Deere specifically calls out both in routine service.
9. Why is the cut uneven on my John Deere D100?
An uneven cut usually points to low or mismatched tire pressure, a deck that is out of level, worn blades, or a damaged spindle area. Tire pressure and deck level are the fastest checks, and both have a strong effect on cut height consistency.
10. Why does the John Deere D100 scalp parts of the lawn?
Scalping often comes from deck height set too low, uneven ground, wrong deck pitch, or tire pressure differences side to side. Check the deck setup before changing blades or belts, because geometry problems create consistent scalping patterns.
11. Why does grass clump under my John Deere D100 deck?
Wet grass, heavy growth, a dirty deck shell, and dull blades are the usual causes. Deere’s schedule includes deck cleaning and blade maintenance because packed debris under the deck quickly hurts airflow and discharge performance.
12. Why are the blades on my John Deere D100 not engaging properly?
If the blades engage weakly or slip under load, inspect the mower deck belt, idlers, and visible pulleys first. A worn 42-inch deck belt such as GX20072 on the applicable deck setup can cause weak blade drive well before it fails completely.
13. Why does the John Deere D100 deck belt keep slipping?
A slipping belt usually means wear, glazing, contamination, pulley drag, or tension issues. Replacing the belt alone may not solve the problem if an idler or spindle bearing is stiff, so spin related components by hand during inspection with the machine safely disabled.
14. Why does my John Deere D100 keep throwing the mower belt?
A thrown belt usually means the belt is the wrong part number, badly worn, misrouted, or running on a damaged pulley or guide. Confirm the correct belt for the deck, then inspect guards, keepers, and pulley alignment before mowing again.
15. Why is my John Deere D100 vibrating badly?
Bad vibration is often caused by a bent blade, a blade installed incorrectly, debris wrapped around the spindle area, or damage after striking an object. Deere says to stop and inspect the machine immediately after abnormal vibration or impact instead of continuing to operate it.
16. Why does the John Deere D100 make a squealing noise?
A squeal usually comes from a slipping belt, dirty pulley surface, or bearing drag in an idler or spindle. If the noise changes when the deck is engaged, focus on the mower deck belt path first.
17. Why does my John Deere D100 backfire?
Backfire can come from stale fuel, ignition issues, governor/carburetion problems, or abrupt shutdown with an already rich-running engine. Start with tune-up parts and fresh fuel before suspecting deeper engine faults.
18. Why is there white or blue smoke from my John Deere D100?
Smoke may be oil burning, overfilled oil, engine wear, or oil entering the cylinder after the machine has been tipped or parked oddly. Check oil level first, then inspect for leaks and signs of overfill before assuming major engine damage.
19. Why does my John Deere D100 smell hot?
A hot smell usually means debris on hot surfaces, a slipping belt, or an engine cooling problem. Deere repeatedly warns owners to clean around the muffler, engine screens, top of deck, and transmission because debris accumulation raises fire risk.
20. Why is my John Deere D100 overheating?
Overheating is commonly caused by blocked cooling fins, debris around the engine, or mowing in dusty conditions without more frequent cleaning. Deere specifically lists cleaning engine cooling fins as yearly or 50-hour service and notes that severe conditions may require more frequent service.
21. Why does my John Deere D100 leak fuel?
Fuel leaks commonly appear at the in-line filter, hose connections, tank cap area, or aging fuel line. Do not keep operating the tractor until the leak is fixed because the manual treats fuel handling and fire prevention as major safety issues.
22. Why does my John Deere D100 leak oil?
Oil can seep from the drain area, filter seal, crankcase gasket areas, or from overfilling after service. If a fresh oil change was done recently, recheck the filter seal and oil level first before assuming a harder repair.
23. Why does my John Deere D100 move slowly uphill?
Some slowdown on slopes is normal for a residential lawn tractor, but a sharp loss of drive can point to traction loss, belt issues, or transmission wear. Deere also warns not to operate on wet grass or beyond recommended slope limits, so confirm conditions before blaming the transaxle.
24. Why does my John Deere D100 barely move when hot?
If the tractor moves better cold than hot, that can indicate belt slip or a weakening transmission. Once the easy external checks are done, persistent heat-related drive loss is usually a dealer-level diagnosis.
25. Why does the John Deere D100 battery keep going flat?
Repeated battery discharge usually comes from corrosion, a weak battery, poor charging, loose grounds, or long storage without maintenance charging. Deere includes battery-terminal cleaning in the regular service schedule, which reflects how common connection-related problems are.
26. Why won’t my John Deere D100 start unless I jiggle the brake or PTO?
That symptom strongly suggests a safety-switch or linkage adjustment issue rather than a fuel problem. The D100 uses operator-presence and control-position interlocks, so intermittent switch alignment is a common cause of inconsistent starting.
27. Why does my John Deere D100 shut off when I get off the seat?
That is often normal interlock operation if the PTO is on or the tractor is not in the correct safe state. If it shuts off unexpectedly during normal use, inspect the seat switch and connector for looseness or damage instead of bypassing the circuit.
28. How often should I change the oil in a John Deere D100?
The D100 Series operator’s manual calls for an initial oil and filter change at 8 hours, then yearly or every 50 hours after that for this tractor family. More frequent service is smart in dusty, hot, or severe mowing conditions.
29. How often should I grease a John Deere D100?
Deere lists lubrication of mower spindles, pivot points, front axle pivot, axle spindles, and front wheel bushings at the first 8 hours and then every 25 hours. Owners who mow in dusty conditions should inspect lubrication points more often between intervals.
30. When should I replace blades on a John Deere D100?
Replace or sharpen blades when the cut turns ragged, the blades are nicked, or balance is questionable after impact. Deere includes blade sharpening or replacement in yearly or 50-hour service and advises replacing worn or damaged blades and bolts in sets to preserve balance.
31. How do I know which belt fits my John Deere D100?
Use the full tractor model, PIN, deck size, and the old belt number if readable. For many D100 tractors with a 42-inch deck, Deere-focused listings show GX20072 as the deck belt, but owners should still verify fitment before ordering.
32. What maintenance kit fits the John Deere D100?
A commonly listed annual service kit is LG266 for many D100 non-California applications. Even so, check the exact engine and model details before ordering because Deere parts support can vary by specification and serial range.
33. Should I use OEM or aftermarket parts on a John Deere D100?
OEM is the safer choice for belts, switches, guards, and any fit-sensitive or safety-related component. Aftermarket can work for some filters, blades, and batteries, but only when the cross-reference is exact and the seller clearly states D100 fitment by deck and engine.
34. Is the John Deere D100 a good DIY mower to maintain?
Yes, the D100 is one of the more DIY-friendly Deere lawn tractors for routine homeowner service because the official support material covers standard maintenance clearly and the common wear parts are widely available. The practical limit is that transmission internals, advanced electrical diagnosis, and deeper engine work move beyond basic DIY for most owners.
35. When should I stop repairing my John Deere D100?
Stop and reassess when the mower has multiple major faults at once, especially engine, transmission, and deck issues together, or when safety-related problems are stacking up. At that point, money spent on recurring repairs may be better directed toward a newer or heavier-duty machine.
Common reasons for D100 engine surging and stall fixes
Engine surging and stalling on a John Deere D100 almost always comes back to fuel/air mixture problems, air leaks, or governor/carb issues – not “bad ignition” in most cases.
What “surging” on a D100 usually means
Surging is the engine hunting up and down at a steady throttle because the governor is constantly chasing an incorrect air‑fuel mix. In practice that’s usually:
-
Too little fuel (restriction or gummed carb circuit), or
-
Too much air (intake leak, warped manifold, or wrong gasket) – the engine goes lean, then recovers, over and over.
If the surging worsens into stalling under load, you’re seeing the same problem pushed harder: once the load increases, the restricted or leaky system can’t keep up and the engine just quits.
Common causes of D100 surging and stalling
These are the most common, in order of how often they show up on small‑engine/D100 reports.
-
Stale or contaminated fuel
Old petrol, water in the tank, or varnish deposits in the carb causes lean surging and load‑stalling. Owners often report big improvements just from swapping to fresh fuel and flushing contaminated fuel out of the system. -
Partially blocked main or pilot jet in the carburetor
A plugged pilot or main jet is one of the top causes cited for mid‑range surging on these engines; the jet gets coated in hard varnish and the engine leans out, especially at part throttle. -
Dirty or incorrectly fitted carburetor after a cheap “replacement carb”
Several D100 owners chase surging despite new carb/fuel pump/coil, only to find an issue with the carb’s solenoid, jetting, or a missing O‑ring or gasket in the main‑jet or bowl area. -
Vacuum leak at the intake manifold or carb/manifold gasket
A warped plastic intake manifold or poorly sealed carb gasket lets extra air in, causing lean surging; tightening or resealing the intake fixes many “mystery” surging Deere lawn tractors. -
Governor linkage or governor spring issues
A stretched, broken, or incorrectly installed governor spring lets the throttle plate “flutter”, causing surging especially at mid‑range and under load. -
Restricted fuel flow (filter, tank vent, or line)
Blocked fuel filter, collapsing fuel line, or a clogged tank vent will let the engine idle but starve it under load or after a few minutes, leading to surging and then stalling. -
Faulty or low‑quality fuel shutoff solenoid on the carburetor
Users have traced persistent surging and cutting‑out to cheap aftermarket fuel‑bowl solenoids whose plungers bounce or don’t retract fully, partially restricting fuel; swapping to an OEM solenoid or carb cured the issue. -
Severe internal/valve issues (less common)
Misadjusted valves or very weak compression can contribute to unstable running, but most surging fixes are found in the items above before needing valve work.
Practical fixes and the order to try them
For a DIY D100 owner, this is a sensible, low‑risk order:
-
Fuel and basic service checks
-
Drain obvious stale/old fuel and refill with fresh petrol from a trusted source.
-
Replace the fuel filter if it’s old or unknown age.
-
Check and replace the spark plug if it’s worn, fouled, or incorrectly gapped; a good plug won’t cure surging alone, but it removes one variable.
-
-
Check the tank cap vent and fuel flow
-
Run the engine with the cap slightly loose; if surging/stalling improves, the tank vent may be restricted.
-
With the line disconnected (cold engine, safe handling), confirm you have a healthy gravity/pump flow through the filter into a container.
-
-
Inspect governor spring and linkages
-
Look for a stretched, missing, or improperly hooked governor anti‑slack spring at the throttle/governor linkage; this tiny spring is a documented cause of mid‑range surging when broken or weak.
-
If it’s obviously loose or mangled, replace it with the correct spec spring rather than trying to stretch it back.
-
-
Check for intake air leaks
-
Inspect the plastic intake manifold and carb mounting; Deere‑type Briggs plastic manifolds are known to warp or not mate flat to the carb, allowing air leaks.
-
Carefully snug the manifold bolts in a criss‑cross pattern and inspect/replace the manifold‑to‑head gasket or O‑ring if it’s crushed or hardened.
-
A common field test is to lightly mist carb cleaner around the manifold area at idle; a rise in RPM suggests a leak at that spot.
-
-
Clean the carburetor jets properly
-
Remove the carb bowl and main jet; clean varnish and deposits from the jet and emulsion tube with carb cleaner and a fine wire, especially the tiny pilot jet passages, which are a documented surging cause.
-
Reassemble with all O‑rings and gaskets correctly seated; missing main‑jet O‑rings or misaligned bowl gaskets are specifically reported as surging causes after carb swaps.
-
-
Evaluate any aftermarket carb or fuel solenoid
-
If surging started after fitting a cheap carb, consider refitting the original OEM carb after a proper clean, or upgrading to a better brand (for example Ruixing is often recommended) and using an OEM fuel‑bowl solenoid.
-
Owners report cases where an Amazon‑supplied solenoid tested “OK” but still caused surging until replaced with genuine Briggs/Deere parts.
-
-
Only then consider deeper mechanical/valve issues
-
If fuel, air, and governor checks are all clean and the engine still surges and stalls, check valve clearances against the engine spec and consider compression testing.
-
At this stage many owners turn it over to a dealer or small‑engine shop, especially if they lack feeler gauges and torque tools.
-
How to clean John Deere D100 carburetor jets without removing them
You can sometimes improve D100 surging by cleaning jets in place, but any heavy varnish build-up usually still needs proper disassembly for a “real” fix.
Reality check for in-place jet cleaning
Many techs consider full removal and manual cleaning of jets the only reliable fix for gummed carburetors, because spray-only methods often leave varnish in the tiny pilot and main passages. That said, there are a few “quick and dirty” approaches that can clear light deposits on a D100-style carb without pulling it completely off the engine.
If your D100 is badly hunting, surging, and stalling under load, think of these as diagnostic and temporary: if the problem comes back soon, plan on a full strip and clean.
“Minimal tear-down” method: bowl off, jets still in
This keeps the carb mounted but lets you get cleaner directly into the main and emulsion circuits.
-
Prepare and make safe
-
Engine cold, key out, plug wire pulled, and fuel tap off or line pinched.
-
Have safety glasses and gloves; carb cleaner is aggressive on skin and eyes.
-
-
Drop the float bowl only
-
Put a tray or rag underneath and remove the bowl screw to drain old fuel.
-
Take the bowl off and look for rust, varnish flakes, or “slime” – if it’s full of debris, that’s a sign you really should do a full clean, but you can continue with in-place flushing for now.
-
-
Spray through the emulsion tube and main circuit
-
With the bowl off, you will see the emulsion-tube/main-jet stack up inside the carb throat; owners report good results spraying carb cleaner up through this tube from below when the carb is left on the engine.
-
Use a straw nozzle and give several short bursts up the emulsion tube while rotating the throttle from idle to full to move the governor/throttle plate.
-
-
Flush the bowl and passages
-
Clean the bowl itself thoroughly with carb cleaner and wipe out the residue.
-
Spray into the small drillings and passage holes you can see in the lower carb body; allow cleaner to drain out rather than collecting.
-
If you have canned compressed air, blow gently up through the tube and any visible passages (avoid high pressure that could blow out small parts).
-
-
Reassemble and run on treated fuel
-
Refit the bowl and screw, restore fuel flow, and check for leaks.
-
Fill with fresh fuel plus a small dose of a carb-detergent additive (Seafoam, Stabil, Quickleen, etc. – several small-engine techs and hobbyists use these as an in-tank cleaner after partial manual cleaning).
-
Run the engine long enough to pull the treated fuel through the jets; if surging improves but does not disappear, you’ve confirmed the jets are involved.
-
“Spray-and-soak” shortcut through the fuel side
This is more of a “quick & dirty” clean and is only worthwhile on mildly gummed carbs.
-
Shut off or pinch the fuel line and drain the carb through the bowl drain screw (if present) or by cracking the bowl screw.
-
Close the drain, disconnect the fuel line, and use a straw to fill the carb bowl through the fuel inlet with carb cleaner until it just begins to appear at the overflow/drain.
-
Let it soak 20–30 minutes so cleaner can soften varnish in jets and internal drillings.
-
Drain the cleaner out again, reconnect fuel, and run on fresh, treated petrol.
This can loosen light deposits, but if the D100 still hunts badly after this, assume the pilot jet is still restricted and move on to a full strip.
Why additives alone usually aren’t enough
Online discussions often suggest “just run Seafoam or injector cleaner and it’ll clear the jets,” but experienced techs point out that while additives can help keep a clean carb clean, they rarely open a jet that’s already heavily varnished. In other words, additives work best after at least some mechanical or spray cleaning has opened the passage.
When you must pull the carb or the jet
You should abandon in-place cleaning and fully remove the carburetor (or at minimum, the main jet and emulsion tube) if:
-
The carb bowl contains visible rust flakes, white corrosion, or heavy jelly-like varnish.
-
Surging and stalling returns quickly after in-place cleaning attempts.
-
The D100 only runs with choke partly on, which is a classic sign of a still-partially-blocked pilot or idle jet.
On many small-engine carbs like those used on D100s, the plastic main jet/air-tube assembly can actually be pulled out from the bottom with the carb in place, then cleaned properly with carb cleaner and a fine wire, which is a halfway house between “on-mower” cleaning and full carb removal. That tends to be the most effective compromise: still relatively quick, but you actually see and clear the jet orifices.