
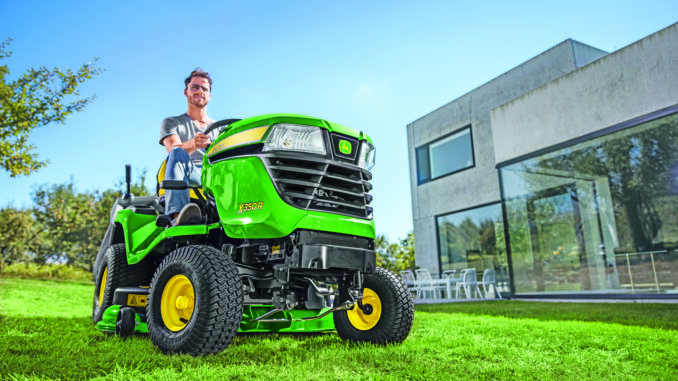
The John Deere D140 is a 100 Series lawn tractor built for homeowner mowing, typically paired with a 48-inch mower deck and covered by the North American D100 Series operator’s manual. For owners in the USA and Canada, it sits in the practical middle ground: capable enough for regular lawn work, but still simple enough that many maintenance jobs and several common repairs are realistic DIY tasks.
This guide is written as a symptom-first repair and maintenance reference for the John Deere D140. It covers common faults, service parts, where to find diagrams and manuals, what you can safely fix yourself, and how to prevent repeat breakdowns with a sensible maintenance routine.
General overview of the John Deere D140
The John Deere D140 belongs to the D100 Series, and the official D100 Series operator’s manual specifically includes the D140 alongside other related models. On this model, the systems most owners deal with are the engine and fuel system, mower deck and belt drive, transmission and traction system, and the electrical and safety-interlock system.
In day-to-day ownership, the parts most often replaced are the 48-inch mower blades, 48-inch mower deck belt, oil filter, engine oil, fuel filter, and air filter elements. Verified service part numbers commonly listed for the John Deere D140 include mower blade GY20852, mower deck belt GX21833, oil filter GY20577, oil TY22029, fuel filter GY20709, and air filter GY21056 or GY21435 depending on serial range.
Troubleshooting the John Deere D140 by symptom
The best way to diagnose a John Deere D140 is to start with the symptom the owner can actually see, hear, or feel, then work inward to the likely cause. For this tractor, the main fault groups are starting issues, poor running, cut-quality problems, vibration or unusual noise, overheating or leaks, drive problems, and electrical or safety-switch faults.
That symptom-first approach matters because the same failure can show up in different ways. A weak battery, dirty air filter, bad fuel, deck belt problem, or loose blade can all create very different owner complaints even though each starts with a simple basic check.
Emergency John Deere D140 repair needs
Some John Deere D140 problems should be dealt with immediately because they affect safe operation or can quickly damage other parts. Stop using the tractor right away if blades do not stop normally, fuel is leaking, belts are smoking, vibration becomes severe, the deck hits objects and keeps being used, or debris has built up around hot engine and muffler areas.
John Deere D140 starting issues
A starting problem usually shows up as a no-crank, slow-crank, or crank-but-will-not-fire complaint. On the D140, that can point to battery condition, connection problems, operator-presence or brake interlocks, fuel delivery faults, or basic tune-up neglect.
-
Common causes: weak battery, dirty or loose terminals, stale fuel, clogged fuel filter, dirty air filter, fouled spark plug, safety switch fault, PTO left engaged.
-
Confirm the PTO is off and the brake is fully applied.
-
Check battery terminals for corrosion and tightness.
-
Inspect the fuel level and fuel filter condition.
-
Remove and inspect the spark plug and air filter if cranking speed is normal but it will not start.
-
If interlocks seem inconsistent, test seat, brake, and PTO switch operation before buying parts.
John Deere D140 cut-quality problems
Poor cut quality usually appears as strips of uncut grass, ragged tips, uneven height, or clumping. On this tractor, the usual causes are blade condition, deck cleanliness, deck level, or belt-driven deck performance.
-
Common causes: dull blades, bent blades, packed deck underside, weak deck belt, incorrect tire pressure, unlevel deck, mowing too fast in heavy grass.
-
Clean the underside of the deck after the machine cools.
-
Inspect blades for wear, damage, and balance issues.
-
Check tire pressures side to side before adjusting deck level.
-
Inspect the 48-inch mower deck belt for glazing, cracking, or stretching.
-
Slow ground speed if the grass is tall or damp.
Vibration and noise on the John Deere D140
Sudden vibration matters because it can mean a damaged blade, loose hardware, belt trouble, or debris wrapped around rotating parts. Continued use can damage spindle assemblies, belts, pulleys, and deck hardware.
-
Common causes: bent blade, loose blade bolt, unbalanced blade set, debris on spindles, damaged belt, worn pulley or spindle bearings, impact damage after striking an object.
-
Shut the engine off and remove the key before inspecting.
-
Check blades and blade bolts first.
-
Inspect belt routing and pulleys for abnormal wear.
-
Look for grass rope, wire, or debris around spindles and mandrels.
-
If vibration began after impact, stop mowing until the deck and blades are checked carefully.
John Deere D140 overheating and leaks
Overheating or a hot-running smell on a D140 often traces back to blocked cooling fins, debris around the engine, old oil, or a machine that has been allowed to collect dry grass around hot parts. Fuel or oil leaks should also be taken seriously because the manual specifically warns that debris and leaks raise fire risk.
-
Common causes: dirty cooling fins, blocked engine screen area, low or old oil, fuel line seepage, oil filter seepage, heavy debris around muffler or transmission.
-
Let the machine cool and clean the engine and muffler area.
-
Check oil level and the oil filter area for leaks.
-
Inspect fuel lines, filter connections, and the tank cap area.
-
Remove deck and engine debris before mowing again in dry conditions.
-
If overheating continues after cleaning and oil service, dealer diagnosis is the safer next step.
Transmission and drive problems
Drive complaints usually show up as weak traction, poor hill performance, hesitation, or abnormal belt-related noises. Owners often assume the transmission is failing, but basic traction, linkage, and drive-belt checks should come first.
-
Common causes: worn mower/drive-related belt components, poor traction on slopes, tire condition issues, debris around moving parts, operator using the machine beyond safe slope limits.
-
Confirm the issue is not simply wet grass or slope-related traction loss.
-
Inspect visible belt condition and routing where accessible.
-
Check tire condition and inflation.
-
Listen for belt slip or pulley noise when engaging movement.
-
Internal transmission work is usually beyond normal homeowner DIY.
Electrical and safety-switch problems
Electrical faults on the John Deere D140 commonly appear as intermittent no-start, no-crank, dead dash, or engine shutdown when the operator shifts position. Many of these issues come from battery condition, terminal corrosion, or one of the safety interlocks rather than a major wiring failure.
-
Common causes: weak battery, dirty terminals, faulty seat switch, brake switch fault, PTO switch fault, damaged wiring near moving parts, poor connection at battery leads.
-
Clean and tighten battery terminals.
-
Inspect visible harness areas for rubbing or melted insulation.
-
Test interlock behavior one switch at a time.
-
Replace only after confirming the actual failed switch or connector.
-
If wiring repairs involve tracing multiple circuits, dealer or experienced small-engine electrical help is sensible.
Summary:
Common D140 faults
These issue patterns are consistently reported across D140 troubleshooting guidance, especially fuel/starting faults, hydrostatic-drive complaints, deck/PTO problems, steering wear, and cooling blockage.lawnmowerly+3
The issues worth prioritising
1. Starting, stalling and rough running
For a D140 that turns over but does not fire, begin with fresh petrol and the fuel system—not parts replacement. Old fuel, water contamination, a partially blocked fuel filter, carburettor deposits, a dirty air filter, and worn plugs can all produce hard starting, surging, or stalling under mowing load.lawnmowerly+2
A practical sequence:
-
Confirm the PTO is off, brake/clutch is correctly applied, and the safety switches are being actuated.
-
Check battery connections for corrosion and make sure the battery is properly charged.
-
Inspect the plug(s): replace if fouled, badly worn, cracked, or oil-soaked.
-
Fit fresh fuel and replace the fuel filter if its service history is uncertain.
-
Check that the air filter is not heavily packed with dust or grass.
-
If it still hunts or dies, clean the carburettor and check fuel-line flow.
Useful clue: black smoke usually points toward an overly rich mixture or restricted air intake; a machine that runs briefly then dies often indicates fuel starvation or a venting/delivery problem.lawnmowerly+1
2. Loss of drive or weak hill performance
If the engine revs normally but the tractor barely moves, the traction-drive belt and idler system are the most cost-effective first inspection. Look for cracking, glazing, frayed edges, oil contamination, incorrect routing, missing belt guides, and idler pulleys that do not spin freely.
A hydrostatic tractor can also feel weak if it has been heavily worked, overheated, or has air in the drive system, but do not assume the transmission has failed until the external belt, pulleys, brake linkage, and bypass/freewheel position have been checked. Slow movement, slipping, inconsistent speed, and poor performance uphill are commonly associated with drive-belt or hydrostatic-system issues.lawnmowerly+1
Deck and cutting problems
The 48-inch deck is another common source of D140 complaints, but many are routine wear or setup problems rather than major failures.
-
PTO engages but blades do not turn properly: inspect the deck belt, tensioner/idlers, and spindle pulleys.
-
PTO will not engage at all: test the PTO switch, wiring/connectors, clutch, battery condition, and safety circuit.
-
Uneven, streaky, or scalped cut: sharpen or replace damaged blades, clean the deck, check blade balance, and level the deck side-to-side and front-to-rear.
-
Heavy vibration: immediately inspect for a bent blade, loose blade bolt, damaged spindle, or debris wrapped around a pulley. Do not continue mowing with severe vibration.lawnmowerly+2
For an older D140, replacing a tired deck belt and correctly levelling the deck often improves both cut quality and blade engagement.
Preventive checks
The simplest way to prevent the common D140 faults is to build a short service routine:
-
Use clean, fresh fuel and stabilise fuel during storage.
-
Clean the engine intake screen and cooling areas after dusty or heavy mowing.
-
Inspect the air filter frequently in dry conditions.
-
Keep battery terminals clean and connections tight.
-
Check engine oil before use and change it on schedule.
-
Inspect both traction and mower-deck belts for glazing, cracks, fraying, and heat damage.
-
Sharpen and balance blades; replace bent or badly worn blades.
-
Clear grass from beneath the deck and around pulleys after mowing.
-
Periodically check steering linkage, front-wheel play, and axle-pivot wear.
Safety note
Before working under the deck or around belts, park on level ground, disengage the PTO, set the brake, remove the key, disconnect the spark-plug lead(s), and prevent accidental engine starting. Never reach beneath a deck merely because the engine is off.
For a D140 with one specific symptom—for example, “runs for 10 minutes then dies,” “will not move forward,” or “PTO clicks but blades do not turn”—the diagnostic path can be narrowed substantially.
How to fix D140 starting problems:
Fix a John Deere D140 starting fault by first identifying which type you have: no crank, cranks but will not fire, or starts then immediately dies. On this model, the fastest wins are usually a fully charged battery with clean connections, the PTO switched off, the brake/park-brake interlock engaged, and fresh fuel.thetoolstrunk+2
Before testing
-
Park on level ground, set the parking brake, disengage the PTO, remove any load from the mower deck, and keep hands clear of belts and blades.
-
Sit in the seat and press the brake pedal firmly; engage the park brake if applicable.
-
Confirm the PTO control is fully in the OFF position.
-
Do not crank the starter continuously. Use short attempts—about five seconds—then wait before retrying.humber+1
Match the symptom
The D140’s starting circuit is designed to prevent starting unless the safety-interlock conditions are met, notably PTO disengagement and correct brake/park-brake operation. The operator’s manual also calls for safety-system testing.thetoolstrunk+1
If it will not crank
1. Check battery condition
A healthy 12-volt battery should read roughly 12.6 V at rest. Below approximately 12.2 V, charge it first; a battery that collapses under starting load is likely weak even if lights still work.thetoolstrunk+1
-
Remove the negative cable first, then positive.
-
Clean the battery posts and cable terminals until bare metal is visible.
-
Refit positive first, then negative, tightening both securely.
-
Follow the negative/black cable to its frame or engine ground point; clean and tighten that connection too.
-
Inspect cables for swelling, damaged insulation, or heat at a terminal after a crank attempt—these can indicate internal corrosion or excessive resistance.
If it clicks once but does not turn over after the battery and connections are confirmed good, investigate the starter solenoid, starter motor, fuse, ignition-switch feed, and wiring rather than replacing parts at random.thetoolstrunk+1
2. Check the interlocks
A failed or misadjusted safety switch can mimic a dead starter. Try this exact setup:
-
PTO completely OFF
-
Brake pedal fully pressed and/or park brake locked
-
Operator seated normally
-
Transmission in the appropriate neutral/start condition
If it starts only when the brake is pushed unusually hard, suspect the brake-pedal safety switch or its adjustment. If changing pressure on the seat affects cranking or causes it to stall, inspect the seat switch, its connector, and the wiring beneath the seat. The safety system should prevent improper starts—not be bypassed.thetoolstrunk+2
3. Inspect the fuse
Locate and inspect the starting-circuit fuse near the solenoid/wiring harness. Replace it only with the same rating. If the replacement immediately blows, stop and trace for chafed, pinched, melted, or shorted wiring; fitting a larger fuse risks harness damage or fire.thetoolstrunk
If it cranks but will not start
1. Replace questionable fuel
Petrol that has been sitting, smells sour/varnish-like, or contains water is a leading cause of cranking without starting. Drain stale fuel from the tank/carburettor bowl as appropriate, refill with clean fresh petrol, and replace the inline fuel filter if it is old, darkened, or restricted.thetoolstrunk+2
Also inspect:
-
Fuel line for cracks, leaks, kinks, or collapsed sections.
-
Fuel filter for restriction and correct flow direction.
-
Fuel-cap vent: briefly loosen the cap and retry. If it then runs, investigate a blocked cap vent.
-
Any fuel shutoff valve, if fitted, to make sure it is open.thetoolstrunk
2. Service the air filter
A heavily clogged or oil-soaked air filter can make the engine run excessively rich or refuse to start cleanly. Remove it, inspect it, and replace it if contaminated or damaged. Do not operate for more than a brief diagnostic check without proper filtration.thetoolstrunk+1
3. Inspect the spark plugs
The D140 uses a twin-cylinder engine, so inspect both plugs and leads.
-
Pull one lead at a time.
-
Remove each plug and look for heavy carbon, wet fuel, oil fouling, damaged insulation, or a worn electrode.
-
Replace plugs that are fouled or worn, and ensure plug wires are pushed fully back on.
-
The commonly cited plug gap is 0.030 in, but verify against the specification for your exact engine/serial-number variant before setting it.thetoolstrunk+2
If there is no spark after plugs and leads check out, the fault may be in the ignition/kill-wire circuit, key switch, safety interlock wiring, or ignition components. At that point, use an inline spark tester or multimeter rather than guessing.
If it starts then dies
This usually narrows the fault to fuel supply or an interlock:
-
Loosen the fuel cap and retry to rule out a blocked tank vent.
-
Check the fuel filter and line for partial blockage.
-
Drain stale fuel and clean the carburettor if fresh fuel does not cure it.
-
Confirm the seat switch does not cut the engine out because the PTO or safety circuit is behaving incorrectly.
-
If it will run only with choke partly on, that strongly suggests a restricted main fuel circuit/carburettor rather than an ignition problem.thetoolstrunk+2
Best repair order
For a D140 that has been parked for weeks or months, the most efficient order is:
-
PTO off, brake fully applied, seated correctly.
-
Charge the battery; clean battery terminals and the ground connection.
-
Confirm fuse integrity and inspect obvious wiring damage.
-
Drain old fuel and refill with fresh fuel.
-
Replace/check fuel filter and inspect fuel line.
-
Inspect/replace air filter as needed.
-
Inspect or replace both spark plugs.
-
Test safety-switch operation.
-
Only then move on to starter-solenoid, starter, carburettor, ignition, or wiring diagnosis.
That order avoids the common mistake of replacing a starter or carburettor when the actual cause is simply stale fuel, a weak battery, corrosion at a ground point, or a safety switch not closing.
How to test the safety switches on a D140:
How to troubleshoot a failed D140 safety switch
DIY or dealer for the John Deere D140?
For the John Deere D140, the normal DIY line is straightforward maintenance, blade and belt work, tune-up parts, and simple inspections. Once a repair involves internal engine work, transmission internals, difficult electrical diagnosis, or major deck spindle damage, most homeowners are better off using a dealer or an experienced independent mower technician.
Good DIY jobs
-
Engine oil and oil filter service.
-
Air filter and fuel filter replacement.
-
Spark plug replacement as part of annual service.
-
Blade removal, sharpening, and replacement.
-
Deck cleaning, leveling checks, and belt inspection.
-
Battery terminal cleaning and battery replacement.
Advanced DIY or dealer jobs
-
Deck belt replacement if routing is unclear.
-
Spindle or pulley replacement after impact damage.
-
Safety-switch diagnosis involving multiple circuits.
-
Valve-clearance adjustment, which Deere lists at 200 hours and directs owners to a dealer for service.
Skill level guide
-
Beginner: oil, air filter, spark plug, blade inspection, battery checks.
-
Intermediate: blade replacement, deck-belt replacement, deck leveling, fuel filter replacement.
-
Advanced: electrical diagnosis, spindle replacement, engine or transmission repair, valve adjustment.
John Deere D140 parts needed, OEM vs aftermarket, and what information to gather
Before ordering John Deere D140 parts, collect the full model name, the product identification number, the engine serial number, and confirmation of deck size or serial-range fit where applicable. That matters because some service parts, especially air filters, can vary by serial range, and Deere’s documentation specifically tells owners to provide model and identification numbers when seeking service information.
OEM parts are the safest choice for belts, safety-related switches, and fit-sensitive items because routing, dimensions, and engagement behavior matter on mower decks and interlock systems. Aftermarket parts can be acceptable for filters, blades, batteries, and tune-up items if the seller clearly cross-references the exact D140 application and serial range.
John Deere D140 parts diagrams and manuals
Owners looking for diagrams and manuals should start with Deere documentation, then use a Deere-focused parts seller for exploded views and ordering help. These are the most useful links for the John Deere D140:
-
Official D100 Series operator’s manual — the primary operating, safety, service-interval, and troubleshooting reference for the D140.
-
D140 parts and maintenance sheet — quick reference for common service parts and maintenance intervals.
-
JDParts / Deere parts lookup — best for confirming current OEM numbers and serial-sensitive parts through official channels.
-
Jacks Small Engines D140 parts diagrams — exploded views that help with belt routing, deck assemblies, and part identification.
-
Green Farm Parts D140 parts page — Deere-focused retail source with model-specific shopping pages.
How to locate John Deere D140 model, PIN, and engine numbers
These numbers matter because John Deere tells owners to provide the model and identification numbers whenever they contact an authorized service center for servicing information. They also help avoid ordering the wrong filter, belt, or serial-range-specific item.
-
Park the tractor safely, shut it off, remove the key, and let hot parts cool.
-
Find the tractor Product Identification Number on the left side of the frame, as shown in the operator’s manual.
-
Record the full PIN exactly as stamped, including any prefix and serial sequence.
-
Locate the engine serial number on the engine itself; the manual illustrates the location for the engine types used in this series.
-
When ordering deck parts, confirm that the machine is the D140 with the 48-inch deck listed on the maintenance sheet.
Buying John Deere D140 parts online and in stores
The smartest buying strategy is to identify the OEM number first, then compare pricing and availability across Deere and Deere-focused retailers. That reduces the chance of buying a close-looking but incorrect aftermarket part.
-
Online: best for belts, blades, filters, and common maintenance kits when you can verify OEM numbers and serial-range notes first.
-
Dealer counter: best for hard-to-identify linkage, electrical, safety, or serial-sensitive parts.
-
Retail stores: acceptable for oil, batteries, spark plugs, and some filters if the packaging clearly lists the D140 application and correct cross-reference.
Useful sources include Deere manuals and support, Jacks Small Engines D140 diagrams, and Green Farm Parts D140 listings.
John Deere D140 fitting guide for common parts
Changing the John Deere D140 air filter
A dirty air filter can cause hard starting, rich running, and power loss. The D140 maintenance sheet lists air-filter service as a routine item and notes that service may need to be more frequent in dusty conditions.
-
Park safely, shut the engine off, and let it cool.
-
Open the air-filter housing and remove the old element and precleaner if fitted.
-
Wipe loose dirt from the housing without pushing debris into the intake.
-
Install the correct new element for the tractor’s serial range.
-
Refit the cover securely and test-run the engine.
Replacing the John Deere D140 fuel filter
A restricted fuel filter can create crank-no-start complaints, surging, or power loss under load. The D140 maintenance sheet lists fuel-filter replacement as a routine service item.
-
Clamp the fuel line if needed and work in a cool, well-ventilated area.
-
Note the flow direction on the existing filter before removal.
-
Remove the old filter and inspect the fuel line for cracks or looseness.
-
Install the new filter in the correct direction and secure the clamps.
-
Check carefully for leaks before mowing.
Replacing the John Deere D140 spark plug
A worn plug often causes hard starting, misfire, and rough running. Spark-plug replacement is part of the periodic service information in D140 parts references.
-
Let the engine cool completely.
-
Pull the plug wire off carefully and remove the old plug.
-
Compare the old and new plug to confirm thread and reach match.
-
Install the new plug carefully by hand first to avoid cross-threading.
-
Reconnect the plug wire and confirm smooth starting.
John Deere D140 blade replacement
Sharp, balanced blades are central to good cut quality and low vibration. Deere’s maintenance information specifically lists sharpening or replacing mower blades as routine service.
-
Park safely, remove the key, and disconnect the spark plug wire before working under the deck.
-
Raise and support the deck area safely enough to access the blades.
-
Remove each blade and inspect for bending, cracks, or severe wear.
-
Install the correct replacement blades as a matched set if needed.
-
Tighten hardware correctly and test for smooth operation without vibration.
Replacing the John Deere D140 deck belt
A worn deck belt can cause weak blade speed, uneven cutting, squealing, or complete loss of mowing drive. The D140 maintenance sheet identifies the 48-inch deck belt as GX21833 and lists deck-belt checks as routine service.
-
Confirm the replacement belt matches GX21833 for the 48-inch deck.
-
Lower the deck, remove guards as needed, and note the routing before removal.
-
Release belt tension and remove the old belt from pulleys carefully.
-
Route the new belt exactly as shown in the deck diagram or parts view.
-
Recheck pulley seating and belt tracking before returning the tractor to service.
Maintenance to prevent John Deere D140 problems returning
Regular service matters on the John Deere D140 because most common failures are not sudden internal failures; they are buildup, wear, belt deterioration, neglected filters, dull blades, and missed inspections. The official service information focuses on lubrication, oil and filter service, air and fuel filtration, blade upkeep, belt checks, and periodic valve-clearance inspection.
-
Starting reliability: keep the battery terminals clean, replace fuel and air filters on schedule, and do not leave old fuel sitting for long periods.
-
Cut quality: sharpen or replace blades, clean the deck, and inspect the mower belt regularly.
-
Fire and overheating prevention: remove grass and debris from the engine, muffler, deck top, and transmission area.
-
Drive performance: check accessible belts, tire condition, and use the machine within Deere’s slope guidance.
-
Electrical reliability: keep terminals clean and inspect wiring around hot or moving areas.
John Deere D140 maintenance schedule and year-round checklist
The quick D140 maintenance sheet gives a solid base schedule for homeowners, with tasks after 8 hours, every 25 hours, yearly or every 50 hours, and every 200 hours. The operator’s manual also notes that severe dust, heat, or harsh operating conditions may require more frequent service.
Daily or before each use
-
Inspect the machine for loose, worn, or damaged parts.
-
Check the mowing area for objects and hazards before use.
-
Look for fuel or oil leaks and clean off debris near hot parts.
-
Confirm guards, shields, and discharge components are in place.
After 8 hours
-
Lubricate mower spindles and pivot points.
-
Check mower deck spindle brakes on manual PTO setups.
-
Lubricate front axle pivot and axle spindles.
-
Lubricate front axle wheel bushings.
Every 25 hours
-
Check or replace the mower drive belt as needed.
-
Lubricate mower spindles and pivot points.
Every 50 hours or yearly
-
Change engine oil and replace the oil filter.
-
Clean or replace the air filter precleaner and element.
-
Replace the fuel filter.
-
Sharpen or replace mower blades.
Every 200 hours
-
Check and adjust valve clearance; Deere directs owners to the dealer for this service.
-
Continue lubrication points listed in the official sheet.
Seasonal checklist
-
Spring: change oil and filter, inspect blades, replace air and fuel filters if due, and clean debris from storage buildup.
-
Mid-season: inspect belt condition, clean the deck often, and lubricate the front axle and mower points on schedule.
-
Fall: sharpen or replace blades, clean the machine thoroughly, inspect for leaks, and prepare for storage with the machine free of debris.
Repair, upgrade, or replace a John Deere D140?
For a John Deere D140 in otherwise solid condition, repairs usually make sense when the problem is confined to normal wear parts such as blades, belts, filters, battery, or simple switches. Replacement becomes easier to justify when the machine has multiple major faults at once, structural deck damage, severe neglect, or repeated transmission and engine issues that push repair costs beyond the value of a homeowner mower.
Repair if…
-
The issue is a normal service part such as a blade, belt, filter, spark plug, or battery.
-
The tractor starts and drives well apart from one clear fault.
-
The deck and frame are structurally sound.
Upgrade if…
-
You need stronger towing, heavier-duty deck construction, or more frequent large-property use than the D140 was designed for.
-
You are repeatedly pushing the machine into work better suited to a heavier garden tractor or zero-turn.
Replace if…
-
The machine has major engine, deck, and transmission issues at the same time.
-
Parts and labor would exceed what a good used or newer replacement mower would reasonably cost.
-
Safety-related systems are compromised on a heavily worn machine.
John Deere D140 troubleshooting FAQ
1. Why will my John Deere D140 not start?
The most common reasons are a weak battery, poor terminal contact, stale fuel, a clogged fuel filter, a dirty air filter, a bad spark plug, or a safety interlock issue. Start by checking PTO position, brake engagement, battery connections, fuel condition, and basic tune-up parts before assuming a major failure.
2. Why does my John Deere D140 crank but not fire?
If the engine cranks normally but will not fire, look first at fuel delivery, spark, and air restriction. A clogged fuel filter, fouled spark plug, or badly dirty air filter are common homeowner-level causes.
3. Why is my John Deere D140 battery always dead?
Repeated battery problems usually come from corrosion at terminals, an aging battery, poor charging, or the machine being stored without enough run time between starts. Clean and tighten the terminals first, then test the battery and charging system if the issue keeps returning.
4. Why does the John Deere D140 start and then die?
This often points to fuel starvation, contaminated fuel, restricted airflow, or a safety-switch issue. Start with the fuel filter, air filter, and interlock behavior because those are common and relatively easy to verify.
5. Why is my John Deere D140 running rough?
Rough running can come from a dirty air filter, old fuel, a worn spark plug, or partial fuel restriction. Annual service items on the D140 directly target these issues, which is why neglected routine maintenance often shows up as rough operation.
6. Why does my John Deere D140 lose power in heavy grass?
Heavy grass exposes blade, deck, and airflow problems quickly. Dull blades, a dirty deck underside, a weak deck belt, or simply mowing too fast can all reduce effective cutting performance.
7. Why is the cut uneven on my John Deere D140?
Uneven cutting usually comes from blade wear, uneven tire pressure, an unlevel deck, or belt-related blade-speed loss. Check the simple setup items first before replacing major parts.
8. Why does my John Deere D140 leave strips of grass?
Streaks or strips are usually a sign of dull blades, reduced blade tip speed, or grass conditions that require a slower pass. A dirty deck and worn belt can also reduce discharge and recutting performance.
9. Why are the grass tips ragged after mowing?
Ragged tips usually mean the blades are dull rather than slicing cleanly. Sharpening or replacing the blades is one of Deere’s listed routine maintenance tasks for the D140.
10. Why is my John Deere D140 vibrating badly?
Bad vibration usually means a bent blade, loose blade hardware, damaged spindle area, or debris wrapped around rotating parts. If the vibration started after hitting something, stop using the mower until the deck is inspected.
11. Why is there a squealing sound from the mower deck?
A squeal often points to belt slip, pulley trouble, or belt wear. On the D140, the deck belt is a high-wear service item, so inspection comes before deeper teardown.
12. Why does my John Deere D140 make noise after I hit an object?
Impact can bend blades, loosen hardware, damage spindles, or disturb belt tracking. Deere’s safety guidance is to stop the machine and inspect it before returning to operation.
13. Why are the blades not engaging properly?
Poor blade engagement can be related to belt condition, pulley issues, or PTO-related problems depending on setup. Start with visible belt condition and correct routing before assuming a larger mechanical failure.
14. Why does the John Deere D140 deck belt keep coming off?
Belts usually come off because of wrong routing, wear, pulley misalignment, damaged keepers, or a belt that is the wrong size. Exploded diagrams are especially useful here because belt path errors are common after DIY replacement.
15. What is the John Deere D140 deck belt part number?
The D140 maintenance sheet lists the 48-inch mower deck belt as GX21833.
16. What blades fit a John Deere D140?
The quick parts sheet lists the 48-inch 3-in-1 mower blade as GY20852 for the D140.
17. What oil filter does a John Deere D140 use?
The D140 parts and maintenance sheet lists oil filter GY20577.
18. What fuel filter fits a John Deere D140?
The D140 maintenance sheet lists fuel filter GY20709, while another D140 parts reference shows AM116304 as a filter reference. Check your serial range and current Deere parts lookup before ordering.
19. Which air filter does a John Deere D140 use?
The maintenance sheet shows two air-filter references, GY21056 and GY21435, depending on serial range. That is why the tractor PIN matters before ordering.
20. What spark plug does a John Deere D140 use?
A D140 replacement-parts reference lists spark plug M78543 for USA and Canada. Verify against your engine tag and current parts lookup before purchase.
21. How often should I change the oil on a John Deere D140?
The D140 maintenance sheet lists engine oil and filter service yearly or every 50 hours, whichever comes first. Dusty conditions can require more frequent service.
22. How often should I replace the fuel filter on a John Deere D140?
The quick maintenance sheet lists fuel-filter replacement yearly or every 50 hours. If fuel quality has been poor or the machine sat unused for a long time, earlier replacement is reasonable.
23. How often should I sharpen the blades on a John Deere D140?
Deere lists sharpening or replacing mower blades as a yearly or 50-hour item on the D140 maintenance sheet. In practice, heavy mowing conditions may require sharpening sooner.
24. How often should I lubricate a John Deere D140?
The D140 sheet lists lubrication after 8 hours for mower spindles, pivot points, front axle pivot and axle spindles, and front axle wheel bushings, with some lubrication points repeated every 25 hours.
25. Does the John Deere D140 need a valve adjustment?
Yes. The D140 maintenance sheet lists valve-clearance check or adjustment at 200 hours and specifically says to see your John Deere dealer for that service.
26. Why does my John Deere D140 overheat?
Overheating is often tied to debris around the engine, cooling fins, muffler area, or old oil and general neglected cleaning. Deere puts strong emphasis on cleaning debris buildup because it affects both cooling and fire risk.
27. Why does my John Deere D140 smell hot after mowing?
A hot smell can come from packed grass on hot surfaces, slipping belts, or oil residue collecting debris. The operator’s manual repeatedly warns owners to clean around the muffler, engine, deck top, and transmission area.
28. Why is fuel leaking on my John Deere D140?
Fuel leaks can come from cracked lines, loose filter connections, or sealing problems around the tank cap or filter area. Because fuel and debris together raise fire risk, stop using the tractor until the leak is fixed.
29. Why does my John Deere D140 lose traction on hills?
Slope, wet grass, and surface conditions are often the first issue rather than a failed transmission. Deere’s operator guidance limits safe operating angles and emphasizes mowing up and down slopes, not across them.
30. Can I repair a John Deere D140 transmission myself?
Most owners can inspect external causes such as belts, traction conditions, and tire issues, but internal transmission repair is generally advanced work. For true internal transmission faults, dealer or specialist repair is the realistic option.
31. Why does my John Deere D140 shut off when I get off the seat?
That usually indicates the safety system is doing what it is designed to do, or the seat-switch circuit is behaving inconsistently. If shutdown happens unexpectedly in normal use, inspect the seat switch and related interlock behavior.
32. Where is the John Deere D140 PIN located?
The operator’s manual shows the machine Product Identification Number on the left side of the frame.
33. Where can I find a John Deere D140 manual online?
The official D100 Series operator’s manual is available through Deere’s manuals site, and there is also a quick D140 parts and maintenance PDF for service reference.
34. Where can I find John Deere D140 parts diagrams?
Exploded parts diagrams are available through Deere-related parts lookup sites such as Jacks Small Engines, and official Deere channels can help confirm current OEM numbers.
35. Are aftermarket parts okay for a John Deere D140?
They can be fine for some filters, blades, batteries, and routine tune-up items if the cross-reference is exact. For belts, safety-switch parts, and fit-critical components, OEM is usually the safer choice.
Common John Deere D140 engine performance troubleshooting
Common John Deere D140 engine performance problems usually come down to fuel, air, spark, or cooling restrictions rather than a major engine failure. The fastest first checks are stale fuel, a plugged air filter, a clogged fuel filter, a fouled spark plug, and debris blocking the cooling fins or air intake.
What the symptoms usually mean
-
Hard starting or no start: often stale fuel, plugged fuel filter, dirty air filter, loose plug wire, or a safety-switch issue.
-
Starts but runs rough: usually dirty fuel, restricted airflow, a bad spark plug, or a carburetor that needs cleaning.
-
Loses power under load: commonly dirty air cleaner, plugged fuel filter, overheating, or the engine being overloaded for the conditions.
-
Stalls when PTO is engaged: can be caused by engine being underpowered, deck drag, bad belt condition, or a safety/engagement issue.
Best first checks
-
Replace stale fuel with fresh fuel and confirm the tank vent is open.
-
Inspect and clean or replace the air filter.
-
Check the fuel filter and fuel lines for restriction or leakage.
-
Remove and inspect the spark plug, and replace it if fouled or worn.
-
Clean cooling fins and the engine air intake area so the engine is not overheating.
-
If power loss happens only when mowing, check deck belt condition, blade sharpness, and whether the mower deck is packed with grass.
When to stop DIY
If the D140 still runs poorly after fresh fuel, air/fuel filter service, spark plug replacement, and cooling cleanup, the next likely causes are carburetor problems, wiring/interlock faults, or an engine issue that needs deeper diagnosis. At that point, a dealer or small-engine specialist is the sensible next step.