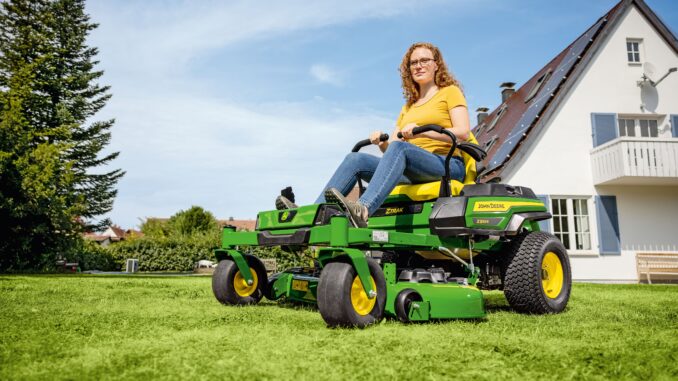
The John Deere D130 is a residential lawn tractor from Deere’s D100 Series, built for homeowners who need reliable weekly mowing, light towing, and general yard maintenance rather than commercial-duty work. It uses a familiar homeowner-tractor layout with a gasoline engine, 42-inch mower deck, belt-driven traction system, battery-and-solenoid starting circuit, and multiple safety interlocks, which means most faults can be diagnosed effectively once the symptom is identified clearly.
This guide focuses specifically on the John Deere D130 and follows the same symptom-first structure used in the other Deere guides. It covers common starting problems, poor cut quality, vibration, overheating and leaks, drive and electrical faults, parts identification, OEM versus aftermarket advice, service schedules, buying guidance, and a large troubleshooting FAQ tailored to owners in the USA and Canada.
1. General Overview of the John Deere D130
At a general level, the D130 is a homeowner lawn tractor intended for regular residential mowing and light seasonal yard work. Deere’s D100 Series operator manual places the D130 within the D105-D170 family of tractors, and the D130 parts and maintenance sheet confirms its 42-inch mower deck setup and owner-service maintenance schedule.
The D130 uses a gasoline engine, a 42-inch mower deck, a belt-driven traction system, and a conventional battery, ignition-switch, and safety-switch electrical layout. Common D130 parts listed in Deere and Deere-oriented references include 42-inch blade kit GY20850, mower belt GX20072, traction drive belt GX20006, ignition switch GY20074, key GY20680, battery TY25878, and fuel cap GX22166 or GX23465, which gives a strong picture of the machine’s most common owner-service and repair areas.
John Deere D130 General description of use
The D130 is best suited to small and medium residential lawns where ease of use, simple controls, and affordable upkeep matter more than speed or commercial longevity. It can mow, bag, mulch, and handle light towing with approved equipment, but it is not designed for brush cutting, severe slopes, or all-day professional use.
John Deere D130 General description of systems and components
-
Engine and fuel system: gasoline engine, air filter, precleaner, fuel filter, spark plug, oil filter, cooling fins, fuel tank, and carburetor/fuel-delivery parts.
-
Mower system: 42-inch deck, blades, deck belt GX20072, spindles, anti-scalp/gauge wheels, lift components, and deck-level adjustment points.
-
Drive system: traction drive belt GX20006, rear transaxle, steering system, brake linkage, and foot controls.
-
Electrical system: battery, ignition switch GY20074, key GY20680, safety interlocks, starter/solenoid, and harnesses.
Common John Deere D130 service parts
Deere’s parts and maintenance sheet for the D130 lists several routine service parts for the 42-inch setup, including blade kit GY20850, mower deck belt GX20072, oil filter GY20577, engine oil TY22029, fuel filter GY20709, and air filter options GY21056 or GY21435 depending on PIN range. Green Farm Parts also lists commonly ordered D130 parts such as inline fuel filter AM116304, oil filter AM125424, spark plugs M78543 or MIU11020, traction drive belt GX20006, 42-inch 3-in-1 blade GX22151, and optional accessories such as mulch kit AM141033 and bagging kit AM141034.
2. Troubleshooting Approach for the John Deere D130
The D130 is usually easiest to diagnose by starting with the operating symptom rather than with the part you think failed. In real use, most owner complaints fall into six broad groups: starting problems, cut-quality problems, vibration and noise, overheating and leaks, drive and traction problems, and electrical or safety-switch faults.
Before service or repair, Deere instructs owners to stop on a level surface, disengage mower blades and attachments, lower attachments to the ground, lock the park brake, stop the engine, remove the key, and wait for all movement to stop. Deere also says to disconnect the negative battery cable or remove the spark plug wire before servicing and to keep the machine clean, especially around the muffler, engine screens, deck top, and transmission area, because debris buildup increases fire risk and contributes to breakdowns.
3. John Deere D130 Emergency and Immediate Repair Needs
The most urgent D130 problems are the ones that stop safe operation or can damage the machine quickly if ignored. Those usually include no-start faults, severe deck vibration, active fuel or oil leaks, overheating, weak drive response, and electrical or interlock failures that cause unpredictable shutdowns.
3.1 John Deere D130 Starting Issues
Starting complaints are among the most common D130 problems because these tractors often sit between mowing sessions and through winter. The first step is to identify which pattern you have: no crank, cranks but will not start, or starts and then dies.
No crank
A no-crank condition usually points to low battery charge, corroded cables, fuse or key-switch problems, PTO or brake start-condition issues, or solenoid/starter faults. Deere’s operator guidance also emphasizes that all drives must be neutral and the park brake locked before start attempts, because incorrect starting conditions can make the tractor appear electrically dead even when the main parts are good.
Checks:
-
Measure battery voltage and inspect battery posts, terminals, and grounds.
-
Check fuse and relay/solenoid area for corrosion or damage.
-
Confirm park brake is fully locked and the PTO is off.
-
Inspect visible safety-switch connectors, especially around seat and brake systems.
-
Listen for solenoid click and inspect key-switch behavior if present.
John Deere D130 Cranks but will not start
If the engine turns over but never runs properly, concentrate on fuel, spark, and air. Deere’s maintenance sheet and Green Farm Parts’ D130 guide identify the core tune-up parts most closely tied to these complaints: fuel filter GY20709 or AM116304 depending on reference, air filter GY21056 or GY21435 depending on PIN range, oil filter GY20577 or AM125424 depending on source, and spark plugs M78543 or MIU11020 depending on engine configuration.
Checks:
-
Confirm fresh fuel and proper fuel level.
-
Inspect or replace the fuel filter.
-
Inspect spark plug condition and wire connection.
-
Inspect and replace dirty air-filter elements.
-
Check for stale fuel, carburetor varnish, or cap venting issues if basics appear normal.
Starts then stalls
If the D130 starts but will not stay running, the cause is often fuel starvation, a tank vent or cap issue, a vacuum leak in the fuel system, carburetor contamination, or an interlock/electrical problem. A D130 owner report specifically described a mower that ran better temporarily after loosening or affecting the tank venting path, and responders suggested running with the cap slightly loose and checking for cracks or vacuum leaks in the fuel lines and fittings.
3.2 John Deere D130 Cut Quality Problems
Poor cut quality on the D130 is usually caused by deck setup, blade condition, or belt speed rather than major engine trouble. Deere’s D100 Series manual provides exact mower-leveling measurements and explains that incorrect front-to-rear pitch can cause double cutting and brown grass tips.
Common causes:
-
Dull, bent, or mismatched blades.
-
Deck out of level side-to-side or front-to-rear.
-
Worn or slipping mower belt GX20072.
-
Incorrect anti-scalp/gauge-wheel adjustment.
-
Grass buildup under or on top of the mower deck.
Deere states that side-to-side blade-tip variation should not exceed 1/8 inch (3 mm), and the front blade tip should be 1/8 to 1/4 inch (3–6 mm) lower than the rear. These measurements matter because even small deck-angle errors can create striping, uneven cut, scalping, or torn grass tips.
3.3 John Deere D130 Vibration and Noise
Strong vibration on a D130 should always be treated seriously because it usually points to a blade, spindle, pulley, or belt problem that can get worse quickly. Deere’s safety guidance says that if abnormal vibration occurs after hitting an object, the machine should be stopped and inspected before further use.
Checks:
-
Inspect blades for bends, cracks, severe wear, or impact damage.
-
Check blade bolts and deck hardware.
-
Inspect deck belt GX20072 for cracks, glazing, stretch, or misrouting.
-
Spin spindles and pulleys by hand with ignition safely disabled to feel for roughness.
-
Inspect top-of-deck belt and spindle zones for debris because Deere identifies them as key cleanout areas.
3.4 John Deere D130 Overheating and Leaks
Heat and debris management are especially important on the D130 because dry clippings collect readily around hot and moving parts. Deere’s D100 Series manual explicitly tells owners to inspect and clean the muffler and exhaust system, engine and engine screens, top of mower deck and under shields, and on or near the transmission to reduce fire risk and improve reliability.
Checks:
-
Clean muffler and exhaust areas only after full cooldown.
-
Clean engine intake screens and cooling fins.
-
Clean top of deck under shields and around spindle/belt areas.
-
Inspect transmission/driveline area for packed debris.
-
Check for oil seepage, fuel leaks, and fuel-cap problems.
3.5 John Deere D130 Transmission and Drive Problems
Weak motion, poor hill climbing, or inconsistent pedal response on a D130 do not automatically mean the transaxle is bad. More commonly, the tractor has a traction belt problem, low tire pressure, brake drag, or driveline debris that is reducing performance.
Green Farm Parts lists traction drive belt GX20006 as a common D130 service part, so it is one of the first items to inspect when the machine feels weak or slips under load.
Checks:
-
Check tire pressures and rear tire condition.
-
Inspect traction drive belt GX20006 for glazing, cracks, contamination, or stretching.
-
Check for brake drag or linkage stiffness.
-
Inspect on and near transmission areas for debris buildup.
-
Compare flat-ground performance with uphill performance before suspecting internal transmission failure.
3.6 John Deere D130 Electrical Problems
Electrical problems on the D130 usually appear as no-start issues, intermittent shutdowns, or key-switch behavior that seems random. Because the system relies on several safety interlocks and simple low-voltage connections, corrosion or a loose connector can easily imitate a more serious failure.
Common electrical repair parts listed for the D130 include ignition switch GY20074, key GY20680, and battery TY25878, all of which are frequently involved in everyday homeowner-tractor electrical faults.
Checks:
-
Inspect battery voltage and cable condition.
-
Check fuse and visible wiring around the battery and start circuit.
-
Verify seat, brake, and PTO start-condition logic basics.
-
Inspect visible harnesses near seat, battery, and relay/solenoid areas.
Summary:
Common D130 problems
Issues worth watching closely
Deck belt, pulleys, and spindles
The D130’s 42-inch deck is the area most likely to need attention on an older or heavily used machine. Reports include belt breakage, loose belts, bad pulleys, and deck/spindle wear.lowes+1
Before buying or repairing one, inspect:
-
Blade spindle housings for vertical or side-to-side play.
-
Pulleys for wobble, heat marks, or rough bearings.
-
The deck shell around spindle mounts and welds for cracks.
-
Belt guards and plastic housings for belt rubbing.
-
Blade condition and correct deck level.
A repeated belt failure is often not just a bad belt—it can indicate a seized pulley, misaligned pulley, damaged belt guide, loose spindle, or deck-shell damage.
Fuel-system problems after storage
If a D130 has stood over winter or for several months, suspect fuel before replacing expensive parts. The owner-manual troubleshooting guidance calls out dirt/old fuel, plugged filters, carburettor issues, and poor-quality fuel as common causes of hard starting, stalling, and loss of power.manuals
A sensible order of attack is:
-
Empty stale petrol and add fresh fuel.
-
Replace the fuel filter if its service history is unknown.
-
Inspect/replace the spark plug.
-
Service the air filter.
-
Check fuel flow to the carburettor.
-
Clean or rebuild the carburettor only if the basic checks do not solve it.
What is normal versus serious
Usually routine and inexpensive
-
Battery, fuse, corroded terminal, spark plug, air filter, fuel filter.
-
Deck belt, blades, deck cleaning, tyre-pressure correction.
-
Carburettor cleaning after stale fuel.
Potentially more expensive
-
Repeated belt failures caused by deck damage or a bad spindle/pulley.
-
Significant steering-gear or linkage wear.
-
Hydrostatic drive loss after confirming belt, brake, linkage, and bypass-control operation.
-
Cracked deck structure or damaged welds.lowes+1
Best preventative maintenance
-
Use fresh petrol; stabilise fuel if the tractor will sit unused.
-
Clean the mower deck and engine cooling screens after mowing, especially in dry or dusty conditions.
-
Keep the blades sharp and balance them after sharpening.
-
Inspect belts, pulleys, and spindle bearings each season.
-
Check deck level and tyre pressure whenever cut quality deteriorates.
-
Avoid forcing the tractor through very tall or wet grass in one pass—raise the deck and make a second lower pass instead.
For an owner or buyer, the quickest assessment is: cold start, drive engagement, blade engagement, deck noise, cut quality, steering free play, and a close inspection under the deck. Those checks reveal most of the D130’s common weak points.
How to test the safety switches
For a John Deere D130, test the safety interlocks first by observing what the tractor does; then use a multimeter only if one test fails. Do not permanently bypass any switch—these circuits are intended to prevent unintended starting, movement, and blade operation. John Deere’s operator information directs owners to the D130 manual and safety guidance for the machine.deere
Before testing
-
Park on level ground outdoors, clear of people and obstacles.
-
Make sure the deck is clear and the blades cannot contact anything.
-
Sit normally on the seat for all start tests.
-
Keep the PTO/blade switch off unless a particular test says to turn it on.
-
For the seat test, only lift your weight off the seat—do not dismount while the engine is running.
-
If a test produces an unsafe result, turn the key off and repair the fault before using the mower.
The relevant interlocks are normally the seat switch, brake/park-brake switch, and PTO switch. A reverse/PTO interlock may also affect blade operation when reversing.manuals.deere+1
Functional tests
1. Brake / park-brake switch
This checks whether the tractor prevents cranking unless the brake is applied or park brake is set.
-
Sit on the seat.
-
Ensure the PTO/blade switch is off.
-
Release the brake pedal and make sure the park brake is not locked.
-
Turn the key to Start.
Correct result: The starter must not crank.
-
Now press the brake pedal fully, or set the park brake.
-
Turn the key to Start again.
Correct result: The engine should be allowed to crank and start if fuel, battery, and other conditions are good.
If it only starts when you jiggle or stomp the pedal, inspect the brake-pedal linkage/tab that presses the switch. On D130-family machines, the brake switch is commonly described as being under the hood on the left side, below the battery area; a bent actuator/linkage can prevent full switch movement.manuals.deere+1
2. PTO / blade-engagement switch
This checks that the tractor cannot be started with the mower blades commanded on.
-
Sit on the seat.
-
Fully press the brake pedal or lock the park brake.
-
Pull the PTO/blade control to On—the engaged position.
-
Turn the key to Start.
Correct result: The starter must not crank.
-
Push the PTO switch back to Off.
-
Turn the key off after testing.
If the starter cranks with PTO engaged, stop using the tractor until the PTO interlock circuit is repaired. Deere’s safety-interlock procedure specifically states that the starting motor must not engage with the PTO on.manuals.deere+1
3. Seat switch
The D130 should stop the engine if you rise from the seat while the tractor is not secured by its park brake, and especially while the PTO is engaged.
Test A: Seat + PTO test
-
Sit on the seat.
-
Start the engine with the brake applied and PTO off.
-
Release the park brake/brake pedal.
-
Engage the PTO/blades.
-
At low throttle, raise yourself just enough that the seat switch releases—do not step off.
Correct result: The engine should begin to stop / shut down.
Test B: Seat + drive-ready test
-
Disengage the PTO.
-
Start the engine.
-
Release the brake/park brake.
-
Rise slightly from the seat without dismounting.
Correct result: The engine should stop.
Test C: Park-brake exception
-
PTO off.
-
Start the engine.
-
Set the park brake.
-
Rise slightly off the seat.
Correct result: The engine should continue running. This confirms the interlock recognizes that the tractor is secured by the park brake.manuals.deere
If a test fails
Multimeter test
Only test electrical continuity with the engine off, key removed, and preferably the negative battery lead disconnected. Unplug the switch connector; do not probe the wiring harness with an ohmmeter while it is powered.
-
Set a digital multimeter to continuity (beeper) or the low-ohms range.
-
Touch the two probes together first—the meter should beep or show near-zero resistance.
-
Identify the switch terminals and test the pairs specified by the wiring diagram or service manual for the particular D130 serial range.
-
Move the relevant control:
-
Press and release the seat-switch plunger.
-
Press and release the brake pedal.
-
Move the PTO switch between Off and On.
-
-
A working switch changes state cleanly: one relevant contact pair changes from open/OL to near-zero resistance, while another pair may do the reverse depending on whether it is a normally open or normally closed circuit.
A switch that reads the same in both positions, changes intermittently, or only works if its connector is held or wiggled is suspect. However, do not assume every two-terminal or multi-terminal switch closes in the same direction: the D130’s interlock wiring can use normally open and normally closed contacts, so compare the readings with the correct wiring diagram rather than relying solely on “continuity equals good.”gardenaider+1
Important caution
A temporary jumper can sometimes be used by an experienced technician only as a stationary diagnostic check, but it should never be left fitted or used to operate the tractor. A bypassed seat, brake, or PTO switch removes a safety layer intended to prevent injury. The correct repair is cleaning/adjusting the actuator, repairing wiring/connectors, or replacing the faulty switch.
How to use a multimeter on these switches
Use the meter on the removed switch connector, with the tractor powered down. The key point is to check whether the switch changes from an open circuit to a closed circuit when its control is moved—not simply whether it has continuity in one position.
For the D130, test the seat, brake/park-brake, and PTO interlock switches one at a time. The exact terminal pair depends on the switch version and your tractor’s serial range, so a wiring diagram or technical manual is the final authority—particularly for the multi-terminal PTO switch. Deere provides D130 manuals and support material through its owner-support page.deere+1
What you need
-
Digital multimeter with continuity (audible beep) and resistance/Ω modes.
-
Small torch.
-
Needle-nose pliers or a small pick, if required to release connector locks.
-
The correct wiring diagram if the switch has more than two terminals.
Do not use voltage, continuity, or resistance testing on a connected, live switch circuit. Key off, remove key, disconnect the negative battery cable, then unplug the switch connector. Continuity/ohms testing supplies a tiny meter current; applying it to a powered circuit can damage the meter.youfixthis
Set up the multimeter
-
Turn the meter to the continuity symbol—usually a sound-wave, diode, or buzzer icon.
-
Touch the two test leads together.
-
Confirm it beeps or reads approximately 00 to 1 Ω1\ \Omega.
-
Separate the probes. It should display OL, 1, or a very high resistance, and stop beeping.
Interpret readings as follows:
Avoid pushing meter probes into the front of harness terminals hard enough to spread them. Probe the exposed terminals on the switch side, not the tractor-harness side, whenever possible.
Test a two-terminal switch
Many brake switches are two-terminal. The procedure is identical for any basic two-wire plunger switch.
-
Photograph the connector arrangement before unplugging it.
-
Disconnect the switch plug.
-
Put one meter probe on each terminal of the switch.
-
Note the reading with the switch actuator released.
-
Press the plunger fully, or operate the relevant pedal/lever so it fully depresses the plunger.
-
Note the reading again.
A good switch must change state:
The brake/start circuit is normally intended to allow cranking only when the pedal or park-brake linkage actuates the switch. If it does not change state when the brake pedal is fully pressed, first verify that the linkage is actually contacting the switch plunger before condemning the switch. A D130-family repair reference specifically notes the need to verify the brake switch closes fully with pedal movement.youfixthis
Seat-switch test
The seat switch is normally underneath the seat pan. Raise the seat and find the switch that is pressed by the seat base or a seat-mounted tab.
-
Disconnect the battery negative lead and unplug the seat-switch connector.
-
Identify whether it has two terminals or more:
-
Two terminals: test directly across them.
-
Three or four terminals: test all terminal pairs and record the results.
-
-
With the seat raised—switch plunger normally released—measure the terminal pair.
-
Push the plunger fully by hand, as the seat would when occupied.
-
Measure again.
A good pair will clearly reverse from open to closed or from closed to open. If the meter changes only when you push sideways, press unusually hard, or wiggle the connector, the problem could be a worn plunger, seat adjustment issue, loose terminal, or broken conductor near the hinge.
For a practical confirmation after reconnecting it: with the engine running, PTO engaged, and the brake/park brake released, rising slightly off the seat should shut the engine down. Do not dismount. The D130 safety system includes a seat interlock intended to stop the blades/engine in unsafe operator-absence conditions.manuals.deere+1
Brake-switch test
The brake/park-brake switch is actuated by the brake-pedal linkage. On the D130 family it is commonly found under the hood, near the left side of the engine/battery/frame area, though exact positioning varies by production version.manua
-
Key off, battery negative disconnected, switch unplugged.
-
Put probes across the two switch terminals.
-
Release the brake pedal: note the reading.
-
Press and hold the pedal fully—or lock the park brake if that is what operates the switch: note the reading.
-
Release and repeat several times.
You want a crisp, repeatable open/closed transition each time. If it is electrically good but the mower only starts when the pedal is forced unusually hard, adjust or repair the pedal actuator rather than replacing a good switch.
PTO switch test
The PTO control is often a multi-terminal switch, so do not assume that any arbitrary pair should beep. It may have separate contacts for the starter interlock, PTO clutch feed, and other safety circuits.
-
Key off, battery negative disconnected.
-
Pull the PTO control to Off, unplug its connector, and photograph or label its terminal positions.
-
Find terminal markings moulded into the underside of the switch, such as letters, numbers, or terminal codes.
-
In continuity mode, make a simple table: test every possible terminal pair with PTO Off, then repeat with PTO On.
-
A working switch will have one or more pairs that change state consistently as you move between Off and On.
-
Compare the changing pairs with the D130 wiring diagram before declaring the switch faulty.
For example, a four-terminal switch gives six possible pairs to test: A − BA\!-\!B, A − CA\!-\!C, A − DA\!-\!D, B − CB\!-\!C, B − DB\!-\!D, and C − DC\!-\!D. Record “beep” or “OL” in each position. The contact pattern—not one isolated continuity result—is what identifies a bad PTO switch.
The operator safety test remains useful alongside the meter test: with the PTO in the engaged/on position, the engine should not crank. Deere’s interlock testing lists park-brake, attachment-engagement, seat, and reverse-implement functions as separate safety checks.manuals.deere
Decide what failed
Replace or repair based on these results:
-
No change at all when the plunger/control moves: switch is likely faulty, or you are on the wrong terminals of a multi-contact switch.
-
Intermittent changes, high resistance when “closed,” or readings altered by wiggling the connector: likely bad switch contacts, corroded terminals, or a damaged pigtail.
-
Switch tests correctly but tractor still fails its functional test: inspect the harness, connector pins, ground path, fuse, relay/solenoid circuit, and mechanical actuator adjustment.
-
Switch works only when manually pressed, not when the pedal/seat/PTO control is operated: the fault is mechanical alignment or linkage travel, not necessarily the switch.
Do not bypass it
Do not leave a jumper wire in place, even if it makes the D130 start. A bypass can allow starting with the PTO on, continued blade operation without an operator seated, or unexpected movement. Use a short-term jumper only if you are experienced, stationary, and diagnosing the circuit—and remove it immediately afterward.
How do I test the seat safety switch
Test the D130 seat safety switch in two stages: first with the mower’s normal safety system, then directly with a multimeter. If the engine keeps running after you lift off the seat while the PTO is on or the brake is released, stop using the tractor until the interlock is repaired. Deere’s D130 operator-manual family includes a dedicated “Testing Seat Switch” safety-system procedure.manuals.deere+1
1. Functional test
This confirms the switch and the rest of its wiring/interlock circuit work together.
-
Park on level ground, with no people or obstructions nearby.
-
Sit in the driver’s seat.
-
Put the PTO/blade switch in Off.
-
Press the brake pedal or set the park brake.
-
Start the engine.
-
Release the park brake/brake pedal.
-
Engage the PTO/blades.
-
Raise your body slightly so your weight comes off the seat—but do not step off the tractor.
Correct result: The engine should shut off promptly when the seat switch is released.
Then check it with the PTO off:
-
Restart the engine while seated.
-
Make sure PTO is Off.
-
Release the park brake/brake pedal.
-
Lift your weight off the seat.
Correct result: The engine should also shut off.
A useful comparison test:
-
PTO off.
-
Set the park brake.
-
Rise slightly off the seat.
Expected result: The engine may continue running because the tractor is secured and the blades are disengaged. That is normal for the interlock logic on this tractor family.manuals.deere+1
2. Find the switch
-
Turn the key off and remove it.
-
Disconnect the negative battery cable.
-
Lift the seat.
-
Look beneath the seat pan for a small plunger-style switch with a two-, three-, or four-wire plug.
-
Check that the seat base or a metal/plastic tab actually presses the switch plunger down when you sit in the seat.
Before using a meter, look for the simple mechanical faults:
-
Seat hinge or pan bent, so it does not fully press the plunger.
-
Switch loose in its bracket.
-
Plunger sticking, cracked, or worn.
-
Plug partly disconnected.
-
Chafed wires around the seat hinge.
-
Corrosion in the connector.
3. Multimeter test
Use the switch side of the disconnected plug, not the tractor-harness side.
-
Set the multimeter to continuity—the setting that beeps when the probes touch—or the lowest Ω range.
-
Touch the probes together first. It should beep or read close to 0 Ω0\ \Omega.
-
Unplug the seat-switch connector.
-
Place one probe on each terminal of the switch.
-
Test it in both positions:
-
Seat raised / plunger released
-
Plunger fully pressed by hand, as it is when you sit on the seat
-
A good switch must clearly change state:
For a basic two-terminal switch, one position must be closed and the other open. It can be either of these patterns:
Either pattern can be correct electrically; what matters is that the state changes reliably and matches the tractor’s wiring design. Do not judge it faulty merely because it beeps with the plunger released—the D130 interlock may use a normally closed contact.
4. If it has 3 or 4 terminals
Some seat switches use multiple contacts. In that case:
-
Label the terminals A, B, C, and D—or photograph any moulded terminal numbers.
-
Test every terminal pair with the plunger released.
-
Push the plunger fully and repeat.
-
Record the results.
For a four-terminal switch, test these six pairs:
At least one pair should change from open to closed, or closed to open. Compare the pattern with the proper D130 wiring diagram before replacing a multi-terminal switch. The D100–D170 technical manual covers the D130 and includes diagnostic/wiring information; Deere’s own technical-publication service is the authoritative route for the machine’s exact serial-number configuration.techpubs.deere+2
5. Interpret the result
Where is the fuse for the safety switch
There is not normally a separate fuse just for the seat safety switch on a John Deere D130. The seat, brake, and PTO switches are part of the safety-interlock/start circuit, which is protected through the tractor’s main fused electrical supply. On the D130, the fuse you want is typically a 20-amp blade fuse under the hood, close to the battery/wiring harness.mowermentor+1
Where to look
-
Park safely, turn the key off, remove it, and disconnect the negative battery cable if you will unplug wiring.
-
Raise the bonnet/hood.
-
Look around the battery area and main wiring harness, especially near the frame/engine-bay side of the battery.
-
Find a small inline fuse holder or a small blade-fuse socket—usually black plastic—with a pull-off cap or rubber cover.
-
The D130 manual reference indicates a 20 A fuse for this location.manual-hub
It may not resemble a car-style fuse box. Often it is a single fuse holder integrated into the loom rather than a large panel.
How to test it
-
Pull the blade fuse straight out.
-
Hold it to the light:
-
Intact metal bridge = likely good.
-
Broken/melted bridge = blown.
-
-
Confirm with your multimeter:
-
Set it to continuity or low-ohms.
-
Put a probe on each blade of the removed fuse.
-
Beep / around 0–1 Ω = good.
-
OL / no beep = blown.
-
Fit only a 20 A automotive blade fuse if that is the rating marked on the old fuse or its holder. Never use a higher-rated fuse or bridge the terminals; a replacement fuse that immediately blows means the wiring or a component has a short circuit.manual-hub
Important distinction
A good fuse does not prove the seat switch is good. The fuse supplies the circuit; the seat switch itself is under the seat pan and must be checked for correct open/closed operation with a multimeter, as described previously. If your D130 has no crank/no click but the fuse is good, the next checks are:
-
Battery voltage and clean tight cable connections.
-
Brake pedal fully operating its switch.
-
PTO control fully in Off.
-
Seat-switch connector and seat-switch plunger.
-
Ignition-switch and solenoid wiring.
Where is the PTO switch located
On the John Deere D130, the PTO/blade-engagement control is the yellow knob or lever to the right of the steering wheel. It is mounted in the dash/cowl area; pull it up to engage the mower blades and push it down to disengage them.hunker+1
The actual safety switch
The electrical PTO interlock switch you may need to test is not necessarily the yellow control itself. On many D130s it sits under the dashboard, behind or below the PTO control, and is actuated by a metal tab/blade attached to the PTO engagement lever.
To find it:
-
Turn the key off and remove it.
-
Disconnect the negative battery lead before unplugging connectors.
-
Look up underneath the dashboard on the right-hand side of the steering column, directly behind/below the yellow PTO control.
-
Move the yellow PTO control from Off to On while watching underneath.
-
Look for a small spring-loaded plunger/microswitch with a wire plug; the moving metal tab from the control should press or release its pin.
A D130 owner report describes the PTO interlock as a spring-loaded pin switch under the dash, operated by a metal “blade” on the PTO engagement lever.tractorbynet
What to check
With the PTO control in the Off/down position:
-
The linkage/tab should fully actuate the switch in its normal start-safe position.
-
The switch connector should be firmly seated.
-
The tab should not be bent, missing, or only partly touching the plunger.
-
The wiring should not be chafed where it passes behind the dash.
With the PTO control in the On/up position:
-
The tab should move fully away from—or fully press—the plunger, depending on switch orientation.
-
The mower should not be able to crank with the PTO engaged.
The operator guidance confirms that electric attachment-engagement switches are pushed down to disengage and pulled up to engage.
Common causes for a slipping belt
On a John Deere D130, a slipping belt is most often caused by a worn deck belt, a weak/sticking tensioner or idler pulley, incorrect routing, or a pulley/spindle that is rough, loose, or misaligned. First establish whether you mean the mower-deck belt—blades slow, squeal, or leave uncut strips—or the traction drive belt—tractor loses drive or struggles uphill. They have different fault paths.tractorsby+1
If the blades slip
For the D130’s 42-inch deck, the common blade-drive belt is typically GX20072 (also cross-referenced as GY20570), but verify from the old belt, deck label, or parts catalogue before ordering.tractorsby+1
Debris buildup, stretched or damaged belts, failing pulley bearings, weak tension springs, bent belt guides, and oil contamination are all established causes of mower-deck belts slipping or coming off.poweredoutdoors+2
If the tractor loses drive
If the engine revs but the D130 barely moves, slows on a slope, or stops pulling under load, inspect the traction drive belt, not the blade belt.
Common causes include:
-
Worn, glazed, stretched, or oil-contaminated traction belt.
-
Drive belt incorrectly routed or off an idler.
-
Idler pulley seized, rough, or not applying enough tension.
-
Brake linkage partly holding the transmission brake on.
-
Debris packed around the variable-speed/idler mechanism.
-
Drive-control linkage out of adjustment.
-
Transmission bypass/freewheel control left in the push position.
-
Internal hydrostatic-transmission wear or overheating—but check the belt, idlers, brake, and linkage before assuming the transmission has failed.
The D130’s traction belt is commonly identified as GX20006; it is distinct from the GX20072 mower-deck belt.tractorsby
Fast inspection order
With the engine off, key removed, PTO disengaged, and park brake set:
-
Remove the deck/belt guards as necessary and inspect the belt for glazing, cracks, fraying, exposed cords, or oil.
-
Check belt routing against the diagram before buying a belt.
-
Spin every idler pulley and blade spindle pulley by hand.
-
Check for pulley wobble and blade-spindle play.
-
Move the idler/tensioner arm: it should move freely and snap back with firm spring force.
-
Clear grass and mud from the top of the deck, belt covers, pulley grooves, and tensioner area.
-
Inspect belt guides and keepers for bending, missing hardware, or contact marks.
-
Install the exact correct belt and ensure it is fully seated before engaging the PTO.
If a new belt slips immediately, do not fit another belt first. The usual underlying cause is incorrect routing, an idler or spindle bearing problem, a bent keeper/guide, weak tension spring, or pulley misalignment.manza+2
Symptoms that narrow it down
-
Squeals only when blades are first engaged: belt glazed/loose, belt wet, or idler tension weak.
-
Squeals only in dense grass: normal overload, dull blades, low engine RPM, weak tensioner, or belt near end of life.
-
Belt repeatedly jumps off: bent guide, pulley/spindle wobble, debris, wrong routing, or incorrect belt length/profile.
-
One belt edge is frayed: belt guide rubbing, misaligned pulley, or tilted spindle/idler.
-
Black rubber dust: slipping belt, seized/rough pulley, incorrect belt profile, or contaminated pulley surfaces.
-
Strong vibration plus belt trouble: inspect blade balance, spindle bearings, pulley damage, and deck structure before mowing again.
How do I check spindle bearings for play
What causes excessive mower vibration
How to balance D130 lawn mower blades
How to clean the carburetor on a D130
On a John Deere D130, clean the carburettor only after confirming you have fresh fuel, adequate fuel flow, a clean air filter, and a good spark plug. The D130 technical manual includes a specific carburettor-cleaning procedure, and stale fuel deposits are a common reason for hard starting, surging, stalling, or an engine that runs only on choke.tractorgearbox+1
Before you remove it
Symptoms that point to the carburettor
-
Starts briefly with choke, then dies as choke is opened.
-
Hunts/surges at steady throttle.
-
Starts only with carburettor cleaner or starting fluid.
-
Runs rough after sitting with petrol in the tank.
-
Fuel is fresh and flowing, but the engine still starves for fuel.
Check these first:
-
Drain old fuel and refill with fresh petrol.
-
Replace the fuel filter if it is dirty, restricted, or of unknown age.
-
Inspect the fuel line for cracking, kinks, or blockage.
-
Clean or replace the air filter.
-
Check the spark plug, plug lead, and oil level.
-
Confirm the fuel-tank cap vent is not blocked.
A plugged filter, old fuel, dirt in the fuel lines, and carburettor malfunction are all listed D130 fuel-system fault possibilities.tractorgearbox
What you need
-
Carburettor cleaner aerosol with straw.
-
Socket set/nut driver and screwdrivers.
-
Long-nose pliers.
-
Clean rags and a shallow container for fuel.
-
Safety glasses and nitrile gloves.
-
New carburettor bowl gasket/O-ring and intake gasket if the originals are damaged.
-
Compressed air, if available.
Work outdoors or in very well-ventilated conditions—petrol vapour and carb cleaner are highly flammable. Keep away from ignition sources, including smoking, grinders, heaters, and pilot lights.
Safely prepare the D130
-
Park on level ground and allow the engine to cool completely.
-
Turn key off, remove it, set the parking brake, and disconnect both spark-plug wires.
-
Turn the fuel shut-off valve off, if fitted. If there is no valve, clamp the fuel line gently with a proper fuel-line clamp, or drain the tank into an approved container.
-
Clean dirt from around the carburettor and air-filter housing before opening anything.
-
Photograph every linkage, spring, hose, and cable before removal.
The D130 is a V-twin model in this series, so take special care to reconnect throttle/governor linkages exactly as found. The technical manual identifies the D130 among the D100–D170 machines covered by its carburettor service information.techpubs.deere
Remove and clean the bowl
This is the least invasive clean and often fixes a machine that has sat with old fuel.
-
Remove the air-filter cover, filter, and air-filter housing as necessary to expose the carburettor.
-
Put a rag/container below the carburettor.
-
Clean the outside of the float bowl so dirt cannot enter when opened.
-
Remove the bolt/nut at the bottom centre of the float bowl.
-
Lower the bowl carefully; catch the fuel inside.
-
Keep track of the bowl O-ring/gasket. Do not soak rubber seals in aggressive carb cleaner.
Inspect the bowl:
-
Varnish/gum: yellow-brown sticky film from aged petrol.
-
White powder/crust: corrosion or ethanol-related deposits.
-
Water/rust/debris: indicates tank or fuel-system contamination; flushing the whole fuel system is then important.
Clean the bowl thoroughly with carb cleaner and wipe it dry.
Clean the jet and passages
The bowl bolt often doubles as, or provides access to, a main-jet fuel passage. It has small drilled holes that clog easily.
-
Spray carb cleaner through every visible hole in the bowl nut/main jet and through the central emulsion tube/stem.
-
Use a torch to confirm each tiny hole is clear.
-
Blow through the passages with compressed air if available.
-
Spray cleaner into the main jet and carburettor passages, allowing it to exit from another opening.
-
Confirm the float pivots freely and the float needle moves without sticking.
-
Inspect the needle tip and seat area for wear or debris.
Use only a soft nylon bristle, a strand of copper wire, or a purpose-made jet-cleaning tool if a passage is blocked. Do not force a steel drill bit, welding tip cleaner, or hard wire through a calibrated jet, because enlarging it changes fuel metering and can make the engine run incorrectly. The standard carburettor-cleaning sequence includes checking the bowl, stem/jet holes, deposits, float movement, and careful reassembly.techpubs.deere+1
Reassemble and test
-
Refit the bowl O-ring/gasket correctly; replace it if swollen, cut, flattened, or damaged.
-
Refit the bowl and tighten its bolt/nut snugly—do not overtighten the soft carburettor body.
-
Refit the air-filter housing, linkages, springs, hoses, and air filter exactly as photographed.
-
Reconnect the fuel line and open the fuel valve, if fitted.
-
Check carefully for leaks before reconnecting the spark-plug leads.
-
Reconnect plug leads, start the engine, and let it warm up.
-
Run it at mowing speed and gradually open the choke fully.
Use fresh fuel after cleaning. If the bowl contained significant water, rust, or debris, drain the tank, flush/replace the fuel line as necessary, and replace the fuel filter, otherwise contamination can clog the cleaned carburettor again.tractorgearbox+1
When bowl cleaning is not enough
Remove the full carburettor for deeper cleaning or replacement if:
-
It starts only with a spray of carb cleaner.
-
It still surges or dies with fresh fuel and a clean bowl jet.
-
The float needle leaks or sticks.
-
The throttle/choke shaft is excessively loose.
-
Internal corrosion will not clean out.
-
Gaskets tear during removal.
For full removal, disconnect the fuel line, then carefully unhook governor/throttle springs and linkages, remove mounting fasteners, and protect the intake opening immediately with a clean lint-free rag. Replace damaged gaskets rather than reusing them. If you are not comfortable keeping track of the small governor springs and linkage positions, a carburettor service shop is usually cheaper than correcting an incorrect reassembly.techpubs.deere+1
Avoid these mistakes
-
Do not spray carb cleaner into a running engine near hot exhaust parts.
-
Do not use starting fluid as a routine diagnostic on this engine.
-
Do not adjust mixture screws unless your exact carburettor has adjustable screws and you have the correct service specification; many later small-engine carburettors use fixed jets.
-
Do not reuse a fuel-contaminated air filter.
-
Do not refit the carburettor with missing or damaged intake gaskets—an air leak can mimic a blocked jet.
When should I just replace it instead
Replace the carburettor rather than clean/rebuild it when it has physical damage, significant corrosion, permanently blocked metering passages, worn moving parts, or repeated failure after a proper clean with fresh fuel and a new filter. For ordinary stale-fuel varnish, cleaning is usually worthwhile first; for corrosion or breakage, Briggs & Stratton explicitly recommends replacement.briggsandstratton+1
Replace it now if
Briggs & Stratton recommends inspecting the bowl for debris, replacing damaged or permanently clogged parts, and choosing replacement where corrosion or breakage is present.briggsandstratton
Clean or rebuild first if
Cleaning or a rebuild kit makes sense when the problem is clearly stale-fuel contamination and the carburettor is otherwise sound:
-
Yellow/brown varnish or gum in the bowl.
-
Dirt in the bowl bolt/main-jet holes.
-
Float moves freely and is intact.
-
No white corrosion, cracks, broken fittings, or stripped threads.
-
Engine ran normally before storage, then developed a problem after sitting.
-
It runs better after cleaning, fresh petrol, and a new fuel filter.
Most small-engine carburettor faults arise from dirt, varnish, and fuel deposits, which carburettor cleaner and compressed air can remove.briggsandstratton
A sensible decision order
Before ordering a carburettor for your D130:
-
Drain stale fuel and refill with fresh petrol.
-
Replace the fuel filter and inspect the fuel line.
-
Confirm fuel flows freely from the tank and the cap vent is not blocked.
-
Clean the bowl and main jet/emulsion tube.
-
Inspect the float, needle, bowl O-ring, and intake gasket.
-
Reassemble and test at operating speed with choke fully off.
-
Replace the carburettor if it still surges, dies, floods, or will only run on choke after those checks.
If the engine still runs only with partial choke after a thorough carburettor clean, it can indicate either a remaining internal fuel restriction or an intake air leak. Inspect the carb mounting and intake gaskets before assuming a new carb is the answer.
Replacement is often the better value when
Choose a complete replacement rather than spending more time rebuilding if:
-
The mower has sat for years with ethanol-blended fuel.
-
The bowl contains extensive white powder, rust, or water damage.
-
Multiple jets/passages are blocked or damaged.
-
You need the mower running reliably and the price difference between a quality replacement and a rebuild kit is small.
-
The throttle/governor shaft is worn or the carb body itself is damaged.
Use the engine model/type/code stamped on the engine—not only “John Deere D130”—to source the correct carburettor. D130 production spans variants, and the proper replacement must match the engine, linkage layout, choke/throttle arrangement, fuel inlet, and emissions configuration. Deere’s D130 owner-support page provides manuals, maintenance information, and parts support for model-specific verification.deere
Avoid poor replacement choices
-
Do not order solely by photographs or “fits D130” marketplace claims.
-
Do not fit a carburettor with different linkage geometry or a different fuel-inlet position.
-
Avoid altering mixture screws or fitting a non-equivalent emissions-specification carburettor.
-
Replace the fuel filter and flush contaminated fuel before fitting the new carb, or it may clog again quickly.
-
Fit new gaskets/O-rings where provided and check carefully for fuel leaks before starting.
The practical line is simple: clean when deposits are the only problem; replace when the carburettor is damaged, corroded, or still fails after a full fuel-system service and a careful clean.
4. John Deere D130 DIY or Dealer? Repair Decision Guide
Many D130 repairs are realistic DIY jobs because the tractor is mechanically straightforward and routine service access is reasonable. The line between DIY and dealer work usually appears when the problem extends beyond wear parts into internal engine, transaxle, or layered electrical diagnosis.
Good DIY jobs
-
Battery replacement and terminal cleaning.
-
Oil and filter, fuel filter, air filter, and spark plug service.
-
Blade replacement and sharpening.
-
Deck cleanout and deck-level adjustment.
-
Mower belt replacement GX20072.
-
Basic fuse, switch, and visible wiring checks.
Advanced DIY or dealer jobs
-
Persistent no-start after battery, fuel, spark, and interlock basics have been checked.
-
Internal carburetor or engine diagnosis when symptoms overlap.
-
Major transmission or transaxle repair.
-
Repeated wiring faults or hidden harness damage.
Skill level guide
-
Beginner: filters, battery, blades, cleanout, tire pressure, simple inspections.
-
Intermediate: deck leveling, belt replacement, tune-up work, switch replacement.
-
Advanced: carburetor diagnosis, driveline diagnosis, major electrical tracing, engine or transaxle repair.
5. John Deere D130 Parts Needed, OEM vs Aftermarket, and What Information You Need
The most important step before ordering D130 parts is correct identification. Deere’s operator manual says the dealer needs the machine Product Identification Number and engine serial number, and the D130 parts sheet specifically notes that some air-filter applications differ by PIN range.
Information to gather before ordering
-
Full model: John Deere D130.
-
Product Identification Number from the left side of the frame.
-
Engine serial number from the engine.
-
Deck size: 42-inch deck.
-
Existing part number if visible.
Common John Deere D130 service and repair parts
John Deere D130 OEM vs aftermarket
OEM parts are usually the better choice for belts, switches, ignition items, and any parts where exact fit or safety logic matters. Aftermarket parts can work well for blades, batteries, filters, and some tune-up parts, but only when they cross-reference directly to the D130 OEM number and the correct PIN/engine configuration.
6. John Deere D130 Where to Find Parts Diagrams and Service Manuals
The best sources for D130 repair information are Deere’s own operator and parts references, followed by Deere-oriented parts suppliers. Deere’s operator manual provides the official operating, safety, machine-cleanout, and service framework, while the maintenance sheet and parts guides identify model-specific service parts and intervals.
Useful sources:
-
D100 Series operator manual: http://pdf.lowes.com/operatingguides/759936768866_oper.pdf
-
D130 parts and maintenance sheet: http://pdf.lowes.com/useandcareguides/889818000743_use.pdf
-
Deere Technical Publications: https://techpubs.deere.com/
-
JDParts: http://JDParts.deere.com
-
Green Farm Parts D130 page: https://greenfarmparts.com/john-deere-d130-lawn-tractor-maintenance-guide/
7. John Deere D130 How to Locate the Model Number, Serial Number, and Engine Number
Deere’s operator manual states that the machine Product Identification Number is located on the left side of the frame and that the engine serial number is located on the engine itself. These numbers matter because some D130 parts vary by PIN range or engine specification.
Step-by-step guide
-
Park safely on level ground and remove the key.
-
Locate the PIN label on the left side of the frame.
-
Record the full machine number exactly as shown.
-
Locate the engine serial number on the engine and record it separately.
-
Use both numbers when ordering filters, belts, electrical parts, or engine components.
8. John Deere D130 Buying Parts Online and In Physical Stores
For the D130, the smartest buying strategy is to confirm the OEM part number first, then compare stock and price across Deere and Deere-focused sellers. Because the D130 parts sheet shows PIN-range differences for at least some filters, serial-number confirmation is especially important before buying tune-up parts.
Useful online and store-related URLs
-
JDParts: http://JDParts.deere.com
-
Deere Technical Publications: https://techpubs.deere.com/
-
Green Farm Parts D130 page: https://greenfarmparts.com/john-deere-d130-lawn-tractor-maintenance-guide/
Buying advice
-
Online: match the exact OEM number and verify the correct PIN range.
-
Dealer counter: best for serial-number-sensitive parts, fuel-system questions, and electrical items.
-
Physical retail: useful for oil, filters, blades, and belts when the packaging clearly confirms D130 fitment.
9. John Deere D130 Step-by-Step Fitting Guide for Common Parts
For most D130 owners, the most useful repairs to learn first are filters, spark plug service, blades, and belts. These solve many real-world complaints and align directly with Deere’s published maintenance schedule.
Fuel filter and air filter service
-
Park safely and allow machine to cool.
-
Replace fuel filter GY20709 or confirmed equivalent AM116304 if correct for your engine/PIN.
-
Replace air filter and precleaner using the correct PIN-range-specific elements.
-
Inspect fuel lines and air-box sealing before restart.
John Deere D130 Spark plug replacement
-
Remove spark plug wire and allow engine to cool.
-
Remove old spark plug and inspect color and deposits.
-
Install the correct replacement plug for your engine configuration.
-
Reconnect securely and test start quality.
John Deere D130 Blade replacement
-
Park safely, remove key, and disconnect the negative battery cable or spark plug wire.
-
Block blade rotation and remove blade hardware.
-
Install new blade(s) in correct orientation.
-
Tighten correctly and test for smooth operation before mowing.
Deck belt replacement
-
Lower or remove the deck as needed.
-
Photograph belt routing before removal.
-
Remove belt guards and release idler tension.
-
Remove old GX20072 belt and inspect pulleys.
-
Install new belt with correct routing and verify tracking.
10. John Deere D130 Maintenance to Prevent Problems Reoccurring
Preventive maintenance has a major effect on D130 reliability because the machine is simple enough that small neglected issues often become repeat problems. Deere’s service and machine-cleanout guidance show that many common D130 failures are tied to ignored filters, worn belts, poor lubrication, and dry debris buildup rather than rare component defects.
Focus areas
-
Starting reliability: keep battery charged, use fresh fuel, and replace filters and spark plug on schedule.
-
Cut quality: sharpen blades, level the deck correctly, and inspect deck belt condition often.
-
Fire prevention: clean muffler, engine screens, top of deck, and transmission area frequently.
-
Drive performance: monitor tire pressure, traction belt condition, and brake drag.
-
Electrical reliability: inspect battery terminals, visible harnesses, and switch connections regularly.
11. John Deere D130 Maintenance Schedule and Year-Round Checklist
The Deere D130 parts and maintenance sheet gives a clear owner-service schedule. After 8 hours, Deere lists lubricating mower spindles and pivot points, checking mower deck spindle brakes on manual PTO machines, lubricating front axle pivot and axle spindles, and lubricating front axle wheel bushings. Every 25 hours, Deere repeats the spindle and front axle lubrication points.
Yearly or every 50 hours, Deere lists engine oil and filter change, clean/replace air-filter precleaner and element, replace fuel filter, sharpen or replace mower blades, and check or replace the mower drive belt. At 200 hours, Deere calls for valve-clearance check/adjustment by a dealer.
Daily or before each use
-
Check safety devices and brakes.
-
Check fuel level and engine oil level.
-
Check tire pressure and visible hardware.
-
Remove debris from engine compartment, muffler area, top of mower deck, and near transmission.
-
Inspect for leaks and abnormal wear.
After 8 hours
-
Lubricate mower spindles and pivot points.
-
Check mower deck spindle brakes on manual PTO setups.
-
Lubricate front axle pivot and axle spindles.
-
Lubricate front axle wheel bushings.
Every 25 hours
-
Lubricate mower spindles and pivot points.
-
Lubricate front axle pivot and axle spindles.
-
Lubricate front axle wheel bushings.
Every 50 hours or yearly
-
Change engine oil and replace oil filter.
-
Clean or replace air filter and precleaner.
-
Replace fuel filter.
-
Sharpen or replace blades.
-
Check or replace mower drive belt.
Every 200 hours
-
Have valve clearance checked or adjusted by a John Deere dealer.
John Deere D130 Seasonal checklist
Spring
-
Charge battery, use fresh fuel, change oil and filter, inspect air and fuel filters, inspect blades, and check deck level.
Mid-season
-
Recheck blades, belts, tire pressures, driveline cleanout, and heat/debris-prone areas.
Fall / storage
-
Clean the entire tractor, manage fuel for storage, maintain battery charge, and store only after machine cooldown.
12. John Deere D130 Repair, Upgrade, or Replace
In most cases, a D130 is worth repairing when the frame, deck shell, engine, and transmission are still fundamentally sound. Belts, blades, filters, tune-up parts, switches, and battery service are normal ownership items on an older homeowner tractor and do not by themselves justify replacement.
Repair if
-
Problems are limited to routine service parts, deck setup, belt replacement, battery service, or minor electrical faults.
-
The frame and deck shell are structurally sound.
-
The engine and transmission still perform acceptably after routine service.
Upgrade if
-
The machine works well but would benefit from mulching, bagging, or refreshed wear parts for continued use.
Replace if
-
Major engine, transmission, and structural deck/frame issues overlap.
-
Reliability has fallen enough that downtime outweighs repair value.
-
Your property now justifies a heavier-duty tractor or zero-turn mower.
13. John Deere D130 Troubleshooting FAQ
1. Why will my John Deere D130 not start at all?
Start by identifying whether the tractor does not crank or whether it cranks but never fires. Most D130 no-start complaints begin with the battery, fuse, park-brake/PTO start conditions, and safety-switch basics rather than with major engine failure.
2. Why does my D130 only click when I turn the key?
A click usually means the solenoid is trying to engage but the battery is weak under load or the cables have too much resistance. Clean both battery terminals, inspect the frame ground, and test the battery before replacing the starter.
3. Could the ignition switch keep the D130 from starting?
Yes. Green Farm Parts lists GY20074 as the D130 ignition switch, and switches on homeowner tractors do wear over time. If the fuse and battery are good but the key circuit behaves inconsistently, the switch is a realistic suspect.
4. Could a safety switch stop it from cranking?
Yes. Deere’s operating instructions require the correct park-brake and start conditions, and a faulty seat, brake, or PTO-related interlock can stop the start circuit even when the battery is fully charged.
5. Why does my D130 crank but not start?
That usually means the issue is in fuel, spark, or air. Start with fresh fuel, fuel-filter condition, spark plug condition, and air-filter restriction before moving into carburetor or fuel-pump diagnosis.
6. What fuel filter fits the D130?
Deere’s parts sheet lists GY20709, while Green Farm Parts lists AM116304. Because the D130 has engine and PIN-range differences in some service parts, confirm with your serial and engine details before ordering.
7. What air filter fits the D130?
Deere’s parts sheet lists GY21056 for one PIN range and GY21435 for a later PIN range. That means owners should never order the D130 air filter by model alone without checking the serial range.
8. What spark plug should I use?
Green Farm Parts lists M78543 and MIU11020 as D130 spark-plug options depending on configuration. The correct plug should be confirmed by engine model and serial number rather than guesswork.
9. Why does my D130 start only with choke or die when I remove choke?
That pattern usually points to fuel-delivery or carburetor restriction problems. If the engine improves only with choke, it often means the normal fuel path is too lean because of a restriction, air leak, or venting issue.
10. Why does my D130 start and then die after 20 or 30 minutes?
A real-world D130 case described exactly this pattern, along with surging before shutdown. Suggestions there included testing with the gas cap slightly loose and checking the fuel lines and fittings for cracks or leaks because the system depends on proper vacuum and venting.
11. Could the gas cap be the problem?
Yes. In the D130 running problem discussion, loosening the cap was suggested as a test for a venting problem. A bad cap or blocked vent can restrict fuel flow enough to cause surging and stalling.
12. Why does my D130 surge before it dies?
Surging usually points to unstable fuel delivery rather than an immediate electrical cut. Check the cap vent, fuel lines, fuel filter, carburetor condition, and any vacuum leaks before assuming the engine itself is damaged.
13. Why does my D130 leave strips of uncut grass?
This usually means dull blades, poor deck level, a slipping deck belt, or mowing too fast for conditions. Start with blade condition and Deere’s deck-level measurements before blaming the engine.
14. Why are the grass tips brown after mowing?
Deere explains that incorrect front-to-rear deck pitch can cause double cutting and brown grass tips. Set the front of the deck 1/8 to 1/4 inch lower than the rear and make sure the blades are sharp.
15. What is the correct side-to-side deck level on a D130?
Deere says the outside blade-tip difference should not exceed 1/8 inch, or 3 mm. Always check tire pressure first because unequal tires can create a false deck-level problem.
16. What is the correct front-to-rear deck pitch?
The front blade tip should be 1/8 to 1/4 inch, or 3 to 6 mm, lower than the rear. That slight forward pitch improves cut quality and reduces double cutting.
17. Why does my D130 scalp the lawn?
Scalping usually comes from mowing too low, uneven ground, or anti-scalp wheels set incorrectly. Deere says those wheels should typically sit about 1/8 to 1/2 inch from the ground, and lower when mowing at 3 inches or higher.
18. Why does the mower belt keep coming off?
A stretched or worn belt, bent guide, seized idler, or incorrect routing are the most common causes. If your D130 uses the common GX20072 deck belt, make sure the replacement is the exact correct size and profile.
19. How often should I check or replace the deck belt?
Deere says to check or replace the mower drive belt yearly or every 50 hours. Heavy mowing, heat, and packed debris on top of the deck can shorten belt life.
20. Why does the tractor vibrate badly when mowing?
Severe vibration usually means a bent blade, loose hardware, spindle wear, or pulley/belt trouble. Stop using the machine and inspect it immediately, because continued mowing can damage the deck and spindle assemblies.
21. Can I straighten a bent mower blade?
No. Deere’s safety guidance says damaged blades should be replaced, not straightened or welded. A slightly bent blade can still be weakened or badly out of balance.
22. What areas should I clean most often to prevent overheating or fire?
Deere specifically points to the muffler and exhaust system, engine and engine screens, top of mower deck and under shields, and on or near the transmission. Those are the highest-value cleanout areas on a D130.
23. Why is there debris on top of the deck when the underside is clean?
Because dry clippings and dust collect under the deck shields and around the belt and spindle zones, not just beneath the deck. Deere specifically identifies the top of the mower deck and under-shield area as a critical cleanout zone.
24. Why does my D130 feel weak going uphill?
Weak uphill performance often comes from low tire pressure, traction loss, or a slipping traction belt rather than from immediate transmission failure. Since Green Farm Parts lists GX20006 as the traction belt, that is one of the first drive parts to inspect.
25. Could the transmission be bad if the tractor barely moves?
Possibly, but check the simpler causes first: traction belt condition, brake drag, tire pressure, and debris around the driveline. Residential tractors often mimic transmission failure when the real issue is external and cheaper to fix.
26. Can low tire pressure affect both cutting and traction?
Yes. Deere’s daily checks include tire pressure because tire height changes deck level and traction at the same time. It is one of the easiest high-impact checks on a D130.
27. Why does my battery keep going flat?
The usual reasons are battery age, poor charging, corroded terminals, or long storage without maintenance charging. Start with a fully charged battery and clean terminals, then test whether the issue returns after normal use.
28. Which routine parts should I keep on hand?
A practical D130 spare-parts set includes a fuel filter, air filter, spark plug, deck belt, and spare blade set. Deere and Green Farm Parts both identify these items as routine service or commonly replaced parts.
29. How often should I change the oil and filter?
Deere says yearly or every 50 hours, whichever comes first. In dusty conditions or heavy summer mowing, more frequent changes can be worthwhile.
30. How often should I replace the air filter?
The Deere sheet says to clean or replace the air-filter precleaner and element yearly or every 50 hours. If you mow dusty ground or dry leaves, inspect it far more often.
31. How often should I replace the fuel filter?
Deere lists fuel-filter replacement yearly or every 50 hours on the D130 maintenance sheet. If the fuel is old or the tractor sat unused for a long time, earlier replacement is often smart.
32. How often should I sharpen or replace the blades?
Deere lists sharpening or replacing the mower blades yearly or every 50 hours. If you hit roots, rocks, or debris, inspect them immediately instead of waiting for the scheduled interval.
33. Is the D130 worth repairing?
Usually yes, if the machine mainly needs filters, belts, blades, switches, or tune-up parts. These are normal ownership items and the D130 still has strong parts support.
34. Where do I find the model and serial number on a D130?
Deere says the machine Product Identification Number is on the left side of the frame and the engine serial number is on the engine. Record both before ordering parts.
35. When should I stop troubleshooting and take it to a dealer?
If you have already checked battery, fuse, fuel, spark, deck, visible safety switches, and simple fuel-vent issues but the tractor still has overlapping electrical, driveline, or internal engine symptoms, dealer diagnosis may save time and money. That is especially true when fuel and electrical symptoms seem to overlap.