
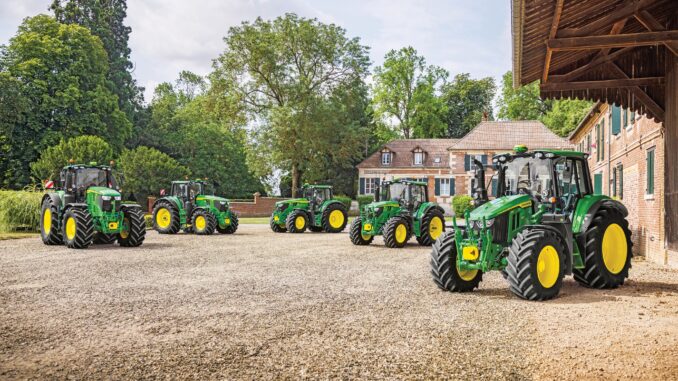
The John Deere 2555 is a mid-size utility tractor built for demanding property, livestock, hay, loader, and general farm work. It uses a 3.9L four-cylinder diesel engine and was offered in several drivetrain configurations, so accurate identification is important before ordering repair parts or following a service procedure.
This John Deere 2555 repair guide covers symptom-based troubleshooting, practical maintenance, common repair parts, manuals and diagrams, realistic DIY jobs, and the problems that normally justify dealer or experienced-mechanic support.
General overview of the John Deere 2555
The John Deere 2555 sits in Deere’s utility-tractor range and is substantially more capable than a homeowner compact tractor. Depending on version and equipment, it may have two- or four-wheel drive, a ROPS platform or cab, loader compatibility, rear remote hydraulics, and a 540 or 540/1000 RPM PTO arrangement.
The tractor was available with differing engine and transmission specifications. Basic versions used a naturally aspirated diesel with a collar-shift transmission, while TSS-equipped tractors could have a turbocharged engine, different PTO configuration, four-wheel drive, cab options, and more advanced transmission features. Do not assume that a part fits solely because it is listed for “2555”; always match the Product Identification Number, transmission, engine arrangement, and equipment fitted to the tractor.
The main systems to understand when repairing a John Deere 2555 are:
-
Diesel engine, air intake, fuel supply, injection system, cooling system, and exhaust
-
Clutch, transmission, differential lock, PTO, and final drives
-
Hydraulic pump, steering, selective control valves, three-point hitch, and loader circuits
-
Electrical charging and starting system, lighting, gauges, relays, switches, and safety circuits
-
Front axle, steering linkage, brakes, tires, and wheel hardware
-
Optional equipment such as loaders, cabs, dual remotes, front PTO systems, and front-wheel assist
Common service parts owners often need include:
-
Engine oil filter
-
Fuel filter or fuel-filter elements
-
Primary and secondary air-filter elements
-
Engine oil and coolant
-
Fan belt or accessory-drive belt
-
Starter, alternator, battery cables, and battery
-
Thermostat, radiator hoses, water pump, and radiator cap
-
Clutch components and release-bearing parts
-
PTO and hydraulic-control parts
-
Hydraulic filters, hydraulic oil, O-rings, hoses, couplers, and seals
-
Brake components, tie-rod ends, front axle seals, and wheel bearings
John Deere 2555 troubleshooting approach
Start diagnosis with the symptom the operator sees rather than replacing parts by guesswork. A John Deere 2555 that cranks but will not start has a different diagnostic path from one that starts normally but loses power under load, overheats, slips out of gear, or will not lift an implement.
Before beginning, park on level ground, lower all implements, engage the parking brake, place the transmission in neutral, shut off the engine, remove the key, and relieve hydraulic pressure where applicable. Never work beneath a raised loader, raised implement, or unsupported tractor.
The main symptom groups are:
-
No crank, slow crank, or no-start condition
-
Hard starting, smoke, rough running, or low engine power
-
Overheating, coolant loss, oil leaks, hydraulic leaks, and fuel leaks
-
Clutch, gear-shifting, PTO, or transmission problems
-
Weak steering, poor three-point lift, loader problems, or hydraulic noise
-
Battery, charging, lights, gauges, starter, and switch faults
-
Vibration, brake issues, front-end wear, tire damage, and driveline noise
Immediate John Deere 2555 repair needs
Some problems should stop work immediately. Continuing to operate a tractor with low engine oil pressure, overheating, a fuel leak, serious hydraulic leak, failed brakes, damaged steering, or abnormal driveline noise can create a much larger repair bill and may cause injury.
Starting issues
A no-crank condition may be as simple as a poor battery connection, but it can also involve a safety switch, starter circuit, key switch, solenoid, or starter motor. A diesel that cranks normally but will not start needs a fuel- and air-system check before injection-pump or injector work is considered.
Common causes include:
-
Weak battery or corroded battery terminals
-
Loose ground strap or damaged positive battery cable
-
Faulty neutral-start or clutch safety switch
-
Failed starter solenoid or starter motor
-
Empty fuel tank, shut fuel valve, plugged filter, or air in the fuel system
-
Water-contaminated diesel fuel
-
Faulty glow-aid or cold-start system where equipped
-
Internal engine or fuel-injection fault
Basic checks:
-
Check battery voltage, cable tightness, and the ground connection at the engine or frame.
-
Confirm the transmission, range selector, and PTO controls are in the correct safe starting positions.
-
Inspect the fuel level and open any fuel shutoff valve.
-
Check the fuel filter for contamination or water.
-
Listen for the starter solenoid click and observe whether the engine cranks at normal speed.
-
If fuel delivery has been opened, follow the correct bleeding procedure before attempting repeated starts.
Do not use ether or starting fluid unless the operator’s manual specifically allows it for the tractor’s cold-start equipment. Incorrect use can damage an engine or create an intake fire.
Power loss and rough running
A John Deere 2555 that starts but loses power under load, produces excessive smoke, surges, misses, or stalls may have an air restriction, fuel-supply problem, overheating condition, or mechanical engine issue.
Common causes include:
-
Plugged primary or secondary air filter
-
Collapsed intake hose or blocked pre-cleaner
-
Restricted fuel filter or contaminated fuel
-
Air leak on the suction side of the fuel system
-
Water in diesel fuel
-
Incorrect throttle linkage movement
-
Cooling-system restriction causing excessive engine temperature
-
Turbocharger or intake-system issue on turbocharged versions
-
Injector, injection-pump, or compression problem
Basic checks:
-
Inspect the air-filter restriction indicator if fitted and examine the air-cleaner housing.
-
Drain water from the fuel sediment bowl or separator if equipped.
-
Replace a visibly dirty or overdue fuel filter.
-
Inspect fuel lines for cracks, loose clamps, and damp areas that may draw air.
-
Check coolant level only when the engine is cool.
-
Compare exhaust smoke and engine behavior at idle versus under load.
Black smoke often indicates too much fuel or too little air. White smoke on a cold engine can be normal briefly, but continued white smoke with rough running may indicate poor combustion, water contamination, injector trouble, or low compression. Blue smoke generally points toward oil consumption.
Vibration and noise
New vibration, rattling, grinding, knocking, or squealing deserves immediate attention. A loose wheel, damaged driveline component, failing bearing, cracked loader mount, worn steering joint, or slipping accessory belt can become unsafe quickly.
Common causes include:
-
Loose wheel bolts or damaged wheel centers
-
Incorrect tire pressure or damaged tire
-
Worn tie-rod ends, steering joints, or front axle pivots
-
Loose loader mounts or implement hardware
-
Failing alternator, water-pump, fan, or idler bearing
-
Worn clutch-release bearing
-
PTO shaft, universal-joint, or implement driveline fault
-
Brake or final-drive issue
Basic checks:
-
Stop the tractor and inspect tire condition, wheel hardware, and visible leaks.
-
Check that loader frames, implements, drawbar equipment, and ballast are secure.
-
Inspect belts for cracking, glazing, and correct tension.
-
With the engine off, check for excessive movement in steering linkage and driveline components.
-
Isolate whether the noise changes with engine speed, ground speed, clutch position, PTO engagement, or hydraulic operation.
Do not run the PTO or operate the tractor until an unexplained driveline knock, grinding noise, or wheel-related vibration has been identified.
Overheating and leaks
The John Deere 2555 uses a liquid-cooled diesel engine. Overheating can quickly damage the head gasket, cylinder head, pistons, liners, hoses, radiator, and water pump. Hydraulic leaks can also introduce air, reduce steering or lift performance, and contaminate soil.
Common causes include:
-
Plugged radiator screen, grille, oil cooler, or radiator fins
-
Low coolant level
-
Loose fan belt
-
Faulty thermostat, radiator cap, water pump, or fan
-
Coolant hose leak
-
Incorrect coolant mixture
-
Low hydraulic oil level
-
Damaged hose, coupler, seal, or O-ring
-
Hydraulic pump or relief-valve issue
Basic checks:
-
Shut the engine down if the temperature gauge reaches an unsafe range.
-
Allow the engine to cool fully before opening the radiator cap.
-
Clean external debris from the grille, screen, and cooling stack with low-pressure air or water.
-
Check fan-belt condition and tension.
-
Inspect underneath the tractor for fresh engine oil, fuel, coolant, or hydraulic oil.
-
Identify the source of a leak before tightening fittings or replacing parts.
Never search for a pressurized hydraulic leak with your hand. High-pressure fluid can penetrate skin and requires urgent medical treatment.
Transmission and drive problems
The 2555 was offered with more than one transmission configuration, so repair methods differ. Difficulty shifting, clutch drag, loss of motion, unusual gear noise, PTO faults, or front-wheel-assist problems should be diagnosed against the exact transmission and axle arrangement on the tractor.
Common causes include:
-
Clutch linkage out of adjustment
-
Worn clutch disc, pressure plate, release bearing, or pilot bearing
-
Low or incorrect transmission-hydraulic oil
-
Clogged hydraulic or transmission filter
-
Worn shift linkage, rail, fork, or synchronizer components
-
Internal transmission wear
-
Differential-lock or final-drive issue
-
Front axle or driveshaft problem on four-wheel-drive tractors
-
PTO clutch or control-linkage problem
Basic checks:
-
Verify fluid level and use the correct oil specification for the tractor.
-
Check whether the fault occurs in all gears, only one range, only forward or reverse, or only when warm.
-
Test whether the clutch fully disengages with the pedal depressed.
-
Inspect external linkage for loose pins, worn bushings, or binding movement.
-
Do not force a gear lever against resistance.
-
If the tractor loses drive or produces major internal noise, stop operation and arrange professional diagnosis.
Electrical problems
Electrical faults are often caused by poor connections rather than a failed major component. Older utility tractors commonly develop voltage drop through corroded terminals, grounds, fuse holders, switches, and harness connectors.
Common causes include:
-
Weak battery
-
Corroded battery terminals or bad engine ground
-
Loose alternator wiring
-
Blown fuse or corroded fuse holder
-
Failed key switch, relay, safety switch, or starter solenoid
-
Damaged wiring near the engine, battery, loader frame, or cab
-
Failed alternator or voltage regulator
-
Burned-out bulb or poor lamp ground
Basic checks:
-
Inspect the battery, cables, grounds, fuses, and visible wiring before replacing electrical components.
-
Use a multimeter to check battery voltage before and during cranking.
-
Check charging voltage with the engine running.
-
Wiggle-test suspect connectors only with the tractor safely parked and PTO disengaged.
-
Repair damaged wiring with proper terminals, heat-shrink protection, and routing away from heat and moving parts.
John Deere 2555 DIY or dealer repair guide
Routine maintenance and external component replacement are realistic DIY work for an owner with a service manual, safe lifting equipment, basic hand tools, torque tools, and patience. Internal engine, injection, transmission, PTO, hydraulic-pump, and major steering repairs usually require specialist tools, measurements, clean work areas, and model-specific technical information.
Good DIY jobs
-
Engine oil and filter changes
-
Fuel-filter replacement and bleeding the fuel system
-
Primary and secondary air-filter service
-
Cooling-stack cleaning and basic radiator-hose inspection
-
Fan-belt inspection and replacement
-
Battery, battery-cable, fuse, lamp, and simple switch repairs
-
Greasing chassis, steering, loader, and implement points
-
Replacing external hydraulic hoses and couplers after depressurizing the system
-
Replacing seat, mirrors, lights, drawbar hardware, and other bolt-on parts
-
Tire-pressure checks and routine wheel-hardware inspection
Advanced DIY or dealer jobs
-
Injection-pump timing, injector testing, and fuel-system calibration
-
Cylinder-head, piston, liner, or internal-engine work
-
Turbocharger diagnosis and replacement on applicable tractors
-
Clutch replacement, tractor splitting, and flywheel work
-
Internal transmission, PTO, differential, or final-drive repairs
-
Hydraulic-pump, steering-valve, priority-valve, and selective-control-valve rebuilds
-
Front-wheel-assist axle, driveshaft, and bevel-gear repairs
-
Brake-system internal repairs
-
Electrical harness replacement or complex charging-system diagnosis
Skill level guide
-
Beginner: Fluid checks, greasing, air-filter service, battery-terminal cleaning, fuse replacement, and cooling-screen cleaning.
-
Intermediate: Oil and fuel-filter service, belt replacement, bleeding fuel, replacing hoses, alternator work, basic multimeter testing, and external linkage adjustment.
-
Advanced: Clutch work, hydraulic diagnosis using pressure gauges, injector-system diagnosis, transmission repair, axle repair, and major engine work.
John Deere 2555 parts and OEM numbers
Always gather the tractor’s full model information and Product Identification Number before ordering parts. The John Deere 2555 can have important configuration differences, especially in the engine, transmission, PTO, front axle, steering, hydraulics, cab equipment, and optional loader installation.
For engine-related parts, record the engine model and serial number from the engine identification plate. For driveline and hydraulic parts, note whether the tractor has two-wheel drive or front-wheel assist, which transmission it has, whether it has a cab, and how many hydraulic remotes are installed.
OEM parts are the safer choice for belts, filters where fit is critical, hydraulic components, PTO parts, brake parts, steering parts, clutch components, electrical switches, and any safety-related repair. Deere parts typically reduce uncertainty when serial-number breaks or configuration changes are involved.
Quality aftermarket parts can be suitable for common filters, batteries, lights, hoses, certain seals, and some wear components, provided the supplier gives a confirmed cross-reference for the exact tractor configuration. Avoid low-cost unknown-brand hydraulic hoses, steering parts, clutch components, and electrical parts where failure can cause downtime or unsafe operation.
John Deere 2555 parts diagrams and manuals
A parts diagram is best for identifying component names, ordering numbers, assembly order, seals, clips, washers, and serial-number breaks. An operator’s manual is best for daily operation, lubrication, fluid specifications, adjustments, and maintenance intervals. A technical manual is the correct source for major repairs, specifications, diagnostic tests, torque values, and disassembly procedures.
Useful starting points include:
-
John Deere Parts for official parts lookup, maintenance information, and machine support resources
-
John Deere Manuals and Training for official operator manuals, technical manuals, and parts catalog options
-
John Deere 2555 parts diagrams at Jacks Small Engines for exploded-view diagrams and component identification
-
Green Farm Parts diagram lookup for another Deere-focused parts-diagram resource
For deeper mechanical work, look for the technical manual covering the 2355, 2555, 2755, and related utility tractor family. Verify that the manual matches the tractor serial range and transmission before relying on it for a repair procedure.
How to find John Deere 2555 serial numbers
The tractor Product Identification Number is essential because Deere used serial-number breaks to identify changes in parts, wiring, hydraulics, engine components, transmission arrangements, and optional equipment. Take a clear photo of every identification tag before ordering parts.
Use this process:
-
Park the tractor safely, lower equipment, set the parking brake, and turn the engine off.
-
Locate the tractor identification plate or Product Identification Number tag on the tractor frame or chassis area; clean it carefully rather than scraping it.
-
Record the complete model designation and all numbers and letters exactly as stamped.
-
Locate the engine identification plate on the engine block or engine-mounted identification area and record the engine model and serial number.
-
Record identification numbers from the loader, front axle, cab, or implement if the repair concerns that equipment.
If a plate is missing or unreadable, a John Deere dealer may help identify the tractor from remaining cast numbers, component numbers, ownership documents, or photos. Do not rely on painted hood decals alone.
Buying John Deere 2555 parts
Use the part number from a diagram or manual whenever possible. Searching by the phrase “John Deere 2555 fuel filter” may return a part that fits only one engine version or may be intended for a related model with a different filter head, thread size, or seal arrangement.
A sensible buying strategy is:
-
Online: Use the complete PIN, engine details, and OEM part number. Compare photographs, dimensions, connector styles, and supplier fitment notes before ordering.
-
Dealer counter: Best for transmission, clutch, PTO, hydraulic, steering, electrical, and serial-number-sensitive components.
-
Retail stores: Suitable for clearly cross-referenced batteries, basic lubricants, bulbs, common hose materials, and certain filters, but confirm the exact application before purchase.
Useful online resources include:
When ordering an aftermarket part, keep the old part until the replacement has been checked against it. Compare mounting holes, thread pitch, hose ends, belt width, pulley profile, electrical terminals, sealing surfaces, and overall dimensions.
John Deere 2555 common parts fitting guide
Replacing the engine oil and oil filter
Regular oil and filter changes protect the crankshaft, bearings, camshaft, turbocharger on applicable versions, and internal engine components. Change oil only when the engine is warm enough to drain well but cool enough to work around safely.
-
Park the tractor on level ground, lower implements, set the parking brake, and shut off the engine.
-
Place a drain pan under the engine drain plug and remove the plug carefully.
-
Allow the oil to drain fully, then reinstall the drain plug with the correct sealing washer and torque specification.
-
Remove the old oil filter and make sure its gasket did not remain stuck to the filter base.
-
Lubricate the new filter gasket with clean engine oil, install the filter by hand, and refill with the specified engine oil.
-
Start the engine, check for leaks, shut it down, wait a few minutes, and recheck the oil level.
Dispose of used oil and filters through an approved recycling point.
Replacing the fuel filter and bleeding the system
A restricted fuel filter can cause hard starting, power loss, hesitation, stalling, and difficulty maintaining engine speed under load. Keep dirt out of the system because diesel injection components are sensitive to contamination.
-
Clean the filter head, lines, and surrounding area before opening the fuel system.
-
Close the fuel shutoff valve if fitted, or use the correct procedure from the operator’s manual.
-
Remove the old filter or filter element and drain fuel into an approved container.
-
Install the correct new filter and replace O-rings or seals as required.
-
Open the fuel supply and use the specified priming or bleeding points.
-
Crank only as directed in the manual, then inspect carefully for fuel leaks after the engine starts.
If the tractor still will not start after correct bleeding, stop cranking and check for air leaks, a blocked fuel pickup, contaminated fuel, or a deeper injection-system fault.
Servicing the air filter
A clean air filter protects the engine from dust while ensuring adequate airflow. A blocked filter can cause black smoke, reduced power, increased fuel consumption, and overheating under load.
-
Shut the engine off and clean loose dust from the outside of the air-cleaner housing.
-
Release the housing cover without allowing debris to fall into the clean-air side.
-
Remove the primary element carefully and inspect the inside of the housing.
-
Replace the primary element if damaged, heavily restricted, oil-soaked, or due by the maintenance schedule.
-
Inspect the secondary safety element and replace it only when required by the service schedule or if contamination is suspected.
-
Refit the cover securely and make sure all intake hoses and clamps are sealed.
Do not strike filters against hard surfaces or use uncontrolled compressed air that can damage the filter media.
Replacing an external hydraulic hose
A cracked or leaking hose can reduce steering, loader, remote, or three-point-hitch performance. Hydraulic systems remain pressurized after shutdown, so work carefully.
-
Park safely, lower all implements fully, shut off the engine, and move hydraulic controls through their positions to relieve residual pressure.
-
Clean the hose fittings and surrounding area thoroughly.
-
Place absorbent material and a drain pan under the connection points.
-
Remove the damaged hose using correct flare-nut or line wrenches where needed, then cap open ports to prevent contamination.
-
Install a matching hose with the correct length, fitting type, routing, and pressure rating.
-
Start the tractor, operate the circuit slowly, inspect from a safe distance for leaks, and recheck hydraulic oil level.
Never use fingers to check for a hydraulic leak. Use cardboard or wood held at a safe distance.
Maintenance to prevent repeat John Deere 2555 problems
Regular maintenance is the best defense against starting trouble, overheating, hydraulic faults, poor performance, and expensive driveline wear. A utility tractor often works in dust, chaff, mud, cold weather, and heavy loads, so condition-based inspection matters as much as calendar-based servicing.
Focus on these areas:
-
Starting reliability: Keep the battery charged, cable ends clean, grounds tight, fuel clean, and filters serviced.
-
Engine protection: Maintain oil level, replace filters on schedule, and keep the intake system sealed.
-
Cooling protection: Clean screens and radiator fins often during dusty work, and repair coolant leaks before they become overheating events.
-
Hydraulic performance: Check oil level, inspect hoses and couplers, change filters as scheduled, and prevent dirt from entering open couplers.
-
Drive performance: Keep clutch, transmission, axle, and PTO concerns from becoming major failures by investigating shifting or driveline changes early.
-
Electrical reliability: Protect wiring from chafing, heat, rodents, moisture, and loader-frame movement.
-
Safety: Check brakes, steering, lights, tires, ROPS hardware, seat components, hitch equipment, and PTO guards before heavy work.
John Deere 2555 maintenance schedule
Use the operator’s manual for the exact schedule for your serial number and equipment. The following is a practical owner checklist based on the types of tasks normally required on a utility tractor of this design. Heavy dust, loader work, extreme temperatures, and frequent PTO use may require shorter intervals.
Daily or before each use
-
Check engine oil level.
-
Check coolant level only when the engine is cool.
-
Check fuel level and drain water from the fuel system if equipped.
-
Inspect tires, wheels, steering, brakes, hitch hardware, and loader mounts.
-
Look for oil, fuel, coolant, and hydraulic leaks.
-
Clean the radiator screen, grille, and cooling-air path when working in chaff, dust, or mowing debris.
-
Check that PTO shields, guards, and safety equipment are in place.
After the first 8 to 10 hours after service
-
Recheck engine oil, coolant, and hydraulic oil levels.
-
Inspect for leaks around filters, drain plugs, hose fittings, and repaired components.
-
Recheck wheel hardware and loader or implement mounting hardware after heavy work.
-
Inspect belt tension and condition after a new belt has seated.
Every 25 hours
-
Grease steering, axle, loader, hitch, and implement points that require frequent lubrication.
-
Inspect battery terminals and cable routing.
-
Check air-cleaner condition and intake-hose clamps.
-
Inspect fan belt, radiator hoses, and cooling-stack cleanliness.
-
Check clutch, brake, throttle, and PTO-control operation.
Every 50 hours or as required
-
Inspect fuel filters and drain accumulated water or sediment.
-
Check front axle and steering components for looseness or damaged seals.
-
Inspect hydraulic hoses, couplers, remote outlets, and cylinder rods.
-
Check tire pressures and examine sidewalls for cuts or weather cracking.
-
Inspect PTO shaft guards and implement driveline universal joints.
Every 200 hours or yearly
-
Change engine oil and oil filter according to the correct interval for the engine and oil type used.
-
Replace fuel filters as specified for the fuel system.
-
Service or replace air-filter elements as required.
-
Check cooling-system condition, coolant protection level, and hoses.
-
Change or inspect hydraulic and transmission filters according to the official schedule.
-
Inspect alternator output, starter-cable connections, and battery condition.
Seasonal checklist
-
Before spring or heavy-use season: Complete fluid checks, inspect belts and hoses, grease all points, verify brakes and steering, and service filters as needed.
-
Mid-season: Clean the cooling system more frequently, inspect the intake system, monitor hydraulic connections, and correct leaks while they are small.
-
Before winter: Use clean seasonal diesel fuel, maintain the battery, inspect coolant freeze protection, and correct any starting or charging problem before cold weather.
-
Long-term storage: Clean debris from the tractor, fill or stabilize fuel as appropriate, protect battery condition, relieve implement load, cover exhaust openings if needed, and store under cover where possible.
John Deere 2555 repair, upgrade, or replace?
A well-maintained John Deere 2555 can remain a useful working tractor for many years, especially when repairs address known wear items before secondary damage occurs. The decision to repair, upgrade, or replace should be based on the tractor’s condition, repair scope, expected annual use, access to parts, and whether its capability still matches the work required.
Repair if
-
The engine has good oil pressure, starts reliably, and does not show severe blow-by or coolant contamination.
-
The transmission, PTO, hydraulics, and steering work correctly apart from a defined fault.
-
The tractor has a sound chassis, usable tires, safe brakes, and no severe structural corrosion or damage.
-
The cost is limited to routine wear parts, hoses, filters, seals, electrical repairs, cooling repairs, or external hydraulic work.
-
The tractor suits the size of your implements and workload.
Upgrade if
-
You need more loader lift, hydraulic flow, PTO horsepower, four-wheel-drive capability, cab comfort, or modern hydraulic controls.
-
Your existing tractor lacks the transmission speed range needed for your work.
-
Frequent attachment changes make a newer hitch, hydraulic, or PTO arrangement worthwhile.
-
Downtime has become too costly for your operation.
Replace if
-
The tractor needs combined engine, clutch, transmission, hydraulic, and axle repairs that exceed its working value.
-
Safety-critical structure, steering, brakes, or drivetrain components are severely damaged.
-
Parts availability is too uncertain for the exact configuration.
-
The tractor no longer performs the work safely or efficiently.
John Deere 2555 troubleshooting FAQ
1. Why will my John Deere 2555 not start?
First determine whether the engine will crank. If it will not crank, inspect the battery, cable connections, grounds, starter circuit, key switch, neutral safety system, and starter motor. If it cranks normally but will not fire, check fuel level, filter condition, water contamination, fuel shutoff position, air in the fuel system, and correct fuel-bleeding procedure.
2. Why does my John Deere 2555 crank slowly?
Slow cranking usually points to a weak battery, corroded terminals, poor ground connection, damaged battery cable, failing starter, or thick oil in very cold weather. Check battery voltage at rest and while cranking. A battery can appear charged but still collapse under starter load.
3. Why does my John Deere 2555 start and then stall?
A tractor that starts briefly and dies commonly has restricted fuel flow, a plugged fuel filter, water in the fuel, a closed or restricted fuel valve, or an air leak on the suction side of the system. Check for adequate fuel flow to the filter and make sure the system is properly bled after service.
4. Why is my John Deere 2555 hard to start when cold?
Cold diesel starting depends on healthy battery capacity, proper cranking speed, clean fuel, correct oil viscosity, good compression, and functioning cold-start equipment. Start by servicing the battery, cables, fuel filter, and air filter. Persistent cold-start trouble may require injector, compression, or injection-system diagnosis.
5. Why does my John Deere 2555 lose power under load?
The most common early checks are the air filter, fuel filter, fuel quality, fuel lines, cooling system, and intake restrictions. If those are correct, check whether the engine is overheating or producing unusual smoke. Turbocharged versions also need inspection of turbocharger and intake plumbing.
6. Why does my John Deere 2555 produce black smoke?
Black smoke generally means the engine has too much fuel for the air available. A dirty air filter, blocked intake, collapsed hose, overloaded implement, turbocharger problem, or fuel-system fault can cause it. Stop heavy work if smoke is excessive and inspect the intake system before continuing.
7. Why does my John Deere 2555 produce white smoke?
Brief white smoke when cold can occur with a diesel engine, particularly in cold weather. Persistent white smoke with rough running can indicate unburned fuel, water-contaminated fuel, air in the fuel system, injector issues, low compression, or coolant entering the combustion area. Continued white smoke warrants diagnosis rather than continued use.
8. Why does my John Deere 2555 use engine oil?
Oil consumption may come from external leaks, worn valve guides, turbocharger faults on applicable versions, piston-ring wear, or cylinder wear. Check for blue exhaust smoke, oil around the engine, oil in intake plumbing, and crankcase blow-by. Track oil use by operating hours before deciding whether internal repair is needed.
9. Why is my John Deere 2555 overheating?
Check coolant level, radiator cleanliness, grille and screen blockage, fan-belt tension, hose condition, and signs of coolant leakage. Dust, hay chaff, and loader work can plug a cooling stack quickly. Never remove the radiator cap while the engine is hot or pressurized.
10. Why does the radiator keep plugging on my John Deere 2555?
Fine chaff, seeds, dust, and mowing debris can accumulate between cooling components even if the front screen looks clean. Clean the screen frequently and inspect the radiator, oil cooler, and any other cooling surfaces for packed material. Blow debris out from the engine side where practical so it exits the same direction it entered.
11. Why is my John Deere 2555 leaking coolant?
Look for damp hoses, loose clamps, a leaking radiator, failing water pump, thermostat housing seepage, heater-hose leaks on cab tractors, or a weak radiator cap. If coolant disappears without an obvious external leak, check for overheating, white exhaust smoke, oil contamination, or combustion-gas intrusion.
12. Why does my John Deere 2555 have a hydraulic oil leak?
Hydraulic leaks usually come from a cracked hose, loose fitting, failed coupler seal, worn cylinder seal, damaged O-ring, or seal at a pump, valve, axle, or remote connection. Clean the area first so the fresh leak can be identified. Depressurize the system before removing a hose or fitting.
13. Why are the three-point hitch arms slow or weak?
Check hydraulic oil level, filter condition, remote-control position, hydraulic coupler connection, and whether other hydraulic functions are also weak. If steering, loader, and hitch functions all suffer, the issue may involve oil supply, filters, pump performance, or a system-pressure problem. A single weak circuit can point toward its control valve or cylinder.
14. Why is my John Deere 2555 loader weak or jerky?
Low hydraulic oil, aerated oil, a restricted filter, leaking quick coupler, damaged hose, internal cylinder leakage, or a control-valve problem can cause weak or jerky loader movement. Check whether the problem affects both lift and curl, and whether steering or three-point operation is also weak. This helps narrow the fault to the loader circuit or the main hydraulic system.
15. Why is the steering hard on my John Deere 2555?
Check front-tire pressure, steering linkage wear, front axle lubrication, hydraulic oil level, and visible leaks. If steering becomes worse at low engine speed but improves at higher rpm, hydraulic flow or pressure may be involved. Do not continue operating with excessive steering play, damaged tie-rod ends, or a major front-axle oil leak.
16. Why does my John Deere 2555 clutch drag?
A dragging clutch may make shifting difficult, cause gear clash, or allow the tractor to creep when the pedal is fully depressed. Check pedal free play, linkage movement, and external adjustment first. If adjustment does not correct it, the clutch disc, pressure plate, pilot bearing, release bearing, or internal linkage may require major repair.
17. Why is it hard to shift my John Deere 2555?
First make sure the clutch is fully disengaging and the tractor is at a complete stop when required. Worn linkage bushings, incorrect clutch adjustment, low or incorrect transmission oil, internal synchronizer wear, or damaged shift components can all make shifting difficult. Do not force the lever because that can worsen internal damage.
18. Why does my John Deere 2555 jump out of gear?
Jumping out of gear can result from worn linkage, weak detent components, damaged shift forks, worn gears, or internal transmission wear. Determine whether it occurs in one gear, one range, under deceleration, or only while pulling hard. Continued use can damage mating gears and should be avoided.
19. Why will my John Deere 2555 not move?
Check that the parking brake is released, the correct range and gear are selected, the clutch is released properly, and the transmission or shuttle controls are in the correct position. If the engine runs but the tractor has no drive, stop use and investigate clutch, transmission, final-drive, or hydraulic transmission-control faults according to the exact configuration.
20. Why does my John Deere 2555 PTO not turn?
Check PTO control position, clutch operation, PTO shaft engagement, implement driveline condition, and any applicable safety interlocks. If the PTO engages but slips under load, the issue may involve clutch adjustment, worn PTO clutch components, or internal PTO controls. Keep clear of the PTO shaft and remove the key before inspection.
21. Why does the PTO make noise?
A PTO noise can come from the tractor’s internal PTO drive, shaft bearing, clutch, implement driveline, universal joints, telescoping shaft, or gearbox. Disconnect the implement only if it can be done safely, then determine whether the noise remains with the PTO running unloaded. Stop operation for grinding, banging, or severe vibration.
22. Why does my John Deere 2555 have a vibration at certain speeds?
Vibration that changes with engine rpm may involve the engine, fan, accessory belt, alternator, water pump, or clutch area. Vibration that changes with travel speed points more toward tires, wheel hardware, driveline components, axle parts, or bearings. Identify the operating condition that changes the vibration before replacing parts.
23. Why does my John Deere 2555 have a squealing belt?
A squeal can indicate a loose, glazed, worn, oil-contaminated, or misaligned belt. Check the fan belt and accessory pulleys, then inspect bearings for roughness or wobble. Replacing only the belt will not solve the problem if a pulley is misaligned or a driven accessory is beginning to seize.
24. How often should I change the engine oil on a John Deere 2555?
Follow the operator’s manual for the interval and oil specification for your tractor and working conditions. As a practical rule, change oil and filter on schedule, sooner if oil is contaminated, the tractor works in severe conditions, or the history is unknown. Keep a service log showing date, hours, oil type, and filter used.
25. How often should I change the fuel filter?
Use the official service schedule, and change it sooner if fuel quality is questionable, water is present, power drops, or the tractor has sat for a long time. A fuel filter is inexpensive compared with injection-system repairs. Always clean around the filter before removal and bleed the system correctly afterward.
26. Can I clean the John Deere 2555 air filter?
The primary filter may sometimes be cleaned only if the operator’s manual permits it and the element is not damaged or overdue for replacement. Do not clean the safety element unless the manual specifically allows it. If there is doubt about the filter’s condition, replacement is the safer choice.
27. What hydraulic oil should I use in a John Deere 2555?
Use the fluid specification stated in the operator’s manual for the tractor’s transmission-hydraulic and hydraulic systems. Avoid mixing unknown fluids. If the tractor’s fluid history is uncertain, identify the correct specification before topping up or performing a full fluid change.
28. Why does my John Deere 2555 battery keep going flat?
First check battery age, terminal corrosion, cable condition, ground connections, and alternator charging voltage. Then inspect for lights, accessories, relays, or wiring that remain energized with the key off. A battery that repeatedly discharges may be faulty even if it accepts a surface charge.
29. How do I know whether my John Deere 2555 alternator is charging?
Use a multimeter at the battery terminals. Compare battery voltage with the engine off and with it running at a moderate operating speed. If voltage does not rise appropriately, inspect the belt, wiring, grounds, alternator connections, and regulator arrangement before condemning the alternator.
30. Why are the lights or gauges not working?
Check fuses, fuse holders, bulbs, grounds, key-switch output, connectors, and harness damage. A single failed lamp may be a bulb or local ground issue. Multiple failed lights or gauges often point toward a fuse, feed wire, key switch, instrument circuit, or common ground.
31. Can I use aftermarket parts on a John Deere 2555?
Yes, but use aftermarket parts selectively. Quality filters, batteries, bulbs, hoses, and some wear items can be acceptable when they are confirmed to cross-reference correctly. Use OEM or high-quality proven parts for belts, steering, brakes, PTO, clutch, hydraulics, safety switches, and serial-number-sensitive components.
32. Where can I find John Deere 2555 parts diagrams?
Start with John Deere’s official parts resources and search using the full tractor PIN. Exploded diagrams help identify the correct component, related seals, washers, retainers, and serial-number changes. Deere-focused aftermarket parts sites can also be useful for visual reference, but confirm final fitment with the PIN.
33. Where can I get a John Deere 2555 service manual?
John Deere’s Manuals and Training resources are the best starting point for official operator manuals, parts catalogs, and technical manuals. For major repairs, use a technical manual matched to the 2555 and its serial range. A generic repair guide is not a substitute for the correct Deere procedure and specifications.
34. Is a John Deere 2555 a realistic DIY tractor to maintain?
Yes, for routine service and many external repairs. Owners can usually handle fluids, filters, belts, batteries, hoses, greasing, basic electrical checks, and external linkage work. Internal engine, clutch, transmission, hydraulic, fuel-injection, and front-drive repairs should be approached only with the correct manual, equipment, and experience.