
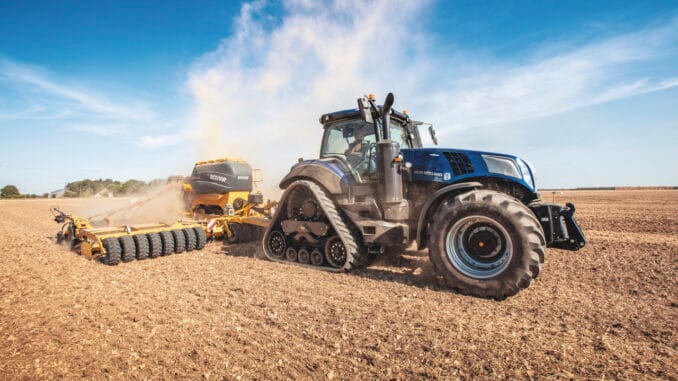
Sliding-gear transmissions in compact tractors provide a cost-effective, mechanically direct power transfer ideal for field work and PTO-intensive tasks. Proper maintenance extends their lifespan, prevents grinding shifts, and ensures reliable performance in demanding landscaping and agricultural use.
What Is a Sliding-Gear Transmission?
Sliding-gear transmissions, also called sliding mesh, feature gears that slide along shafts to engage directly via shift forks. Unlike hydrostatic systems, they offer no power loss for maximum PTO efficiency but require full stops or clutch use for shifts.
Common in budget compact tractors like certain Solis, Mahindra, or older John Deere/Kubota models, they suit experienced operators handling towing or tillage. Gears mesh in ratios like 3:1 for first gear, demanding precise lubrication to minimize wear from sliding contact.
This diagram shows a typical tractor power flow through clutches, gear packs, and PTO in sliding-gear setups.
Why Maintain Sliding-Gear Transmissions?
Neglect leads to grinding, hard shifting, or fork damage from incomplete separation or dry components. Regular care cuts downtime, preserves gear teeth from scuffing, and maintains efficiency over hydrostatic alternatives.
For compact tractors under heavy loads, maintenance prevents heat buildup and adhesive wear during sliding motion. Owners report longevity beyond 2000 hours with consistent fluid changes and greasing.
Daily Pre-Operation Checklist
Perform these checks before each use to catch issues early.
-
Inspect transmission fluid level via dipstick (above rear PTO); top off if low, noting any leaks or contamination.
-
Test shift lever for smooth movement without binding; listen for unusual noises during neutral selection.
-
Verify clutch pedal free play (typically 1-2 inches) to ensure full disengagement.
-
Check tire pressure and wheel lug nuts, as uneven traction stresses gears.
-
Visually scan linkage and shift forks for grease coverage or damage.
These steps take under 10 minutes but prevent 80% of shift-related failures.
Every 50-Hour Service
Align with initial break-in or regular intervals; repeat from owner’s manual.
Fluid and Filter Inspection:
-
Drain and replace break-in gear oil if first service (20-50 hours); use SAE 80W-90 or manufacturer-spec GL-4.
-
Clean magnetic drain plug; inspect for metal shavings indicating gear wear.
Lubrication Points:
-
Grease all shift fork pivots, levers, and external linkages with NLGI #2 grease.
-
Apply dry lube to shift rails if dusty conditions prevail.
Shift Mechanism Check:
-
Adjust clutch if pedal feels spongy; incomplete separation causes grinding.
-
Rock tractor in neutral to confirm detents hold positions.
Tools Needed: Jack stands, drain pan, torque wrench, grease gun.
Every 250-Hour Deep Clean
Focus on internals accessible without full teardown.
Transmission Fluid Change:
-
Warm tractor, drain fully, replace filter/strainer if equipped; refill to dipstick mark (typically 10-20 quarts).
-
Cycle through gears post-refill to circulate oil.
Inspection Table:
Greasing Schedule:
-
Zero hours: Initial grease on all zerks.
-
250 hours: Full re-grease, including PTO shaft U-joints.
Inspect for clutch slip under load; adjust linkage per manual.
Annual or 500-Hour Maintenance
Professional input recommended for seals and bearings.
-
Full gear oil flush with synthetic for extended intervals (up to 1000 hours).
-
Check backlash on accessible gears; aim for 0.005-0.015 inches.
-
Torque shift tower bolts; test for play.
-
Replace worn detent balls/springs if shifts pop out.
In dusty London-area farms, shorten to 400 hours.
Fluid Types and Capacities
Use extreme pressure (EP) gear oils resisting sliding wear.
Recommended Fluids:
-
SAE 80W-90 GL-4 for most (avoids synchro damage if present).
-
Synthetics like 75W-90 for cold starts.
-
Capacity: 12-18 liters for compact units (check dipstick).
Change intervals: Initial 50 hours, then 250-500 hours or yearly. Contaminated fluid (milky or burnt) demands immediate service.
Lubrication Points Diagram Description
Key zerks include:
-
Shift lever pivots (2-4 points).
-
Fork shafts (internal via ports).
-
External rods and yokes.
Pump until fresh grease extrudes; over-greasing attracts dirt.
Common Problems and Fixes
Hard shifting tops issues, often from poor clutch release or dry forks.
Troubleshooting Table:
For loader work, avoid rapid F/R cycles to spare forks.
Advanced Maintenance: Tools and Tips
Essential Tools:
-
Dial indicator for backlash.
-
Feeler gauges for clearances.
-
Transmission jack for disassembly.
Pro Tips for Landscapers:
-
In wet UK conditions, rinse undercarriage post-use to clear mud from linkages.
-
Log hours via app; set reminders for 50/250 intervals.
-
For WordPress site owners, embed checklists as downloadable PDFs for readers. [user interests implied]
Winter storage: Drain water from breathers, fog internals.
Long-Term Care and Overhauls
At 2000+ hours, inspect internals:
-
Split case, measure gear wear (replace if pitted).
-
New fork shafts, seals, bearings.
Cost: £500-1500 parts/labor. Extend with synthetics. Hybrid gear/HST models emerging, but pure sliding-gear thrives in PTO apps.
Safety During Maintenance
Park on level ground, chock wheels, disconnect battery. Wear gloves; hot oil burns. Use stands, never rely on jacks.
Final Pre-Use Test:
-
Idle shifts smooth across ranges.
-
No leaks post-service.
-
Full power in top gear.
Consistent adherence yields 10+ years of service. Consult manuals for model specifics like Solis 6F/2R setups.
How to troubleshoot hard shifting in sliding gear tractors
Hard shifting in sliding-gear tractors often stems from clutch issues, dry linkages, or fluid problems, but systematic checks resolve most cases quickly. Start with basics before deeper disassembly to avoid unnecessary costs.
Initial Safety and Prep Steps
Park on level ground, engage parking brake, chock wheels, and let the tractor cool to prevent burns or skewed readings. Disconnect the battery if accessing electrical components, and gather tools: feeler gauges, grease gun, flashlight, and penetrating oil.
Step 1: Check Clutch Adjustment
Incomplete clutch disengagement is the top cause, as sliding gears need full separation to slide without grinding.
-
Measure pedal free play: Depress clutch until resistance; it should be 1-2 inches (25-50mm) before grabbing—adjust via linkage nut under the pedal or at the throwout bearing.
-
Test: With engine off, shift through gears easily; then run at idle, clutch in, and attempt shifts—if still hard, proceed.
-
Rock method: In gear, clutch out, rock tractor forward/back to unload dogs, then shift at low RPM.
Tighten linkage incrementally; over-adjustment drags the clutch.
Step 2: Inspect Transmission Fluid
Low or degraded oil increases friction on sliding surfaces.
-
Check level via dipstick (engine off, on level ground); top with SAE 80W-90 GL-4 if low, inspecting for metal flakes or burnt smell. [previous context]
-
Drain sample: If milky (water) or dark, change fully after warming (10-20L capacity typical).
-
Clean magnetic plug during check—shavings signal gear wear. [previous context]
Fresh fluid often restores 70% of shift quality alone.
Step 3: Lubricate Linkages and Shift Tower
Dry pivots bind forks, worsening after heat buildup.
-
Grease all zerks: Shift lever pivots, external rods, fork shafts (via ports), and U-joints—pump NLGI #2 until it extrudes. [previous context]
-
Spray penetrating lube on internal rails if accessible; work lever back/forth.
-
Inspect boot/seals around tower for tears letting dirt in.
In UK damp conditions, rinse mud first to expose fittings. [previous context]
Troubleshooting Decision Table
Step 4: Test Shift Linkage Under Load
Bypass seat switch temporarily (jumper wires) for neutral testing with wheels off ground.
-
Jack front (loader up), shift ranges—adjust play at tower (often 13mm bolts) until neutral holds without creep.
-
Verify no brake drag or tire bind mimicking resistance.
Step 5: Advanced Checks (If Needed)
-
Linkage under dash: Inspect bushings/arms for wear; lube or replace roll pins.
-
Flywheel/pressure plate: Resurface if scored (during clutch service).
-
Internal: Split case for fork bending (>0.010″ play bad) or gear dog wear. [previous context]
Prevention Tips
Service at 50/250 hours per prior checklist; avoid shifts under power. [previous context] Log fixes for patterns—e.g., loader work accelerates wear.
Most fixes take under an hour; if internals fail, rebuild costs £500-1000. [previous context] Test post-repair with full cycles cold-to-ho
Common sliding gear transmission problems in compact tractors
Sliding-gear transmissions in compact tractors are durable but prone to wear from dirt, heat, and improper operation. Common issues often trace to clutch linkage, lubrication failures, or mechanical binding, affecting models like older Kubota, Solis, or Mahindra units.
Difficulty Shifting Gears
The most frequent complaint involves stiff, grinding, or reluctant shifts, especially when hot. Causes include misadjusted clutch preventing full gear separation, low or contaminated transmission fluid increasing friction, and worn shift forks or bushings binding the mechanism. Bent linkage rods from impacts exacerbate this during loader work.
Gears Popping Out
Transmission jumps out of gear under load or on slopes due to weak detent springs/balls, worn gear dogs (the locking teeth on sliding collars), or insufficient fork engagement from play in rails. This risks safety during towing; early signs appear in specific gears like low range.
Noises and Grinding
Whining, clunking, or metal-on-metal sounds signal low fluid letting bearings or gears scuff, or debris trapped between rails blocking forks—as seen in vintage Kubota cases with water intrusion. Clutch drag from riding the pedal adds grinding during engagement.
Clutch-Related Failures
Slipping under load or spongy pedal stems from glazed discs, warped pressure plates, or excessive forward-reverse shuttling in loader tasks—common operator errors generating heat. Incomplete disengagement mimics transmission faults, wearing dogs prematurely.
Stuck in Gear
Rare but severe: shift forks freeze on rails from corrosion or gummed grease, as in 1970s Kubotas, or detent pins slip between rails on Fergusons/TO models. Linkage wear under the tower allows slop, preventing neutral selection.
Problems Comparison Table
Prevention Notes
Address at 50/250-hour intervals with fluid checks and greasing; avoid shifts under power and rapid F/R cycles. In damp UK conditions, rinse linkages post-use to block corrosion.[previous context] Early fluid analysis spots metal wear before failure.